Sony SAT-A2 Operating Instructions  (primary manual) Скачать руководство пользователя страница 1

1

3-856-591-21(1)

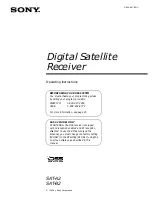
Digital Satellite 
Receiver

Operating Instructions

SAT-A2
SAT-B2

BEFORE USING YOUR DSS SYSTEM

You must activate your programming service 
by calling your program providers:

DIRECTV®

1-800-347-3288

USSB

1-800-204-8772

For more information, see page 25.

SAT-A2 MODEL ONLY

RF ANTENNA: The DSS receiver is shipped 
with IR reception enabled and RF reception 
disabled. To use the RF feature (and the 
antenna), you must change the factory setting 
(IR ONLY) to the RF setting (RF ONLY) using the 
on-screen displays, as described in this 
manual.

© 1996 by  Sony Corporation

Содержание SAT-A2 Operating Instructions (primary manual)

Страница 1: ...viders DIRECTV 1 800 347 3288 USSB 1 800 204 8772 For more information see page 25 SAT A2 MODEL ONLY RF ANTENNA The DSS receiver is shipped with IR reception enabled and RF reception disabled To use the RF feature and the antenna you must change the factory setting IR ONLY to the RF setting RF ONLY using the on screen displays as described in this manual 1996 by Sony Corporation ...

Страница 2: ...Model Number ___________________________________________ Serial Number _____________________________________________ Access Card Number _______________________________________ Customer Support For DSS Programming For subscription information or to resolve problems related to DSS programming call DIRECTV at 1 800 DIRECTV 347 3288 or USSB at 1 800 204 USSB 8772 For DSS Hardware and Installation To a...

Страница 3: ... 32 Selecting a Program List 33 Selecting a Different Program Guide or List 36 Using the Station Index 38 Setting Up the Timer 40 Using the Favorite Station Guides 43 Displaying the Program Banner 44 Using the DISPLAY Feature Chapter 5 Using the Options Menu 45 Overview 46 Displaying the Options Menu 47 Checking and Cancelling PPV Purchases 48 Setting Display Options 51 Using the Jump Loop Feature...

Страница 4: ...ence and Ease of Use Order premium pay per view PPV movies PPV programs start as often as every 30 minutes so you can watch programs when you want to see them Sony s Express Navigator on screen display system guides you through all the system features and functions Select from a variety of program guides that are sorted by program categories including Sports Movies News and more The Timer feature ...

Страница 5: ...ot included with SAT B2 SAT A1 includes RM Y130 remote control shown above SAT B2 includes RM Y129 remote control shown on page 8 The access card comes already inserted into the DSS receiver If you are missing items contact the dealer from whom you purchased the DSS receiver Note Keep the original carton and packing materials to safely transport the system in the future ...

Страница 6: ...trol SAT B2 Remote Control 2 Insert two size AA batteries supplied Be sure to line up the and on the batteries with the and on the battery compartment Notes on Batteries When the batteries become weak the Function button indicator blinks If the remote control does not operate properly the batteries might be worn out When replacing batteries replace both of them with new ones and do not mix differe...

Страница 7: ...s pages through the guide GUIDE Button Brings up the Custom Guide DSS POWER Button Turns the DSS receiver on and off Joystick Button Moving the joystick up down left right and diagonally scrolls through the program guides Pressing the button selects the program that s highlighted When a program guide is not displayed pressing the button brings up the Station Index 0 9 and ENTER Buttons Pressing th...

Страница 8: ...sing the button brings up the Station Index GUIDE Button Brings up the Custom Guide DSS POWER Button Turns the DSS receiver on and off 0 9 and ENTER Buttons Pressing the 0 9 buttons and then the ENTER button selects a station number directly FUNCTION Buttons Selects the component DSS TV CABLE that you want to operate These buttons flash to indicate which component the remote control is set to oper...

Страница 9: ...me SAT A2 Move the joystick left and right to move one time slot at a time SAT B2 Press the and buttons Both Models Or press the GUIDE button to page to future time slots Go to other stations in the guide one page at a time Press the PAGE CH and PAGE CH buttons In program guides you can select station call letters numbers to display a description of the station Go to a station directly Press the 0...

Страница 10: ...various ways in which you can move around in the Station Index 3 Press the button to tune to the program that s highlighted Moving Around In the Station Index To Do This Use This Button Go to other stations in the guide one station at a time SAT A2 Move the joystick in any direction SAT B2 Press the buttons You can also change the look of the Station Index by pressing the DISPLAY button See Using ...

Страница 11: ...ment configuration to take advantage of your hi fi system s audio capabilities If your TV has an S VIDEO jack use it to connect your TV to the DSS receiver An S Video connection provides a better picture than RCA type video or RF connections If your TV does not have an S VIDEO jack use your TV s A V connectors to connect your components An A V connection provides a better picture and audio when co...

Страница 12: ...must use an A V connection described on page 13 3 Connect one end of the telephone line cord to the DSS receiver s TEL LINE jack Connect the other end to your home s modular telephone outlet 4 Connect one end of the AC power cord to the DSS receiver s AC IN jack Connect the plug end to an AC outlet Optional Connections If you have a cable input cable box or a terrestrial TV antenna connect it to t...

Страница 13: ...nd of the AC power cord to the DSS receiver s AC IN jack Connect the plug end to an AC outlet Optional Connections Some TVs label this jack RF IN instead of VHF UHF IN If you have a cable input cable box or a terrestrial TV antenna connect it to the TV s VHF UHF IN jack Best Connection If your TV has an S VIDEO jack use an S VIDEO cable to connect the DSS receiver s S VIDEO jack to the TV s S VIDE...

Страница 14: ...ck connect the VCR s VHF UHF OUT jack to the TV s VHF UHF IN jack 4 Connect one end of the telephone line cord to the DSS receiver s TEL LINE jack Connect the other end to your home s modular telephone outlet 5 Connect one end of the AC power cord to the DSS receiver s AC IN jack Connect the plug end to an AC outlet Optional Connections If you have a cable input cable box or a terrestrial TV anten...

Страница 15: ...Chapter 3 Connecting Your System 15 1 2 3 5 2 2 4 SAT A2 receiver is pictured but connections are identical for SAT B2 ...

Страница 16: ...A V OUT jacks to the TV s A V IN jacks Good Connection If your TV or VCR has only an RF jack connect the VCR s VHF UHF OUT jack to the TV s VHF UHF IN jack 6 Connect one end of the telephone line cord to the DSS receiver s TEL LINE jack Connect the other end to your home s modular telephone outlet 7 Connect one end of the AC power cord to the DSS receiver s AC IN jack Connect the plug end to an AC...

Страница 17: ...Chapter 3 Connecting Your System 17 1 5 7 4 4 6 2 Note SAT A2 receiver is pictured but connections are identical for SAT B2 3 ...

Страница 18: ... Connect the plug end to an AC outlet Optional Connections Some VCRs label this jack RF IN instead of VHF UHF IN If you have a cable input cable box or a terrestrial TV antenna connect it to the VCR s VHF UHF IN jack Best Connection If your A V receiver has an S VIDEO jack use an S VIDEO cable to connect the DSS receiver s S VIDEO jack to the A V receiver s S VIDEO IN jack Then connect an S VIDEO ...

Страница 19: ...Chapter 3 Connecting Your System 19 1 2 6 3 5 2 4 SAT A2 receiver is pictured but connections are identical for SAT B2 ...

Страница 20: ...se is positioned directly above the VCR s IR receiving area If it s still not working try this procedure again using the other codes listed for your VCR For more troubleshooting information see page 90 4 To check that the code is correct press the 1 button on the VCR Mouse If the VCR turns on and off each time you press 1 the code number is correct To use the VCR Mouse 1 Set the DSS Timer page 38 ...

Страница 21: ...ch as a MiniDisc MD or digital audio tape DAT recorder Note The digital audio component must have a digital input frequency of 48 kHz Check your component s instruction manual to determine the digital input frequency of your component To connect a digital audio component Connect the DSS receiver s DIGITAL OUT connector to the audio component s digital audio input connector using the component s di...

Страница 22: ... metal object For best results place the RF antenna in a visible location 2 Place the RF antenna at least one foot away from the DSS receiver 3 Use the on screen displays to set up the DSS receiver to accept RF transmission RF ONLY See Setting Up the Remote Control on page 71 for details The DSS receiver is shipped with IR transmission enabled and RF transmission disabled To use the RF feature you...

Страница 23: ... Recording Satellite Programs While Watching Cable or Off Air Programs The following instructions apply only if you connected your cable TV or terrestrial antenna to your DSS receiver 1 Turn on the TV and then If you have a cable box turn it on and then tune the TV to the output channel of your cable box usually channel 3 or 4 If you do not have a cable box tune your TV to the station you want to ...

Страница 24: ...system is completely set up and ready to be used page 25 Using Highlight and Select the simple two step process for operating the on screen displays page 26 Displaying and navigating through the program guide page 27 Selecting subscription and pay per view programs from the program guides page 31 Using the program list page 32 Selecting other program guides that are sorted by category and subcateg...

Страница 25: ...n connect the receiver to your television and telephone line See Chapter 3 Note Your phone line must be connected to the DSS receiver in order for you to purchase a pay per view program with the DSS remote control 3 Make sure the access card is inserted into the DSS receiver The receiver comes with the card already inserted See page 68 for details on inserting the access card 4 Call your program p...

Страница 26: ...lect it by pressing the button Example Highlight and Select 1 In the sample menu that follows moving the joystick up SAT A2 or pressing the button SAT B2 moves the highlight from ITEM 5 to ITEM 2 2 Pressing the button selects ITEM 2 You can apply this basic operation of highlighting and selecting to perform any of the system s functions highlight ITEM 2 ITEM 5 ITEM 1 ITEM 4 ITEM 7 ITEM 8 ITEM 3 IT...

Страница 27: ...ess the MENU button to bring up the Main Menu Then highlight and select MASTER GUIDE from the menu Note To bring up the Custom Guide press the GUIDE button on the remote control See Setting Up a List of Custom Stations on page 57 for details Features of the program guide are discussed in more detail on the following pages MASTER GUIDE 2 Shortcut You can select menu items directly by pressing the c...

Страница 28: ...e 49 for details Time slots These appear left to right with the current time s programming in the leftmost position Page indicator This shows you approximately which page you re on relative to all the pages in the guide The size of the indicator is proportional to the overall size of the entire program guide First Knight 8 00 PM 10 00 PM PG 13 Act Adv 1995 Richard Gere Sean Connery Julia Ormond Th...

Страница 29: ...ow buttons Paging Vertically Through the Stations To page use the PAGE buttons to move through the guide one page at a time This allows you to move through the guide more quickly than scrolling To page through the guide Press the PAGE or PAGE buttons The PAGE button pages in the up direction The PAGE button pages in the down direction Paging Through Later Program Start Times To display future time...

Страница 30: ... instructions on setting up your favorite stations Changing the Appearance of the Guide To toggle through the three variations of program guide Press the DISPLAY button repeatedly See Using the DISPLAY Feature on page 44 for details Exiting the Guide There are two ways to exit the program guide Select a program from the guide by pressing the button See Selecting a Program from the Guide on page 31...

Страница 31: ...p window appears which gives you the option of adding the program to the Timer list returning to the program guide or tuning to the current program on that station See Setting Up the Timer on page 38 for details on using the Timer To watch a PPV program you ve purchased in advance just tune to the station when the program is about to start Your program providers will bill you automatically About C...

Страница 32: ... toggle through the three variations of lists Press the DISPLAY button repeatedly See Using the DISPLAY Feature on page 44 for details To exit the list Select a program from the list by pressing the button Or Press the EXIT button on the remote You will be returned to the last program you were watching before the list was displayed The buttons that appear for each program indicate start times For ...

Страница 33: ...e made available by your program providers These guides may contain groups of stations with similar subjects for example special promotions or pay per view programs To select a guide type 1 Select GUIDE from the Select Guide screen 2 Select the type of guide you want to display 3 Select OK to display the selected program guide or select different options for time category or subcategory OK The GUI...

Страница 34: ... The CATEGORY option lets you select from a list of program guide categories To select a program guide category 1 Select CATEGORY from the Select Guide screen 2 Select the program category you want to display 3 Select OK to display the selected program guide or select different options for guide time or subcategory SELECT GUIDE GUIDE TIME CATEGORY SUBCATEGORY OK RETURN RESET SELECT TIME SAT 5 00 P...

Страница 35: ... LIST from the Main Menu How SELECT GUIDE and SELECT LIST Change the Main Menu The selections you make using SELECT GUIDE and SELECT LIST affect the program categories displayed in the Main Menu The category you select using SELECT GUIDE changes button 4 of the Main Menu The category you select using SELECT LIST changes button 6 of the Main Menu This feature allows you to recall the last program g...

Страница 36: ...tion Index Press the button The Station Index appears The station you are currently tuned to is automatically highlighted and program title is displayed at the top Moving Through the Station Index To move through the Station Index Move the joystick SAT A2 or press the arrow buttons SAT B2 to move one station at a time Press the PAGE or PAGE buttons to page move up or down several rows at a time En...

Страница 37: ...n Index Press the DISPLAY button repeatedly See Using the DISPLAY Feature on page 44 for details Selecting a Program from the Station Index To select a program Press the button to tune to the highlighted station The Station Index disappears To exit the Station Index without changing stations Press the EXIT button The Station Index disappears and you return to the station you were watching before d...

Страница 38: ... date automatically appears 4 Set the day start time stop time and station number as follows To set each item day time etc move the joystick up or down SAT A2 or press up or down arrow buttons SAT B2 To move to the next or previous item move the joystick right or left SAT A2 or press the right or left arrow buttons SAT B2 Note You can set the timer up to 30 days in advance You can also set the tim...

Страница 39: ...ing select CLEAR 4 Select OK to save your settings Notes on Using the Timer After the timer is set the TIMER indicator on the front panel lights indicating that the timer has been set To use the timer to record a PPV program you must first purchase it in advance of its showing See Ordering Pay Per View Programs on page 31 If locks and limits are set and the system is locked check to make sure they...

Страница 40: ...he seven Favorite Station buttons are blank 2 Highlight a Favorite Station button that you want to set Then press and hold the button The Favorite Station Guide switches to edit mode The station list appears the selected Favorite Station button flashes and the highlight moves to the current station in the station list FAVORITE STATION GUIDE FAVORITE 1 TITLE 1 2 3 4 5 6 7 EXIT TO CURRENT STATION Be...

Страница 41: ...uttons on the remote Then press the button The station list disappears and the Favorite Station Guide reappears with the stations you ve set up EDIT FAVORITE STATION GUIDE FAVORITE 1 2 3 4 6 7 EXIT TO PRIOR STATION To clear a Favorite Station button that is already assigned select CLEAR STATION 5 206 207 208 209 211 212 215 216 220 222 BASKETBALL 1 206 CLEAR STATION FAVORITE STATION GUIDE FAVORITE...

Страница 42: ...stations Select Exit to Current Station which appears in the bottom right corner of the Favorite Station Guide or press the EXIT button Creating a Custom Favorite Station Guide Title To create a custom title for the Favorite Station Guide 1 Select TITLE from the Favorite Station Guide The Set Favorite Guide Title screen appears 2 To edit the title move the joystick up or down SAT A2 or press the u...

Страница 43: ...m title station name and number current date and time start and end times rating and program description It may also include any of the following indicators To clear the program banner Press the DISPLAY or EXIT button or wait a few seconds for it to automatically disappear Symbol Indicates For Details See Data services available page 63 New and unread messages page 61 Alternate audio tracks availa...

Страница 44: ... 240 MUSIC VIDEOS 989 SHOGUN 212 THE NATURAL 980 PHILADELPHIA 198 BIOGRAPHY 256 TOM AND JERRY 233 EXIT TO CURRENT STATION 967 HBO First Knight Act Adv 1995 Richard Gere Sean Connery Julia Ormond Thrilling romance results when rogue knight Lancelot becomes torn between his loyalty to King Arthur and his love for Queen Guinevere CC ST A V MASTER GUIDE WED OCT 5 8 45 PM First Knight DTV102 COM990 It ...

Страница 45: ...he on screen displays and the order in which the stations are displayed page 48 Setting up and using the Jump Loop feature pages 50 51 Set system locks and limits which allow you to control program viewing by ratings spending amount and station page 52 Create a Custom Guide by selecting stations from the Master Guide that you want to skip page 57 Select an alternate audio track for the program you...

Страница 46: ...S MENU The Options Menu appears The following pages describe how to use the Options Menu to your system s setup MASTER GUIDE 2 SELECT GUIDE 1 MOVIE GUIDE 4 OPTIONS MENU 7 EXIT 5 TIMER SETUP 8 SELECT LIST 3 MOVIE LIST 6 SETUP MENU 9 MAIN MENU CUSTOM STATIONS 8 A LOCKS AND LIMITS 6 EXIT 5 DISPLAY OPTIONS 4 MESSAGES 3 PURCHASES 2 ALTERNATE AUDIO 1 OPTIONS MENU ...

Страница 47: ... The Review Cancel Purchases screen appears which lists the programs purchased and canceled 2 To review the details of a pay per view program you ve purchased Select the program you want to review Then select REVIEW To cancel a pay per view program you ve ordered Select the program you want to cancel Then select CANCEL PPV 3 Select RETURN to return to the Options Menu Note Once you tune to a purch...

Страница 48: ...change the color palette of the on screen displays The default color is EMERALD 1 Select COLORS from the Set Display Options screen The Set Colors screen appears 2 To preview a color move the highlight The Set Colors screen automatically changes to reflect the color that s highlighted 3 To change the color select a different color and then select OK to return to the Set Display Options screen 4 Se...

Страница 49: ...rogram guides to alphabetical or numerical The default setting is NUMERICAL 1 Select STATION ORDER from the Set Display Options screen 2 Select NUMERICAL or ALPHABETICAL 3 Select RETURN to return to the Options Menu RETURN SET DISPLAY OPTIONS COLORS TRANSPARENCY STATION ORDER JUMP GREEN STANDARD JUMP HELP SET TRANSPARENCY SOLID LIGHT MEDIUM RETURN SET DISPLAY OPTIONS COLORS TRANSPARENCY STATION OR...

Страница 50: ...p Loop which sets the JUMP button to jump among as many as 5 preset stations see Using the Jump Loop Feature on page 51 for details on presetting stations To set the Jump Mode 1 Select JUMP from the Set Display Options screen 2 Select STANDARD JUMP or JUMP LOOP 3 Select RETURN to return to the Options Menu SET DISPLAY OPTIONS COLORS TRANSPARENCY STATION ORDER JUMP RETURN HELP JUMP LOOP SET JUMP ST...

Страница 51: ...jump stations while a program guide menu etc is being displayed 3 Press and hold the JUMP button A message appears indicating that the station has been assigned to the Jump Loop 4 To set additional jump stations repeat steps 2 and 3 of this procedure Note If you set more than 5 jump stations the sixth jump station automatically overwrites the first jump station in the loop and so on To jump throug...

Страница 52: ...t for a single pay per view program When the system is locked you cannot purchase a program that costs more than the amount set The default setting is 10 00 Ratings Limit Allows you to set a maximum ratings limit When the system is locked you cannot view programs rated higher than the rating set The default rating is R Pay Per View Allows you to prevent PPV purchases When the system and the PPV op...

Страница 53: ...tings Limit To set a ratings limit 1 Select RATINGS LIMIT from the Set Locks and Limits screen 2 Select a rating beyond which programs cannot be watched 3 Select another lock or limit to set or go to step 4 4 Lock your system as described in Locking Your System on page 55 SET LOCKS AND LIMITS SPENDING LIMIT RATINGS LIMIT PAY PER VIEW STATION LOCKS None UNLOCKED 0 STATIONS CURRENTLY LOCKED RETURN L...

Страница 54: ...ve been locked To unlock a station just select it again The key disappears 3 Select OK to return to the Set Locks and Limits screen 4 Select another lock or limit to set or go to step 5 5 Lock your system as described in Locking Your System on page 55 SET LOCKS AND LIMITS SPENDING LIMIT RATINGS LIMIT PAY PER VIEW STATION LOCKS RETURN LOCK HELP SET PPV LOCK UNLOCKED LOCKED OK CANCEL ALL NONE SET ST...

Страница 55: ...been set if you know the system passcode For example if you try to watch a program on a locked station a message identifies the lock or limit exceeded After you press the button the Temporary Unlock window appears By entering the passcode and then selecting when you want the system to automatically relock you can temporarily unlock the system Note If you override the system lock you can reset the ...

Страница 56: ...ears as an asterisk which keeps your passcode secret Your system is now unlocked and all locks and limits previously set are no longer in effect Determining the Status of the System Lock While you re watching programs you can check the status of the system lock by pressing the DISPLAY button to bring up the Program Banner which includes the following lock symbols Symbol System Lock Status No padlo...

Страница 57: ...lowing screen stations 203 208 and 213 are set to be skipped To set a station so that it is not skipped just select it again The checkmark disappears Note Use the PAGE and PAGE buttons to quickly move through the rows of stations You can also use the 0 9 buttons to enter the three digit station number directly 3 Select OK when you re finished setting skipped stations To see the results of your Cus...

Страница 58: ... AUTO function does not skip pay per view stations To use the AUTO Skip feature 1 Select CUSTOM STATIONS from the Options Menu 2 Select the AUTO button The DSS receiver begins to evaluate all the stations in the Master Guide and displays a status bar similar to the following Note This process may take a few minutes to complete When the DSS receiver is finished scanning the station list reappears w...

Страница 59: ...ternate audio tracks are available for that program Selecting an Alternate Audio Track Using the remote control SAT A2 only Press the ALTERNATE AUDIO button repeatedly on the remote control If more than two alternate audio tracks are available for the current program the Set Alternate Audio screen automatically appears see below Using the on screen menus SAT A2 SAT B2 1 Press the MENU button to br...

Страница 60: ... in multiple languages To set a default language 1 Select DEFAULT from the Set Alternate Audio screen 2 Select a default language 3 Select RETURN to return to the Options Menu Note If the default language you select is not available for a program that you tune to you will not hear the default language Instead you ll hear one of the languages available for that program usually English For example i...

Страница 61: ...read mail The DSS receiver s front panel MESSAGE indicator blinks An envelope appears in the Program Banner accessed by pressing the DISPLAY button An envelope appears in menu item 7 Options Menu of the Main Menu Displaying Your Messages To display your messages 1 Press the MENU button to bring up the Main Menu 2 Select OPTIONS MENU 3 Select MESSAGES The message s date along with the first few wor...

Страница 62: ...t of the message appears 2 To erase a message after you ve read it select ERASE To keep a message after you ve read it select RETURN Note Your mailbox can hold about 50 messages before exhausting the receiver s memory MESSAGES READ 11 6 Sign up now for our special 11 8 Welcome to USSB 11 23 Happy Thanksgiving RETURN HELP RETURN READ MESSAGE ERASE HELP 11 23 Happy Thanksgiving from everyone at DIRE...

Страница 63: ...that specific station Selecting a Data Service To select a data service 1 Select DATA SERVICES from the Options Menu 2 The Data Services screen appears which lists only the data services that are available for the station you are currently tuned to DATA SERVICES appears only when the station you re tuned to includes data services CUSTOM STATIONS 8 DATA SERVICES 7 LOCKS AND LIMITS 6 EXIT 5 DISPLAY ...

Страница 64: ...urrent station only Select the data service and then select RETURN Change the data service for all stations Select DEFAULT then see Changing the Default Data Service below Change the baud rate for the DSS receiver s wide band data port Select BAUD then see Setting the Baud Rate below The titles of the data services may be different based on the service being provided DATA 8 DATA 1 DATA 2 DATA 3 DA...

Страница 65: ...e your access card page 68 Change the aspect ratio of the DSS receiver to match your TV screen standard or widescreen page 70 SAT A2 Only Change the DSS receiver to receive RF radio frequency remote control signals or IR infrared remote control signals page 71 Display a list of programmable codes for other components you may want to operate using the DSS remote control page 74 Run a system test to...

Страница 66: ...elect SETUP MENU 3 The Setup Menu appears The following pages describe how to use the Setup Menu to set up your system SELECT GUIDE 1 MOVIES GUIDE 4 OPTIONS MENU 7 MASTER GUIDE 2 EXIT 5 TIMER SETUP 8 SELECT LIST 3 MOVIES LIST 6 SETUP MENU 9 MAIN MENU SYSTEM TEST 8 REMOTE CONTROL 1 ANTENNA 4 TROUBLE SHOOTING 7 ACCESS CARD 2 EXIT 5 ASPECT RATIO 6 TIPS AND SHORTCUTS 9 SETUP MENU ...

Страница 67: ... and azimuth settings for the satellite antenna select ZIP CODE or LAT LONG ZIP CODE uses your five digit zip code to determine the elevation and azimuth settings LAT LONG uses your location s latitude and longitude to determine the azimuth and elevation settings The Signal Strength Meter indicates the current signal strength of the antenna The Transponder option allows you to select a transponder...

Страница 68: ...ze the new card your old card becomes invalid To replace your access card 1 Select ACCESS CARD from the Setup Menu 2 When the Replace Access Card screen appears insert your old access card if you removed it as follows Open the door to the access card Place your fingertip in the slot as shown or carefully use the edge of a coin and gently pull the door down SYSTEM TEST 8 REMOTE CONTROL 1 ANTENNA 4 ...

Страница 69: ...e the procedure When the message Replace Access Card Procedure Complete appears select OK to return to the Setup Menu RETURN REPLACE ACCESS CARD Please insert OLD access card and select OK to initialize NEW card CAUTION After you select OK you cannot stop this process and your OLD access card will no longer be valid OK HELP Selecting RETURN returns you to the Setup Menu without starting the initia...

Страница 70: ...pect ratio 1 Select ASPECT RATIO from the Setup Menu 2 Select one of the options based on the type of TV you have If you have a standard TV select 4 3 If you have a wide screen TV select 16 9 3 Select OK to return to the Setup Menu Selecting CANCEL returns you to the Setup Menu without saving your selection SET ASPECT RATIO STANDARD WIDE CANCEL OK HELP 4 3 16 9 ...

Страница 71: ...m or is placed behind a cabinet door In other words with the RF feature the remote control does not require a direct line of sight to the front panel of the DSS receiver Note You must set up the RF antenna to take advantage of the RF feature See Setting Up the RF Antenna SAT A2 Only on page 22 for details The DSS receiver is shipped with IR transmission enabled and RF transmission disabled To use ...

Страница 72: ...curity code Step 1 is changing the DSS receiver s security code step 2 is changing the DSS remote control s security code Both the receiver and the remote control must use the same three digit security code Step 1 Select the DSS Receiver s RF Security Code 1 Select REMOTE CONTROL from the Setup Menu 2 Select RF SECURITY CODE and then select a different security code 3 Select OK to save your change...

Страница 73: ...ton in the Set Up Remote screen 1 Bring up the Set Up Remote screen as described on page 71 2 Select IDENTIFY 3 When the message Press the joystick within 5 seconds appears press the joystick before the 5 seconds expire The current RF security code for the DSS remote control appears Note If the message Security code could not be identified appears check to make sure that RF is enabled and that the...

Страница 74: ...want to use with the DSS remote 3 Scroll through the list that appears to find the remote codes for the manufacturer of your component Press the button to return to the Set Up Remote screen 4 To program the remote control select INSTRUCTIONS and follow the on screen instructions 5 Select OK to return to the Setup Menu SET UP REMOTE REMOTE SIGNAL RF SECURITY CODE IR ONLY OK CANCEL IDENTIFY HELP REM...

Страница 75: ...s Check your system for any of the following The access card test will fail if you have not yet called your program providers to establish service After your service has been established the access card test should pass Check that all cables are connected properly to the DSS receiver Check that the satellite antenna is installed correctly and that the signal has been optimized See the manual that ...

Страница 76: ...nu Displaying Tips and Shortcut Information To display tips and shortcut information 1 Select TIPS AND SHORTCUTS from the Setup Menu 2 Select the topic for which you want information Details of that topic are displayed 3 Press the button to return to the Tips and Shortcuts screen 4 Select RETURN to return to the Setup Menu SYSTEM TEST 8 REMOTE CONTROL 1 ANTENNA 4 TROUBLE SHOOTING 7 ACCESS CARD 2 E...

Страница 77: ... the controls and indicators on the front and back panels of the DSS receiver page 78 Remote control button descriptions page 81 Programming the remote to operate your TV and other video components page 85 Troubleshooting information page 88 Precautions page 91 FCC Information page 92 Limited warranty page 93 Specifications page 94 Index page 95 ...

Страница 78: ...d The arrow buttons highlight items in the on screen displays program guides menus etc The button selects highlighted items When pressed during normal DSS viewing the button brings up the Station Index unless a message appears TV DSS Button Switches the output of the DSS receiver between TV normal TV programs if you ve connected a TV cable or antenna and DSS programs Power Indicator Indicates whet...

Страница 79: ...iver to a digital audio component with a digital input frequency of 48 kHz Optical digital mini plug RF REMOTE Connects to the RF antenna RCA type AUDIO 3 OUT R L Connects your DSS receiver to the right and left audio inputs of your audio or video component Audio 2 RCA type AUDIO R L OUT Connects your DSS receiver to the right and left audio inputs of your audio or video component Audio 2 RCA type...

Страница 80: ...ect the Sony VCR Mouse RM VM101 Audio mono miniplug AUDIO R L OUT Connects your DSS receiver to the right and left audio inputs of your audio or video component Audio 2 RCA type VIDEO OUT Connects your DSS receiver to your TV or VCR s video input Video RCA type S VIDEO OUT Allows you to connect your DSS receiver directly to your TV if your TV has S VIDEO IN S Video 4 pin mini DIN CH3 CH4 Switch Wh...

Страница 81: ...scribed in the following table can operate components other than the DSS receiver only if you ve programmed the remote and the component supports the function described See page 85 for instructions on programming the DSS remote Button Operates Description TV Mutes the volume Press again to restore the volume TV Automatically turns off the TV after the time period that you specify CABLE Turns the c...

Страница 82: ...creens used to enter numerical values such as a spending limit or passcode DSS TV Toggles through the different displays of on screen guides DSS or other display TV See Using the DISPLAY Feature on page 44 for details DSS TV When moved forward back left right and diagonally highlights items in the on screen displays program guides menus etc When pressed selects highlighted items When pressed durin...

Страница 83: ...serdisc Fast forward VCR Laserdisc Turns the VCR or laserdisc player on and off VCR Changes the VHF UHF output of the VCR VCR Laserdisc Stop VCR Laserdisc Pause VCR Record VCR Laserdisc Changes the channel VCR or chapter laserdisc DSS Used for programming the remote to operate your TV cable box VCR laserdisc player or DSS receiver Also used to change the RF security code DSS Used for setting up th...

Страница 84: ...on number DSS In menus selects the menu item with the corresponding number Also in some screens used to enter numerical values such as a spending limit or passcode DSS TV Toggles through the different displays of on screen guides DSS or other display TV See Using the DISPLAY Feature on page 44 for details DSS TV Cable box Used with 0 9 buttons to change stations without any delay in tuning DSS TV ...

Страница 85: ...onent you re setting up SAT A2 Only To set up a VCR or laserdisc player set the slide switch to any position VTR1 2 3 MDP You must perform step 4 within 10 seconds of step 3 or you must start again from step 2 To cancel the operation press the ENTER button 4 Enter the three digit code number 5 Press the ENTER button To Check if the Code Number Works Use the following procedure to make sure the cod...

Страница 86: ...anufacturer Code Sony 301 302 303 Aiwa 338 Audio Dynamic 314 347 Bell Howell M Wards 330 343 Brocsonic 319 Canon 309 308 Citizen 332 Craig 315 302 332 Curtis Mathis 304 338 309 Daewoo 341 312 309 DBX 314 336 337 Dimensia 304 Emerson 319 320 316 317 318 Fisher 330 334 335 333 Funai 338 General Electric 329 304 309 Goldstar 332 Hitachi 306 304 305 Instant Replay 309 308 JC Penney 309 305 304 330 314...

Страница 87: ...ready to learn 5 Hold down the corresponding button on the other component s remote control When the Learn indicator flashes off then on release the button on the other component s remote control If the indicator doesn t flash repeat steps 4 and 5 6 To learn other functions repeat steps 4 and 5 About the Learn Function The Learn function does not work in the VTR1 and VTR2 slide switch positions Du...

Страница 88: ...played there may be an electrical short in the RG 6 cable and you will need to replace it In rare cases the picture may be distorted if you connected a terrestrial TV antenna to the UHF VHF IN jack of the receiver This distortion could occur if the channel selector on the back of the receiver is set to a channel that is normally received on channel 3 or 4 of your TV For example you can receive a l...

Страница 89: ...ay per view lock not working properly Check locks and limits Then check that the system is locked See Chapter 5 Cannot access locks or limits screens The system must be unlocked before you can make changes to the locks and limits See Chapter 5 Cannot lock or unlock the system Make sure you ve entered the correct passcode If you ve lost or forgotten your passcode call your program provider See Cust...

Страница 90: ...T GUIDE to change the program category shown in button 4 Use SELECT LIST to change the program category shown in button 6 See page 35 Access card problems Check that the card is inserted properly See page 68 Call your program providers See Customer Support on page 2 Remote control doesn t work To operate your TV or other video components make sure you ve programmed the remote properly See Programm...

Страница 91: ...ety and will fit into the wall outlet only one way If you are unable to insert the plug fully into the outlet contact your dealer If the AC power cord gets damaged and needs to be replaced have it done at a qualified service shop only On Placement Place the receiver in a location with adequate ventilation to prevent heat build up in the receiver and prolong the life of the receiver Do not place th...

Страница 92: ...or service call 1 800 838 7669 Radio Interference Information This equipment has been tested and found to comply with the limits for a Class B digital device pursuant to Part 15 of the FCC Rules These limits are designed to provide reasonable protection against harmful interference in a residential installation This equipment generates uses and can radiate radio frequency energy and if not install...

Страница 93: ...the United States Proof of purchase in the form of a bill of sale or receipted invoice which is evidence that the unit is within the Warranty period must be presented to obtain warranty service REPAIR OR REPLACEMENT AS PROVIDED UNDER THIS WARRANTY IS THE EXCLUSIVE REMEDY OF THE CONSUMER SONY SHALL NOT BE LIABLE FOR ANY INCIDENTAL OR CONSEQUENTIAL DAMAGES FOR BREACH OF ANY EXPRESS OR IMPLIED WARRAN...

Страница 94: ...Dimensions w h d 430 x 85 x 290 mm 16 9 x 3 2 x 10 8 inches Weight Set 5 2 kg 11 4 lbs SAT A2 4 9 kg 10 8 lbs SAT B2 Unit 3 0 kg 6 6 lbs SAT A2 2 9 kg 6 4 lbs SAT B2 Note Design and specifications are subject to change without notice Supplied Accessories Remote Control RM Y130 SAT A2 RM Y129 SAT B2 Size AA Batteries 2 Access Card 1 Audio Video Cable 1 S VIDEO Cable 1 SAT A2 RF Antenna 1 SAT A2 RF ...

Страница 95: ...Navigator 4 F Fast forward button 83 FAVORITE button 30 40 81 84 Favorite Station Guide changing the title 42 clearing a station 42 displaying and setting up 40 displaying different Favorite Station Guides 42 exiting 42 using DISPLAY button with 44 features described 4 front panel controls 78 FUNCTION buttons 81 84 G GUIDE button 7 8 9 29 82 84 guides selecting a guide category 34 selecting a guid...

Страница 96: ...7 scrolling 8 29 SELECT button 7 8 26 78 SELECT GUIDE 35 SELECT LIST 35 Setup Menu displaying 66 SLEEP button 81 S LINK feature 11 spending limit explained 52 setting 53 Station Index displaying 7 8 10 36 displaying favorite stations in 37 exiting 37 selecting programs in 10 37 using DISPLAY button with 44 station locks setting 54 station order setting 49 Stop button 83 S VIDEO jack 11 13 14 16 18...

Отзывы: