background image

33

GB

Tabl

e of


C

o

n

tent
s

Let

’s

 U
s

e

E

njo
y

ing 
Mo

re

T

ro

u

b

les
hoo

ti

ng

In

dex

Exporting an image from internal 
memory

You can export images in internal memory to a memory card.

1

Press MENU when an image stored in internal memory is displayed on 
the screen.

2

Press 

B

/

b

 to select the 

 (Editing) tab.

3

Press 

v

/

V

 to select [Export] then press 

 (enter).

4

Select an item then press 


(enter).

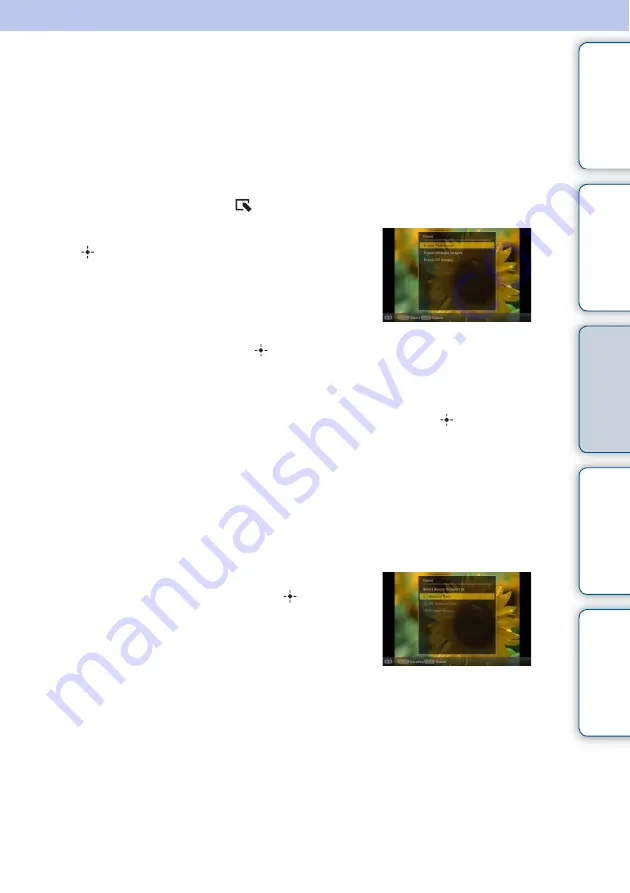
[Export This Image]:

 The image currently displayed is exported to the device. (This 

item cannot be selected on the slideshow display.)

[Export Multiple Images]:

 An image list is displayed.

Select the image to be exported from the image list then and press 


(enter). A check 

mark (

) is added to the selected image. If you want to export multiple images at a 

time, repeat this operation.

[Export All Images]:

 An image list will appear with check boxes checked for all 

images.

5

Press MENU.

A screen for selection of the memory card to which the image is to be exported is 
displayed.

6

Select a memory card to which the image 
is to be exported then pres

s  

(enter)

.

Continued 

r

Содержание S-Frame DPF-HD1000

Страница 1: ...DPF HD1000 HD800 HD700 4 295 278 12 1 Table of Contents Let s Use Enjoying More Troubleshooting Index Digital Photo Frame Handbook ...

Страница 2: ...endations To avoid potential risk of data loss caused by accidental operation or malfunction of the digital photo frame we recommend that you save a backup copy of your data Notes on the LCD screen Do not press against the LCD screen The screen may become discolored and that may cause a malfunction Exposing the LCD screen to direct sunlight for a long period may cause malfunctions The LCD screen i...

Страница 3: ... the view mode 16 Playing a movie 20 Saving images in your photo frame import 21 Specifying the playback memory 23 Enjoying More Playing a slideshow with background music 24 Adjusting image size and orientation 27 Registering a favorite mark 29 Sorting images Filtering 30 Deleting an image 31 Exporting an image from internal memory 33 Using the auto power on off timer 35 Changing the settings 38 C...

Страница 4: ...ge 9 Rear A Speaker B MENU button C enter button D v V B b buttons E BACK button F Holes for hanging the unit on a wall page 10 G VIEW MODE button page 16 H 1 on standby button I Standby indicator J USB Mini B connector page 14 42 K USB A connector page 14 L DC IN jack page 11 M Memory card slot page 14 N Stand page 9 Let s Use Continued r ...

Страница 5: ... on standby button page 12 H zoom in button page 27 I v V B b buttons page 13 VOL VOL volume buttons page 20 J enter button page 13 K zoom out button page 27 L IMPORT button page 21 M DELETE button page 31 N ROTATE button page 28 The supplied lithium battery CR2025 has already been inserted into the remote control Pull out the protective sheet before use as illustrated below Protective sheet Remot...

Страница 6: ...uivalent into the photo frame Memory cards USB memory supported by the photo frame Adaptor Memory Stick Duo Not compatible Compatible with MagicGate Memory Stick PRO Duo Memory Stick PRO HG Duo Not necessary Memory Stick Micro M2 SD memory card SDHC memory card SDXC memory card Not necessary miniSD card miniSDHC card microSD card microSDHC card USB memory M2 adaptor Duo size miniSD miniSDHC adapto...

Страница 7: ...been demonstrated as operable with an SDXC memory card with a capacity of 64 GB or less We do not guarantee connection with all types of memory card devices This photo frame is equipped with a Memory Stick Duo slot A Memory Stick standard cannot be used in this slot When using miniSD miniSDHC microSD microSDHC or Memory Stick Micro be sure to mount it in an appropriate card adaptor If you insert t...

Страница 8: ...eparation 1 Checking included items Make sure that the following items are included Digital photo frame 1 Remote control 1 Stand 1 AC adaptor 1 Operating Instructions 1 CD ROM Digital Photo Frame Handbook 1 Warranty 1 In some regions the warranty is not packaged together ...

Страница 9: ...tation The directions indicated on v V B b on the rear panel depend on the orientation of the photo frame When the photo frame is placed in portrait orientation or when you turn off the power the Sony logo doesn t light up The photo frame does not detect and rotate the orientation of images when Auto display orientation of General Settings under the Settings tab is set to OFF A movie file is not r...

Страница 10: ...from the wall When you want to re insert a memory card remove the photo frame from the wall then eject and re insert the memory card while the photo frame is placed on a stable surface Remove the stand when you hang the photo frame on a wall Connect the DC cable of the AC adaptor to the photo frame and hang the photo frame on the wall Then plug the AC adaptor into the wall outlet Sony takes no res...

Страница 11: ...aration 4 Setting up the photo frame page 13 If the initial settings have already been made c Proceed to Enjoying a slideshow page 14 If the photo frame is not operated for a certain time the demonstration mode is displayed If any other button than the power button is pressed the screen returns to the initial display To adjust the volume of the demonstration display press v V Connecting the AC ada...

Страница 12: ...adaptor to an easily accessible wall outlet close by If trouble occurs while using the adaptor immediately shut off the power by disconnecting the plug from the wall outlet Do not short the plug of the AC adaptor with a metal object Doing so may cause a malfunction Do not use the AC adaptor placed in a narrow space such as between a wall and furniture If you will not be using the photo frame for a...

Страница 13: ...Set the time 1 Press v V to select Time and press enter 2 Press B b to select the hour minute and second press v V to select a value then press enter 8 Select the display format for the date 1 Press v V to select Date Display Order and press enter 2 Press v V to select a format and press enter Y M D M D Y D M Y 9 Set either Sunday or Monday to start the week for the calendar You can set the day of...

Страница 14: ...e after another as a slideshow When enter is pressed during a slideshow a single image is displayed To remove the memory card Remove the memory card from its slot in the opposite direction from which it was inserted Do not remove the memory card while an image is displayed on the screen Doing so may damage the recorded data in the memory card It is better to press MENU to display the menu display ...

Страница 15: ...rd slots A B or the USB connector If multiple memory cards and USB memory media are inserted the photo frame may be damaged Note the following when you select a slideshow using the image stored in a memory card Owing to the characteristics of memory card devices images may be subject to data errors when read too often Do not run a slideshow for a long time with a small number of images This may ca...

Страница 16: ...ttings tab can be operated In the single image display press B or b to select an image to be displayed In Index mode the display is switched to the single image display when you select an image with v V B b and press enter While the index is displayed the size of the thumbnails can be changed with to change the number of the thumbnails on the display If you have not operated the photo frame for an...

Страница 17: ...een one after another Multi image View Displays multiple images at the same time For a movie file only the first frame of the file is displayed Clock View Displays a clock with the current date and time while showing images one after another Calendar View Displays a calendar with the date and time while showing images one after another With this style current date and time are displayed Time Machi...

Страница 18: ... displayed Single View styles Style Description Display example Entire Image Displays an entire image on the screen Fit to Screen Displays an image over the whole screen Entire Image with Exif Displays image information such as the image number file name and shooting date while displaying the entire image Fit to Screen with Exif Displays image information such as the image number file name and sho...

Страница 19: ...uration Movie file size video width video height Video codec Audio codec 4 Setting information 5 Image number folder file number This is displayed if the image is DCF compliant If the image does not comply with DCF its file name is displayed If you named or renamed the file on your computer and the file name includes characters other than alphanumeric characters the file name may not be displayed ...

Страница 20: ...uarantee operation with movie files not mentioned above Fast forward backward playback and playback pause are not available during Slideshow display Continuous playback of a movie that has been divided into multiple files during recording is not allowed Play the divided files one by one Dropped frames may occur depending on the types of data or the transmission speed of the memory card Some of the...

Страница 21: ...depending on the original image file sizes 1 Press IMPORT when an image stored in the memory card is displayed on the screen To operate using the buttons on the photo frame 1Press MENU with an image stored in the memory card displayed 2Press B b to select the Editing tab select B b Import with v V then press enter 2 Select an item and press enter Import This Image The image currently displayed is ...

Страница 22: ...enter when confirmation screen is displayed Avoid the following while an image is being imported to internal memory Doing so may damage the photo frame memory card or data Turning off the power Removing a memory card Inserting another memory card Importing movie files from the memory card to internal memory is not available To import a movie file connect a computer to the photo frame first then tr...

Страница 23: ...ve displayed 1 Press SELECT DEVICE To operate using the buttons on the photo frame Press MENU then select the Select device tab with B b If the memory card you want to select is not inserted insert it now 2 Select the memory whose contents you want to have displayed then press enter The images in the selected memory are displayed During clock and calendar display you cannot select the Select devic...

Страница 24: ...djust the volume Press VOL VOL during playback or playback pause mode of the movie file To stop the background music Select the file with a check mark and press enter to delete the check mark Alternatively select BGM ON OFF in Slideshow BGM Settings of the menu then set it to OFF Only music files imported to internal memory can be played Fast forward backward playback of background music is not av...

Страница 25: ... Select a music file you want to import from the music file list and press enter A check mark is displayed next to the selected file To clear the selection select the file you want to clear then press enter 6 Repeat step 5 if you want to select two or more files 7 Press MENU after you finish selecting the music file s 8 Press enter when the confirmation screen is displayed The selected music file ...

Страница 26: ...show The music files provided in the internal memory at the factory as BGM1 BGM2 and BGM3 cannot be deleted Up to 40 music files can be imported to internal memory of the photo frame Up to 200 music files can be shown on the importing music file list display Only the file name is displayed for a music file A song title and artist s name cannot be shown ...

Страница 27: ... the enlarged or reduced image is displayed 2 Select the saving method Save as new image A copy of the image is saved 1 Select the memory in which the image is to be saved then press enter 2 Select a destination folder then press enter Overwrite The new image overwrites the old image 3 Select Yes and press enter 4 When the confirmation screen appears press enter The image is saved If you pan the e...

Страница 28: ...e photo frame 1Press MENU in Single View mode 2Press B b to select the Editing tab 3Press v V to select Rotate then press enter 4Press v V to select the angle of rotation then press enter For an internal memory image image rotation data will be retained even after the power is turned off You can also rotate the index image display An enlarged image cannot be rotated A movie file cannot be rotated ...

Страница 29: ...ges The image list is displayed Select an image from the image list to be marked then press enter A check mark is added to the selected image If you want to mark multiple images at a time repeat this step Mark All Images An image list will appear with the check boxes checked for all images 4 Press MENU A confirmation screen appears 5 Select Yes then press enter The favorite mark is placed for the ...

Страница 30: ... horizontal Filters by the image orientation Sort by mark Filters by mark page 29 Sort by videos photos Filters according to files that contain movies videos or still images photos Either the movie files or still image files are sorted 3 Select the desired option item then press enter To cancel a sort operation Press MENU while the sorted images are displayed select Exit sort show all photos then ...

Страница 31: ... want to delete multiple images at a time repeat this operation Delete All Images An image list will appear with check boxes checked for all images 3 Press MENU A deletion confirmation screen is displayed 4 Select Yes then press enter The image is deleted 5 Press enter when the confirmation screen is displayed Avoid doing the following while an image is being deleted Doing so may damage the photo ...

Страница 32: ...lect Format Internal Memory then press enter A confirmation screen for initializing the internal memory is displayed 5 Select Yes then press enter Note that all the images added to the internal memory will be deleted by formatting The total capacity of the internal memory is not equal to the remaining capacity even immediately after initialization Do not format the internal memory using connection...

Страница 33: ...displayed is exported to the device This item cannot be selected on the slideshow display Export Multiple Images An image list is displayed Select the image to be exported from the image list then and press enter A check mark is added to the selected image If you want to export multiple images at a time repeat this operation Export All Images An image list will appear with check boxes checked for ...

Страница 34: ...orted 9 Press enter when the confirmation screen is displayed The image is copied to the specified memory card Avoid the following while an image is being exported Doing so may damage the photo frame memory card or data Turning off the power Removing a memory card Inserting another memory card Any device that is not recognized by the photo frame is displayed in gray and cannot be selected When a s...

Страница 35: ...ect an item and press enter Advanced You can set the auto power on off function in one hour units independently for each day of the week Simple You can set the auto power on off function in one minute increments Auto off You can set the auto power off time as a specified time that has elapsed with no operation after the photo frame is turned on You can specify two or four hours as an elapsed time ...

Страница 36: ...t the time by one hour units independently for each day of the week The color of the selected time zone changes to blue and the power turns on 2 Press v V B b to set the time you want the power automatically turned off then press enter Set the time in one hour units for each day of the week The color of the selected time zone changes to gray and the power is turned off 3 Select OK The power is tur...

Страница 37: ...elect Auto ON time or Auto OFF time and press enter 2 Press B b to select the hour or minute press v V to adjust it and press enter 3 Select the day of the week 1 Select Auto ON day or Auto OFF day then press enter 2 Select the day of the week on which you want the timer activated then press enter The select day of the week is checked 3 Move the cursor to OK then press enter When Auto off is selec...

Страница 38: ...o change the setting page 39 5 Select a setting value then press enter 6 Press MENU The menu closes When the photo frame is for instance displaying a slideshow some option settings cannot be changed in step 4 They are displayed in gray and cannot be selected To reset to the factory default settings 1 Press MENU then select the Settings tab by pressing B b 2 Press v V to select Initialize then pres...

Страница 39: ...xt image as though blinds were being lowered vertically Horiz Blinds Transitions to the next image as though blinds were being pulled horizontally Fade Transitions to the next image by fading the current image out and fading the next image in Wipe Transitions to the next image as though the current image were being wiped off the screen to reveal the next image Random Swiching images by using the a...

Страница 40: ...he style of the slideshow While a movie file is being played in a slideshow the video image is always displayed in Entire Image mode even if you change the Display Mode setting Slideshow BGM Settings Auto Power ON OFF Sets the timer function to turn the photo frame on or off automatically page 35 Date Time Settings Sets the date time First day of the week etc page 13 Setting Description BGM ON OFF...

Страница 41: ...o a level from 1 to 10 Image import size Resize Resizes the images and save them to internal memory when importing images from a memory card You can save more images However when the images are displayed on a large monitor via a computer etc image quality is deteriorated compared with the original Original Saves images to internal memory without compressing them There is no deterioration but you c...

Страница 42: ...l memory of the photo frame with a computer and copy them to a computer and to copy images from a computer to the photo frame 1 Connect the AC adaptor to the photo frame and to the AC outlet then turn the photo frame on 2 Connect the computer and photo frame with a commercially available USB cable To USB Mini B connector Computer To USB connector Continued r ...

Страница 43: ...t the Mini B TYPE USB connector to the photo frame shorter than 3 meters If multiple USB devices are connected to a computer or if a hub is used a problem may occur You cannot operate the photo frame from another USB device being used simultaneously Do not disconnect the USB cable during data communication Operation may not be guaranteed with some computers even if they satisfy the recommended sys...

Страница 44: ...pen this sony folder 3 Open the folder that contains the image files you want to copy then copy the image files by drag and drop When saving images from a computer to internal memory make a folder in internal memory and save the images to this folder If you do not make a folder you can only save up to 512 images In addition the number of images may be reduced depending on the file name length or c...

Страница 45: ...age 44 proceed as follows 1 Move the cursor in this window and double click on the MUSIC folder 2 Open the folder that contains the music you want to copy then copy the file to MUSIC folder by drag and drop Copy music files to the MUSIC folder If you copy them to any folder other than the MUSIC folder they cannot be played Copying a music ...

Страница 46: ...is not compatible with DCF may not be displayed with the photo frame even if it can be displayed with a computer Is the image file damaged c If the image file is damaged it may take approximately one minute indicated by display of the mark after the image is distinguished When it will take one minute or more confirm whether the image is properly displayed on the computer A message No images on fil...

Страница 47: ... again the image cannot be displayed c The image file is supported by the photo frame but the thumbnail data or image itself cannot be opened Select the mark then press enter If the mark is displayed again the image cannot be displayed Were the images created with an application on a computer c If you named or renamed the file on your computer and the file name includes characters other than alpha...

Страница 48: ... not make a folder you can only save up to 512 images In addition the number of images to be saved may be reduced depending on the file name length or character type When you save images in the internal memory from a computer be sure to make a folder in internal memory and save the images to that folder The message Error reading the Memory Stick SD Memory Card or Write error on the Memory Stick SD...

Страница 49: ...g a music file A music file cannot be imported Is a memory card that stores only music files inserted c When a memory card that stores only music files is inserted the message No images on file appears on the screen In this case do not replace the card but merely press enter x Playing the background music A music file cannot be played Is the file playable on this photo frame c Check if the music f...

Страница 50: ...ossible to take it out using a fine tipped tool such as tweezers or needle nose pliers In this case be careful that this does not damage the memory card and or photo frame x Remote control Nothing happens even if you operate the remote control Is the battery inserted in the remote control properly c Replace the battery page 51 c Insert a battery in the proper orientation page 51 Did you point the ...

Страница 51: ...t No the confirmation screen for refreshing is displayed again when refreshing is needed It may take approximately 5 minutes to refresh the internal memory Do not turn off the power while the internal memory is being refreshed It may cause a malfunction We recommend that you perform periodic backup of your data to avoid losing them Avoid running a slideshow continuously with fewer than 10 images w...

Страница 52: ...rge the battery When the remote control will not be used for a long period of time remove the battery from the remote control to prevent leaking and corrosion Incorrectly inserting shorting dismantling or heating the battery or throwing it into a fire may cause the battery to rupture or leak When the lithium battery becomes weak the operating distance of the remote control may shorten or the remot...

Страница 53: ...transport When you transport the photo frame remove the memory card AC adaptor and connected cables from the photo frame and put the photo frame and its peripherals in the original box with the protective packaging If you no longer have the original box and packing parts use similar packing material so that the photo frame will not be damaged while being transported If the body of the unit is dirt...

Страница 54: ...rect insertion direction of the card Incorrect insertion may cause damage to the photo frame When inserting a memory card it will only insert part of the way so do not try to force it as this could damage the memory card and or photo frame Do not remove a memory card or turn off the photo frame while the photo frame is reading or accessing data Otherwise data may be rendered unreadable or be erase...

Страница 55: ...ector Type A Hi Speed USB Memory Stick PRO Duo SD memory card slots Compatible file formats 1 JPEG DCF 2 0 Exif 2 3 MPF baseline MPF extended 2 JFIF TIFF Exif 2 3 compatible BMP 1 4 8 16 24 32 bit Windows format RAW 3 SRF SR2 ARW 2 2 preview only Still image Movie 4 5 6 MPEG 4 AVC H 264 Extension mp4 mts Profile Baseline Profile Main Profile High Profile Level lower than 4 2 Maximum resolution 192...

Страница 56: ...n be saved Power requirements DC IN jack DC 5V Power consumption At the maximum load 11 3 W normal mode 6 3 W At the maximum load 10 7 W normal mode 5 5 W At the maximum load 10 1 W normal mode 5 0 W With the AC adaptor Without the AC adaptor At the maximum load 8 5 W At the maximum load 8 5 W At the maximum load 8 0 W Operating temperature 5 C to 35 C 41 F to 95 F Dimensions width height depth Ap...

Страница 57: ...equired An image with an aspect ratio of 20 1 or more may not be displayed properly Even if the aspect ratio is less than 20 1 display problem may occur in thumbnails slideshow or other occasions 8 When measuring media capacity 1 GB equals 1 000 000 000 bytes a portion of which is used for data management and or application files The capacity that a user can use is approximately 1 8 GB 9 The numbe...

Страница 58: ...son All other companies and product names mentioned herein may be the trademarks or registered trademarks of their respective companies Furthermore and are not mentioned in each case in this manual Notes on the License THIS PRODUCT IS LICENSED UNDER THE MPEG 4 VISUAL PATENT PORTFOLIO LICENSE FOR THE PERSONAL AND NONCOMMERCIAL USE OF A CONSUMER FOR i ENCODING VIDEO IN COMPLIANCE WITH THE MPEG 4 VIS...

Страница 59: ...AT WAS ENCODED BY A CONSUMER ENGAGED IN A PERSONAL AND NON COMMERCIAL ACTIVITY AND OR WAS OBTAINED FROM A VIDEO PROVIDER LICENSED TO PROVIDE AVC VIDEO NO LICENSE IS GRANTED OR SHALL BE IMPLIED FOR ANY OTHER USE ADDITIONAL INFORMATION MAY BE OBTAINED FROM MPEG LA L L C SEE HTTP WWW MPEGLA COM ...

Страница 60: ...eaning 53 Compatible file formats 55 Compatible Memory Card 6 Computer Connecting to a computer 42 Copying from a computer 44 Disconnecting from a computer 43 System requirements 43 Connecting Computer 42 USB memory 14 Copying Image 44 Music 45 D Date Time Settings 40 Deleting Image 31 Music 25 Demonstration display 11 E Editing image Delete 31 Export 33 Import 21 Marking 29 Rotate 28 Sort 30 Zoom...

Страница 61: ...e 27 Refresh mode 51 Registering a favorite mark 29 Remote control 5 51 Replacing the battery 51 Reset 38 Rotating an image 28 S Saving import Movies 22 Still images 21 Select device 23 Single view style Changing 16 Entire Image 18 Entire Image with Exif 18 Fit to Screen 18 Fit to Screen with Exif 18 Slideshow 14 Slideshow BGM Settings 24 Slideshow Settings 39 Slideshow style Calendar View 17 Chan...

Страница 62: ...62GB Table of Contents Let s Use Enjoying More Troubleshooting Index V View mode 16 Clock and calendar 16 Index 16 Single image display 16 Slideshow 16 Volume 20 24 Z Zoom in 27 Zoom out 27 ...

Страница 63: ... 2011 Sony Corporation http www sony net ...

Отзывы: