background image

16 

GB

Try using various functions

Various functions

• Importing an image (a memory card 

b

 the internal 

memory)

• Exporting an image (the internal memory 

b


a memory card)

• Deleting an image

1

When a desired image is displayed, press MENU and 
then  

B

/

b

 to select the 

 (Editing) tab.

2

Select the desired menu item (Import/Export/Delete), 
and then press 

 (ENTER).

3

Press 

v

/

V

 to select [ ... this image]/[... multiple 

images]/[... all images], and then press 

 (ENTER).

(“...” stands for each command: “Import”, “Export”, or 
“Delete”.)

[... this image]: 

Press 

v

/

V

 to select the destination, and then press 

 (ENTER).

[... multiple images]:

Press 

B

/

b

/

v

/

V

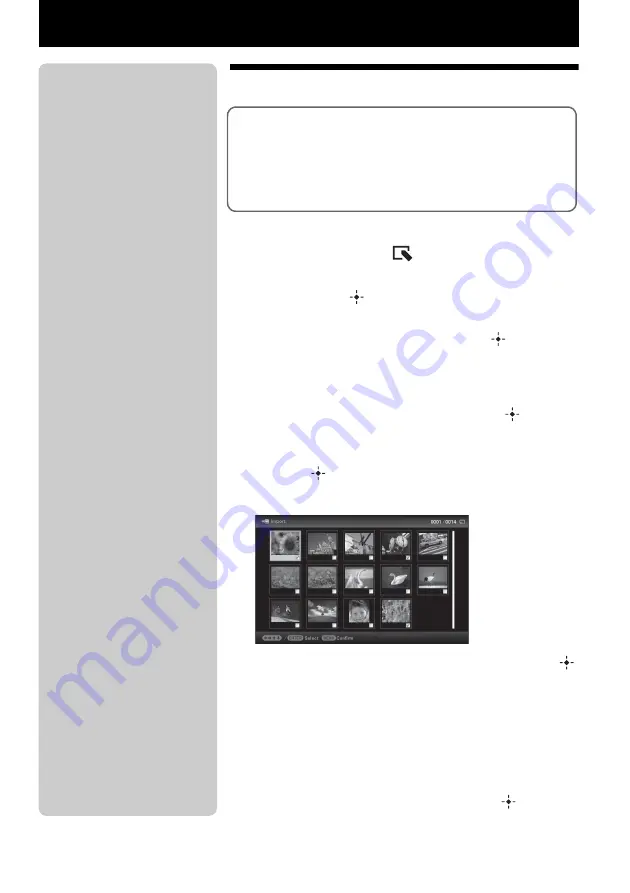
 to select a desired image in the image list, and 

then press 

 (ENTER) to add “

”.

Repeat this operation to select multiple images.

To clear the selection: 

Select the image and then press  


(ENTER).  “

” disappears from the image.

After you finish selecting the images, press MENU and then 
select the destination.

[... all images]:

All the images are displayed with “

”. 

Press MENU and then select the destination.

4

Press 

v

/

V

 to select [Yes], and then press  

 (ENTER).

z

 Tips

x

 Importing

The number of images to be saved in 
the internal memory:
• Resize: approx. 250 images
• Original: the number of images 

may vary, depending on the 
original image file size.

x

 Exporting

Any memory card that is not 
recognized by this photo frame is 
shown in gray and you cannot select 
it.

P

Notes

x

 During exporting/deleting

Avoid doing the following. Doing so 
may damage this photo frame, 
memory card, or the data:
• Turning off the power
• Removing a memory card
• Inserting another card

x

 When deleting

If deletion has started, the deleted 
image cannot be recovered even if 
you stop deletion. 

Содержание S-Frame DPF-E710

Страница 1: ...ration For your safety Let s get the photo frame ready Let s view an image Try using various functions Troubleshooting Additional information Operating Instructions Before operating this unit please read this manual thoroughly and retain it for future reference ...

Страница 2: ...pean Union and other European countries with separate collection systems This symbol on the battery or on the packaging indicates that the battery provided with this product shall not be treated as household waste On certain batteries this symbol might be used in combination with a chemical symbol The chemical symbols for mercury Hg or lead Pb are added if the battery contains more than 0 0005 mer...

Страница 3: ...you hold copyright or have permission of copyright holders for the materials to be duplicated use of those materials beyond this limit may infringe the provisions of the copyright law and be subject to the copyright holders claim for damages When using photo images with this digital photo frame pay special attention not to infringe the provisions of the copyright law Any unauthorized use or modifi...

Страница 4: ...e photo frame on 11 Operations in an initial state 12 Setting the current time 12 Let s view an image Inserting a memory card 13 Changing the display 14 About the information displayed on the LCD screen 15 Try using various functions Various functions 16 Specifying the playback device 17 Adjusting image size and orientation Zoom in Zoom out Rotate 17 Changing the settings of the auto power on off ...

Страница 5: ...n error message appears 21 If trouble occurs 21 Additional information Precautions 23 Installation 23 Cleaning 23 Restrictions on duplication 23 Disposing of the photo frame 23 Specifications 24 On trademarks and copyrights 25 ...

Страница 6: ...ble panels 3 Operating Instructions this manual 1 CD ROM Digital Photo Frame Handbook 1 Warranty 1 One of the 3 panels is already attached to the digital photo frame The supplied CD ROM contains the Digital Photo Frame Handbook that explains operations and setups of the digital photo frame in detail To view the handbook insert the CD ROM into the computer and double click the Handbook icon To disp...

Страница 7: ...ote sensor BACK button ENTER button Direction v V buttons Direction B b buttons MENU button VIEW MODE button page 14 1 on standby button Standby indicator USB mini B connector page 20 Memory card slot page 13 Access lamp Holes for hanging unit on the wall DC IN 5 V jack page 11 Stand page 9 ...

Страница 8: ...INDEX button Zoom in button Direction B b v V buttons ENTER button Zoom out button IMPORT button DELETE button About descriptions in this manual The operations described in this manual are based on remote control operation When an operation is performed differently for example with the remote control and the buttons on the photo frame it will be explained in a tip ...

Страница 9: ... to portrait or landscape orientation by rotating it without moving the stand Protective sheet P Notes If the remote control stops working Replace the battery CR2025 lithium battery with a new one When the lithium battery becomes weak the operating distance of the remote control may shorten or the remote control may not function properly In this case replace the battery with a Sony CR2025 lithium ...

Страница 10: ...uitable for the quality of the material of the wall The screws may be damaged depending on the type of material used in the wall Set the screws in a pillar or stud in the wall When you want to re insert the memory card remove the photo frame from the wall then eject and re insert the memory card while the photo frame is placed on a stable surface Remove the stand when you hang the photo frame on t...

Страница 11: ...an easily accessible wall outlet close by If trouble occurs while using the adaptor immediately shut off the power by disconnecting the plug from the wall outlet Do not short the plug of the AC adaptor with a metal object Doing so may cause a malfunction Do not use the AC adaptor placed in a narrow space such as between a wall and furniture After use remove the AC adaptor from the DC IN 5 V jack o...

Страница 12: ...n use the same procedures as time setting to set the following Setting items Date Date Display Order Y M D M D Y D M Y First day of the week Sunday Monday 12hr 24hr display 12 hours 24 hours zTips x If the photo frame is not operated If the photo frame is not operated for 10 seconds the demo mode is displayed x Releasing the demonstration mode If any other button than the power button is pressed t...

Страница 13: ...lots If you insert memory cards both into the A and B slots simultaneously the photo frame will not work properly Access lamp SD memory Card Slot A Memory Stick Slot A Memory Stick Duo Slot B PNote When using a memory card of the following types make sure to insert it in an appropriate adaptor If you insert it without an adaptor you may be unable to remove it As shown in the right most illustratio...

Страница 14: ...deshow Single view Multi image view Clock view Calendar view Time Machine Random view Clock and calendar Clock1 to Clock10 Calendar1 to Calendar3 Entire image Fit to screen Entire image with Exif Fit to screen with Exif Index Index 1 to Index 2 VIEW MODE buttons PNote If you do not operate the photo frame for a certain period of time the style indicated by the cursor is automatically selected z Ti...

Страница 15: ...n information 4Setting information 5Image number folder file number This is displayed if the image is DCF compliant If the image does not comply with DCF its file name is displayed If you named or renamed the file on your computer and the file name includes characters other than alphanumeric characters the file name may not be able to be displayed properly on the photo frame Also for a file create...

Страница 16: ...o clear the selection Select the image and then press ENTER disappears from the image After you finish selecting the images press MENU and then select the destination all images All the images are displayed with Press MENU and then select the destination 4 Press v V to select Yes and then press ENTER z Tips x Importing The number of images to be saved in the internal memory Resize approx 250 image...

Страница 17: ... V to select Rotate and then press ENTER 2 Press v V to select the desired pattern to rotate and then press ENTER Rotate 90 Rotates the image 90 degrees clockwise Rotate 180 Flips the image upside down Rotate 270 Rotates the image 90 degrees counterclockwise z What is playback device A memory card or the internal memory P Note During Clock and calendar display you cannot select the Select device t...

Страница 18: ...imer or Power OFF timer ENTER 3Press v V to select Enable ENTER 4 Auto ON time Auto OFF time setting v V Set the time AM or PM is displayed when you select 12 hours on the time display setting 5 Auto ON day Auto OFF day setting v V Add a check mark to select the day on which you want activate the timer Move the cursor to OK and then press ENTER Auto off z Tips x During operation The power is turne...

Страница 19: ...then B b to select the Settings tab Press v V to select the item and setting value and then press ENTER Setting items Slideshow Settings Auto Power ON OFF Date time Settings General Settings Listing Order etc Language Setting Initialize PNotes Depending on the status on the photo frame some settings of some items cannot be changed They are displayed in gray and cannot be selected During Clock and ...

Страница 20: ...cable When you use a commercially available USB cable use a USB cable with a mini B type plug for the USB mini B connector of this unit frame side connector type shorter than 3 meters If multiple USB devices are connected to a computer or if a hub is used a problem may occur In such a case simplify the connection You cannot operate the photo frame from another USB device being used simultaneously ...

Страница 21: ...iles imported to the internal memory are deleted Write error on the Memory Stick Write error on the SD Memory Card Write error on the internal memory Memory card format not supported For a memory card use your digital camera or other device to format the memory card Note When you initialize the memory card all the files on the memory card will be deleted Symptom Check item Cause Solutions Some ima...

Страница 22: ...nd save the images in this folder Cannot delete an image Is the memory card write protected Or is the write protect switch locked c Use the device you are using to cancel write protection and try deleting again c Slide the write protect switch to the enable position Is this image protected c Check the image information from the single view mode page 15 c An image with a mark is set to Read Only Yo...

Страница 23: ...mid room moisture may condense inside the unit In such cases the photo frame will probably not work properly and may even develop a fault if you persist in using it If moisture condensation occurs unplug the AC adaptor of the photo frame and do not use the photo frame for at least one hour On transport When you transport the photo frame remove the memory card AC adaptor and connected cables from t...

Страница 24: ...8 000 H dots 6 000 V dots 3 File system FAT12 16 32 Image file name DCF format 126 one byte characters within 8th hierarchy Maximum number of files that can be handled 4 999 files for the internal memory or for a memory card Internal memory capacity 4 128 MB Approx 250 images 5 can be saved Power requirements DC IN jack DC 5V Power consumption Operating temperature 5 C to 35 C Dimensions With the ...

Страница 25: ...re saved The value may vary depending on the shooting condition On trademarks and copyrights Cyber shot Memory Stick Memory Stick Duo MagicGate Memory Stick Memory Stick PRO Memory Stick PRO Duo Memory Stick PRO HG Duo Memory Stick Micro Memory Stick ROM MagicGate and are trademarks or registered trademarks of Sony Corporation Microsoft Windows and Windows Vista are registered trademarks of Micros...

Страница 26: ...26 GB Memo ...

Страница 27: ...27 GB Memo ...

Страница 28: ...Sony Corporation Printed in China Printed using VOC Volatile Organic Compound free vegetable oil based ink ...

Отзывы: