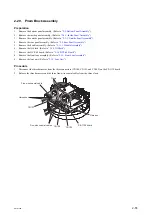
2-15. Front Lens Assembly
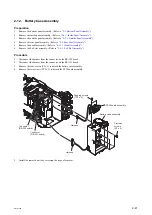
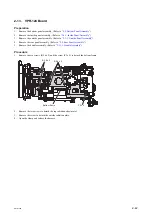
Preparation
1.
Remove the bottom panel assembly. (Refer to
2.
Remove the inside panel assembly. (Refer to
“2-6-1. Inside Panel Assembly”
)
3.
Remove the outside panel assembly. (Refer to
“2-7-1. Outside Panel Assembly”
)
4.
Remove the rear panel assembly. (Refer to
“2-7-1. Outside Panel Assembly”
)
5.
Remove the handle assembly. (Refer to
6.
Remove the IO block. (Refer to
)
7.
Remove the DCP-64 board. (Refer to
Procedure
1.
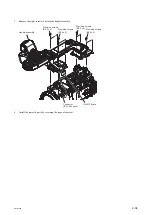
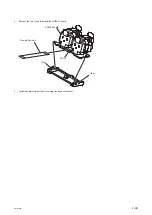
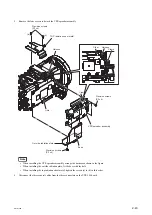
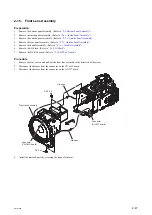
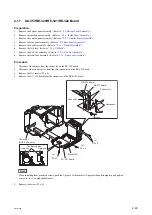
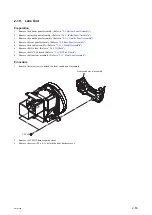
Remove the four screws and pull out the front lens assembly in the direction of the arrow.
2.
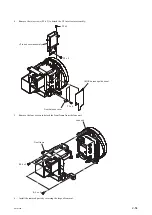
Disconnect the harness from the connector on the CN-3634 board.
3.
Disconnect the harness from the connector on the AU-357 board.
P2.6 x 5
Connector
(AU-357 board)
Connector
(CN-3634 board)
Front lens assembly
Harness
Harness
P2.6 x 5
4.
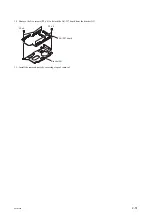
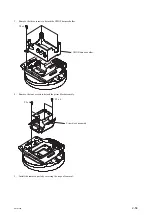
Install the removed parts by reversing the steps of removal.
PMW-300
2-47
Содержание PMW-300
Страница 1: ...SOLID STATE MEMORY CAMCORDER PMW 300 SERVICE MANUAL 1st Edition ...
Страница 4: ......
Страница 8: ......
Страница 10: ......
Страница 98: ......
Страница 106: ......
Страница 130: ......
Страница 133: ......
Страница 134: ...PMW 300 J PMW 300 UC PMW 300 CE PMW 300 E PMW 300 CN J E 9 878 486 01 Sony Corporation Printed in Japan 2013 9 08 2013 ...


