background image

151

Einstellungen für den DVD-Spieler

DV
D

s

DE

• DVDs können videobasierte und filmbasierte Software enthalten, bei denen 

unterschiedliche Vollbildraten verwendet werden. Bei der Wiedergabe 
videobasierter DVD-Software mit Progressive Scan erscheinen einige Bilder unter 
Umständen unnatürlich. Setzen Sie „Progressive-Modus“ in diesem Fall auf „Aus“ 
und lassen Sie die Bilder im normalen Interlace-Modus anzeigen.

• Wenn Sie „Progressive-Modus“ auf „Ein“ setzen, wird „TV-Gerät“ 

(

Seite 149) automatisch auf „16:9“ gesetzt.

• Der Inhalt von DVD-RWs (VR-Modus) kann nur im normalen Interlace-Format 

angezeigt werden. Die Option „Progressive-Modus“ steht für die Wiedergabe 
solcher Inhalte nicht zur Verfügung.

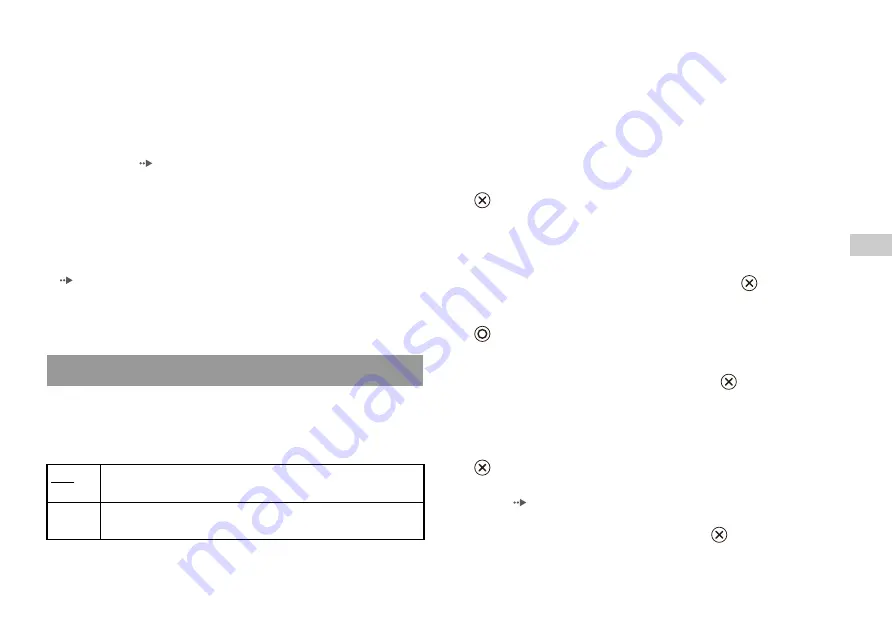
Pausenmodus

Mit dieser Option können Sie einen Bildstatus einstellen, wenn die 
Wiedergabe unterbrochen wird.

Kindersicherung

In einigen Regionen kann die Wiedergabe von DVDs auf der Grundlage 
des Alters der Zuschauer oder anderer Faktoren eingeschränkt werden. 
Mithilfe der Kindersicherungsfunktion können Sie eine Stufe einstellen, 
anhand derer die Wiedergabe mit Ihrer Konsole eingeschränkt wird.
Je niedriger der Wert, um so stärker ist die Einschränkung. 

Einstellen der Kindersicherung

1

Wählen Sie „Kindersicherung“ aus und drücken Sie die 

-Taste.

Der Bildschirm zum Registrieren des Passworts wird angezeigt. Wenn 
bereits ein Passwort registriert wurde, wird der Bildschirm zum 
Bestätigen des Passworts angezeigt.

2

Geben Sie eine Ziffer ein und drücken Sie die 

-Taste.

Geben Sie auf diese Weise alle vier Ziffern für das vierstellige 
Passwort ein. Wenn Sie eine Ziffer löschen wollen, drücken Sie die 

-Taste. Wenn Sie ein Passwort registrieren, müssen Sie es zur 

Bestätigung erneut eingeben.

3

Wählen Sie „Region“ und drücken Sie die 

-Taste.

Die Liste der Regionen wird angezeigt.

4

Wählen Sie die Region aus, auf der die 
Kindersicherungsstufe basieren soll, und drücken Sie die 

-Taste.

Wenn Sie „Sonstiges“ wählen, schlagen Sie unter „Regionalcode-
Liste“ (

Seite 152) nach.

5

Wählen Sie „Stufe“ und drücken Sie die 

-Taste.

Die Liste der verschiedenen Stufen wird angezeigt.

1

Überprüfen Sie, ob sich eine DVD in der Konsole befindet.

2

Drücken Sie die 

\

/

1

 (Ein/Standby)/RESET-Taste an der 

Konsolenvorderseite.
Halten Sie dann die START-Taste des Analog Controller 
(DUALSHOCK

®

2) am Controller-Anschluss 1 gedrückt, bis das DVD-

Bild angezeigt wird. Die Option „Progressive-Modus“ wird auf „Aus“ 
zurückgesetzt und das Bild des DVD-Videos wird normal angezeigt. Sie 
können diese Einstellung auch mit der Option „Progressive-Modus 
ausschalten“ (

Seite 161) auf dem Bildschirm „Grundeinstellung“ 

deaktivieren.

Einstellen von Benutzeroptionen

Auto

Ein Bild mit bewegten Motiven wird ohne Bildzittern angezeigt. 
Normalerweise sollten Sie diese Einstellung wählen.

Standbild

Ein Bild ohne bewegte Motive kann mit hoher Auflösung angezeigt 
werden.

Содержание Playstation 2

Страница 1: ...uct carefully read the supplied documentation Avant d utiliser ce produit lisez attentivement la documentation fournie Prima di utilizzare questo prodotto leggere attentamente la documentazione allegata Lesen Sie vor Verwendung dieses Produkts die mitgelieferte Dokumentation sorgfältig durch 04 UG1GB FR IT DE ...

Страница 2: ...rk 38 Creating network settings 40 Additional information Specifications 41 About the PlayStation 2 console documentation The PlayStation 2 console documentation includes the following Quick Reference A manual that is included in the package with the console It contains information on setting up and performing basic operations on the console as well as safety and troubleshooting information User s...

Страница 3: ...ical Stand Caution Do not place the console in locations where it may be exposed to the following conditions Places subject to excessive cigarette smoke or dust Cigarette smoke residue or dust build up on the internal components such as the lens may cause the console to malfunction Places subject to extreme temperatures in direct sunlight near a heat source or in a car with its windows closed part...

Страница 4: ...Hint For part names of the Analog Controller DUALSHOCK 2 see Using the Analog Controller DUALSHOCK 2 page 13 Part names PlayStation 2 console front MEMORY CARD MEMORY CARD Controller port 2 product family logo A open button IR receiver USB connector MEMORY CARD slot 2 MEMORY CARD slot 1 Controller port 1 1 on standby indicator 1 on standby RESET button Disc cover PlayStation 2 console rear Rear ve...

Страница 5: ...sole setting menus DVD menus or paused images may leave a faint image permanently on the TV screen if left on for an extended time Refer to the instructions supplied with your TV for details Hint The console can be connected to a VCR or an integrated TV VCR Note however that if you play a DVD with copy protection encryption picture quality may be reduced Connecting to a TV Before connecting Connec...

Страница 6: ... the Euro AV connector plug To Euro AV connector To AV MULTI OUT connector Console rear Euro AV connector plug AV Cable When using a cable other than the supplied AV cable TV Cable type A TV with component video input connectors Component AV Cable SCPH 10490 A TV with Euro AV SCART connector Euro AV Cable SCPH 10142 A TV with S VIDEO inputs S VIDEO Cable SCPH 10480 Picture quality scale High quali...

Страница 7: ...ng the console to audio equipment with digital connectors refer to the instructions supplied with the device to be connected Hints If you connect the console to audio equipment using an optical digital cable it may affect the audio output of some PlayStation 2 format software with the result that no sound is produced If this happens use a cable such as the supplied AV Cable and connect it to the c...

Страница 8: ...ngs The socket outlet shall be installed near the equipment and shall be easily accessible Do not plug the AC power cord for the console into the electrical outlet until you have made all other connections 1 Connect the AC power cord to the AC IN connector on the console rear Connecting the controller MEMORY CARD MEMORY CARD MEMORY CARD Console front Analog Controller DUALSHOCK 2 Connecting the AC...

Страница 9: ...h the console is connected 1 Check that the 1 on standby indicator on the console front is lit up in red 2 Press the 1 on standby RESET button on the console front The 1 indicator on the console front will turn green and output from the console will be displayed on the TV Console rear AC power cord To the electrical outlet Some regions and countries may use a different electrical outlet plug from ...

Страница 10: ...n Size in the System Configuration menu page 33 1 Press and hold the 1 RESET button on the console front for at least one second The 1 indicator will turn red to indicate that the console has entered standby mode Warning The power is not completely turned off when the console is in standby mode If you do not plan to use the console for an extended period of time unplug the AC power cord from the e...

Страница 11: ...set up a network See Connecting to a network page 38 for details 1 Turn on the console page 9 The main menu is displayed page 31 2 Press the A open button on the console front The disc cover opens 3 Place the disc in the console Set the disc in the disc holder with the label side facing up Games Playing a game MEMORY CARD MEMORY CARD 1 RESET button A open button Disc cover Place the disc in the co...

Страница 12: ...ng as doing so may cause injury damage to the disc or console malfunction 1 Press the A button on the console front 2 Remove the disc Hold down the black centre part of the console and then lift the disc by the edges 3 Close the disc cover 4 Press the 1 RESET button The main menu is displayed page 31 Changing game discs 1 Open the disc cover and remove the disc When removing a disc hold down the b...

Страница 13: ... the pressure sensitive button function is turned off Depending on the software you may not be able to switch modes even if you press the ANALOG mode button About analog controls When playing a PlayStation 2 format software title you can use all buttons in analog mode except for the START SELECT L3 and R3 buttons When playing a PlayStation format software title only the left and right analog stick...

Страница 14: ...e and load game data using a Memory Card sold separately You can also delete game data or copy game data from one Memory Card to another There are two types of Memory Cards Select a Memory Card suitable for the software in use MagicGate is a term of copyright protection technology developed by Sony Corporation About using the Analog Controller DUALSHOCK SCPH 110 E Using Memory Cards About Memory C...

Страница 15: ...If you have selected Delete skip to step 5 4 Select the destination and then press the button 5 Select Yes and then press the button While copying or deleting data do not remove the Memory Cards 6 When copying or deleting is completed press the button Hints To view information about a game data item select the icon for the data and then press the button to check the details Compatibility between s...

Страница 16: ...r or if it is connected to the AV MULTI OUT connector Using the directional buttons select the icon for the desired track and then press the button You can operate directly by pressing the analog controller DUALSHOCK 2 buttons shown in parentheses Hint You can also use the DVD Remote Control for PlayStation 2 sold separately 1 Using the directional buttons select x and then press the button Playba...

Страница 17: ...ect the audio CD icon and then press the button The track numbers are displayed and the setting option is shown in the lower left of the screen 6 Select the desired track and then press the button Playback begins Hints You can also access the Play Options screen from the screen displaying the tracks by selecting the Audio CD icon in the upper left corner of the screen and pressing the button You c...

Страница 18: ...tation 2 console plays disc content as recorded in the DVD software Note that not all features are available on all DVDs 1 Start playback of the DVD page 20 2 Press the SELECT button The Control Panel is displayed If you press the SELECT button again the display will change its position on the screen 3 Using the directional buttons select an icon and then press the button Hint To turn off the Cont...

Страница 19: ...ime Display Displays the current title or chapter number the elapsed time etc page 21 Help Displays the direct button functions of the Analog Controller DUALSHOCK 2 0 9 Go to Chapter Used to enter the number of a chapter you want to play page 20 Previous Next Returns skips to the beginning of the current previous or next chapter Search Fast reverses forwards playback page 21 Slow Changes to playba...

Страница 20: ...e button Selecting a scene by chapter number 1 During playback select the desired chapter number in the Control Panel page 18 and then press the button Playback of the selected chapter begins If you want to play a chapter with a single digit number i e 1 9 enter a leading zero For example enter as 01 Selecting a scene by title number chapter number or by specifying the time 1 During playback selec...

Страница 21: ...2 or R2 button to begin searching Use the directional buttons to change speeds Release the L2 or R2 button when you reach the point you are searching for You can display information such as the current title number or elapsed time 1 During playback select in the Control Panel page 18 and then press the button The display changes as shown below each time you press the button Finding a particular po...

Страница 22: ...e 23 The following instructions assume use of the Control Panel page 18 to operate the DVD player Hints You can play combinations of Program Play Shuffle Play and Repeat Play Note however that some Shuffle Play or Repeat Play options may not be available depending on the combination The PlayStation 2 console plays disc content as recorded in the DVD software You can create programmes to play title...

Страница 23: ...atedly 1 Select in the Control Panel page 18 and then press the button The display changes as shown below each time you press the button 2 Select N and then press the button You can set a specific scene to be played repeatedly 1 During playback select in the Control Panel page 18 and then press the button at the point you want to start repeated playback The starting point point A is set 2 Press th...

Страница 24: ...not support the features listed you will not be able to change the settings The following options are not available during playback or Resume Play Clear Resume Play page 20 before changing these settings Menu Audio and Subtitles in Language Setup TV Type and Progressive in Screen Setup Parental Control in Custom Setup DTS and Audio Track Auto Select Mode in Audio Setup You can change DVD player se...

Страница 25: ...set to match the language selected for the DVD s audio track In the Screen Setup menu you can set the screen size aspect ratio and other options that affect picture quality TV Type You can set the aspect ratio to match the screen of the connected TV Hint When you set Progressive to On TV Type is automatically set to 16 9 Setting language options Menu Selects the language for the DVD s menu Audio S...

Страница 26: ... If picture quality is reduced or no image is displayed set Progressive to Off when the console is connected to a TV without the necessary equipment If you accidentally set this option to On for such a TV picture quality may be reduced or the picture may not be displayed To clear the setting follow these steps DVDs can contain video based and film based material which use different frame rates Whe...

Страница 27: ...e screen for confirming the password is displayed 2 Select a number and then press the button Repeat step 2 to enter a four digit password If you want to clear a number press the button When registering a password you are required to enter it again for confirmation 3 Select Region and then press the button The list of region options is displayed 4 Select the region to base the Parental Control lev...

Страница 28: ...el to allow playback This usually occurs immediately at disc start up but may also occur at different times depending on the DVD 2 Using the directional buttons select Yes and then press the button The screen for entering the password is displayed 3 Select a number and then press the button Repeat step 3 to enter the four digit password After entering the password playback will begin again When DV...

Страница 29: ... DIGITAL OUT OPTICAL connector Setting sound options On Select this option when you want sound audio signal to be output through the DIGITAL OUT OPTICAL connector Settings for Dolby Digital DTS and MPEG are displayed Off Select this option when you do not want sound to be output through the DIGITAL OUT OPTICAL connector Settings for Dolby Digital DTS and MPEG are not displayed On Select this optio...

Страница 30: ...ot played Depending on the DVD the audio channel with priority may be predetermined In this case the audio track will be selected based on the DVD s order of priority DVD Volume You can set this option if the audio output level of the DVD is low You can set this only when Digital Out Optical is set to Off in Audio Digital Out page 29 Caution If you set this option to 1 or 2 the sound may become di...

Страница 31: ...urn on the console with a disc inserted the main menu will not be displayed To display the main menu press the A open button on the console front and remove the disc Then press the 1 on standby RESET button to reset the console You can do the following from the Browser screen Copy or delete game data saved on a Memory Card Start a game Start playback of an audio CD Start playback of a DVD 1 Displa...

Страница 32: ...k of the DVD will begin Hint The message There is no data is displayed on the Browser screen when no Memory Card or disc is inserted in the console From the System Configuration menu you can change settings for numerous options including language or time display and audio or video output method 1 Display the main menu page 31 2 Using the directional buttons select System Configuration and then pre...

Страница 33: ...io CD screen You can set whether to output the signal through the DIGITAL OUT OPTICAL connector Clock Adjustment Time Format Sets the system clock to either 12 hour or 24 hour clock display Date Format Sets the display order of year month and day Time Zone Sets the time zone Daylight Savings Time Sets Standard or Daylight Savings Summer Time Normally select Standard Screen Size 4 3 Select this opt...

Страница 34: ...rom controller port 1 If this happens set to Gameplay Function Off You can use this option to select the language displayed on the main menu Browser screen System Configuration menu and Version Information screen Component Video Out Y Cb Pb Cr Pr Select this option when connecting the console to component video input connectors RGB Select this option when connecting the console to RGB input connec...

Страница 35: ... Select an item and then press the button The available options are displayed 3 Select the desired setting and then press the button For details see the instructions for each item pages 35 to 37 Hint The default setting for each menu item is underlined in the explanations below The PlayStation 2 console automatically adjusts its internal settings for optimal playback When Diagnosis is set to On th...

Страница 36: ... to a TV without the necessary equipment the picture quality may be reduced or the picture may not be displayed You can clear the Progressive setting by following the procedure below Remove the DVD before clearing the setting Clear Progressive Setting 1 Display the Version Information screen 2 Using the directional buttons select DVD Player and then press the button The Clear Progressive Setting o...

Страница 37: ...he Version Information screen Main menu GB 7 Close the disc cover Playback begins Hint The setting will not be cleared if 1 you do not start a DVD after step 4 or 2 you reset or turn off the console before step 6 ...

Страница 38: ...supplied with the network device or your Broadband Internet Service Provider for details You can connect the console to a network using an Ethernet cable connected to the NETWORK connector on the console rear You can connect to a 100 Base TX or 10 Base T network Refer to the instructions supplied with the network device for details Basic network setup Hint When connecting the console and a PC to t...

Страница 39: ... device Refer to the instructions supplied with the network device for details Warning Do not connect Ethernet cables or telephone cords of the following types to the network connector too much electrical current may pass through the connector causing a malfunction excessive heat or fire in the connector Standard residential telephone lines Ethernet cables not appropriate for use with a 10Base T 1...

Страница 40: ...gistration com To create a network setting you will need the following items A Memory Card 8MB for PlayStation 2 sold separately Login and network setup information provided by your Broadband Internet Service Provider Hint Depending on the type of Internet service used you may need to provide your Broadband Internet Service Provider with your MAC Address You can find the MAC Address for your conso...

Страница 41: ...DVD Videos and audio CDs and copies of software designed for this product are prevented by access control Unauthorised transfer delivery display export import or transmission of programs devices or the product modified with programs or devices to defeat the purpose of this access control feature is or may be prohibited by law Additional information Specifications Power requirements 220 240 V AC 50...

Страница 42: ...ion 76 Connexion réseau Connexion au réseau 79 Création des paramètres réseau 81 Informations supplémentaires Spécifications 82 À propos de la documentation de la console PlayStation 2 La documentation de la console PlayStation 2 comprend ce qui suit Aide mémoire Un manuel livré avec la console Il présente des informations sur l installation de la console et l exécution d opérations élémentaires a...

Страница 43: ...un endroit où elle pourrait être exposée aux conditions suivantes Endroits soumis à une quantité excessive de poussière ou de fumée de cigarette Les résidus de fumée de cigarette ou l accumulation de poussière sur les composants internes tels que la lentille peuvent provoquer une défaillance de la console Endroits soumis à des températures extrêmes ou aux rayons directs du soleil situés à proximit...

Страница 44: ...logique DUALSHOCK 2 reportez vous à la section Utilisation de la Manette Analogique DUALSHOCK 2 page 53 Noms des composants Console PlayStation 2 Avant MEMORY CARD MEMORY CARD Port de manette N 2 Logo de la gamme de produits Bouton A ouvrir Récepteur infrarouge Connecteur USB Fente pour MEMORY CARD carte mémoire N 2 Fente pour MEMORY CARD carte mémoire N 1 Port de manette N 1 Indicateur 1 marche v...

Страница 45: ...ètres de la console un menu DVD ou une image en pause un effet d image rémanente risque de se produire sur l écran Pour plus de détails reportez vous aux instructions qui accompagnent votre téléviseur Conseil La console peut être raccordée à un magnétoscope ou à un téléviseur avec magnétoscope intégré Remarquez cependant que si vous lisez un DVD protégé par cryptage contre la copie la qualité d im...

Страница 46: ...ro AV Vers le connecteur Euro AV Vers le connecteur AV MULTI OUT sortie AV multiple Arrière de la console Câble AV Fiche du Connecteur Euro AV Utilisation d un câble AV autre que celui fourni Téléviseur Type de câble Téléviseur équipé de connecteurs d entrée vidéo composant Câble AV composant SCPH 10490 Téléviseur équipé d un connecteur Euro AV SCART Câble Euro AV SCPH 10142 Téléviseur équipé d en...

Страница 47: ...e commercialisé qui reproduit la qualité acoustique d un cinéma ou d une salle de concert Si vous raccordez la console à un équipement audio à l aide de connecteurs numériques reportez vous aux instructions qui accompagnent le périphérique à connecter Conseils Si vous raccordez la console à un équipement audio à l aide d un câble numérique optique cela peut affecter la sortie audio de certains log...

Страница 48: ... à la section DIGITAL OUT OPTICAL page 74 1 Insérez la Manette Analogique DUALSHOCK 2 dans un port de manette de la console Conseil Certains logiciels spécifient l utilisation d un port de manette particulier Pour plus de détails reportez vous aux instructions qui accompagnent le logiciel Branchement de la manette MEMORY CARD MEMORY CARD MEMORY CARD Avant de la console ManetteAnalogique DUALSHOCK ...

Страница 49: ...se AC IN située à l arrière de la console 2 Branchez le Cordon d Alimentation sur la prise électrique L indicateur 1 marche veille situé à l avant de la console s allume en rouge pour indiquer que la console est en mode de veille Raccordement du Cordon d Alimentation Arrière de la console Cordon d alimentation Prise AC IN Arrière de la console Cordon d Alimentation Vers la prise électrique Certain...

Страница 50: ...s et Type d heure s affichent Suivez les instructions qui s affichent pour achever la définition des réglages Si vous raccordez la console à un téléviseur grand écran réglez Taille de l écran dans le menu Configuration du Système page 74 1 Maintenez enfoncé pendant plus d une seconde le bouton 1 RESET situé à l avant de la console L indicateur 1 devient rouge pour indiquer que la console est passé...

Страница 51: ...Alimentation page 49 Conseil Pour jouer à des jeux en ligne vous devez d abord vous connecter à un réseau et le configurer Pour plus de détails reportez vous à la section Connexion à un réseau page 79 Jeux Comment jouer MEMORY CARD MEMORY CARD Bouton 1 RESET Bouton A ouvrir Couvercle du compartiment à disque Insérez le disque dans la console l étiquette orientée vers le haut Positionnez le disque ...

Страница 52: ...uyez sur le bouton 1 marche veille RESET situé à l avant de la console N appuyez pas par inadvertance sur le bouton 1 RESET pendant que vous jouez car cela entraînerait la réinitialisation du jeu Attention Lorsque vous retirez un disque vérifiez qu il est complètement arrêté Ne touchez pas le disque s il tourne encore car vous risqueriez de vous blesser d endommager le disque ou d entraîner une dé...

Страница 53: ...e DUALSHOCK 2 est dotée d une fonction de bouton sensible à la pression Elle propose également une fonction de vibration Noms des composants Les joysticks analogiques gauche et droit ou les touches L3 et R3 fonctionnent uniquement en mode analogique indicateur rouge Les touches L3 et R3 fonctionnent lorsque l utilisateur appuie sur les joysticks analogiques Utilisation de la Manette Analogique DUA...

Страница 54: ...e à l exception des touches START de mise en marche SELECT de sélection L3 et R3 Lorsque vous lisez un logiciel au format PlayStation seuls les joysticks analogiques gauche et droit peuvent être utilisés en mode analogique Conseil Selon le logiciel les touches disponibles en mode analogique peuvent être limitées Pour plus de détails reportez vous aux instructions qui accompagnent le logiciel A pro...

Страница 55: ...ente pour MEMORY CARD Carte Mémoire située à l avant de la console Conseil Certains logiciels spécifient l utilisation d une fente pour MEMORY CARD carte mémoire particulière Pour plus de détails reportez vous aux instructions qui accompagnent le logiciel Utilisation des Memory Cards Cartes Mémoire A propos des types de Memory Cards Cartes Mémoire Type de Memory Card Carte Mémoire Logiciels compat...

Страница 56: ...a copie ou de la suppression de données ne retirez pas les Memory Cards Cartes Mémoire 6 Une fois la copie ou la suppression terminée appuyez sur la touche Conseils Pour afficher des informations sur des données de jeu sélectionnez l icône correspondant à ces données puis appuyez sur la touche pour vérifier les détails Compatibilité entre les logiciels et les Memory Cards Cartes Mémoire Vous ne po...

Страница 57: ...bruit extrêmement fort peut être émis si le périphérique ne dispose pas de décodeur DTS ou s il est raccordé au connecteur AV MULTI OUT sortie AV multiple A l aide des touches directionnelles sélectionnez l icône de la plage désirée puis appuyez sur la touche Vous pouvez utiliser directement le lecteur en appuyant sur les touches de la manette analogique DUALSHOCK 2 indiquées entre parenthèses Con...

Страница 58: ...r s affiche 5 Sélectionnez l icône du CD audio puis appuyez sur la touche Les numéros de plages s affichent et l option apparaît dans la partie inférieure gauche de l écran 6 Sélectionnez la plage désirée puis appuyez sur la touche La lecture démarre Conseils Vous pouvez également accéder à l écran Options de Lecture à partir de l écran indiquant les plages en sélectionnant l icône du CD audio dan...

Страница 59: ...sque tel qu il a été enregistré dans le logiciel du DVD Remarquez que toutes les fonctions ne sont pas disponibles sur l ensemble des DVD 1 Lancez la lecture du DVD page 61 2 Appuyez sur la touche SELECT de sélection Le Panneau de commandes s affiche Si vous appuyez à nouveau sur la touche SELECT de sélection l affichage change de position à l écran 3 A l aide des touches directionnelles sélection...

Страница 60: ...e la Manette Analogique DUALSHOCK 2 0 9 Aller au chapitre Permet d entrer le numéro du chapitre que vous souhaitez lire page 61 Icône Fonction Précédent Suivant Permet de revenir au début du chapitre en cours ou précédent ou de passer au début du chapitre suivant Recherche Retour avance rapide page 62 Ralenti Permet de passer à la lecture ou à la lecture retour au ralenti N Lecture Démarre la lect...

Страница 61: ...mmandes page 59 puis appuyez sur la touche La lecture s arrête Appuyez sur le bouton A ouvrir situé à l avant de la console puis retirez le disque 1 Pendant la lecture sélectionnez x dans le Panneau de commandes page 59 puis appuyez sur la touche 2 Sélectionnez N puis appuyez sur la touche La lecture reprend depuis le point où vous avez arrêté le disque à l étape 1 Pour désactiver Reprise de lectu...

Страница 62: ...our utiliser la Manette Analogique afin d effectuer une recherche pendant la lecture maintenez la touche L2 ou R2 enfoncée afin de lancer la recherche Utilisez les touches directionnelles pour modifier la vitesse Relâchez la touche L2 ou R2 quand vous avez trouvé le point que vous cherchez Vous pouvez afficher des informations telles que le numéro du titre en cours ou le temps écoulé 1 Pendant la ...

Страница 63: ...rogrammée page 63 Lecture aléatoire page 64 Lecture répétée page 64 Lecture répétée A B page 65 Les instructions suivantes supposent l utilisation du Panneau de commandes page 59 pour contrôler le lecteur DVD Conseils Vous pouvez combiner les modes Lecture programmée Lecture aléatoire et Lecture répétée Il se peut cependant que certaines options de Lecture aléatoire et de Lecture répétée ne soient...

Страница 64: ... 1 Sélectionnez dans le Panneau de commandes page 59 puis appuyez sur la touche A chaque fois que vous appuyez sur la touche l écran change tel qu illustré ci dessous 2 Sélectionnez N puis appuyez sur la touche Vous pouvez définir cette option pour lire des titres ou chapitres de manière répétée 1 Sélectionnez dans le Panneau de commandes page 59 puis appuyez sur la touche A chaque fois que vous a...

Страница 65: ... titres la langue de la bande son et le niveau de Contrôle parental Conseils Certains DVD ne prennent pas en charge tous les paramètres La console PlayStation 2 lit le contenu du disque tel qu il a été enregistré dans le logiciel du DVD Si le DVD ne prend pas en charge les fonctions répertoriées vous ne pouvez pas modifier les paramètres Les options suivantes ne sont pas disponibles pendant la lec...

Страница 66: ...tres la langue de ceux ci sera automatiquement définie pour correspondre à la langue sélectionnée pour la bande son du DVD Dans le menu Réglage de l écran vous pouvez définir la taille de l écran rapport d aspect et d autres options qui affectent la qualité de l image Type TV Vous pouvez définir le rapport d aspect afin qu il corresponde à l écran du téléviseur raccordé Conseil Lorsque Balayage pr...

Страница 67: ...as cela produit une image plus claire et sans sautillement Cette fonction n est disponible que si votre téléviseur et le Câble AV prennent en charge le balayage progressif 480p Le Câble AV composant vendu séparément est compatible avec le balayage progressif Le mode Balayage progressif du lecteur DVD est disponible uniquement lors de la lecture d un disque enregistré au format NTSC et ce sur un té...

Страница 68: ...n code d accès l écran de confirmation s affiche 2 Sélectionnez un chiffre puis appuyez sur la touche Répétez l étape 2 pour saisir un code d accès à quatre chiffres Si vous souhaitez effacer un chiffre appuyez sur la touche Lorsque vous spécifiez un code d accès vous devez le saisir à nouveau pour confirmation 3 Sélectionnez Région puis appuyez sur la touche La liste des codes de région s affiche...

Страница 69: ...rôle parental page 68 Utilisez les touches directionnelles pour sélectionner la première lettre puis appuyez sur la touche directionnelle droite Ensuite sélectionnez la deuxième lettre et appuyez sur la touche Changement de votre code d accès A l étape 2 de la section Réglages du Contrôle parental page 68 exécutez les étapes suivantes Région Code Région Code Allemagne DE Malte MT Autriche AT Norvè...

Страница 70: ...i au niveau préalablement choisi Conseils Si vous avez oublié votre code d accès consultez l Aide mémoire page 42 Si vous ne définissez pas de code d accès vous ne pouvez pas modifier les paramètres du Contrôle parental Certains DVD proposant la fonction de Contrôle parental n autorisent pas l utilisation des modes de lecture pages 63 à 65 Sortie audio numérique Vous pouvez changer le mode de sort...

Страница 71: ...te option si le niveau de sortie audio du DVD est bas Cette option n est disponible que si DIGITAL OUT OPTICAL est réglé sur Désactivé e dans Sortie audio numérique page 70 Attention Si vous réglez cette option sur 1 ou 2 le son risque d être déformé Dans ce cas sélectionnez Normal Remarquez également que si vous réglez le volume trop fort cela risque d endommager les haut parleurs ou votre ouïe A...

Страница 72: ...principal ne s affiche pas Pour afficher le menu principal appuyez sur le bouton A ouvrir situé à l avant de la console et retirez le disque Appuyez ensuite sur le bouton 1 marche veille RESET pour réinitialiser la console L écran navigateur vous permet de réaliser les opérations suivantes Copie ou suppression de données de jeu sauvegardées sur une Memory Card Carte Mémoire Démarrage d un jeu Lanc...

Страница 73: ... la section Lecture d un CD audio page 57 Si vous sélectionnez l icône d un DVD la lecture du DVD démarre Conseil Le message Aucune donnée s affiche sur l écran navigateur si aucune Memory Card Carte Mémoire ou aucun disque ne sont insérés dans la console A partir du menu Configuration du Système vous pouvez modifier les paramètres de nombreuses options telles que la langue ou l affichage de l heu...

Страница 74: ... est compatible avec le menu Configuration du Système l écran navigateur et l écran CD audio Vous pouvez choisir de diffuser le signal via le connecteur DIGITAL OUT OPTICAL Configuration de l heure Affichage de l heure Configure l horloge système pour utiliser le format à 12 heures ou à 24 heures Affichage de la date Définit l ordre d affichage de l année du mois et du jour Fuseaux horaires Défini...

Страница 75: ...N 1 Si cela se produit sélectionnez l option Fonction Jeu Désactivée Cette option permet de sélectionner la langue d affichage du menu principal de l écran navigateur du menu Configuration du Système et de l écran d informations sur la version Sortie vidéo Y Cb Pb Cr Pr Sélectionnez cette option si vous raccordez la console aux connecteurs d entrée vidéo composant RGB Sélectionnez cette option si ...

Страница 76: ...onnez une option puis appuyez sur la touche Les options disponibles s affichent 3 Sélectionnez le paramètre désiré puis appuyez sur la touche Pour plus de détails reportez vous aux instructions relatives à chaque paramètre pages 76 à 78 Conseil Le paramètre par défaut de chaque menu a été souligné dans les explications ci dessous La console PlayStation 2 règle automatiquement ses configurations in...

Страница 77: ...sélectionnée Si vous réglez Balayage progressif sur Activé lorsque la console est raccordée à un téléviseur qui ne dispose pas de l équipement nécessaire la qualité de l image peut être réduite ou il se peut que l image ne s affiche pas Vous pouvez désactiver le paramètre Balayage progressif de la manière suivante Retirez le DVD avant de désactiver ce paramètre Désactiver Balayage Progressif 1 Aff...

Страница 78: ...ez sur le bouton A ouvrir situé à l avant de la console et insérez un DVD dans la console 7 Refermez le couvercle du compartiment à disque La lecture démarre Conseil Le paramètre ne sera pas désactivé si 1 vous ne démarrez pas la lecture d un DVD après l étape 4 ou si 2 vous réinitialisez ou mettez hors tension la console avant l étape 6 ...

Страница 79: ...âble correct lorsque vous raccordez votre console PlayStation 2 à la connexion Internet à large bande Pour plus de détails reportez vous au mode d emploi qui accompagne le périphérique réseau ou adressez vous à votre fournisseur de services Internet à large bande Vous pouvez connecter la console à un réseau à l aide d un câble Ethernet raccordé au connecteur NETWORK réseau situé à l arrière de la ...

Страница 80: ...e 2 Raccorder le câble Ethernet au périphérique réseau La méthode de connexion varie selon le périphérique réseau utilisé Pour plus de détails reportez vous aux instructions qui accompagnent le périphérique réseau Avertissement Ne pas branchez les câbles Ethernet ou les cordons téléphoniques suivants au connecteur NETWORK réseau une trop grande quantité de courant électrique risque de passer par l...

Страница 81: ... configuration de réseau vous devez disposer des éléments suivants Une Memory Card Carte Mémoire 8 MB pour PlayStation 2 vendue séparément Des informations de connexion et de configuration du réseau obtenues auprès de votre fournisseur de services Internet à large bande Conseil Selon le type de service Internet utilisé il se peut que vous deviez spécifier votre adresse MAC à votre fournisseur de s...

Страница 82: ...s pour ce produit est interdite par contrôle d accès Tout transfert livraison affichage exportation importation ou transmission non autorisés de programmes périphériques ou toute modification du produit par des programmes ou périphériques pour contourner la fonction de contrôle d accès est ou peut être interdit par la loi Informations supplémentaires Spécifications Alimentation 220 240 V AC 50 60 ...

Страница 83: ...83 Spécifications Informations supplémentaires FR ...

Страница 84: ...ulla versione 117 Collegamento in rete Collegamento a una rete 120 Creazione di impostazioni di rete 122 Altre informazioni Caratteristiche tecniche 123 Documentazione relativa alla console PlayStation 2 La documentazione della console PlayStation 2 include quanto segue Guida di riferimento rapido Manuale incluso nella confezione insieme alla console Contiene informazioni sull impostazione e il fu...

Страница 85: ...on collocare la console in luoghi in cui potrebbe essere esposta alle seguenti condizioni Luoghi soggetti a fumo o polvere di sigarette eccessivi Residui di fumo di sigarette o formazione di polvere sui componenti interni come la lente possono determinare il cattivo funzionamento della console I luoghi soggetti a temperature estreme nella luce solare diretta vicino una fonte di calore o in un auto...

Страница 86: ...elle parti del Controller Analogico DUALSHOCK 2 vedere Uso del Controller Analogico DUALSHOCK 2 pagina 94 Nomi di componenti PlayStation 2 parte anteriore della console MEMORY CARD MEMORY CARD Ingresso controller 2 Logo della linea prodotti Tasto A apertura Ricevitore a infrarossi IR Connettore USB Ingresso MEMORY CARD 2 Ingresso MEMORY CARD 1 Ingresso controller 1 Spia 1 acceso attesa Tasto 1 acc...

Страница 87: ...ono determinare un immagine poco definita impressa in modo permanente sullo schermo del televisore se viene lasciato acceso per un lungo periodo di tempo Fare riferimento alle istruzioni per l uso in dotazione con il televisore Nota Nota La console può essere collegata a un videoregistratore o a un televisore videoregistratore integrato Tuttavia notare che se si riproduce un DVD con criptatura per...

Страница 88: ...deo component destinate all uso esclusivo per HDTV Y PB PR Fare riferimento alle istruzioni per l uso in dotazione con il televisore Collegamento a un televisore munito di un connettore Euro AV SCART mediante la Presa per Connettore Euro AV Al connettore Euro AV Al connettore AV MULTI OUT Parte posteriore della console Cavo AV Presa per Connettore Euro AV Utilizzo di un cavo diverso dal Cavo AV in...

Страница 89: ... Cavo AV in dotazione e collegarlo al connettore AV MULTI OUT della console Non usare un cavo digitale ottico Dopo aver collegato l apparecchiatura audio digitale impostare DIGITAL OUT OPTICAL su On nel menu Configurazione di Sistema Per ulteriori informazioni vedere DIGITAL OUT OPTICAL pagina 116 1 Inserire il Controller Analogico DUALSHOCK 2 in un ingresso controller della console Nota Nota Alcu...

Страница 90: ...e posteriore della console 2 Collegare il Cavo di Alimentazione AC all adattatore AC La spia 1 acceso attesa sul lato anteriore della console si accende in rosso a indicare che la console è nel modo di attesa Collegamento del cavo di alimentazione AC Parte posteriore della console Cavo di Alimentazione AC Connettore AC IN alimentazione Parte posteriore della console Cavo di Alimentazione AC Alla p...

Страница 91: ...le schermate per l impostazione di Lingua Fuso orario e Ora legale Per completare le impostazioni seguite le istruzioni sullo schermo Se si collega la console a un televisore a grande schermo impostare Dimensioni Schermo nel menu Configurazione di Sistema pagina 116 1 Premere e tenere premuto il tasto 1 RESET sulla parte anteriore della console per almeno un secondo La spia 1 diventerà rossa a ind...

Страница 92: ...Collegamento a una rete pagina 120 1 Accendere la console pagina 91 Viene visualizzato il menu principale pagina 113 2 Premere il tasto A apri sulla parte anteriore della console Il coperchio del disco si apre 3 Collocare il disco nella console Posizionare il disco sull apposito contenitore con il lato dell etichetta rivolto verso l alto Giochi Riproduzione di un gioco MEMORY CARD MEMORY CARD Tast...

Страница 93: ...nare il cattivo funzionamento della console 1 Premere il tasto A sulla parte anteriore della console 2 Rimuovere il disco Tenere abbassata la parte centrale nera della console quindi sollevare il disco afferrandolo per i bordi 3 Chiudere il coperchio del disco 4 Premere il tasto 1 RESET Viene visualizzato il menu principale pagina 113 Sostituzione dei dischi del gioco 1 Aprire il coperchio del dis...

Страница 94: ...oltre la funzione del tasto sensibile alla pressione è disattivata A seconda del software potrebbe non essere possibile commutare le modalità anche premendo il tasto modalità ANALOG analogica Controlli analogici Durante la riproduzione di un titolo software per PlayStation 2 è possibile usare tutti i tasti nella modalità analogica ad eccezione dei tasti START SELECT L3 e R3 Durante la riproduzione...

Страница 95: ...nalogico DUALSHOCK 2 È possibile salvare e caricare i dati di un gioco mediante una Memory Card venduta a parte Inoltre è possibile eliminare i dati del gioco o copiarli da una Memory Card all altra Esistono due tipi di Memory Card Selezionare una Memory Card idonea per il software in uso MagicGate è un termine che designa una tecnologia di protezione del copyright sviluppata da Sony Corporation I...

Страница 96: ...na passare al punto 5 4 Selezionare la destinazione quindi premere il tasto 5 Selezionare Sì quindi premere il tasto Durante la copia o l eliminazione dei dati non rimuovere la Memory Card 6 Al termine della copia o dell eliminazione premere il tasto Note Per visualizzare informazioni sui dati di un gioco selezionare l icona relativa ai dati e quindi premere il tasto per controllarle Compatibilità...

Страница 97: ...otrebbe venire emesso un rumore molto forte qualora il dispositivo non disponga di un decoder DTS o sia collegato al connettore AV MULTI OUT Utilizzando i tasti direzionali selezionare l icona per il brano desiderato e premere quindi il tasto Può essere utilizzato direttamente premendo i tasti del controller analogico DUALSHOCK 2 indicati tra parentesi Nota È anche possibile usare il Telecomando D...

Страница 98: ... schermata del Browser 5 Selezionare l icona del CD quindi premere il tasto Vengono visualizzati i numeri dei brani e l opzione di impostazione viene visualizzata nell angolo inferiore sinistro dello schermo 6 Selezionare il brano desiderato quindi premere il tasto Inizia la riproduzione Note Alla schermata Opzioni riproduzione si può accedere anche dalla schermata che visualizza i brani seleziona...

Страница 99: ...enuto del disco registrato nel software del DVD Notare che non tutte le funzioni sono disponibili su tutti i DVD 1 Avviare la riproduzione del DVD pagina 101 2 Premere il tasto SELECT selezione Viene visualizzato il pannello di controllo Se si preme di nuovo il tasto SELECT seleziona il display cambia la sua posizione sullo schermo 3 Usando i tasti direzionali selezionare un icona e premere quindi...

Страница 100: ...o di un capitolo da riprodurre pagina 101 Precedente Successivo Torna salta l inizio del capitolo corrente precedente o successivo Cerca Consente di riprodurre all indietro far avanzare rapidamente la riproduzione pagina 102 Icona Funzione Rallentatore Passa alla riproduzione al rallentatore avanti indietro N Riproduci Avvia la riproduzione X Pausa Interrompe momentaneamente la riproduzione x Arre...

Страница 101: ...onsole quindi rimuovere il disco 1 Durante la riproduzione selezionare x nel Pannello di controllo pagina 99 quindi premere il tasto 2 Selezionare N quindi premere il tasto La riproduzione inizia dal punto in cui si era interrotto il disco al punto 1 Per cancellare la funzione di ripristino della riproduzione Dopo la fase 1 selezionare x e premere quindi il tasto Selezione di una scena per numero ...

Страница 102: ...r iniziare a cercare Usare i tasti bidirezionali per cambiare velocità Rilasciare il tasto L2 o R2 quando si raggiunge il punto che si sta cercando È possibile visualizzare informazioni come il numero del titolo corrente o il tempo trascorso 1 Durante la riproduzione selezionare nel Pannello di controllo pagina 99 quindi premere il tasto Per visualizzare le modifiche visualizzate di seguito ogni v...

Страница 103: ...rodurre ripetutamente una scena specifica Ci sono quattro modalità di riproduzione Riproduzione programmata pagina 104 Riproduzione casuale pagina 104 Riproduzione ripetuta pagina 105 Ripetizione A B pagina 105 Nelle seguenti istruzioni si presuppone che per il funzionamento del lettore DVD si utilizzi il Pannello di controllo pagina 99 Note È possibile riprodurre le combinazioni di Riproduzione p...

Страница 104: ...5 Premere il tasto START avvio La riproduzione programmata ha inizio Nota L impostazione non verrà cancellata al termine della Riproduzione programmata Questa opzione può essere impostata per la riproduzione casuale di tutti i titoli o i capitoli registrati su un disco L ordine di riproduzione sarà diverso ad ogni utilizzo della riproduzione in ordine casuale 1 Selezionare nel Pannello di controll...

Страница 105: ...denza del punto in cui si desidera far terminare la riproduzione ripetuta Il punto finale punto B è impostato e inizia la riproduzione ripetuta della sezione dalla A alla B Disattiva le modalità di riproduzione per consentire la normale riproduzione 1 Selezionare nel Pannello di controllo pagina 99 quindi premere il tasto Viene visualizzato il messaggio Annullato contenuto modalità di esecuzione e...

Страница 106: ...lezionare l icona relativa all impostazione da modificare e premere il tasto Viene visualizzata l impostazione corrente per ciascuna opzione 3 Selezionare l opzione desiderata quindi premere il tasto L opzione di menu si attiva ed è selezionabile 4 Selezionare l impostazione desiderata quindi premere il tasto L impostazione dell opzione è completa Per ulteriori informazioni consultare le istruzion...

Страница 107: ...a In tal caso selezionare Off La funzione DNR potrebbe dare risultati limitati su alcuni DVD Quando si imposta Scansione Progressiva su On DNR viene automaticamente disattivato e non può essere attivato Aumento Contrasto È possibile accentuare o sfocare i contorni dell immagine a schermo Più il valore è elevato più il contorno è accentuato Normalmente selezionare 0 Nota A seconda del DVD l accentu...

Страница 108: ...izzano frequenze di fotogrammi diversi Quando si riproduce materiale basato su video utilizzando la scansione progressiva alcune immagini potrebbero apparire innaturali In tal caso impostare Scansione Progressiva su Off e visualizzare nella modalità interlacciata standard Quando si imposta Scansione Progressiva su On Formato TV pagina 107 viene automaticamente impostato su 16 9 Il contenuto del di...

Страница 109: ...tere le operazioni al punto 2 per una password a quattro cifre Se si desidera cancellare un numero premere il tasto Durante la registrazione di una password viene chiesto di reimmetterla per la conferma 3 Selezionare Regione quindi premere il tasto Viene visualizzato l elenco di opzioni dell area 4 Selezionare l area su cui basare il livello di Protezione visione Programmi quindi premere il tasto ...

Страница 110: ...are temporaneamente il livello di Protezione visione Programmi per consentire la riproduzione Di solito questo si verifica immediatamente all avvio del disco ma potrebbe anche avvenire in momenti diversi a seconda del DVD 2 Usando i tasti direzionali selezionare Sì quindi premere il tasto Viene visualizzata la schermata per immettere la password 3 Selezionare un numero quindi premere il tasto Ripe...

Страница 111: ...l connettore DIGITAL OUT OPTICAL Impostazione delle opzioni audio On Selezionare questa opzione se si desidera che i suoni segnale audio vengano inviati attraverso il connettore DIGITAL OUT OPTICAL Vengono visualizzate le impostazioni per Dolby Digital DTS e MPEG Off Selezionare questa opzione quando non si desidera che l audio venga inviato attraverso il connettore DIGITAL OUT OPTICAL Non vengono...

Страница 112: ...D è possibile che il canale audio con priorità sia predeterminato In questo caso il brano audio verrà selezionato in base all ordine di priorità del DVD Volume DVD Questa opzione può essere impostata se il livello di uscita audio del DVD è basso Può essere impostata solo se l opzione DIGITAL OUT OPTICAL è impostata su Off in USCITA AUDIO DIGITALE pagina 111 Attenzione Se si imposta questa opzione ...

Страница 113: ...a pagina 115 Schermata delle informazioni sulla versione pagina 117 1 Accendere la console pagina 91 Viene visualizzato il menu principale Si noti che potrebbero essere necessari alcuni secondi prima che venga visualizzato il menu principale Nota Se si accende la console con un disco inserito il menu principale non verrà visualizzato Per visualizzare il menu principale premere il tasto A apertura ...

Страница 114: ...elezionare un icona quindi premere il tasto Quando si seleziona l icona Memory Card vengono visualizzate le icone relative ai dati salvati sulla Memory Card Per copiare o eliminare i dati salvati nel gioco vedere Copia o eliminazione dei dati del gioco pagina 96 Se si seleziona l icona relativa al disco del formato per PlayStation 2 o PlayStation il gioco inizia Quando si seleziona l icona per un ...

Страница 115: ...Le impostazioni predefinite sono sottolineate nelle spiegazioni riportate di sotto Le modifiche a ciascuna impostazione vengono salvate e restano attive anche dopo aver spento o riavviato la console È possibile impostare la data e l ora Usare i tasti direzionali per impostare Anno Mese Giorno Ore Minuti e Secondi L impostazione diventa operativa quando si preme il tasto Impostazioni opzionali Se s...

Страница 116: ...visore standard Schermo Intero Selezionare questa opzione se con la console si usa un televisore standard I margini neri sulla parte superiore e inferiore dello schermo sono tagliati 16 9 Selezionare questa opzione se si usa un televisore widescreen o un televisore standard con funzionalità speciale 16 9 DIGITAL OUT OPTICAL On Selezionare questa opzione quando si desidera inviare il segnale attrav...

Страница 117: ... controllare le informazioni sulla versione per i vari componenti della console È anche possibile modificare le impostazioni opzionali per alcuni elementi 1 Nel menu principale pagina 113 premere il tasto Viene visualizzata la schermata delle informazioni sulla versione Impostazioni opzionali Sono disponibili impostazioni opzionali per Unità Driver PlayStation e Lettore DVD L opzione Lettore DVD p...

Страница 118: ...n o di un DVD Quando la console viene reimpostata Quando la console viene spenta È possibile impostare il programma PlayStation Driver per ottimizzare le prestazioni del software per PlayStation Nota Le impostazioni tornano automaticamente ai valori predefiniti nel seguente caso Quando la console viene spenta Velocità Disco Nota Impostare su Normale nei seguenti casi Quando il caricamento veloce n...

Страница 119: ...mazioni sulla versione 2 Usando i tasti direzionali selezionare Lettore DVD quindi premere il tasto Viene visualizzata l opzione Annullare Scansione Progressiva 3 Premere il tasto 4 Selezionare Sì quindi premere il tasto 5 Premere due volte il tasto Il display torna al menu principale 6 Premere il tasto A apertura sulla parte anteriore della console e inserire un DVD nella console 7 Chiudere il co...

Страница 120: ...ruzioni fornito con il dispositivo di rete oppure il fornitore di servizi Internet a banda larga È possibile collegare la console a una rete usando un cavo Ethernet collegato al connettore NETWORK sulla parte posteriore della console È possibile realizzare il collegamento a una rete 100 Base TX o 10 Base T Per informazioni fare riferimento alle istruzioni per l uso in dotazione con il dispositivo ...

Страница 121: ... dispositivo di rete Per informazioni fare riferimento alle istruzioni per l uso in dotazione con il dispositivo di rete Avvertenze Non collegare i cavi Ethernet o i cavi del telefono dei seguenti tipi al connettore di rete una quantità eccessiva di corrente elettrica potrebbe passare attraverso il connettore provocando un errore di funzionamento calore eccessivo o incendi nel connettore Linee tel...

Страница 122: ... com Per creare impostazioni di rete saranno necessari i seguenti elementi Una Memory Card 8MB per PlayStation 2 venduta a parte Informazioni di login e impostazione di rete fornite dal fornitore di servizi Internet a banda larga Nota A seconda del tipo di servizio Internet usato potrebbe essere necessario specificare il fornitore di servizi Internet a banda larga insieme all indirizzo MAC L indir...

Страница 123: ... DVD video e gli audio CD e di copie di software progettate per questo prodotto è impedito dal controllo dell accesso Il trasferimento la consegna l esposizione l esportazione l importazione o la trasmissione di programmi dispositivi o del prodotto modificato con programmi o dispositivi per eludere i fini di questa funzione di controllo dell accesso sono o potrebbero essere proibiti dalla legge Al...

Страница 124: ...ließen an ein Netzwerk 162 Vornehmen von Netzwerkeinstellungen 164 Weitere Informationen Technische Daten 165 Hinweis zur Bedienungsanleitung für die PlayStation 2 Konsole Die Dokumentation für die PlayStation 2 Konsole beinhaltet Kurzanleitung Eine Anleitung die im Paket mit der Konsole mitgeliefert wird Sie beinhaltet Informationen zu Einstellungen und Basisfunktionen der Konsole sowie Hinweise ...

Страница 125: ...m Kaufen eines Vertikalständers den SCPH 90110 E Vorsicht Stellen Sie die Konsole nicht an einen Ort an dem sie folgenden Bedingungen ausgesetzt ist Übermäßigem Zigarettenrauch oder Staub Rückstände von Zigarettenrauch oder Staub auf internen Komponenten wie z B der Linse können zu Fehlfunktionen der Konsole führen Extremen Temperaturen direktem Sonnenlicht Hitze in der Nähe einer Wärmequelle oder...

Страница 126: ...lüsse am Analog Controller DUALSHOCK 2 finden Sie unter Der Analog Controller DUALSHOCK 2 Seite 135 Teile und Anschlüsse Vorderansicht der PlayStation 2 Konsole MEMORY CARD MEMORY CARD Controller Anschluss 2 Produktfamilienlogo A Eject Taste Infrarot Empfänger USB Anschluss MEMORY CARD Steckplatz 2 MEMORY CARD Steckplatz 1 Controller Anschluss 1 1 Ein Standby Kontroll Leuchte 1 Ein Standby RESET T...

Страница 127: ...us können auf dem Bildschirm dauerhaft ein schwaches Nachbild erzeugen wenn sie über einen längeren Zeitraum hinweg angezeigt werden Einzelheiten dazu schlagen Sie bitte in der mit dem Fernsehgerät gelieferten Bedienungsanleitung nach Anmerkung Die Konsole kann an einen Videorecorder oder einen integrierten Fernseher Videorecorder angeschlossen werden Beachten Sie jedoch dass sich die Bildqualität...

Страница 128: ...ernsehgerät mit einem Euro Scart Anschluss über den Euro Scart Adapter an Euro Scart Anschluss an AV MULTI OUT Anschluss Konsolenrückseite Euro Scart Adapter AV Kabel Verwendung eines anderen als des mitgelieferten AV Kabels Fernsehgerät Kabeltyp Fernsehgerät mit Komponenten Video Eingängen Komponenten AV Kabel SCPH 10490 Fernsehgerät mit Euro Scart Anschluss Euro AV Kabel SCPH 10142 Fernsehgerät ...

Страница 129: ...ie Konsole an ein Audiogerät mit digitalen Anschlüssen anschließen schlagen Sie auch in der Bedienungsanleitung zum anzuschließenden Gerät nach Anmerkungen Wenn Sie die Konsole über ein optisches Digitalkabel an ein Audiogerät anschließen kann die Audioausgabe mancher Software im PlayStation 2 Format so beeinträchtigt sein dass kein Ton erzeugt wird Verwenden Sie in diesem Fall beispielsweise das ...

Страница 130: ...isungen nach Achtung Die Netzsteckdose muss sich in der Nähe des Geräts befinden und leicht zugänglich sein Stecken Sie das Netzkabel für die Konsole erst in eine Netzsteckdose wenn Sie alle anderen Anschlüsse vorgenommen haben 1 Stecken Sie den Stecker des Netzkabels in den AC IN Anschluss an der Konsolenrückseite Anschließen des Controllers MEMORY CARD MEMORY CARD MEMORY CARD Konsolenvorderseite...

Страница 131: ... angezeigt werden an den die Konsole angeschlossen ist 1 Überprüfen Sie ob die 1 Ein Standby Kontroll Leuchte an der Konsolenvorderseite rot leuchtet 2 Drücken Sie die 1 Ein Standby RESET Taste an der Konsolenvorderseite Die 1 Kontroll Leuchte an der Konsolenvorderseite leuchtet grün und die Signale von der Konsole werden auf dem Fernsehschirm angezeigt Konsolenrückseite Netzkabel an eine Netzstec...

Страница 132: ...dschirmgröße im Systemkonfiguration Menü ein Seite 158 1 Halten Sie die 1 RESET Taste an der Konsolenvorderseite für mindestens eine Sekunde gedrückt Die 1 Kontroll Leuchte wechselt zu rot um anzuzeigen dass sich die Konsole nun im Standby Modus befindet Achtung Die Konsole ist nicht vollständig ausgeschaltet wenn sie sich im Standby Modus befindet Wenn Sie die Konsole längere Zeit nicht benutzen ...

Страница 133: ...schließen des Netzkabels Seite 130 Anmerkung Wenn Sie Online Spiele spielen wollen müssen Sie zuerst eine Verbindung zu einem Netzwerk herstellen und dieses konfigurieren Einzelheiten dazu finden Sie unter Anschließen an ein Netzwerk Seite 162 Spiele Spielen MEMORY CARD MEMORY CARD 1 RESET Taste A Eject Taste CD Fach Legen Sie die DVD CD mit der beschrifteten Seite nach oben in die Konsole ein Leg...

Страница 134: ...n der Konsolenvorderseite Drücken Sie die 1 RESET Taste nicht versehentlich während eines Spiels Andernfalls wird das Spiel zurückgesetzt Vorsicht Achten Sie beim Herausnehmen einer DVD CD darauf dass sich die DVD CD nicht mehr dreht Berühren Sie die DVD CD auf keinen Fall solange sie sich noch dreht Andernfalls könnten Sie sich verletzen und es könnte zu Schäden an der DVD CD bzw Fehlfunktionen a...

Страница 135: ...eine Vibrationsfunktion Bezeichnung der Teile Der linke und der rechte Analog Stick bzw die L3 und die R3 Taste funktionieren nur im Analogmodus Kontroll Leuchte rot Die L3 und die R3 Taste funktionieren wenn die Analog Sticks gedrückt werden Anmerkung Bevor Sie den Analog Controller DUALSHOCK 2 verwenden drehen Sie bei eingeschalteter Konsole einmal den linken und den rechten Analog Stick mit dem...

Страница 136: ... Analog Stick verwendet werden Anmerkung Je nach Software sind die Tasten die im Analogmodus verwendet werden können eingeschränkt Einzelheiten dazu schlagen Sie bitte in den mit der Software gelieferten Anweisungen nach Hinweis zur Vibrationsfunktion Die Vibrationsfunktion können Sie im Optionsmenü der Software auf EIN oder AUS setzen Anmerkung Je nach Software wird die Vibrationsfunktion unter U...

Страница 137: ...n muss ein bestimmter MEMORY CARD Steckplatz verwendet werden Einzelheiten dazu schlagen Sie bitte in den mit der Software gelieferten Anweisungen nach Je nach Software kann sich das Verfahren zum Speichern bzw Laden unterscheiden Einzelheiten dazu schlagen Sie bitte in den mit der Software gelieferten Anweisungen nach Die Memory Card Informationen zu den Memory Card Typen Memory Card Typ Kompatib...

Страница 138: ...ry Cards beim Kopieren oder Löschen von Daten nicht heraus 6 Wenn das Kopieren bzw Löschen abgeschlossen ist drücken Sie die Taste Anmerkungen Wenn Sie Informationen zu bestimmten Spieldaten anzeigen wollen wählen Sie das Symbol für die Daten aus und drücken die Taste Daraufhin werden Einzelheiten angezeigt Kompatibilität von Software mit Memory Cards Software im PlayStation 2 Format kann nicht au...

Страница 139: ...n Sie bitte dass möglicherweise ein extrem lautes Störgeräusch ausgegeben wird wenn das Gerät nicht über einen DTS Decoder verfügt oder an den AV MULTI OUT Anschluss angeschlossen wird Wählen Sie mit den Richtungstasten das Symbol für den gewünschten Titel aus und drücken Sie die Taste Sie können das Gerät direkt über die in Klammern dargestellten Tasten des Analog Controller DUALSHOCK 2 bedienen ...

Страница 140: ...hirm erscheint 5 Wählen Sie das Symbol für die Audio CD aus und drücken Sie die Taste Die Titelnummern werden angezeigt und die Einstelloption erscheint unten links auf dem Bildschirm 6 Wählen Sie den gewünschten Titel aus und drücken Sie die Taste Die Wiedergabe beginnt Anmerkungen Sie können die Wiedergabeoptionen auch von dem Bildschirm mit den Titeln aus aufrufen indem Sie das Symbol für die A...

Страница 141: ...en Inhalt einer DVD so wie in der DVD Software aufgezeichnet wieder Beachten Sie dass nicht alle Funktionen bei allen DVDs zur Verfügung stehen 1 Starten Sie die Wiedergabe einer DVD Seite 143 2 Drücken Sie die SELECT Taste Das Kontrollmenü wird angezeigt Wenn Sie die SELECT Taste erneut drücken wechselt die Position der Anzeige auf dem Bildschirm 3 Wählen Sie mit den Richtungstasten ein Symbol au...

Страница 142: ...n der Nummer eines Kapitels für die Wiedergabe Seite 144 Vorher Weiter Zurück Weiterschalten zum Anfang des aktuellen vorherigen bzw nächsten Kapitels Symbol Funktion Suche Schneller Rück Vorlauf während der Wiedergabe Seite 144 Zeitlupe Wiedergabe bzw Wiedergabe rückwärts in Zeitlupe N Wiedergabe Starten der Wiedergabe X Pause Unterbrechen der Wiedergabe x Stopp Stoppen der Wiedergabe Seite 143 A...

Страница 143: ... und bereits eine DVD eingelegt ist startet die Wiedergabe automatisch Sie können die Wiedergabe auch vom Browser Bildschirm aus starten Seite 156 1 Wählen Sie während der Wiedergabe x im Kontrollmenü Seite 141 und drücken Sie die Taste Die Wiedergabe stoppt Drücken Sie die A Eject Taste an der Konsolenvorderseite und nehmen Sie die DVD heraus 1 Wählen Sie während der Wiedergabe x im Kontrollmenü ...

Страница 144: ... DVD ansteuern 1 Wählen Sie während der Wiedergabe oder im Kontrollmenü aus Seite 141 und halten Sie die Taste gedrückt Die Suchgeschwindigkeit wechselt wie unten dargestellt wenn Sie die Taste gedrückt halten und dabei die Richtungstaste Oben oder die Richtungstaste Unten drücken Suche 3 Suche 2 Suche 1 Zeitlupe 2 Lassen Sie die Taste los wenn Sie die gewünschte Stelle gefunden haben Die Wiederga...

Страница 145: ...s steht bei DVD RWs VR Modus nicht zur Verfügung Diese Funktion können Sie nicht zusammen mit dem Fortsetzungsmodus verwenden Schalten Sie den Fortsetzungsmodus aus Seite 143 bevor Sie diese Funktion auswählen Anzeigen von Wiedergabeinformationen Titel X Kapitel X Titelnummer und Kapitelnummer Titel X Kapitel X C XX XX XX Spieldauer des aktuellen Kapitels Titel X Kapitel X C XX XX XX Restspieldaue...

Страница 146: ...nicht zur Verfügung stehen Die PlayStation 2 Konsole gibt den Inhalt einer DVD so wie in der DVD Software festgelegt wieder Sie können Programme zusammenstellen und damit Titel und Kapitel in beliebiger Reihenfolge wiedergeben lassen 1 Wählen Sie während der Wiedergabe im Kontrollmenü Seite 141 und drücken Sie die Taste 2 Wählen Sie eine Programmnummer aus und drücken Sie die Taste Wenn noch nicht...

Страница 147: ...stimmte Szene festlegen und wiederholt wiedergeben lassen 1 Wählen Sie während der Wiedergabe im Kontrollmenü Seite 141 und drücken Sie die Taste an der Stelle an der die wiederholte Wiedergabe starten soll Damit haben Sie den Anfangspunkt Punkt A festgelegt 2 Drücken Sie die Taste an der Stelle an der die wiederholte Wiedergabe enden soll Damit haben Sie den Endpunkt Punkt B festgelegt und die wi...

Страница 148: ...r DVD Software aufgezeichnet wieder Wenn die DVD die aufgelisteten Funktionen nicht unterstützt können Sie die Einstellungen nicht ändern Die folgenden Optionen stehen während der Wiedergabe oder im Fortsetzungsmodus nicht zur Verfügung Schalten Sie den Fortsetzungsmodus Seite 143 aus bevor Sie diese Einstellungen ändern Menü Audio und Untertitel in Spracheinstellungen TV Gerät und Progressive Mod...

Страница 149: ...titel Wie Audio auswählen wird als Untertitelsprache automatisch die Sprache eingestellt die für den DVD Ton ausgewählt wurde Im Menü Bildschirmeinstellungen können Sie das Bildseitenverhältnis und andere Optionen einstellen die die Bildqualität betreffen TV Gerät Sie können das Bildseitenverhältnis entsprechend dem Bildschirm des angeschlossenen Fernsehgeräts einstellen Anmerkung Wenn Sie Progres...

Страница 150: ... meisten Fällen wird dabei ein klareres flimmerfreies Bild erzeugt Diese Funktion steht nur zur Verfügung wenn das Fernsehgerät und das AV Kabel Progressive Scan 480p unterstützen Das Komponenten AV Kabel separat erhältlich ist Progressive Scan kompatibel Der Progressive Scan Modus des DVD Spielers steht nur zur Verfügung wenn Sie eine im NTSC Format aufgenommene DVD auf einem Fernsehgerät wiederg...

Страница 151: ...igt Wenn bereits ein Passwort registriert wurde wird der Bildschirm zum Bestätigen des Passworts angezeigt 2 Geben Sie eine Ziffer ein und drücken Sie die Taste Geben Sie auf diese Weise alle vier Ziffern für das vierstellige Passwort ein Wenn Sie eine Ziffer löschen wollen drücken Sie die Taste Wenn Sie ein Passwort registrieren müssen Sie es zur Bestätigung erneut eingeben 3 Wählen Sie Region un...

Страница 152: ...werden dazu aufgefordert das Passwort zur Bestätigung erneut einzugeben Temporäres Überschreiben der Kindersicherungseinstellungen 1 Starten Sie die Wiedergabe der DVD Seite 143 Sie werden dazu aufgefordert die Kindersicherungsstufe vorübergehend zu ändern um die Wiedergabe zu ermöglichen Dies erfolgt in der Regel unmittelbar am Anfang der DVD Wiedergabe kann aber bei einigen DVDs auch an anderen ...

Страница 153: ...n DIGITAL OUT OPTICAL Anschluss festgelegt Dolby Digital Mit dieser Option wird Dolby Digital als Ausgangssignal über den DIGITAL OUT OPTICAL Anschluss festgelegt DTS Mit dieser Option wird DTS als Ausgangssignal über den DIGITAL OUT OPTICAL Anschluss festgelegt Einstellen der Tonoptionen Ein Wählen Sie diese Option wenn Ton Audiosignale über den DIGITAL OUT OPTICAL Anschluss ausgegeben werden sol...

Страница 154: ...r auf der DVD festgelegten Reihenfolge ausgewählt DVD Lautstärke Sie können diese Option einstellen wenn der Audioausgangspegel der DVD niedrig ist Die Option steht nur zur Verfügung wenn DIGITAL OUT OPTICAL unter Digitaler Audio Ausgang Seite 153 auf Aus gesetzt ist Vorsicht Wenn Sie diese Option auf 1 oder 2 setzen kann der Ton verzerrt sein Setzen Sie die Option in diesem Fall auf Normal Beacht...

Страница 155: ...Systemkonfiguration Menü Seite 157 Bildschirm Grundeinstellung Seite 159 1 Schalten Sie die Konsole ein Seite 131 Das Hauptmenü wird angezeigt Beachten Sie dass es etwas dauern kann bis das Hauptmenü angezeigt wird Anmerkung Wenn Sie die Konsole einschalten und eine DVD CD eingelegt ist wird das Hauptmenü nicht angezeigt Zum Aufrufen des Hauptmenüs drücken Sie die A Eject Taste an der Konsolenvord...

Страница 156: ...ie die Taste Wenn Sie das Memory Card Symbol auswählen werden Symbole für die auf der Memory Card gespeicherten Daten angezeigt Informationen zum Kopieren oder Löschen gespeicherter Spieldaten finden Sie unter Kopieren oder Löschen von Spieldaten Seite 138 Wenn Sie das Symbol für eine Software DVD CD im PlayStation 2 oder PlayStation Format auswählen wird ein Spiel gestartet Wenn Sie das Symbol fü...

Страница 157: ...einstellungen unterstrichen Änderungen an den einzelnen Einstellungen werden gespeichert und bleiben auch nach dem Ausschalten oder Zurücksetzen der Konsole erhalten Hier können Sie Datum und Uhrzeit einstellen Stellen Sie mit den Richtungstasten das Jahr den Monat den Tag die Stunden die Minuten und die Sekunden ein Die Einstellung wird wirksam wenn Sie die Taste drücken Weitere Einstellungen Wen...

Страница 158: ...n Ganzer Bildschirm Wählen Sie diese Option wenn Sie die Konsole mit einem normalen Fernsehgerät verwenden Die schwarzen Balken am oberen und unteren Bildschirmrand werden abgeschnitten 16 9 Wählen Sie diese Option wenn Sie ein Breitbildfernsehgerät oder ein normales Fernsehgerät mit speziellen 16 9 Breitbildfunktionen verwenden DIGITAL OUT OPTICAL Ein Wählen Sie diese Option wenn Signale über den...

Страница 159: ...chirm können Sie die Versionsinformationen zu verschiedenen Konsolenkomponenten anzeigen lassen Außerdem können Sie bei einigen Optionen weitere Einstellungen vornehmen 1 Drücken Sie im Hauptmenü Seite 155 die Taste Der Bildschirm Grundeinstellung wird angezeigt Weitere Einstellungen Weitere Einstellungen stehen bei Konsole PlayStation Treiber und DVD Spieler zur Verfügung DVD Spieler kann nur ein...

Страница 160: ...ausgeschaltet wird Sie können das PlayStation Treiberprogramm so einstellen dass die Leistung der Software im PlayStation Format optimiert wird Anmerkung Die Einstellungen werden im folgenden Fall automatisch auf die Standardeinstellungen zurückgesetzt Wenn die Konsole ausgeschaltet wird DVD CD ROM Geschwindigkeit Anmerkung Setzen Sie die Option in den folgenden Fällen auf Standard Wenn das Laden ...

Страница 161: ...Richtungstasten die Option DVD Spieler aus und drücken Sie die Taste Die Option Progressive Modus ausschalten wird angezeigt 3 Drücken Sie die Taste 4 Wählen Sie Ja aus und drücken Sie die Taste 5 Drücken Sie die Taste zweimal Das Hauptmenü wird wieder angezeigt 6 Drücken Sie die A Eject Taste an der Konsolenvorderseite und legen Sie eine DVD in die Konsole ein 7 Schließen Sie das CD Fach Die Wied...

Страница 162: ...m Netzwerkgerät gelieferten Bedienungsanleitung nach oder wenden Sie sich an Ihren Breitband Internet Serviceprovider Sie können die Konsole mit einem Netzwerk verbinden indem Sie ein Netzwerkkabel an den NETWORK Anschluss auf der Konsolenrückseite anschließen Sie können die Konsole an ein 100 Base TX oder 10 Base T Netzwerk anschließen Einzelheiten dazu schlagen Sie bitte in den mit dem Netzwerkg...

Страница 163: ...kgerät ab Einzelheiten dazu schlagen Sie bitte in den mit dem Netzwerkgerät gelieferten Anweisungen nach Achtung Schließen Sie keine Netzwerkkabel oder Telefonkabel der folgenden Typen an den Netzwerkanschluss an Anderenfalls kann unter Umständen zu viel elektrischer Strom den Anschluss passieren was zu einer Fehlfunktion übermäßiger Wärmeentwicklung oder Feuer im Anschluss führen kann Standardtel...

Страница 164: ...registration com besuchen Zum Vornehmen von Netzwerkeinstellungen benötigen Sie Folgendes Eine Memory Card 8MB für PlayStation 2 separat erhältlich Anmelde und Netzwerkkonfigurationsinformationen die Sie von Ihrem Breitband Internet Serviceprovider erhalten Anmerkung Je nach Typ des verwendeten Internet Service müssen Sie Ihrem Breitband Internet Serviceprovider Ihre MAC Adresse mitteilen Die MAC ...

Страница 165: ...rt wurde mit Ausnahme von DVD Videos und Audio CDs sowie von Kopien von Software für dieses Produkt wird über die Zugriffskontrolle verhindert Das unberechtigte Übertragen Ausliefern Anzeigen Exportieren Importieren oder Übermitteln von Programmen Geräten oder dem mithilfe von Programmen oder Geräten modifizierten Produkt mit dem Ziel die Zugriffskontrolle außer Kraft zu setzen ist unter Umständen...

Страница 166: ...ques déposées et MagicGate est une marque commerciale de Sony Corporation PlayStation DUALSHOCK e sono marchi registrati di Sony Computer Entertainment Inc SONY e sono marchi registrati e MagicGate è un marchio di Sony Corporation PlayStation DUALSHOCK und sind eingetragene Marken der Sony Computer Entertainment Inc SONY und sind eingetragene Marken und MagicGate ist eine Marke der Sony Corporatio...

Отзывы: