73
Disc Operations
Chap
ter
5
Op
erat
ion
s
on
Cli
p
L
is
t Sc
re
ens
Disc Operations
Checking the disc information
1
On a clip list screen, press the MENU button to display
the Clip menu.
2
Select “Media Properties”, and then press the PUSH
SET knob.
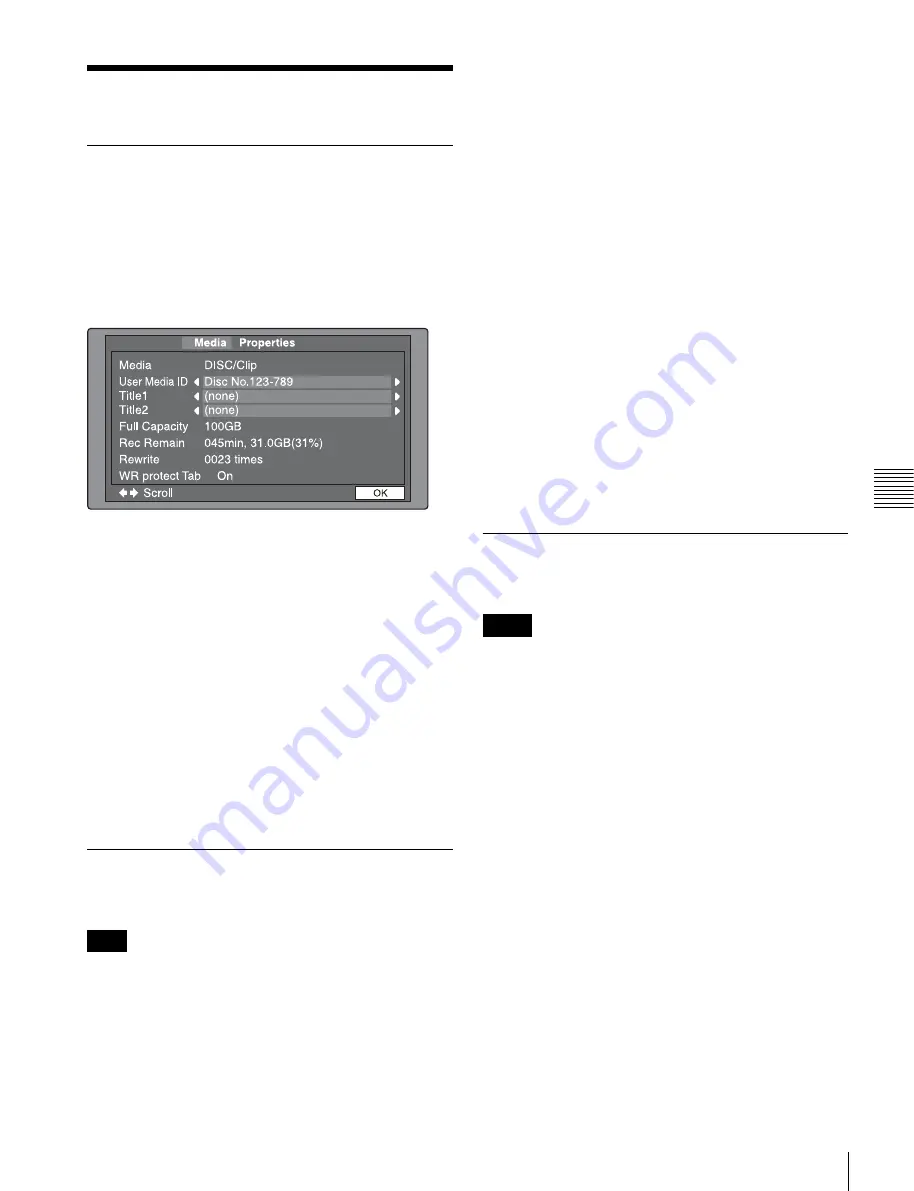
The properties screen for the selected disc appears.
Media:
DISC/Clip
User Media ID:
User media ID
Title1:
Title 1
Title2:
Title 2
Full Capacity:
Total capacity
Rec Remain:
Remaining capacity for recording
Rewrite:
Number of times the disc has been rewritten
WR protect Tab:
Status of the Write Inhibit tab
To display hidden text
For items displaying
b
or
B
, press the
B
/IN or
b
/OUT
button to scroll the text by one character at a time.
Pressing the
V
/MARK1 or
v
/MARK2 button displays the
first character or last character, respectively.
To return to the previous screen
Press the PUSH SET knob.
Formatting (initializing) discs
You can format recorded discs.
Finalized discs cannot be formatted.
1
Insert the disc you want to format into the disc slot.
2
Switch the display to the clip list screen.
3
Press the MENU button to display the Clip Menu.
4
Select “Format Media” and press the PUSH SET knob.
A confirmation message appears asking you whether
to execute formatting.
5
To execute formatting, select “OK” and press the
PUSH SET knob.
The formatting starts, and the message “Format
Executing...” appears.
To cancel the formatting
Select “CANCEL” and press the PUSH SET knob.
When the formatting is completed, the message
“Format was successful.” appears.
To format another disc
Remove the disc that has been formatted, and insert
another disc into the disc slot. When the confirmation
message appears asking if you want to execute
formatting, execute step
5
once more.
6
To quit formatting, select “Exit” and press the PUSH
SET knob.
Finalizing discs
You can finalize write-once type Professional Discs.
• You cannot write additional data to finalized discs.
• Finalized discs cannot be finalized again.
1
Insert the disc you want to finalize into the disc slot.
2
Switch the display to the clip list screen.
3
Press the MENU button to display the Clip Menu.
4
Select “Finalize Disc” and press the PUSH SET knob.
A confirmation message appears asking you whether
to execute finalizing.
5
To execute finalizing, select “OK” and press the
PUSH SET knob.
The finalizing starts, and the message “Finalize
Executing...” appears.
To cancel the finalizing
Select “CANCEL” and press the PUSH SET knob.
When the finalizing is completed, the message
“Finalize completed.” appears.
Note
Notes


