70
EDL Editing
Chapt
er 5 O
p
e
rat
ion
s
on
Clip
L
is
t Sc
ree
n
s
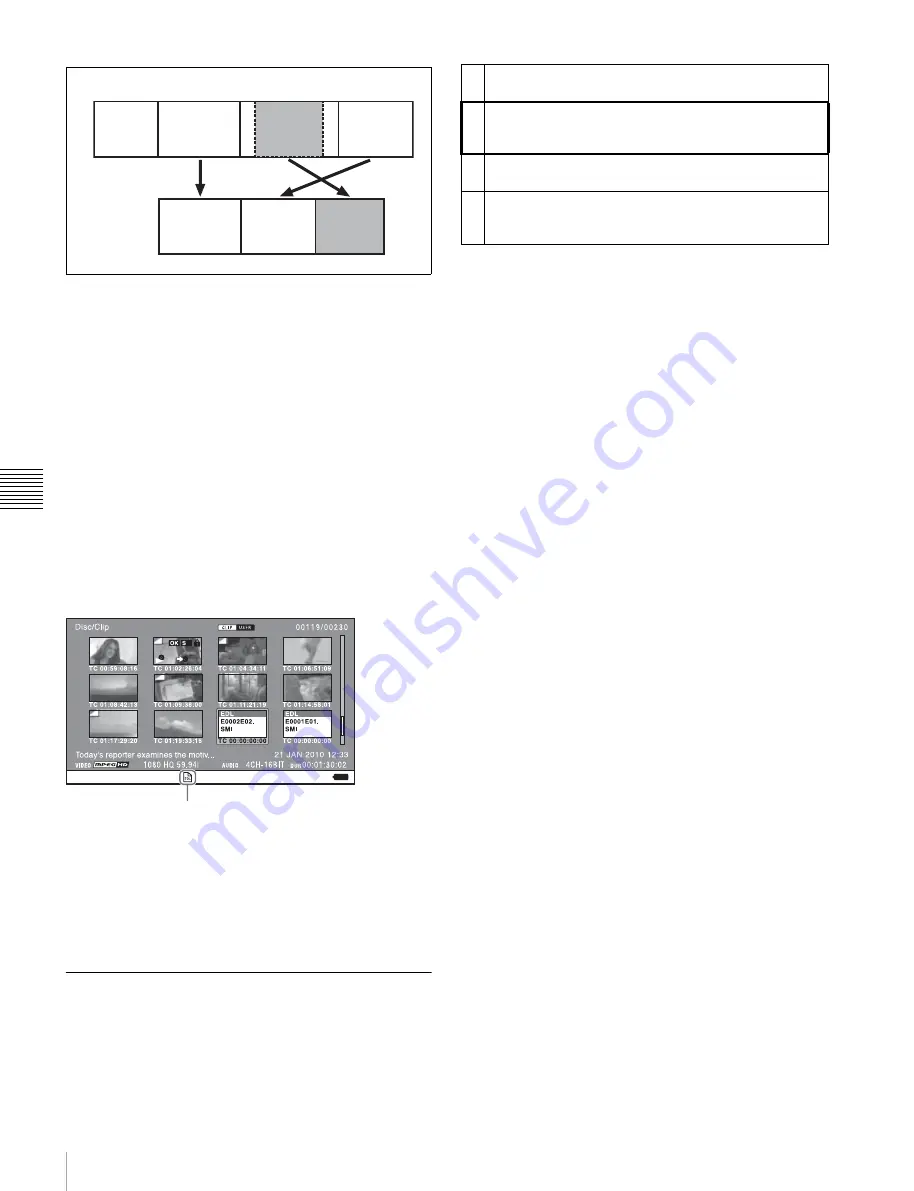
In the above example, the whole of clip 2 has been added
as sub clip 1, and the whole of clip 4 has been added as sub
clip 2.
Sub clip 3 is part of clip 3. Therefore, when EDL E0001 is
played back, clip 4 is played after clip 2, and then the part
of clip 3 shown in gray color is played.
EDL editing (current EDL)
To edit an EDL on a disc, you must first select the target
EDL for editing. Existing EDLs and newly created EDLs
can be selected. The target EDL for editing is called the
“current EDL”.
EDLs are automatically saved on a disc when they are
created and modified.
The current EDL icon is displayed in the status display
area on the clip list screen (thumbnail view) when the
current EDL is selected.
EDL playback
Clips and EDLs are saved together on a disc.
To play an EDL, load the EDL that you want to play, and
press the PLAY button. Clips are played according to the
data in the EDL.
Creating and editing EDLs
The following table lists the steps in the creation and
editing of EDLs with the EDL editing function. To create
an EDL, you always need to carry out the steps inside the
heavy lines. Other steps can be carried out as required.
To create an EDL
You can select multiple clips on the clip list screens and
then create a new EDL. You can also create a new EDL by
assigning an IN point/OUT point on the video monitor
screen.
Creating an EDL on the clip list screens
See page 59 for information about screen operations.
1
On a clip list screen, select the clips that you want to
become sub clips (multiple selections possible).
2
Press and hold the SHIFT button and then press the
PUSH SET knob or display the P1 EDL page of the
Clip F menu and press the CREATE NEW EDL
function button (F3).
The EDL creation starts.
The name for the created EDL appears when the
creation finishes. The created EDL becomes the
current EDL.
3
Select “OK”, and then press the PUSH SET knob.
Creating an EDL on the video monitor screen
You can create an EDL while checking the video on the
video monitor screen by specifying the range to use as a
sub clip. You can perform this operation during recording,
playback (including when stopped), and searching.
During recording, the currently recording clip cannot be
used as a sub clip to create a new EDL, but IN/OUT points
can still be set.
1
On the video monitor screen, cue the frame you want
to specify for the IN point.
2
Press and hold the
B
/IN button, and then press the
PUSH SET knob.
The IN/OUT setting window appears on the bottom
right.
The time code for the IN point is displayed in the IN/
OUT setting window, and the IN indicator is lit.
Clip 1
(C0001)
Clip 2
(C0002)
Clip 3
(C0003)
Clip 4
(C0004)
EDL (E0001)
Sub clip 1
Sub clip 2
Sub clip 3
Clips on a disc
Current EDL icon
1
Create EDLs:
Use the CREATE NEW EDL command to
create an EDL containing the selected clips.
2
Add sub clips:
Use the ADD TO CURT.EDL command
to add the clips you want to use to an EDL. You can
add up to 300 sub clips to one EDL.
3
Delete sub clips:
Use the REMOVE command to delete
specified sub clips from an EDL.
4
Play the EDL:
Use the PLAY button and other playback
controls to play the current EDL and check its
contents.


