3
NW-MS70D
SECTION 1
SERVICING NOTES
[ NOTES ON USING “MEMORY STICK DUO” ]
•
Do not remove “Memory Stick Duo” during reading or writing data.
•
Data may be damaged in the following cases.
– The Network Walkman is removed from the USB cradle or the dedicated USB cable is unplugged while reading or writing data.
– The “Memory Stick” is used in a location subject to static electricity or electric noise.
•
Creating backup copies of important data is recommended.
[ NOTES ON FORMATTING (INITIALIZING) ]
“Memory Stick Duo” is shipped with a FAT format as the standard format.
To format “Memory Stick”, please use devices conformable with the “Memory Stick”.
If “Memory Stick” is formatted using Windows Explorer, “FORMAT ERROR” will be displayed and audio files cannot be played on the
Network Walkman. On Windows XP, you can format “Memory Stick” properly. When you format “Memory Stick”, always perform either
one of the following:
•
Follow the instructions of “Formatting memory”.
•
Format using the supplied Sonic Stage software.
For details on how to format using the Sonic Stage software, refer to “Sonic Stage Online Help: Formatting MG Memory Stick”.
[ DISPLAYING ON WINDOWS EXPLORER ]
When you connect Network Walkman to your computer with the supplied USB cable, you can display the data stored on “Memory Stick” or
built-in flash memory as an external drive (for example, as the D drive) using Windows Explorer.
•
Data checked out with the Sonic Stage software will be stored in a “HIFI” folder. Do not edit data stored in the “HIFI” folder using
Windows Explorer. Data copied or edited using Windows Explorer cannot be played on your Network Walkman.
•
You can display data that has been stored on other “Memory Stick” compatible devices (JPEG,MPEG format, etc.,).
For in formation on how to handle data except in the “HIFI” folder, refer to the instruction manual that comes with the equipment with which
the recording has been done.
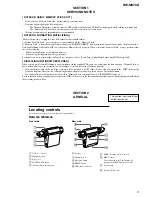
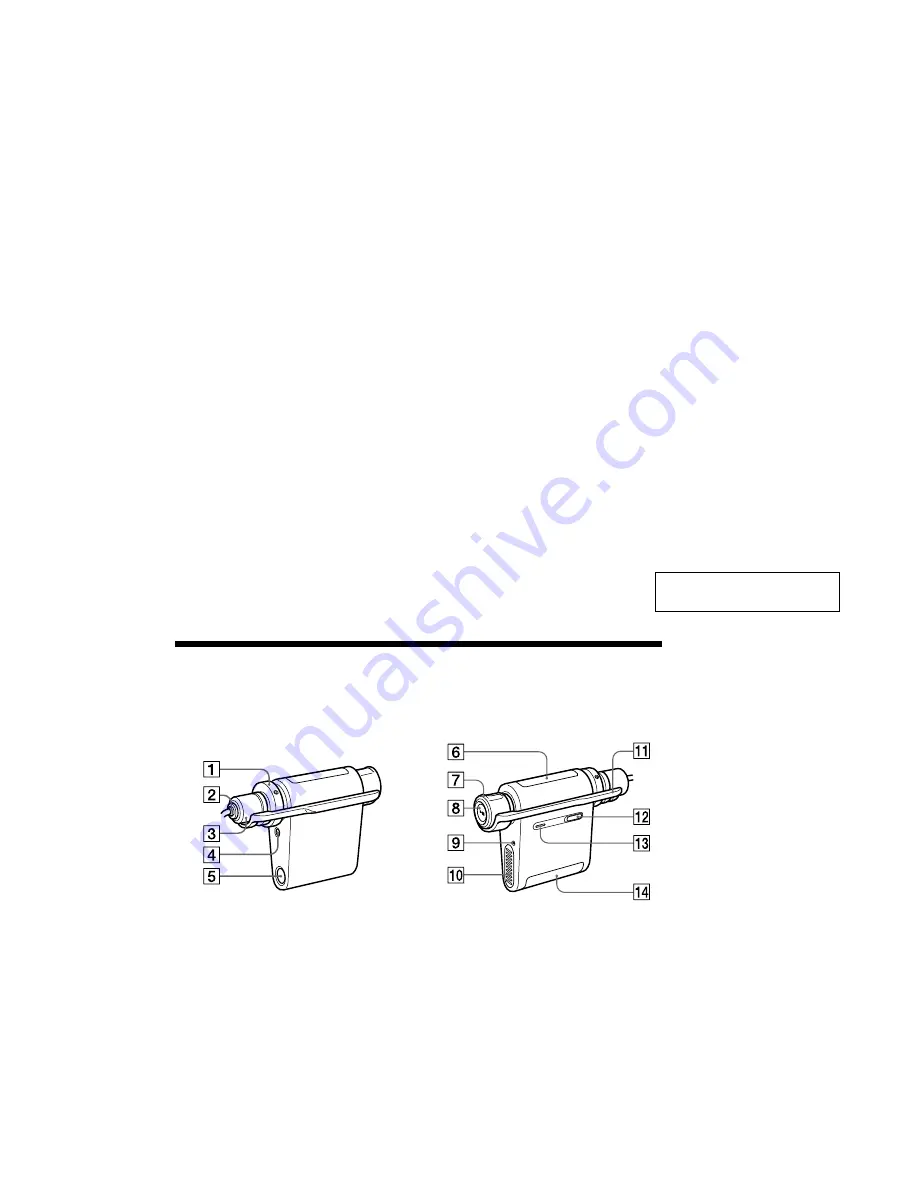
Locating controls
For details about each part, refer to the pages in parentheses.
Network Walkman
Rear side
Front side
1
VOL (+/–) control
2
Headphone plug
3
Plug cover
4
SOUND/AVLS button
5
“Memory Stick” Eject button
6
Display
7
Shuttle switch
8
Play/Stop button
9
RESET button
0
USB cradle connector
qa
HOLD (Locking controls) switch
qs
MENU button
You can switch to the Time display by
pressing the MENU button for a while.
qd
Access lamp
qf
“Memory Stick” slot
SECTION 2
GENELAL
This section is extracted from
instruction manual.


