background image

58

Preserving battery 
power (EL Light)

With this function, you can set the display 
window to turn off automatically or to 
stay lit during battery-powered operation. 
Power consumption is reduced when the 
display turns off automatically.

1

Enter the menu and select “Option” - 
“EL Light”.

2

Turn the jog dial to select “Auto Off” 
or “On”, and then press the jog dial to 
enter the selection.

Lighting up the display 
window when necessary, even 
with “EL Light” set to “Auto 
Off”

Press LIGHT.
The display window lights up.

The display window will not turn off while:
—the recorder is being used with the AC 

power adaptor.

—charging the rechargeable battery.
—the recorder is connected to a computer.
—a menu item is being selected.
—a track is being selected directly,
—the recorder is searching for a track.
—the recorder is fast forwarding, fast 

rewinding, or using AMS.

—the Divide Rehearsal function is being 

performed.

—messages are displayed.
—the A-B Repeat play is being set.

If the battery power grows weak during 
recording (battery level indication shows 

), the display window darkens to 

conserve battery power.

Storing the settings for 
individual discs (Disc 
Memory)

The recorder is factory set to 
automatically store settings for each disc. 
The recorder automatically stores the 
settings for a disc and retrieves them 
whenever the disc is inserted.
The following setting can be stored:

Bookmark

“Custom 1” and “Custom 2” settings of 
6-Band Equalizer (for models except 
European models)

You can check the setting as follows.

Display

Setting

Auto Off 
(factory 
setting)

The display window 
darkens when no operation 
has occurred for 10 
seconds. If no operation 
occurs for 5 more seconds, 
the display window turns 
off automatically (only the 
indication showing the 
operating condition 
remains lit).

On

The display window 
remains lit even it becomes 
dark when no operation 
has been made for 10 
seconds.

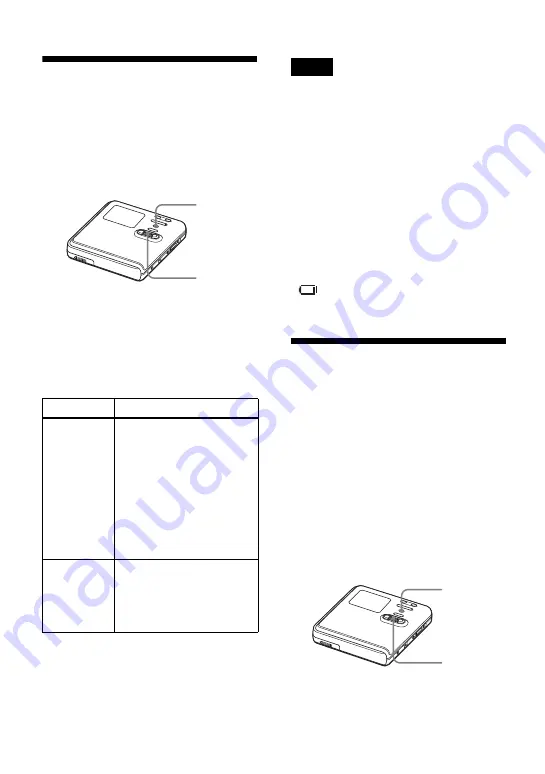
MENU

Jog dial

Notes

MENU

Jog dial

Содержание MZ-M100

Страница 1: ...n ___________ Software Operation ___________ Portable MD Recorder WALKMAN is a registered trademark of Sony Corporation to represent Headphone Stereo products is a trademark of Sony Corporation This warranty is valid only in the United States 2 6 3 8 5 0 9 1 1 1 page 12 page 90 Portable MD Recorder MZ M100 ...

Страница 2: ...e rear of the disc compartment lid and the model number is located at the top and bottom Record the serial number in the space provided below Refer to them whenever you call upon your Sony dealer regarding this product Model No MZ M100 Serial No Product registration Please register this product on line at www sony com walkmanreg http www sony com walkmanreg Proper registration will enable us to se...

Страница 3: ...radio TV technician for help You are cautioned that any changes or modifications not expressly approved in this manual could void your authority to operate this equipment For customers in the USA and Canada only The validity of the CE marking is restricted to only those countries where it is legally enforced mainly in the countries EEA European Economic Area Declaration of Conformity Trade Name SO...

Страница 4: ...sion of the copyright holder In no event will SONY be liable for any financial damage or loss of profits including claims made by third parties arising out of the use of the software supplied with this recorder In the event a problem occurs with this software as a result of defective manufacturing SONY will replace it However SONY bears no other responsibility The software provided with this recor...

Страница 5: ...ore of the following U S Patents 5 987 525 6 061 680 6 154 773 6 161 132 6 230 192 6 230 207 6 240 459 6 330 593 and other patents issued or pending Services supplied and or device manufactured under license for following Open Globe Inc United States Patent 6 304 523 Gracenote is a registered trademarks of Gracenote The Gracenote logo and logotype and the Powered by Gracenote logo are trademarks o...

Страница 6: ...iewing various information 31 Recording from a microphone 32 Recording from a TV or radio Analog Recording 34 Selecting the recording mode 34 Adjusting the recording level manually 35 Adding track marks while recording 36 Recording without creating a new group 37 To start stop recording in sync with the sound source Synchro recording 38 Various ways of playback 39 Viewing various information 39 Se...

Страница 7: ...57 Preserving battery power EL Light 58 Storing the settings for individual discs Disc Memory 58 Starting the playback quickly Quick Mode 59 Selecting the disc mode Disc Mode 60 Changing the operational direction of the display 60 Selecting the display language 61 Using the recorder with a computer 62 What you can do through connection with a computer 62 Connecting the recorder to your computer 63...

Страница 8: ...D Walkman 97 Transferring back audio data from the MD Walkman to your computer 99 Writing audio data to a CD R CD RW disc 102 Using SonicStage Help 104 Referring to SonicStage Help 106 Using MD Simple Burner 108 Before using MD Simple Burner 108 Recording using MD Walkman operations Simple mode 109 Recording by computer operations Standard mode 110 Other information 112 Uninstalling SonicStage MD ...

Страница 9: ...9 ...

Страница 10: ...rder Operation pages 12 to 88 This section explains all of the recorder functions It also gives details on the problems you may encounter while using the recorder and how to solve them and about what to do when a message appears in the display When you encounter any problems or need more explanation Refer to Troubleshooting and explanations page 71 Learning more about Hi MD Hi MD is a new MiniDisc...

Страница 11: ...g instructions explains the installation and operations of the supplied Hi MD WAV Importer software Using the recorder while it is connected to a computer Windows The supplied SonicStage software allows you to transfer audio data between the recorder and the computer The supplied MD Simple Burner software allows you to record audio data to the recorder Using the recorder while it is connected to a...

Страница 12: ...de rechargeable battery 1 Earphones 1 Battery carrying case 1 Dry battery case 1 Comes attached with a clamp filter on the cord of the North American and Chinese models Clamp filters are not attached to the cord for the Southeast Asian African and tourist models Stereo microphone 1 When using this unit remember to follow the precautions below in order to avoid warping the cabinet or causing the un...

Страница 13: ...10 for the European Australian Hong Kong and Korean models For the optional line cable RK G129 RK G136 small size clamp filter ESD SR 110 except for the Southeast Asian African and tourist models 1 Open the clamp filter 2 Attach the clamp filters as follows For the supplied remote control Wind the cord around the clamp filter once Approx 4 cm 1 6 in from the plug For the optional line cable Pass t...

Страница 14: ...ast rewind AMS fast forward button H Battery compartment I X pause button J VOL volume 1 button K i earphones jack L REC N T MARK button M SEARCH LIGHT MENU button2 N x stop CANCEL CHG button O DC IN 3V jack P USB cable connecting jack Q The cover of the USB cable connecting jack R Terminals for attaching dry battery case 1 There are tactile dots beside the VOL button and the MIC PLUG IN POWER jac...

Страница 15: ...tery indication Shows the approximate remaining battery power If the batteries are weak the indication becomes empty and starts flashing D Track number and group number display area Displays the track number or group number E Text information display area Displays titles menu items error messages etc Titles are preceded by the following icons track name artist name album name group name disc name ...

Страница 16: ...in the direction of the arrow to disable the buttons on the remote control To prevent the buttons from being accidentally operated when you carry the recorder use this function C Clip D group button E NX play pause button F x stop button G AMS fast rewind AMS fast forward button B C D E F G A ...

Страница 17: ...recorder and the AC power adaptor to a wall outlet 2Press x CANCEL CHG Charging appears in the display and charging starts When charging is completed Charging disappears 2Insert the NH 14WM rechargeable battery E end first 3Close the lid 1Slide OPEN to open the battery compartment lid AC power adaptor To DC IN 3V To a wall outlet Make sure the cover is closed x CANCEL CHG continued ...

Страница 18: ...echargeable battery become sufficiently charged The charging time may vary depending on the condition of the rechargeable battery 3 Make connections Connect the earphones with the remote control to i Using the alkaline dry battery for extended operation 1 Attach the dry battery case to the recorder 2 Insert a LR6 size AA alkaline dry battery Inset the battery E end first Rear of the recorder To i ...

Страница 19: ... recorder on house current when recording or editing When powering the recorder with batteries make sure to use a fully charged rechargeable battery or a new alkaline dry battery When operating the recorder with a dry battery make sure it is an alkaline type Use of another type may result in shorter battery life or cause a deterioration in the performance of the rechargeable battery being used in ...

Страница 20: ...6 6 5 NH 14WM LR6 9 5 14 5 16 5 1 Measured with EL Light is set to Auto Off page 58 2 Measured in accordance with the JEITA Japan Electronics and Information Technology Industries Association standard 3 When using a 100 fully charged nickel metal hydride rechargeable battery 4 When using a Sony LR6 size AA alkaline dry battery produced in Japan Disc type Batteries LinearPCM Hi SP Hi LP MP31 1 Trac...

Страница 21: ...computer You can record in Hi MD mode on this recorder 1 Make connections Insert the cables firmly and completely into the appropriate jacks 1Connect the AC power adaptor to the recorder and a house current 2Connect the optical cable to the recorder and an external component Note To a wall outlet AC power adaptor To DC IN 3V Make sure the cover is closed Optical cable To LINE IN OPT Optical plug O...

Страница 22: ...e Burner software to record in MD mode refer to the Software Operation section When using a 1GB Hi MD disc the operation mode will only be Hi MD When using a standard disc 60 74 80 minutes the operation mode can be set as follows Make sure to check the record protect tab is closed Disc condition Operation mode Blank disc The mode set for the Disc Mode in the menu 1 When recording on this recorder ...

Страница 23: ...s Track marks are automatically added at the same point as the sound source and the contents are recorded together as a group PAUSE Connected component Make sure the x indication is displayed REC N T MARK Jog dial N ENT PAUSE Connected component To Press Stop Press x Pause Press X1 Press X again to resume recording Remove the disc Press x and open the lid The lid does not open while SYSTEM FILE WR...

Страница 24: ...ed Make sure the x indication is displayed before you start recording Do not move or jog the recorder or disconnect the power source while recording or while DATA SAVE or SYSTEM FILE WRITING is displayed If you do the data recorded up to that point may not be recorded to the disc or data on the disc may be damaged Recording cannot be done when the disc does not have enough space for recording If t...

Страница 25: ...NX on the remote control 2Press VOL or to adjust the volume on the recorder Turn the VOL control on the remote control The volume will be shown in the display To stop play press x Playback starts from the point you last stopped playing After you stop the recorder the recorder will automatically turn off in about 10 seconds when using batteries or about 3 minutes when using an AC power adaptor VOL ...

Страница 26: ...ntil you reach the beginning of the desired track Press Press repeatedly until you reach the beginning of the desired track Find the beginning of the next track Press Press Go backwards or forward Press and hold or Press and hold or Cue to the next or previous group while playing a track in a group Group skip 1 Press or Start with the first track of the disc While the recorder is stopped press the...

Страница 27: ... appear or Simple only basic menu items appear Refer to Changing the displayed menu items Menu Mode page 57 for menu mode setting 1 Press and hold MENU for 2 seconds or more to enter the menu 2 Turn the jog dial to select the item 3 Press the jog dial N ENT to enter the selection 4 Repeat steps 2 and 3 The setting will be entered when you press the jog dial N ENT at the last To return the precedin...

Страница 28: ...ge page 61 Note Menu 1 Menu 2 Function Site page Edit Title Input Adding a track name artist name album name group name or disc name page 46 Group Set Assigns recorded tracks or groups to a new group page 49 GroupRelease Releases group settings page 50 Move Changes the order of tracks or groups page 51 Erase Erases tracks groups or the entire disc contents page 52 Format Formats the disc and resto...

Страница 29: ...ro Recording page 38 File List Displays a list of the non audio data stored on a disc used in Hi MD mode page 65 Option Menu Mode Changes the displayed menu items page 57 AVLS Sets a limit on the maximum volume to protect your hearing page 57 Beep Turns the beep sound on or off page 57 EL Light Turns the display window on or off page 58 Disc Memory Stores the recorder settings Disc Memory page 58 ...

Страница 30: ... a 1GB Hi MD disc connect the AC power adaptor to the recorder charge the rechargeable battery fully battery level indication shows or use a new alkaline dry battery battery level indication shows When you attempt to start recording on a 1GB Hi MD disc NOT ENOUGH POWER TO REC may appear and recording cannot be done even if the battery level indication shows sufficient remaining power while the rec...

Страница 31: ...ears at A B and C While the recorder is stopped Jog dial MENU Lap Time A Track number Group number1 B Elapsed time C Track name Artist name Hi MD Group name MD Album name Hi MD Disc name MD 1 Remain A Track number Group number1 B Remaining time after the current location in the track C Track name Artist name Hi MD Group name MD Album name Hi MD Disc name MD Tr Property A Track number Group number1...

Страница 32: ...o check the playing position or track name while playing see Viewing various information page 39 Recording from a microphone 1 Connect the stereo microphone to the MIC PLUG IN POWER jack 2 Press the jog dial N ENT while pressing REC N T MARK to start recording You can select the microphone sensitivity depending on the volume of the sound source 1 While the recorder is recording or stopped enter th...

Страница 33: ...natural volume transitions similar to those of the original When using a plug in power type microphone the microphone can be operated even when its power switch is turned off since power is supplied from the recorder itself The recorder automatically switches input in the following order optical input microphone input and analog input You cannot record through the microphone while an optical cable...

Страница 34: ... Windows computer and record or transfer audio data using the supplied SonicStage or MD Simple Burner software refer to the Software Operation section 1 While the recorder is stopped enter the menu and select REC Settings REC Mode 2 Turn the jog dial to select the desired recording mode and then press the jog dial to enter the selection The recording mode is saved on the recorder until it is next ...

Страница 35: ...nd 12dB segment If high sound input causes the segments beyond the OVER segment to light up lower the recording level Each level meter shows the following Upper L channel input level Lower R channel input level 5 Press X again to start recording If your source is an externally connected component play the source to the beginning of the material to be recorded and then start recording To switch bac...

Страница 36: ... recorder adds track marks at the point you set the time interval and from that point the recorder adds a track mark whenever the time interval has elapsed Example Eight minutes of recording has been completed when the Time Mark time interval is set to 5 minutes A track mark will be added at the 8 minute point after the start of recording and after each 5 minute interval thereafter When the time i...

Страница 37: ...s then you can select that group to play those tracks The following figure shows the difference between a disc on which groups are recorded and a disc on which no groups are recorded Disc with groups recorded Disc with no groups recorded You can record a maximum of 255 groups on a disc If you record a track without creating a group but then later want to create a group for that track refer to Assi...

Страница 38: ...om the player again the recorder resumes synchro recording If the recorder is kept in the standby mode for 5 minutes or longer the recorder stops automatically The pause function cannot be turned on or off manually during synchro recording Do not switch the SYNC REC setting while recording Recording may not be done properly Even when there is no sound on the sound source there may be cases when re...

Страница 39: ...maining time or the recording position while recording or in stop mode see Viewing various information page 31 Lap Time A Track number Group number1 B Elapsed time C Track name Artist name Hi MD Group name MD Album name Hi MD Disc name MD Jog dial MENU 1 Remain A Track number Group number1 B Remaining time of the current track C Track name Artist name Hi MD Group name MD Album name Hi MD Disc name...

Страница 40: ...the desired track and then press the jog dial to enter the selection The selected track starts playing The recorder plays from the selected track to the last track in the disc Listening to tracks in a specific group Group Play 1 Do step 1 and select Group Play in step 2 of Playing tracks in Main play mode page 40 A list of the groups on a disc appears 2 Turn the jog dial to select the desired grou...

Страница 41: ...bum name you can listen to tracks of a selected album only 1 Do step 1 and select Album Play in step 2 of Playing tracks in Main play mode page 40 A list of the albums on the disc appears in alphabetical order 2 Turn the jog dial to select the desired album name and then press the jog dial to enter A list of the tracks in the selected album appears in recorded order 3 Turn the jog dial to select t...

Страница 42: ...l at the starting point A Point A is entered and B flashes in the display 3 Press the jog dial at the ending point B Point B is entered ApB and lights up and the section between point A and B starts playing repeatedly z You can reset points A and B by pressing the button during A B Repeat play If the recorder comes to the end of the last track on the disc while you are selecting point A the settin...

Страница 43: ...nitial character 1 Do steps 1 and 2 of Searching for a track Search 2 Turn the jog dial to select Initial Search and then press the jog dial to enter 3 Turn the jog dial to select the first character of the name to be searched for and then press the jog dial to enter the letter The following characters can be entered for an initial search When you press the jog dial a list of tracks groups artists...

Страница 44: ...ted items SORTING appears in the display The Search function is automatically canceled if no operation is made for 3 minutes Selecting the sound quality 6 Band Equalizer 1 While playing enter the menu and select Sound Sound EQ 2 Turn the jog dial to select the desired sound mode and then press the jog dial to enter the selection When you press the jog dial the selected sound mode will appear at A ...

Страница 45: ...nd quality 6 Band Equalizer page 44 2 Press or repeatedly to select the frequency 3 Turn the jog dial to adjust the level 4 Repeat steps 2 and 3 to adjust the level for each frequency 5 Press the jog dial to enter the selection 6 Band Equalizer will not function during recording Frequency 100 Hz From the left you can select 100 Hz 250 Hz 630 Hz 1 6kHz 4 kHz or 10 kHz Level 10 dB You can select fro...

Страница 46: ...FILE WRITING is displayed the lid becomes locked Adding titles Title Input You can add titles to tracks groups and discs You can also add artist names and album names to tracks on a disc used in Hi MD mode Some features depend on the model such as the number of characters that can be input and the character palette on the recorder Refer to the following items to verify what input characters are su...

Страница 47: ...acters In MD mode A maximum of about 1 700 characters The number of titles that can be stored on a disc depends on the number of characters that are input for track names group names artist names album names and disc name Character palette The character palette has the following configuration About the character palette During operations on the recorder characters can be selected from the characte...

Страница 48: ...ant to label 1 Enter the menu and select Edit Title Input 2 Turn the jog dial to select one of the following and then press the jog dial The cursor flashes in the letter input area 3 Turn the jog dial downward The cursor shifts from the letter input area to the character palette 4 Select a letter and press the jog dial to enter The selected letter appears in the letter input area and the cursor mo...

Страница 49: ... tracks is not possible for example track 3 and tracks 7 and 8 cannot be assigned to a new group It is not possible to make a new group if the first track or last track of the group has been selected from the middle of an existing group Track numbers appear according to their order on the disc not their order within the group To move the cursor up or down Turn the jog dial To enter a letter Press ...

Страница 50: ...ayed 3 Turn the jog dial to select the number of the desired last track and then press the jog dial to enter This selects the last track of the new group and the group can be labeled If the disc contains groups only the last track number of each group is displayed 4 Label a group see Adding titles Title Input page 46 In step 2 the first track must be either the first track of an existing group or ...

Страница 51: ...track is not in the group the name of the currently selected track appears on the 3rd line in the display 2 If you are moving a track from inside a group to outside the group or if there is no group on a disc skip this step If you are moving a track to a different group turn the jog dial to select the destination group and then press the jog dial to enter If you are moving a track within the same ...

Страница 52: ...Windows computer TRK FROM PC ERASE OK appears in the display If you erased tracks that have been transferred from the computer the transfer authorization of the tracks will be as follows If the tracks were transferred in Hi MD mode the transfer authorization of the tracks are restored automatically when you insert the disc into the recorder and then connect the recorder to the computer If the trac...

Страница 53: ...ect a group you want to erase and check the contents see page 40 2 Press x 3 Enter the menu to select Edit Erase Group Erase 4 Turn the jog dial to select OK and then press the jog dial to erase the group The group is erased 1 Play the disc you want to erase to check the contents 2 Press x 3 Enter the menu to select Edit Erase All Tr Erase ALL TRACKS WILL BE ERASED appears in the display 4 Turn th...

Страница 54: ...ausing press T MARK at the point you want to mark 1 While playing press T MARK for 2 seconds or more Four seconds of the track from the point T MARK is pressed is played back repeatedly 2 Turn the jog dial to adjust the point to divide Turning the jog dial moves the dividing point forward or backwards The dividing point can be moved up to a maximum of 8 seconds forward or backwards from the point ...

Страница 55: ...e 1 While playing the track with the track mark you want to erase press X to pause 2 Find the track mark by pressing slightly For example to erase the third track mark find the beginning of the third track 00 00 appears in the display MARK appears in the display for a few seconds 3 Press T MARK to erase the mark MARK OFF appears in the display The track mark is erased and the two tracks are combin...

Страница 56: ...ven if a different operation mode was selected in the SonicStage software or a different operation mode appeared on the display after the disc was formatted by the SonicStage software 1 While the recorder is stopped enter the menu and select Edit Format ALL DATA WILL BE DELETED appears in the display 2 Turn the jog dial to select OK and then press the jog dial to enter the selection SYSTEM FILE WR...

Страница 57: ...inimize sound leakage sound pressure on the ears and the danger connected with the failure to hear important exterior sounds 1 Enter the menu and select Option AVLS 2 Turn the jog dial to select On and then press the jog dial to enter the selection When you try to turn the volume too high AVLS NO VOLUME OPERATION appears in the display The volume is kept to a moderate level To cancel the AVLS Sele...

Страница 58: ...ivide Rehearsal function is being performed messages are displayed the A B Repeat play is being set If the battery power grows weak during recording battery level indication shows the display window darkens to conserve battery power Storing the settings for individual discs Disc Memory The recorder is factory set to automatically store settings for each disc The recorder automatically stores the s...

Страница 59: ...ks recorded per disc means fewer discs can be stored If you try to erase the disc information of a disc that have never been stored NO DISC MEMORY appears in the display for a few seconds Starting the playback quickly Quick Mode The recorder is factory set to quickly start playback after the playback button is pressed You can check the setting as follows 1 While the recorder is stopped or playing ...

Страница 60: ...l to enter the selection Even if you select MD as the Disc Mode setting the operation mode can only be Hi MD when using a 1GB Hi MD disc The operation mode set in the Disc Mode menu is applied to a blank 60 74 80 minute standard disc used on the recorder even if a different operation mode was selected in the SonicStage software or a different operation mode appeared on the display after the disc w...

Страница 61: ...can models English factory setting French German Italian and Spanish For the Asian African Australian and tourist models Japanese English factory setting French German Italian Spanish Traditional Chinese and Simplified Chinese 1 Enter the menu and select Option Language 2 Turn the jog dial to select the desired language and then press the jog dial to enter the selection MENU Jog dial ...

Страница 62: ...he computer display as an external drive allowing you to transfer non audio data such as text and image files For details refer to Storing non audio data to a disc page 64 z If you play audio files using the SonicStage software the sound is output from the computer speakers when a disc used in Hi MD mode is inserted and from the earphones connected to the recorder when a disc used in MD mode is in...

Страница 63: ...c into the recorder 2 Make sure the recorder is stopped and HOLD is released 3 Open the cover of the USB connecting jack on the recorder and connect the supplied USB cable to the recorder and to the computer 4 Check the connections When the connections have been properly made appears in the display When you unplug the USB cable from the computer or remove the disc from the recorder Be sure to remo...

Страница 64: ...p PC for example is operating on battery power this connection may cause the computer s battery to drain It is thus recommended to use the computer with an AC power adaptor We do not ensure trouble free operation on all computers that satisfy the system requirements Storing non audio data to a disc If you connect the recorder to a computer with a disc in Hi MD mode inserted the disc is recognized ...

Страница 65: ...firm and then press the jog dial to enter the selection File size appears If you want to go deeper select the folder containing the file you want to check and then press the jog dial A list of files and folders in the selected folder appears in the display Afterwards perform the operation in step 2 again This function cannot be used to open files Text containing characters that are not supported b...

Страница 66: ...d other factors Therefore the actual space available for use may be lower than that displayed on the computer display Free space 60 minute standard disc 219 MB 229 965 824 bytes 832 KB 851 968 bytes 218 MB 229 113 856 bytes 74 minute standard disc 270 MB 283 312 128 bytes 832 KB 851 968 bytes 269 MB 282 460 160 bytes 80 minute standard disc 291 MB 305 856 512 bytes 832 KB 851 968 bytes 290 MB 305 ...

Страница 67: ...der in anything when it is being used with the AC power adaptor Heat build up in the recorder may cause malfunction or damage On the earphones Road safety Do not use earphones while driving cycling or operating any motorized vehicle It may create a traffic hazard and is illegal in many areas It can also be potentially dangerous to play your recorder at high volume while walking especially at pedes...

Страница 68: ...ugs of the earphones or the remote control Dirty plugs may cause sound distortion or intermittent breaks in the sound On batteries Incorrect battery usage may lead to leakage of battery fluid or bursting battery To prevent such accidents observe the following precautions Install the and poles of the batteries correctly When the recorder is not to be used for a long time be sure to remove the batte...

Страница 69: ...uency response 20 to 20 000 Hz 3 dB Inputs1 MIC stereo mini jack minimum input level 0 13 mV Line in stereo mini jack for analog input minimum input level 49 mV optical digital mini jack for optical digital input Outputs i stereo mini jack dedicated remote control jack Maximum output DC Headphones 2 8 mW 2 8 mW 16 Ω European models 5 mW 5 mW 16 Ω Other models Power requirements Sony AC Power Adapt...

Страница 70: ...eries Recordable Hi MD disc HMD1G Nickel metal hydride rechargeable battery NH 14WM Your dealer may not handle some of the above listed accessories Please ask the dealer for detailed information about the accessories in your country When using optional headphones use only headphones earphones with stereo mini plugs You cannot use headphones earphones with micro plugs ...

Страница 71: ...e battery several times The normal battery life will be restored The surrounding temperature is too high or too low Charge the battery at a temperature of 5 C 41 F to 35 C 95 F You charged the rechargeable battery using USB bus power USB bus power charging is only provisional and cannot be used to fully charge the rechargeable battery Disconnect the recorder from the computer and charge the rechar...

Страница 72: ...ears in the display data will not be recorded to the first few seconds of the first track Wait until the x indication appears before you start recording Recording cannot be done correctly You tried to record in MD mode on this recorder Only Hi MD mode can be used to record directly on this recorder without using a computer To record in MD mode connect the recorder to a Windows computer and use the...

Страница 73: ...s in LP4 mode When recording is stopped the last unit of recording always uses this unit of 2 seconds 4 seconds or 8 seconds even if the actual recording is shorter Likewise when recording is restarted after the stop the recorder will automatically insert a blank space amounting to 2 seconds 4 seconds or 8 seconds before the next recording This is to prevent accidental erasing of a previous track ...

Страница 74: ...ug The disc cannot be played on another component The component does not support Hi MD Discs recorded on this recorder can be played only on components that support Hi MD The edited tracks may exhibit sound dropout during search operations This occurs due to the MiniDisc system limitation The fragmentation of data may cause sound dropout while searching because the tracks are played in higher spee...

Страница 75: ...erased Non audio data cannot be erased with the Erase function Confirm the contents by connecting the recorder to your computer If it is okay to delete the contents then perform the Format function page 56 Tracks cannot be combined This is due to the MiniDisc system limitations When the tracks are scattered and the length of each track is short you may not be able to combine the tracks Combining t...

Страница 76: ...solved by updating your Windows operating system so that it contains all the latest features Charging by USB bus power cannot be done flashes in the display The battery compartment lid is not firmly closed Reinsert the rechargeable battery and close the battery compartment lid firmly The temperature of the battery charging location is too low or too high Charge the rechargeable battery within a te...

Страница 77: ...isplayed on the computer is not the same as the disc size printed on the disc The difference is due to the use of the binary system to indicate the disc size on the computer and the decimal system to express the disc size on the disc and other recording media For details on the disc size see page 66 You cannot operate the recorder You cannot operate the recorder while the recorder is connected to ...

Страница 78: ... AC power adaptor The disc is damaged or does not contain proper recording or editing data Reinsert the disc Rerecord the disc If the error message still appears replace it with another disc There is a built in malfunction in the system While operating the recorder received a mechanical shock too much static abnormal power voltage caused by lightning etc Restart the operation as follows 1 Disconne...

Страница 79: ...e track mark at the beginning of the first track or group You tried to erase a track mark to combine tracks the recorder cannot combine a track recorded in stereo and in mono for example You tried to overwrite a track marks You tried to change a title that includes characters the recorder cannot edit Editing titles cannot be done if the title includes characters that cannot be input on the recorde...

Страница 80: ... DOWNLOAD READY MD Simple Burner is now ready to record an audio CD to the disc in the recorder using Simple mode Refer to Software Operation section EJECT DISC OK The recorder has finished communicating with the computer and it is safe to eject the disc from the recorder or disconnect the USB cable END The recorder reached to the end of the disc while playing or pressing ERROR There is an interna...

Страница 81: ...r Insert a disc NO DISC MEMORY You tried to erase a setting in the Disc Memory on a disc that contains no settings in the Disc Memory page 58 NO FILE While viewing the file list you selected a folder that have no folders or files NO GROUP You selected Group Erase with a disc without group setting You cannot erase groups with a disc with no groups You tried to release a group setting with a disc th...

Страница 82: ... not a standard disc Try recording again with another disc SEARCH You pressed a button or a control on the remote control while using the Search function on the recorder Use the buttons and controls on the recorder SYSTEM FILE WRITING The recorder is storing information track start and end position from the memory to the disk Wait until this process is completed Do not expose the player to physica...

Страница 83: ...ed tracks You tried to combine or divide tracks that were recorded in Hi MD mode using the MD Simple Burner software You cannot combine or divide tracks recorded in Hi MD mode with the MD Simple Burner software TRK FROM PC NO REC You tried to record in the middle of a protected track that has been transferred from the Windows computer You tried to record in the middle of a track that was recorded ...

Страница 84: ... the disc is inserted When using a 1GB Hi MD disc the operation mode will only be Hi MD When using a standard disc 60 74 80 minutes the operation mode can be set as follows About LinearPCM LinearPCM is a digital non compressed audio coding system You can enjoy high quality sound equal to that of CDs by recording in this mode The meaning of no sound No sound describes a recorder condition in which ...

Страница 85: ...28 minutes 26 minutes 21 minutes Hi SP ATRAC3plus 256kbps 7 hours and 55 minutes 2 hours and 20 minutes 2 hours and 10 minutes 1 hour and 40 minutes Hi LP ATRAC3plus 64kbps 34 hours 10 hours and 10 minutes 9 hours and 20 minutes 7 hours and 40 minutes When transferring from the Windows computer Recording time1 2 2 When transferring 4 minute tracks Codec Bit rate 1GB Hi MD disc 80 minute standard d...

Страница 86: ...c ATRAC stereo 292kbps 80 minutes 74 minutes 60 minutes ATRAC3 132 105kbps 2 hours and 40 minutes 2 hours and 28 minutes 2 hours ATRAC3 66kbps 5 hours and 20 minutes 4 hours and 56 minutes 4 hours Disc type Recording method Format Component used for playback Component that supports Hi MD1 1 Audio components marked with the or logo mark Component that supports MDLP2 2 Audio components marked only w...

Страница 87: ...hen edit them on the computer About the DSP TYPE S for ATRAC ATRAC3 This recorder supports DSP TYPE S a specification for high level Sony MiniDisc decks equipped with digital signal processors DSP This specification allows the recorder to produce high quality sound from tracks recorded in MDLP mode Since it retains DSP TYPE R support the recorder produces superior results during playback in SP nor...

Страница 88: ...r DVD player etc Equipment with an analog line output jack Casette deck radio record player etc Usable cord Optical cable with an optical or an optical mini plug page 21 Line cable with 2 phono plugs or a stereo mini plug page 34 Signal from the source Digital Analog Even when a digital source such as a CD is connected the signal sent to the recorder is analog Track marks1 1 You can erase unnecess...

Страница 89: ...89 ...

Страница 90: ...d the Internet and then transfer the audio data stored in your computer to an MD MD Simple Burner allows you to record music tracks from an audio CD in the CD drive of your computer to an MD Walkman without first recording the music tracks to the computer What you can do with SonicStage What you can do with MD Simple Burner Audio CD MD Walkman Internet Import Transfer Music files in the MP3 WAV an...

Страница 91: ...Stage MD Simple Burner Importing audio data to your computer page 95 Connecting an MD walkman to your computer see page 63 on Recorder Operation Transferring audio data from your computer page 97 Connecting an MD walkman to your computer see page 63 on Recorder Operation Recording music tracks from an audio CD in the CD drive of your computer page 108 Listening to an MD ...

Страница 92: ...suspend sleep or hibernation mode System requirements Computer IBM PC AT or Compatible CPU Pentium III 450 MHz or higher Hard disk drive space 200 MB or more 1 5 GB or more is recommended The amount of free space will vary according to Windows version and the number of music files stored on the hard disk RAM 128 MB or more Others CD drive capable of digital playback by WDM A CD R RW drive is neces...

Страница 93: ... the new version You will still be able to use music data registered by the older software version even after the new SonicStage has been installed As a precaution we recommend that you back up your music data To back up the data refer to Backing Up My Library on SonicStage Help The method for managing music data differs in part from conventional methods For details refer to For Users of Earlier V...

Страница 94: ...nicStage and MD Simple Burner may differ from those in the illustration above The installation may take 20 to 30 minutes depending on your system environment Make sure to restart your computer only after the installation is completed Was the installation successful If any trouble occurs during the installation see Troubleshooting page 114 Click Install SonicStage and MD Simple Burner ...

Страница 95: ...with a mark can be used with SonicStage We do not guarantee normal operation in the case of the copy controlled CDs 1 Start up SonicStage Select Start All Programs SonicStage SonicStage Programs in the case of Windows 2000 Professional Windows Millennium Edition Windows 98 Second Edition SonicStage starts up and the main window appears z You can also start SonicStage with double click SonicStage i...

Страница 96: ...u click Settings on the right side of the screen CD Importing Format dialog box will appear The dialog box will ask you to select the format and bit rate for recording an audio CD 6 Click The recording of the tracks selected in step 4 starts To stop recording Click To assign cover art for imported albums Find the desired image file jpg gif bmp file using Windows Explorer and drag it to the cover a...

Страница 97: ...about connections see page 63 on Recorder Operation Do not disconnect the power source or the USB cable before the transfer has completed 2 Point to Transfer on the upper right side of the screen and click Hi MD or Net MD The screen is switched to the transfer Hi MD or Net MD screen 3 Click the tracks you want to transfer in the My Library list on the left side of the screen To transfer more than ...

Страница 98: ... select Net MD for the mode operation mode on the right side of the screen after step 2 This operation mode can be selected only when using a 60 74 80 minute standard disc in Hi MD mode for recording A transfer will fail and an error message will appear in the following cases When there is no enough free space on the disc When the track is subject to playback restrictions During the transfer the s...

Страница 99: ...kman to your computer For details about connections see page 63 on Recorder Operation Do not disconnect the power source or the USB cable before the transfer has completed 2 Point to Transfer on the upper right side of the screen and click Hi MD or Net MD The screen is switched to the transfer Hi MD or Net MD screen 3 In the list on the right side of the screen Hi MD or Net MD click to select the ...

Страница 100: ...er art by clicking it on the right side Hi MD side of the display select Import Cover Art from the right click menu and then select the album for which you want to add the cover art from the Select an Album dialog box Tracks transferred to the MD Walkman from another computer cannot be transferred back to My Library on your computer Tracks that have been recorded on a Hi MD Walkman can be imported...

Страница 101: ...racks recorded on the Hi MD Walkman to the computer click Settings in the middle of the screen to display Transfer Mode Settings dialog box and then confirm the status of the Import settings check box it is checked by default in Advanced Then do as follows To import tracks to My Library while deleting them on the Hi MD Walkman uncheck the box To import tracks to My Library while leaving the copy o...

Страница 102: ...e an MP3 CD select Create an MP3 CD ATRAC CDs can be played only on devices that support ATRAC CDs MP3 CDs can be played only on devices that support MP3 CDs 2 Insert a blank CD R CD RW disc into the disc drive of your computer Use a CD R CD RW with a recording capacity of 650MB or 700MB Data may not be correctly written if a disc of another capacity is used 3 Select the albums or tracks to be wri...

Страница 103: ...ically ejected and the screen returns to the Transfer CD Creation screen To cancel track writing 1 Click in the Operation Status Display while tracks are being written to the disc Writing to the disc is canceled and a message appears 2 Click OK The disc is automatically ejected and the screen returns to the Transfer CD Creation screen Note Only tracks in MP3 format can be written to an MP3 CD Trac...

Страница 104: ...lp while SonicStage is running z You can display SonicStage Help by selecting the following Start All Programs SonicStage SonicStage Help Programs in the case of Windows 2000 Professional Windows Millennium Edition Windows 98 Second Edition In SonicStage Help Device Media is the general term for the external device such as the MD Walkman the Network Walkman and the CD Walkman Follow the instructio...

Страница 105: ...dow 2 Type in the words 3 Click List Topics A list of the words that were searched is displayed 4 Click to select the desired item among those displayed 5 Click Display An explanation of the selected item is displayed Understanding SonicStage Help Searching for a word inside an explanation The right side frame The left side frame An explanations of the selected item Type in the keyword to find tex...

Страница 106: ...cStage Help Listen to audio data from the CD drive or My Library Music Playback Playing Back an Audio CD or Playing Back a Track in My Library Listen to audio data on the MD Walkman connected to the computer Music Playback Playing Back a Track on a Device Media Managing and editing imported tracks To SonicStage Help Change information related to CD information downloading Changing SonicStage Setti...

Страница 107: ...p Tool Troubleshooting To SonicStage Help Look up troubleshooting procedure Additional Information Troubleshooting When you want to know To SonicStage Help Look up unknown words Additional Information Glossary Look up the kinds of audio data that can be managed by SonicStage Overview Content Handled Within SonicStage Look up the kinds of functions that can be used with SonicStage Overview Features...

Страница 108: ...ord an entire CD or only the first track without launching MD Simple Burner Standard mode page 110 You can launch MD Simple Burner to record using computer operations Record an entire CD or selected tracks You cannot record in simple mode while the MD Simple Burner in standard mode or OpenMG software SonicStage OpenMG Jukebox etc is active Only audio CDs with a mark can be used with MD Simple Burn...

Страница 109: ... on the CD are recorded as a new group To stop recording Click on the computer display While the first track is being recorded you can use x stop button to stop on the MD Walkman Setting the recording mode Before starting recording right click the MD Simple Burner icon in the task tray and then select in recording mode Net MD LP2 or LP4 Hi MD PCM Hi SP Hi LP or 48kbps Recording first track only Be...

Страница 110: ... the task tray or right click and select Show Standard Mode Double click the MD Simple Burner shortcut icon on the desktop The window for recording all tracks on the CD Open To open the display as shown on page 111 click here Disc name MD Total time of the selected tracks of CD CD icon MD icon Album name CD Recording mode drop down menu Net MD LP2 LP4 Hi MD PCM Hi SP Hi LP 48kbps Remaining recordi...

Страница 111: ...eselect all tracks click here All Erase Check boxes Check the box of the tracks that you want to record To select all tracks click here Get CD Info Information of an audio CD album name track title etc will be reflected in the track list CD operating section Use these controls to confirm the tracks on audio CD to be recorded CONFIG Click here to do the following Set the CD ROM drive View version i...

Страница 112: ...mple Burner 2 0 xx in the Currently Installed Programs list and then click Change and Remove Follow the displayed instruction and restart your computer The uninstallation is completed when the computer has restarted Change Remove in the case of Windows 2000 Professional Add Remove in the case of Windows Millennium Edition Windows 98 Second Edition When you install SonicStage Ver 3 1 MD Simple Burn...

Страница 113: ...io content High quality digital audio content is widely available through music distribution services on the Internet To protect the copyrights of its holders from unauthorized distribution some audio content is distributed with certain restrictions on recording and playback For example the playback period or playback count for the data may be limited ...

Страница 114: ...system RAM capacity Hard disk drive containing SonicStage MD Simple Burner and audio data Capacity of the drive Free space Version of the software SonicStage Ver 3 11 MD Simple Burner Ver 2 02 1 To check the SonicStage software version go to Help About SonicStage in the SonicStage window 2 To check the MD Simple Burner software version go to CONFIG Version in the MD Simple Burner window Error Mess...

Страница 115: ...ce on your hard disk tYou need 200MB or more free space on your hard disk The installation appears to have stopped before it has completed Check for the appearance of an error message beneath the installation window tPress the Tab key while holding down the Alt key If an error message has appeared press the Enter key The installation will resume If there is no message the installation is still in ...

Страница 116: ... disconnected tConnect the supplied USB cable firmly The connections are made through a USB hub tOperations are not guaranteed for USB hub connections Connect the MD Walkman directly to the USB connector on the computer Even though the supplied USB cable is used to connect the MD Walkman to the computer the display on the MD Walkman does not indicate it is connected It takes time to recognize Soni...

Страница 117: ...e 64 Disc memory 58 Disc Mode 60 Display 15 31 39 Display language 61 Divide rehearsal 54 E EMD service 92 Erasing 53 F File list 65 Format 56 G Group erasing 53 moving 52 recording 37 releasing 50 setting 49 Group skip 26 H Hard disk free space 92 Hi MD 84 Hi MD WAV Importer 11 HOLD 14 16 19 I Importing 95 Initial Search 43 Installing 92 L LinearPCM 84 M Macintosh 11 62 MD Simple Burner 108 Menu ...

Страница 118: ... 92 T Title 46 Track mark add 36 54 erase 55 Track search 43 Transferring to the MD Walkman 97 to your computer 99 U Uninstalling 112 USB bus power 63 USB cable 12 USB port 92 W WAV 101 Windows 2000 Professional 92 95 104 110 112 Windows 98 Second Edition 92 95 104 110 112 Windows Media Player 92 Windows Millennium Edition 92 95 104 110 112 Windows XP Home Edition 92 Windows XP Media Center Editio...

Страница 119: ...119 This warranty is valid only in Canada ...

Отзывы: