USO
RESTRITO
428
Control of VTRs, Extended VTRs, and Disk Recorders
Ch
a
p
te
r 12
E
x
te
rn
a
l De
v
ic
e
s
The Device >DDR/VTR >Cueup & Play menu
appears.
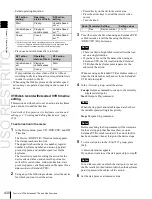
The status area shows the device number, register
number, status information, current time, start point,
stop point, and start delay time.
2
Using any of the following methods, select the device.
•
Press directly on the list in the status area.
•
Press the arrow keys to scroll the reverse video
cursor.
•
Turn the knob.
Knob
Parameter
Adjustment
Setting values
1
Dev
Device number 1 to 12
3
Carry out any of the following operations as required.
•
To set the start point, press [Set] in the <Start TC>
group.
•
To set the stop point, press [Set] in the <Stop TC>
group.
•
To set the start delay time, press [Set] in the <Delay>
group.
A timecode window appears.
4
Set the timecode value for the start point, stop point, or
start delay time.
Notes
You can enter a start delay time in the range that
depends on the signal format as follows:
00:00 to 59:nn,
where nn = (number of frames per second) – 1
frame.
5
Press [Enter].
Clearing the start point, stop point, and
start delay time settings in a menu
In the Device menu, use the following procedure.
1
Press VF3 ‘DDR/VTR’ and HF1 ‘Cueup & Play.’
2
Using any of the following methods, select the device
for which you want to clear the settings.
•
Press directly on the list in the status area.
•
Press the arrow keys to scroll the reverse video
cursor.
•
Turn the knob.
Knob
Parameter
Setting
Setting values
1
Dev
Device number
1 to 12
3
Carry out any of the following operations as required.
•
To clear the start point, press [Clear] in the <Start
TC> group.
•
To clear the stop point, press [Clear] in the <Stop
TC> group.
•
To clear the start delay time, press [Clear] in the
<Delay> group.
This clears the setting of the start point, stop point, or
start delay time.
Selecting Loop or Recue as the playback
mode
You can set the device operation mode to loop or recue.
Loop:
Carry out playback from the start point of a file to
the stop point, then indefinitely repeat playback from
the start point.
Recue:
Carry out playback from the start point of a file to
the stop point, then return to the start point and stop.
Notes
Loop and recue functions are only available when using
the video disk communications protocol. Note that these
functions may not operate, depending on the connected
device.
In the Device menu, use the following procedure.
1
Press VF3 ‘DDR/VTR’ and HF1 ‘Cueup & Play.’
The Device >DDR/VTR >Cueup & Play menu
appears.
The status area shows the device number, register
number, status information, current time, start point,
stop point, start delay time, and playback mode.
2
Using any of the following methods, select the device.
•
Press directly on the list in the status area.
•
Press the arrow keys to scroll the reverse video
cursor.
•
Turn the knob.
Knob
Parameter
Adjustment
Setting values
1
Dev
Device number 1 to 12
3
In the <Mode> group, press [Loop] or [Recue], turning
it on.
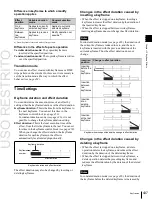
VTR/Disk Recorder/Extended VTR
Timeline
For a keyframe effect controlled from the center control
panel, the timeline allows you to set a VTR, disk recorder
or Extended VTR action at a keyframe point on the
timeline.
Содержание MVS-8000X SystemMVS-7000X System
Страница 358: ...USO RESTRITO 358 Wipe Pattern List Appendix Volume 1 Enhanced Wipes Rotary Wipes ...
Страница 360: ...USO RESTRITO Random Diamond DustWipes 360 1 w pe PaternLO ...
Страница 362: ...USO RESTRITO 362 DME Wipe Pattern List Appendix Volume 1 Door 2D trans 3D trans ...
Страница 363: ...USO RESTRITO DME Wipe Pattern List 363 Appendix Volume 1 Flip tumble Frame in out Picture in picture ...
Страница 364: ...USO RESTRITO 364 DME Wipe Pattern List Appendix Volume 1 Page turn Page roll ...
Страница 365: ...USO RESTRITO DME Wipe Pattern List 365 Appendix Volume 1 Mirror Sphere Character trail Wave Ripple Split slide ...
Страница 367: ...USO RESTRITO DME Wipe Pattern List 367 Appendix Volume 1 Squeeze 3D trans Picture in picture Page turn ...
Страница 376: ...USO RESTRITO 376 Menu Tree Appendix Volume 1 Frame Memory Menu FRAME MEM button Color Bkgd Menu COLOR BKGD button ...
Страница 377: ...USO RESTRITO Menu Tree 377 Appendix Volume 1 AUX Menu AUX button CCR Menu CCR button ...
Страница 379: ...USO RESTRITO Menu Tree 379 Appendix Volume 1 DME Menu DME button ...
Страница 380: ...USO RESTRITO 380 Menu Tree Appendix Volume 1 Global Effect Menu GLB EFF button Router Menu Device Menu DEV button ...
Страница 381: ...USO RESTRITO Menu Tree 381 Appendix Volume 1 Macro Menu MCRO button ...
Страница 382: ...USO RESTRITO 382 Menu Tree Appendix Volume 1 Key Frame Menu KEY FRAME button ...
Страница 383: ...USO RESTRITO Menu Tree 383 Appendix Volume 1 Effect Menu EFF button ...
Страница 384: ...USO RESTRITO 384 Menu Tree Appendix Volume 1 Snapshot Menu SNAPSHOT button ...
Страница 385: ...USO RESTRITO Menu Tree 385 Appendix Volume 1 Shotbox Menu SHOTBOX button ...
Страница 386: ...USO RESTRITO 386 Menu Tree Appendix Volume 1 File Menu FILE button ...
Страница 388: ...USO RESTRITO 388 Menu Tree Appendix Volume 1 ENG SETUP button to previous page topages after 390 to next page ...
Страница 389: ...USO RESTRITO Menu Tree 389 Appendix Volume 1 ENG SETUP button to page 387 to previous pages to following pages ...
Страница 390: ...USO RESTRITO 390 Menu Tree Appendix Volume 1 ENG SETUP button to previous pages to next page a MVS 7000X only ...
Страница 391: ...USO RESTRITO Menu Tree 391 Appendix Volume 1 ENG SETUP button to previous pages ...
Страница 392: ...USO RESTRITO 392 Menu Tree Appendix Volume 1 User Setup Menu USER SETUP button Diagnostic Menu DIAG button ...
Страница 413: ...USO RESTRITO MVS 8000X System MVS 7000X System SY 4 470 637 01 1 Sony Corporation 2013 ...
Страница 706: ...USO RESTRITO MVS 8000X System MVS 7000X System SY 4 470 637 01 1 Sony Corporation 2013 ...


