background image

84

GB

I

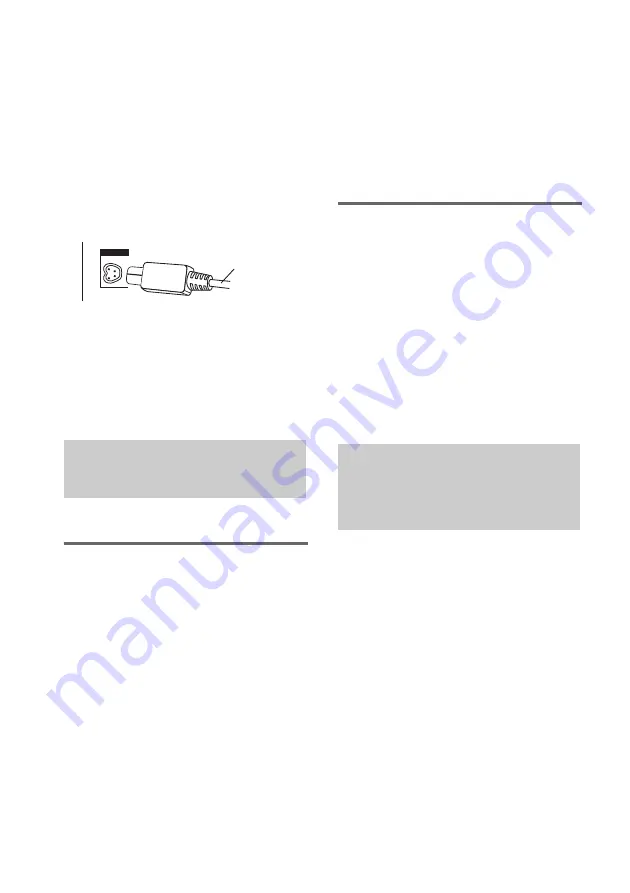
 D-LIGHT SYNC OUT jack

Connect the D-LIGHT SYNC Controller 
(not supplied) to this jack. You need to connect 
the D-LIGHT SYNC Controller to a lighting 
device* (not supplied). The lighting device will 
react according to the control signals transmitted 
by the D-LIGHT SYNC Controller upon 
receiving music source from the system. 
For details on the use of the D-LIGHT SYNC 
Controller and lighting device, refer to the 
operating instructions supplied with the 
respective device.

* Refer to the operating instructions supplied 

with the D-LIGHT SYNC Controller for the 
recommended lighting device.

Note

The lighting effect may be different depending on the 
connected lighting device or the type of music being 
played back.

(Except for MHC-GNZ55D)

Listening to a connected TV 
or satellite tuner

Use the buttons on the unit for the operation.

1

Connect the audio cords.

See “Hooking up optional components” on 
page 81.

2

Press TV/SAT.

To switch between the “TV” and 
“SAT” function

Hold down TV/SAT and press 

?/1

 while the 

system is turned on. Release 

?/1

 first, then 

release TV/SAT. The system switches the 
function from “TV” to “SAT” or vice versa.

Note

If the sound is distorted or too loud when “TV” is 
selected, change the function to “SAT”.

Listening to a connected VCR

1

Connect the audio and video cords.

See “Hooking up optional components” on 
page 81
.

2

Press VIDEO on the unit.

Start playing the connected VCR.

Note

The video signal from the connected VCR


is only 

output through the VIDEO OUT jack of this unit.

Tip

You can press FU/– repeatedly to select 
“TV”, “SAT” or “VIDEO”.

(MHC-GNZ77D/MHC-GNZ55D only)

1

Connect the digital optical cord.

See “Hooking up optional components” on 
page 81
.

2

Connect the speakers to an optional 
amplifier equipped with a decoder.

For the speakers placement, refer to the 
operating instructions supplied with the 
connected amplifier.

3

Start playing a multi channel source, 
such as a DVD VIDEO.

4

Select the audio format you want.

See “Selecting the audio format” on 
page 43
.

Listening to audio from a 
connected component

D-LIGHT SY

N

Controller cord

Enjoying the multi 
channel sound with the 
optional amplifier

Содержание MHC-GN999D

Страница 1: ... 2006 Sony Corporation 2 669 601 14 1 Mini Hi Fi Component System Operating Instructions MHC GN999D MHC GN999DS MHC GNZ88D MHC GNZ77D MHC GNZ55D ...

Страница 2: ... exterior Don t throw away the battery with general house waste dispose of it correctly as chemical waste Note on power cord plug shapes Saudi Arabian model only For AC 220 V wall sockets 1 Make the appropriate voltage setting on the system only for models with a voltage selector 2 Make sure that the 13 A 3 pin plug Type BF is securely attached to the power cord The 13 A 3 pin plug is attached whe...

Страница 3: ... tracks and JPEG image files 32 Playing DATA CDs or DATA DVDs with MP3 audio tracks and JPEG image files 33 Playing MP3 audio tracks and JPEG image files as a slide show with sound 36 Enjoying DivX video files 38 MHC GN999D MHC GN999DS MHC GNZ88D MHC GNZ77D only Russian model only Using the on screen display to search for a title chapter scene track index album file 40 Searching by scene 41 Pictur...

Страница 4: ...lluminator 77 Viewing information about the disc in the front panel display 77 Viewing information about the disc on the TV screen 78 Checking the date information of JPEG image files 80 Optional Components Hooking up optional components 81 Listening to audio from a connected component 84 Except for MHC GNZ55D Enjoying the multi channel sound with the optional amplifier 84 MHC GNZ77D MHC GNZ55D on...

Страница 5: ...on screen display may be different depending on the model and area The Control Menu items may be different depending on the disc area and or model The Setup Menu items may be different depending on the model and area The following symbols are used in this manual 1 Latin American models only 2 MP3 MPEG 1 Audio Layer 3 is a standard format defined by ISO MPEG which compresses audio data 3 DivX is a ...

Страница 6: ...s3 8 of format conforming to UDF Universal Disk Format VR Video Recording format DVD Rs DVD RWs only The system cannot play back the following discs CD ROMs recorded in PHOTO CD format Data part of CD Extras5 Data part of Mixed CDs6 Super Audio CDs DVD Audio discs DVD RAMs A DVD VIDEO with a different region code A disc that has a non standard shape e g heart square star A disc that has the adhesi...

Страница 7: ...e side with digital audio material on the other side However since the audio material side does not conform to Compact Disc CD standard playback on this product is not guaranteed Notes on CD R CD RW DVD R DVD RW DVD R DVD RW In some cases CD Rs CD RWs DVD Rs DVD RWs DVD Rs DVD RWs cannot be played back on this system due to the recording quality or physical condition of the disc or the characteris...

Страница 8: ...re is a session recorded in AUDIO CD format on the disc However the system will only play back the disc if the first session is recorded in AUDIO CD format MHC GN999D MHC GN999DS MHC GNZ88D MHC GNZ77D only With DATA CD or DATA DVD the system will only play back DivX video files even if it contains MP3 audio tracks or JPEG image files Russian model only Copyrights This product incorporates copyrigh...

Страница 9: ...tems depending on the disc type Example Control Menu display 1 when playing a DVD VIDEO Guide to the Control Menu display OFF T 1 3 2 5 5 1 8 3 4 1 2 2 7 DVD VIDEO Quit REPEAT ENTER DISPLAY DISC TITLE CHAPTER OFF Currently playing title number Currently playing chapter number Total number of titles Total number of chapters Control Menu items Selected item Function name of selected Control Menu ite...

Страница 10: ...Rs DVD RWs in VR mode Displays the text information on the CD TEXT discs DVD TEXT discs and MP3 audio tracks PROGRAM2 page 26 Plays back the track in the order you want SHUFFLE2 page 28 Plays back the track in random order REPEAT2 page 29 Plays back all discs repeatedly the entire disc repeatedly or one title chapter track album file repeatedly A V SYNC2 page 45 Sets the delay time between the sou...

Страница 11: ... slides during a slide show MODE MP3 JPEG page 36 Selects the data type MP3 audio track AUDIO JPEG image file IMAGE or both AUTO to be played back KEY CONTROL1 page 69 Changes the key to suit your vocal range SCORE MODE1 page 72 Selects the difficulty level for scoring mode KARAOKE PON1 2 page 68 Enjoys karaoke with a stereo recorded disc even if it is a non karaoke disc by reducing the sound of t...

Страница 12: ... 15 and 16 to hook up your system using the supplied cords and accessories Getting Started Hooking up the system 2 5 1 4 3 3 AM loop antenna FM lead antenna Surround speaker Right Surround speaker Left Front speaker Right Front speaker Left Center speaker For MHC GN999D MHC GN999DS Unit Subwoofer ...

Страница 13: ...Getting Started 13GB For MHC GNZ88D 5 1 4 2 3 3 AM loop antenna FM lead antenna Surround speaker Right Surround speaker Left Front speaker Right Front speaker Left Center speaker Unit continued ...

Страница 14: ... For MHC GNZ77D For MHC GNZ55D 2 5 1 4 3 3 AM loop antenna FM lead antenna Front speaker Right Front speaker Left Unit 2 5 1 4 3 3 AM loop antenna FM lead antenna Front speaker Right Front speaker Left Unit ...

Страница 15: ...ound speakers MHC GNZ88D only Connect the speaker cords to the terminals on the center and surround speakers Subwoofer MHC GN999D MHC GN999DS only MHC GNZ88D MHC GNZ77D only If you have an optional subwoofer see Hooking up optional components on page 81 2 Connect the video input jack of your TV to the VIDEO OUT jack with the supplied video cord Example When using a TV Turn on the TV and select the...

Страница 16: ...ocal power line voltage Depending on the model the VOLTAGE SELECTOR may differ Saudi Arabian model 120 127V 5 Connect the power cord to a wall outlet The demonstration appears in the display When you press 1 the system turns on and the demonstration automatically ends If the supplied adaptor on the plug does not fit your wall outlet detach it from the plug only for models equipped with an adaptor ...

Страница 17: ...t Operating a Sony TV with the remote You can use the following buttons to operate a Sony TV These buttons have been marked in orange To use these buttons hold down TV before pressing the button you want For double digit number hold down TV and press then press the number For example hold down TV press then 2 and 5 for entering 25 Note If you do not use the remote for a long period of time remove ...

Страница 18: ...the speakers on page 53 1 Press 1 to turn on the system 2 Press TIMER MENU The hour indication flashes in the display 3 Press V or v repeatedly to set the hour 4 Press ENTER The minute indication flashes in the display 5 Press V or v repeatedly to set the minute 6 Press ENTER The clock starts functioning To adjust the clock 1 Press TIMER MENU PLAY SET flashes in the display 2 Press V or v repeated...

Страница 19: ...the TV screen 4 Press ENTER The LANGUAGE SETUP display appears on the TV screen 5 Press V or v repeatedly to select a language then press ENTER Tips The selected language is for OSD MENU and SUBTITLE The selectable language is different depending on the area The setting is selected and the SCREEN SETUP display appears on the TV screen 6 Press V or v repeatedly to select the setting that matches yo...

Страница 20: ...on the system for the first time or after performing RESET see To return the DVD setup to the default settings perform reset as follows on page 90 If you do not want to perform QUICK SETUP press CLEAR in step 3 The guide message will disappear from the TV screen If you want to change each setting individually see Using the DVD Setup Menu on page 49 THEATRE SYNC allows you to turn on your Sony TV a...

Страница 21: ...e signals page 81 You can output video signals from COMPONENT VIDEO OUT jacks in INTERLACE or PROGRESSIVE format Use the buttons on the unit for the operation 1 Press DVD 2 Hold down DVD and press DISPLAY repeatedly The display changes cyclically as follows P AUTO t P VIDEO t INTERLACE x P AUTO PROGRESSIVE AUTO Select this when your TV accepts progressive signals and the TV is connected to the COM...

Страница 22: ...n your TV naturally when the video output is in progressive format the progressive signals need to be converted to match your DVD VIDEO software Notes When you connect your TV to the COMPONENT VIDEO OUT jacks and play back video based software in progressive signal format Some sections of the image may appear unnatural due to the conversion process The image from VIDEO OUT and S VIDEO OUT jacks ar...

Страница 23: ... CD Graphics1 JPEG image files or DivX video files2 turn on your TV and select the video input Depending on the DVD VIDEO or VIDEO CD some operations may be different or restricted Refer to the operating instructions supplied with the disc 1 Latin American models only 2 MHC GN999D MHC GN999DS MHC GNZ88D MHC GNZ77D only Russian model only When playing a DVD VIDEO or DVD R DVD RW in VR mode When pla...

Страница 24: ...OOVE A B CD DISC MP3 Elapsed playing time Disc tray number Track number Disc presence indicator Disc playing indicator GROOVE A B DISC DVD Disc tray number Disc presence indicator Disc playing indicator Elapsed playing time To Do this Stop playback Press x Pause playback Press X Press X again or H or nN on the unit to resume playback Select a track1 chapter or video file Press or repeatedly during...

Страница 25: ... automatically and DVD is selected as the function except during Power Saving Mode This system memorizes the point where you stopped the disc so you can resume playback from that point Resume Play is not canceled when you turn off the system except for MP3 audio tracks JPEG image files and DivX video files Watch frame by frame Slow motion Play 8 Press SLOW or SLOW or or on the unit when playback i...

Страница 26: ... back from the beginning of the disc press x twice then press H or nN on the unit Resuming playback of the disc that has been played back Multi Disc Resume This system can store the point where you stopped the playback of the disc for up to 40 discs and resumes playback when you insert the same disc again If you store a playback resume point for the 41st disc the playback resume point for the firs...

Страница 27: ...hange a programmed step 1 Follow steps 1 to 3 of Creating your own program 2 Press V or v repeatedly to select the programmed step number you want to change Then press b 3 Follow step 5 of Creating your own program to program a new track To delete a programmed step 1 Follow steps 1 to 3 of Creating your own program 2 Press V or v repeatedly to select the programmed step number you want to delete T...

Страница 28: ...e playing order may differs 1 Press DISPLAY during playback The Control Menu appears on the TV screen 2 Press V or v repeatedly to select SHUFFLE then press ENTER The options for SHUFFLE appear on the TV screen 3 Press V or v repeatedly to select the setting you want x When playing a VIDEO CD or AUDIO CD TRACK all tracks on the current disc is played back randomly x When Program Play is activated ...

Страница 29: ...ress V or v repeatedly to select the setting you want The default setting is underlined x When playing a DVD VIDEO or DVD R DVD RW in VR mode OFF does not play back repeatedly ALL DISCS repeats all the titles on all the discs ONE DISC repeats all the titles on the current disc TITLE repeats the current title CHAPTER repeats the current chapter x When playing a VIDEO CD or AUDIO CD OFF does not pla...

Страница 30: ...the DISC 1 3 buttons on the unit to select another disc unless Repeat Play is set to ALL DISCS you turn off the system you change the function unless Repeat Play is set to ALL DISCS you perform CD Synchro Recording Tip You can also change the Repeat Play setting when playback is stopped Some DVD VIDEOs have menus to help you enjoy the DVD VIDEOs You can play back DVD VIDEOs using these menus on th...

Страница 31: ...re may differ depending on each disc 1 Press H or nN on the unit to start playing a VIDEO CD with PBC functions Version 2 0 The PBC menu appears on the TV screen 2 Press the numeric buttons to select the item number you want 3 Press ENTER 4 Continue playback according to the instructions on the menus to enjoy interactive playback Refer to the operating instructions supplied with the VIDEO CD as th...

Страница 32: ...s page 6 and Notes on Multi Session disc page 8 Playback order of MP3 audio tracks or JPEG image files The playback order of MP3 audio tracks or JPEG image files recorded on a DATA CD or DATA DVD is as follows x Structure of disc contents When you insert a DATA CD or DATA DVD and press H or nN on the unit the tracks or files are played back sequentially from 1 through 7 The files or tracks of the ...

Страница 33: ... time to start playback a disc recorded with complicated tree structure a disc recorded in Multi Session a disc to which data can be added non finalized disc When playing a DATA CD or DATA DVD containing both MP3 audio tracks and JPEG image files select MODE MP3 JPEG from the Control Menu after the disc s TOC reading is complete If you want to play back both MP3 audio tracks and JPEG image files s...

Страница 34: ...on the unit clockwise The first track of the next album is selected However you cannot select the previous album by pressing repeatedly or turning OPERATION DIAL on the unit counterclockwise repeatedly To select the previous album select the album from the album list To return to the album list display when the track list is displayed Press O RETURN To turn on or off the display of album list or t...

Страница 35: ... file To display the next or previous page of album list Press B or b repeatedly when the album list is displayed To display the next or previous JPEG image file Press B or b repeatedly during the slide show To play back the next album of JPEG image files You can select the next album by pressing b repeatedly until the last file of the current album then press b once The first file of the next alb...

Страница 36: ... Press DISPLAY The Control Menu appears on the TV screen 3 Press V or v repeatedly to select MODE MP3 JPEG then press ENTER The options for MODE MP3 JPEG appear on the TV screen The default setting is underlined AUTO play back both JPEG image files and MP3 audio tracks in the same album as a slide show with sound AUDIO MP3 play back MP3 audio tracks continuously IMAGE JPEG play back JPEG image fil...

Страница 37: ...can also change the slide show speed page 37 and effect page 37 while playing JPEG image files If you want to play back a slide show to the same audio track set the track to Repeat Play page 29 Specifying the slide show speed JPEG image files only When you play back JPEG image files as slide show you can specify the duration for an image to appear on the TV screen 1 Press DISPLAY repeatedly until ...

Страница 38: ...files that the system can play back see Notes on discs page 6 and Notes on Multi Session disc page 8 Notes The system may not play back a DivX video file when the file has been combined from two or more DivX video files The system cannot play back a DivX video file size of more than 720 width x 576 height 2GB Depending on the DivX video file the picture may be unclear or the sound may skip The sys...

Страница 39: ... OPERATION DIAL on the unit counterclockwise repeatedly To select the previous album select the album from the album list To return to the album list display when the file list is displayed Press O RETURN To turn on or off the display of album list or file list Press MENU repeatedly Notes Depending on the DivX video file the picture may pause or be unclear In this case it is recommended that you c...

Страница 40: ... x When playing a VIDEO CD or Super VCD with PBC function is activated SCENE x When playing an AUDIO CD TRACK x When playing a DATA CD or DATA DVD MP3 audio track ALBUM TRACK x When playing a DATA CD or DATA DVD JPEG image file ALBUM FILE x When playing a DATA CD or DATA DVD DivX video file ALBUM FILE Example when you select CHAPTER is selected refers to a number The number in parentheses indicate...

Страница 41: ...ther number Note Depending on the disc you cannot perform Time Search Tips When the Control Menu display is turned off you can search for a chapter DVD VIDEO and DVD R DVD RW in VR mode track AUDIO CD and VIDEO CD or file1 DivX video files in DATA CD and DATA DVD by pressing the numeric buttons and ENTER You can change the display to show elapsed playing time or remaining time For details see Chec...

Страница 42: ...ress v The next 9 chapters titles or tracks display on the TV screen To return to previous scene Press V repeatedly to select a scene at the top row then press V 3 Press V v B b to select a chapter title or track then press ENTER The system starts playback from the selected scene To cancel searching Press O RETURN or DISPLAY Notes Depending on the disc you may not be able to select some items Duri...

Страница 43: ...ack 2 2 MAIN SUB the main and sub sound of the audio track 2 x When playing a DivX video file The options for audio format differ depending on the DivX video files x When playing a VIDEO CD AUDIO CD or MP3 audio track STEREO the stereo sound 1 L the sound of the left channel monaural 2 R the sound of the right channel monaural x When playing a Super VCD 1 STEREO the stereo sound of the audio track...

Страница 44: ... the angle even if multi angles are recorded on the DVD VIDEO You can turn the subtitles on or off while playing a DVD VIDEO DVD R DVD RW in VR mode or DivX video files on which subtitles are recorded You can also change the language of the subtitles with DVD VIDEO DVD R DVD RW in VR mode or DivX video files on which multilingual subtitles are recorded For example you can select the language you w...

Страница 45: ... set playback restrictions so that the system will not play back inappropriate discs Parental Control You can limit the playback of some DVD VIDEOs according to a predetermined level such as the age of the users When a limited scene is played back that scene may be skipped or replaced with different scenes The same password is used for both Custom Parental Control and Parental Control Preventing p...

Страница 46: ...in To turn off the Custom Parental Control function 1 Follow steps 1 through 3 of Preventing playback of specific discs page 45 2 Press Vor vrepeatedly to select OFF t then press ENTER 3 Enter your 4 digit password using the numeric buttons then press ENTER To play back a disc for which Custom Parental Control is set 1 Insert the disc for which Custom Parental Control is set The CUSTOM PARENTAL CO...

Страница 47: ...ming the password appears on the TV screen x When you have already registered a password The display for entering the password appears on the TV screen If you make a mistake entering your password Press B repeatedly to delete the number you have entered then re enter your password again 4 Enter or re enter your 4 digit password using the numeric buttons then press ENTER The display for setting the...

Страница 48: ...on playback cannot be limited on this system Depending on the DVD VIDEO you may be asked to change the Parental Control level while playing the disc In this case enter your password then change the level If Resume Play is canceled the level returns to the original level Tip If you forget your password remove the disc and repeat steps 1 to 3 of Limiting playback for children page 47 When you are pr...

Страница 49: ... on each DVD Setup Menu item see pages 50 56 For an overall list of DVD setup menu items see pages 97 and 98 Note Playback settings stored in the disc take priority over the DVD setup menu settings Therefore some of the DVD setup menu settings may not be performed 1 Press DISPLAY when playback is stopped The Control Menu appears on the TV screen 2 Press V or v repeatedly to select SETUP then press...

Страница 50: ...changes according to the language you selected for the sound track Note When you select a language in MENU SUBTITLE or AUDIO that is not recorded on the DVD VIDEO one of the recorded language is automatically selected However depending on the disc the language may not be selected automatically Tip If you select OTHERS t in MENU SUBTITLE and AUDIO enter a language code from the Language code list p...

Страница 51: ...ing an AUDIO CD or MP3 audio tracks 16 9 Select this when you connect a wide screen TV or a TV with a wide mode function 4 3 LETTER BOX Select this when you connect a 4 3 screen TV This setting displays a wide picture with bands on the upper and lower portions of the screen 4 3 PAN SCAN Select this when you connect a 4 3 screen TV This setting displays the wide picture on the entire screen and cut...

Страница 52: ...e x PAUSE MODE DVD VIDEO and DVD R DVD RW in VR mode only Select the picture when playback is paused x TRACK SELECTION DVD VIDEO only Gives priority to the sound track which contains the highest number of channels when you play back a DVD VIDEO on which multiple audio formats PCM DTS MPEG audio or Dolby Digital format are recorded ON Set the black level of the output signal to the standard level O...

Страница 53: ...etails see Using the DVD Setup Menu page 49 The default settings are underlined Example To return to the default setting when changing a setting Press CLEAR before you press ENTER However note that you cannot return the setting of SIZE to default setting Note You cannot perform SPEAKER SETUP when you connect headphones or microphone to the unit For MHC GN999D MHC GN999DS MHC GNZ88D To obtain the b...

Страница 54: ... center speaker is not connected SURROUND BEHIND Select this if the surround speakers are located in section B SIDE Select this if the surround speakers are located in section A NONE Select this if the surround speakers are not connected SUBWOOFER YES MHC GN999D MHC GN999DS only Normally select this Be sure you have turned on the subwoofer by pressing SUB WOOFER ON OFF on the unit page 67 MHC GNZ8...

Страница 55: ...en you connect or disconnect the subwoofer change the setting for SUBWOOFER Since the front speaker setting is fixed you cannot change it Note When you change the setting the sound cuts off for a moment x LEVEL FRONT You can adjust the level of the front speakers and subwoofer as follows The items that are set to NONE in SIZE cannot be selected L 0 0 dB Set this between 6 0 dB and 0 0 dB in 1 0 dB...

Страница 56: ...om the subwoofer 7 Press V or v repeatedly to select LEVEL FRONT then press ENTER 8 Press V or v repeatedly to select the speaker then press ENTER The test tone is emitted from the selected speaker 9 Press V or v repeatedly to adjust the level from your listening position 10Press ENTER when you have finished making the adjustment 11Repeat steps 8 to 10 to adjust the speaker level for other speaker...

Страница 57: ...m starts scanning for a station Scanning stops automatically and AUTO disappears from the display when a station is tuned in TUNED lights up in the display When a FM stereo program is tuned in STEREO lights up in the display If TUNED does not light up and the scanning does not stop Set the frequency of the radio station you want as described in step 2 of Manual tuning preset 3 Press MENU MEMORY fl...

Страница 58: ...or 10 kHz for some areas Use the buttons on the unit for the operation 1 Press TUNER BAND repeatedly to select AM 2 Press 1 to turn off the system 3 Hold down ILLUMINATION and then press 1 to turn on the system AM 9K STEP or AM 10K STEP appears in the display When you change the interval all the AM preset stations are erased To reset the interval repeat the same procedure Note You cannot change th...

Страница 59: ...the numeric buttons to select the preset station you want then press ENTER Listening to a non preset radio station Manual Tuning 1 Press FUNCTION repeatedly to select TUNER FM or TUNER AM or press TUNER BAND on the unit repeatedly to select FM or AM 2 Press TUNING repeatedly to tune in the station you want Tips To improve broadcast reception adjust the supplied antennas or connect an external ante...

Страница 60: ...rted the corresponding presence indicator lights up in the display If you press TAPE A B on the unit while the system is turned off the system turns on automatically and TAPE A or TAPE B is selected as the function except during Power Saving Mode If you press H or nN on the unit when the TAPE A function is selected and there is no tape in deck A the system automatically switches to the TAPE B func...

Страница 61: ...ur favorite disc onto a tape on page 61 To stop recording Press x Notes You cannot listen to other sources while recording MHC GN999D MHC GN999DS MHC GNZ88D only When you press CD SYNC the sound field is automatically changed to LINK if the headphones are not connected HP 2CH if the headphones are connected MHC GNZ77D MHC GNZ55D only When you press CD SYNC the sound field is automatically changed ...

Страница 62: ...d a recordable tape into deck B 2 Press TAPE A B repeatedly to select TAPE B 3 Press nN repeatedly until the TAPE B reverse side indicator lights up Playback starts from the reverse side 4 Press x at the point you want to start recording 5 Do the same procedures as step 2 to 7 of Recording onto a tape manually on page 62 To stop recording Press x Notes MHC GN999D MHC GN999DS MHC GNZ88D only When y...

Страница 63: ... display if GROOVE ON is selected V GROOVE lights up in the display if V GROOVE ON is selected Use the buttons on the unit for the operation Press PRESET EQ repeatedly to select the preset effect you want Preset effect options To cancel the preset effect Press PRESET EQ repeatedly until FLAT appears in the display Note To store the user equalizer settings see Adjusting and storing the graphic equa...

Страница 64: ...lockwise or counterclockwise repeatedly to select a user equalizer number 1 3 you want to store the equalizer settings 7 Press EQ BAND MEMORY This setting is automatically stored as the user equalizer setting you selected in step 6 The previous setting stored at this memory location is erased and replaced by the new setting To cancel storing Turn OPERATION DIAL clockwise repeatedly in step 6 to se...

Страница 65: ...e not connected Sound field When the headphones are connected DVD MHC GN999D MHC GN999DS MHC GNZ88D only SBS MULTI y A F D AUTO y PRO LOGIC y PLII MOVIE y PLII MUSIC y V M DIM y LINK y 2CH STEREO MHC GN999D MHC GN999DS MHC GNZ88D only HP 2CH y HP VIRTUAL MHC GNZ77D MHC GNZ55D only 2CH STEREO y 2CH SURR y VIRTUAL A y VIRTUAL B MHC GNZ77D MHC GNZ55D only HP 2CH y HP SURR y HP VIRTUAL DVD And one of ...

Страница 66: ...he surround channels from the front channels x LINK SURR Reproduces the surround channels from the front channels with surround effect x 2CH STEREO Reproduces stereo output from multi channel sources such as DVD VIDEOs and DivX video files during DVD function The system outputs the original sound during functions other than DVD and during playback of stereo sources such as VIDEO CD AUDIO CD and MP...

Страница 67: ...VD RW in VR mode VIDEO CD AUDIO CD MP3 audio tracks and DivX video files only 1 Press FUNCTION repeatedly to select DVD or press DVD on the unit 2 Turn MIC 1 LEVEL or MIC 2 LEVEL on the unit to MIN to reduce the microphone volume Note MHC GNZ55D only Turn MIC LEVEL on the unit to MIN to reduce the microphone volume 3 Turn ECHO LEVEL on the unit to MIN to cancel the echo effect except for MHC GNZ55...

Страница 68: ...cted MHC GNZ77D MHC GNZ55D only When you turn on the Karaoke Mode the sound field is automatically changed to 2CH STEREO if the headphones are not connected HP 2CH if the headphones are connected Singing karaoke by reducing the vocal DVD VIDEO DVD R DVD RW in VR mode VIDEO CD AUDIO CD MP3 audio tracks and DivX video files only You can enjoy karaoke with any disc even if it is not a karaoke or mult...

Страница 69: ...ly changed to default setting when you turn off the system change the function connect the headphones turn on the test tone turn off the Karaoke Mode open the disc tray change the disc perform Lock Search or Slow motion Play change the track or title Depending on the disc you may not be able to do the above operation To cancel the KEY CONTROL effect select 3 in step 3 Turning on the vocals When Ka...

Страница 70: ...at 5 1 channel Speaker output in Dolby Digital Karaoke format You can check the audio information by pressing AUDIO page 43 When playing a Dolby Digital Karaoke disc 9 appears at the current audio format page 43 Example Selecting the vocals After setting VOCAL to ON you can change the vocal type 1 Press DISPLAY once or twice when Karaoke Mode is turned on while playing a disc The Control Menu appe...

Страница 71: ...ice when Karaoke Mode is turned on while playing a disc The Control Menu appears on the TV screen 2 Press V or v repeatedly to select GUIDE MELODY then press ENTER The options for GUIDE MELODY appear on the TV screen 3 Press V or v repeatedly to select ON then press ENTER The guide melody is turned on Notes To turn off the guide melody select OFF in step 3 When playing a DVD VIDEO the function onl...

Страница 72: ...to 99 Notes The highest score is reset when the system is turned off The score calculating function may be canceled when certain buttons are pressed In some cases you may not be able to use the scoring mode Tip The SCORE MODE setting is automatically changed to NORMAL when the system is turned off You can mix the sound from the microphone singing or speaking with the music source and record it ont...

Страница 73: ...hed Turn MIC 1 LEVEL or MIC 2 LEVEL to MIN and disconnect the microphone from MIC 1 or MIC 2 jack MHC GNZ55D only Turn MIC LEVEL to MIN and disconnect the microphone from MIC jack Notes MHC GN999D MHC GN999DS MHC GNZ88D only When you connect an optional microphone during DVD function the sound field is automatically changed to LINK if the headphones are not connected HP 2CH if the headphones are c...

Страница 74: ...ET then press ENTER ON appears and the hour indication flashes in the display 5 Set the time to start playback Press V or v repeatedly to set the hour then press ENTER The minute indication flashes in the display Press V or v repeatedly to set the minute then press ENTER OFF appears and the hour indication flashes in the display 6 Set the time to stop playback following the same procedure as step ...

Страница 75: ...n the display 5 Set the time to stop recording following the same procedure as step 4 REC followed by the start time the stop time and the preset radio station to be recorded e g FM5 TAPE appears in the display before the original display returns 6 Load a recordable tape into deck B Make sure the tape is in the front side 7 Press DIRECTION on the unit repeatedly to select g to record on one side o...

Страница 76: ...AY repeatedly while the system is turned off Each time you press the button the display changes cyclically as follows Demonstration1 t Clock2 t No display Power Saving Mode 1 The display changes and the indicators flash even when the system is turned off 2 appears in the display if you have not set the clock Note You cannot perform the following operations during Power Saving Mode Setting the cloc...

Страница 77: ... playing a DVD VIDEO or DVD R DVD RW in VR mode When the menu or the title without a chapter is played back Elapsed playing time of the menu or the current title t Title of the disc2 When a chapter other than above condition is played back Elapsed playing time of the current title t Remaining time of the current title t Elapsed playing time of the current chapter t Remaining time of the current ch...

Страница 78: ...le of the file 6 The current track number and current index number is displayed for 2 seconds before the display returns to elapsed playing time when you press TIME TEXT during display of the title of disc 7 The current scene number is displayed for 2 seconds before the display returns to elapsed playing time when you press TIME TEXT during display of title of the disc Notes If you play back a dis...

Страница 79: ...D T Elapsed playing time of the current track T Remaining time of the current track D Elapsed playing time of the current disc D Remaining time of the current disc Title of disc1 x When playing MP3 audio tracks on a DATA CD or DATA DVD T Elapsed playing time of the current track Title of the track and album x When playing JPEG image files on a DATA CD or DATA DVD Title of the album xWhen playing D...

Страница 80: ...hangeable Image File Format is a digital camera image format defined by the Japan Electronics Information Technology Industries Association JEITA Notes If there is no date information or the data is damaged on the disc the system cannot display the date information The date information format varies depending on the area Checking the date informationofJPEGimage files 1 8 1 2 0 01 01 2003 DATA CD J...

Страница 81: ...u can connect optional components Refer to the operating instructions provided with each component Front panel 1 Except for MHC GNZ55D Optional Components Hooking up optional components 1 1 VCR From the audio and video output jacks of the VCR continued ...

Страница 82: ...he audio output jacks of the TV or satellite tuner TV or satellite tuner To the component video input jacks of the TV or projector TV Subwoofer TV TV or Projector To the video input jack of the TV To the S video input jack of the TV D LIGHT SYNC Controller DLS 1 Amplifier To the audio input jack of the optional subwoofer For MHC GN999D MHC GN999DS MHC GNZ88D MHC GNZ77D For MHC GNZ55D ...

Страница 83: ... or disconnect microphones or headphones the sound cuts off for a moment E COMPONENT VIDEO OUT jacks Except for MHC GNZ55D Use component video cords not supplied to connect the component video input jacks of the TV or projector to these jacks If your TV accept progressive format signals you must use this connection and set to progressive format page 21 You can enjoy higher quality video images Not...

Страница 84: ...T function Hold down TV SAT and press 1 while the system is turned on Release 1 first then release TV SAT The system switches the function from TV to SAT or vice versa Note If the sound is distorted or too loud when TV is selected change the function to SAT Listening to a connected VCR 1 Connect the audio and video cords See Hooking up optional components on page 81 2 Press VIDEO on the unit Start...

Страница 85: ...OLUME on the unit clockwise or turn MIC LEVEL MHC GNZ55D only MIC 1 LEVEL or MIC 2 LEVEL on the unit clockwise to increase the microphone volume Make sure the microphone is connected to the MIC MHC GNZ55D only MIC 1 or MIC 2 jack correctly There is severe hum or noise A TV or VCR is placed too close to the unit Move the unit away from the TV or VCR Move the unit away from the source of noise Conne...

Страница 86: ... Make sure that SUBWOOFER is set to YES page 54 or 55 MHC GN999D MHC GN999DS only Make sure you have pressed SUB WOOFER ON OFF on the unit to turn on the subwoofer There is no sound from the surround speaker 2 Set the surround speaker level to the appropriate level The software being played back has limited sound effects Check the volume with the test tone page 56 Check that the surround speakers ...

Страница 87: ...lied with the disc The MP3 audio track cannot be played back The DATA CD is not recorded in an MP3 format that conforms to ISO 9660 Level 1 Level 2 or Joliet in expansion format The DATA DVD is not recorded in an MP3 format that conforms to UDF Universal Disk Format The MP3 audio track does not have the extension MP3 The data is not stored in MP3 format The MP3 audio tracks in format other than MP...

Страница 88: ...monaural or stereo even if the sound track is recorded in Dolby Digital or MPEG audio format The sound loses stereo effect when you play back an AUDIO CD VIDEO CD MP3 audio track DivX video file or DVD VIDEO Unplug the microphone or press KARAOKE MODE repeatedly until m disappears from the display Make sure the system is connected properly When you press m or M Operation not Possible appears on th...

Страница 89: ... are not recorded on the DVD VIDEO being played back The DVD VIDEO prohibits changing the angles Except for MHC GNZ55D Tuner There is severe hum or noise TUNED or STEREO flashes in the display Set the proper band and frequency page 57 Connect the antenna properly page 16 Find a place and an orientation that provide good reception then set up the antenna again If you cannot obtain good reception we...

Страница 90: ...ess V or v repeatedly to select SETUP then press ENTER 3 Press V or v repeatedly to select RESET then press ENTER 4 Press V or v repeatedly to select YES then press ENTER It takes a few seconds to complete Do not press 1 when resetting the system Except for Parental Control settings Notes MHC GN999D MHC GN999DS only Turn off the subwoofer before you reset the system MHC GNZ88D MHC GNZ77D only If y...

Страница 91: ...iles The MP3 audio track has the extension MP3 but it is not in MP3 format The JPEG image file has the extension JPG or JPEG but it is not in JPEG format The DivX video file has the extension AVI or DIVX but it is not in DivX format PASSWORD Custom Parental Control or Parental Control is set Tape NO TAB You cannot record the tape because the tab has been removed from the tape NO TAPE There is no t...

Страница 92: ...id burning yourself do not touch the cabinet To prevent a malfunction do not cover the ventilation hole for the cooling fan In case color irregularity is observed on a nearby TV screen With the magnetically shielded type of speakers the speakers can be installed near a TV set However color irregularity may still be observed on the TV screen depending on the type of your TV set If color irregularit...

Страница 93: ...of abrasive pad scouring powder or solvent such as thinner benzene or alcohol To save a tape permanently To prevent a tape from being accidentally recorded over break off the tape tab from side A or B as illustrated If you later want to reuse the tape for recording cover the broken tab with adhesive tape Before placing a tape into the tape deck Take up any slack in the tape deck Otherwise the tape...

Страница 94: ...IC MHC GNZ55D only MIC 1 MIC 2 phone jack Sensitivity 1 mV impedance 10 kilohms Outputs VIDEO OUT phono jack Max output level 1 Vp p unbalanced Sync negative load impedance 75 ohms COMPONENT VIDEO OUT Except for MHC GNZ55D Y 1 Vp p 75 ohms PB CB 0 7 Vp p 75 ohms PR CR 0 7 Vp p 75 ohms S VIDEO OUT 4 pin mini DIN jack Except for MHC GNZ55D Y 1 Vp p unbalanced Sync negative C 0 286 Vp p load impedanc...

Страница 95: ...minal impedance 6 ohms Dimensions w h d Approx 281 x 417 x 310 5 mm Mass Approx 7 2 kg net per speaker Surround speaker SS RSX999D Speaker system Full range bass reflex type Speaker units Full range 8 cm cone type x 2 Nominal impedance 16 ohms Dimensions w h d Approx 268 x 107 x 117 mm Mass Approx 1 2 kg net per speaker Center speaker SS CT999D Speaker system Full range bass reflex type magnetical...

Страница 96: ...exican model 127 V AC 60 Hz Saudi Arabian model 120 127 V or 220 240 V AC 50 60 Hz Adjustable with voltage selector Thai model 220 V AC 50 60 Hz Other models 120 V or 220 240 V AC 50 60 Hz Adjustable with voltage selector Power consumption MHC GN999D MHC GN999DS 160 W MHC GNZ88D 100 W MHC GNZ77D 75 W MHC GNZ55D 45 W Dimensions w h d Approx HCD GN999D HCD GNZ88D HCD GNZ77D HCD GNZ55D 280 x 326 x 38...

Страница 97: ...isplayed language list AUDIO Select the language you want to use from the displayed language list SUBTITLE Select the language you want to use from the displayed language list TV TYPE1 16 9 4 3 LETTER BOX 4 3 PAN SCAN COLOR SYSTEM VIDEO CD 2 AUTO PAL NTSC SCREEN SAVER ON OFF BACKGROUND JACKET PICTURE GRAPHICS BLUE BLACK BLACK LEVEL3 ON OFF BLACK LEVEL COMPONENT OUT 3 OFF ON 4 3 OUTPUT4 FULL NORMAL...

Страница 98: ...model only 7 MHC GN999D MHC GN999DS only 8 MHC GNZ88D MHC GNZ77D only SIZE FRONT YES CENTER5 YES NONE SURROUND5 BEHIND SIDE NONE SUBWOOFER YES NONE DISTANCE5 FRONT 3 0m 1 0 m 7 0 m CENTER 3 0m 0 0 m 7 0 m SURROUND 3 0m 0 0 m 7 0 m LEVEL FRONT L 0 0 dB 6 0 dB 0 0 dB R 0 0 dB 6 0 dB 0 0 dB CENTER5 0 0 dB 6 0 dB 6 0 dB SUBWOOFER 3 0 dB7 0 0 dB8 6 0 dB 6 0 dB 7 10 0 dB 10 0 dB 8 LEVEL SURROUND 5 L 0 0...

Страница 99: ... 1253 Icelandic 1408 Oriya 1535 Tonga 1067 Tibetan 1254 Italian 1417 Punjabi 1538 Turkish 1070 Breton 1257 Hebrew 1428 Polish 1539 Tsonga 1079 Catalan 1261 Japanese 1435 Pashto Pushto 1540 Tatar 1093 Corsican 1269 Yiddish 1436 Portuguese 1543 Twi 1097 Czech 1283 Javanese 1463 Quechua 1557 Ukrainian 1103 Welsh 1287 Georgian 1481 Rhaeto Romance 1564 Urdu 1105 Danish 1297 Kazakh 1482 Kirundi 1572 Uzb...

Страница 100: ...er that extracts the spatial properties of the original recording without adding any new sounds or tonal colorations Movie mode The Movie mode is for use with stereo television shows and all the programmes encoded in Dolby Surround The result is enhanced sound field directionality that approaches the quality of discrete 5 1 channel sound Music mode The Music mode is for use with any stereo music r...

Страница 101: ...o Recording mode allow the contents to be programmed or edited DVD RW A DVD RW plus RW is a recordable and rewritable disc DVD RWs use a recording format that is comparable to the DVD VIDEO format File A JPEG image file or a DivX video file recorded on a DATA CD or DATA DVD File is an exclusive definiton for this system A single file consists of a single image or movie Film based software Video ba...

Страница 102: ...k in addition to the video playback function of Version 1 1 discs Moreover you can play high resolution still pictures if they are included on the disc Progressive format sequential scanning Compared to the Interlace format that alternately shows every other line of an image field to create one frame the Progressive format shows the entire image at once as a single frame This means that while the ...

Страница 103: ... CDs also contain compact audio data Sound outside the range of human hearing are compressed while the sounds we can hear are not compressed VIDEO CDs can hold 6 times the audio information of conventional AUDIO CDs There are 2 versions of VIDEO CDs Version 1 1 You can play back only moving pictures and sounds Version 2 0 You can play back high resolution still pictures and enjoy PBC functions Thi...

Страница 104: ... ON OFF3 ej 67 TAPE A B ef 60 62 72 75 76 Tape lid qj wk 60 TUNER BAND eg 57 59 76 TUNING qh 57 59 TV SAT1 ed 62 76 84 86 VIDEO1 es 62 76 84 VIDEO INPUT1 jacks wa 83 94 1 on standby ek 16 18 58 84 90 Z OPEN CLOSE 9 18 19 23 25 86 nN play qs 24 27 31 33 35 36 38 48 51 60 62 73 75 85 87 OPERATION DIAL go backward forward 1 24 32 34 39 59 62 64 65 mM rewind fast forward qh 24 60 88 qh 25 X pause qd 1...

Страница 105: ...Additional Information 105GB Top view Front view 1 234 5 6 9 8 7 q qa qs qd qf qg qh qj qk wa ql ws wf e wl wk wj ea es ed ef eg eh ej ek el r w wd whwg continued ...

Страница 106: ...O2 eg 17 TV VOL 1 2 qf 17 TV 1 on standby 2 2 17 VOLUME 1 qf 24 56 74 77 85 1 on standby 2 16 18 74 75 85 x stop qk 24 26 32 34 36 39 45 58 60 75 86 87 X pause ql 24 60 H1 play wa 24 27 31 33 35 36 38 48 51 60 75 85 87 go forward qh 21 24 32 34 39 go backward wd 24 32 34 39 M fast forward qj 24 60 88 m rewind ws 24 60 88 V v B b wh 18 19 27 31 33 42 45 50 56 65 68 72 74 76 90 10 02 wl 2 wk 17 O RE...

Страница 107: ......

Страница 108: ...Sony Corporation Printed in China ...

Отзывы: