background image

26

(Only when playing version 1.0/1.1, or 
version 2.0 without PBC function.)

• T  **:**

Elapsed playback time of the current track

• T-**:**

Remaining time of the current track

• D  **:**

Elapsed playback time of the current disc

• D-**:**

Remaining time of the current disc

JPEG playback

• Album  number/Total
• Image number/Total

Xvid/MPEG-4 playback

• T  **:**

Elapsed playback time of the current file

• Album  (folder)  number/Total
• File number/Total

Checking text information

The text information (album name, image 
name, etc.) of JPEG/Xvid/MPEG-4 files can 
be checked.

* “NO TEXT” appears if there is no text 

information.

Text information differs depending on the 
format as follows.

JPEG playback

• Album name (when the album number is 

displayed)

• Image name (when the image number is 

displayed)

Xvid/MPEG-4 playback

• Album (folder) name (when the album 

(folder) number is displayed)

• File name (when the file number is 

displayed)

Configuring audio 
settings

Note

Discs in DTS format are not supported. The 
sound is not output if the DTS format is selected.

Changing the audio 
language/format

For DVD, the audio language can be 
changed if the disc is recorded with 
multilingual tracks. For DVD, you can 
change the audio format when playing a 
disc recorded in multiple audio formats 
(e.g., Dolby Digital).

1

During playback, press 




repeatedly until the desired audio 
language/format appears.

* When playing Xvid, audio format/channel 

(e.g., “MP3”) appears.

The audio language switches among the 
available languages.
When the 4-digit input prompt appears, 
input the language code (page 62) for the 
desired language.
When the same language is displayed 
two or more times, the disc is recorded 
in multiple audio formats.

Changing the audio channel 


When playing VCD/CD/MP3/WMA/AAC/
MPEG-4/Xvid, you can select the right or 
left channel sound to listen through both 
right and left speakers.

037(325)

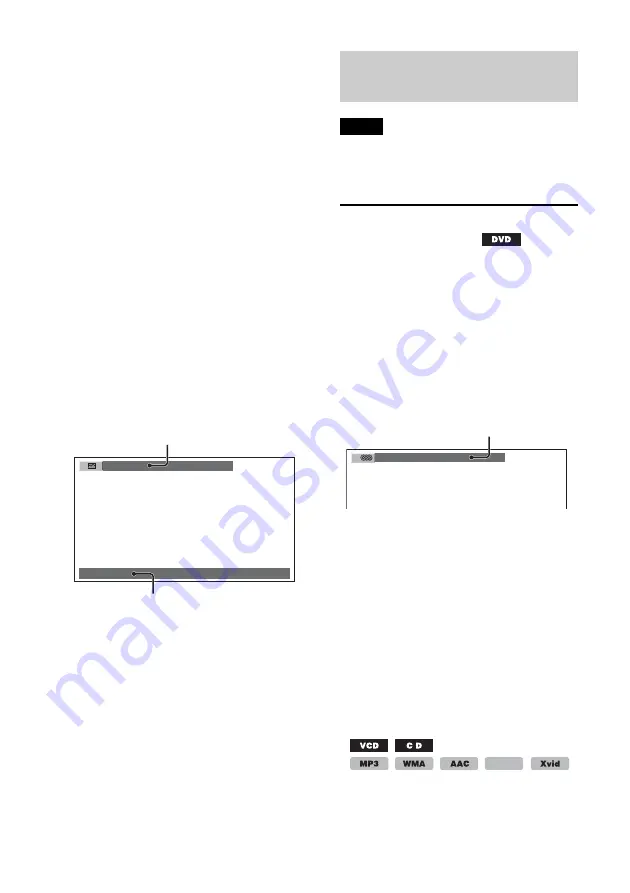
Image name

Album/image/folder/file number

Text information

*

1:ENGLISH  Dolby D

Audio language/format

*

MPEG-4

Содержание MEX-DV1700U

Страница 1: ...The model and serial numbers are located on the bottom of the unit Record the serial number in the space provided below Refer to these numbers whenever you call upon your Sony dealer regarding this product Model No MEX DV1707U DV1700U Serial No Operating Instructions US ...

Страница 2: ...t does cause harmful interference to radio or television reception which can be determined by turning the equipment off and on the user is encouraged to try to correct the interference by one or more of the following measures Reorient or relocate the receiving antenna Increase the separation between the equipment and receiver Connect the equipment into an outlet on a circuit different from that to...

Страница 3: ...moving during video playback pictures from the VIDEO OUT automatically disappear after displaying the following caution The pictures on the screen are turned off but audio source can be heard Do not operate the unit or watch the monitor while driving Video blocked for your safety US and foreign patents licensed from Dolby Laboratories Manufactured under license from Dolby Laboratories Dolby and th...

Страница 4: ...4 PROMOTIONAL INTERNAL AND COMMERCIAL USES AND LICENSING MAY BE OBTAINED FROM MPEG LA LLC SEE HTTP WWW MPEGLA COM ...

Страница 5: ...u 24 Viewing time text information of the disc 25 Configuring audio settings 26 Magnifying pictures 28 Adjusting the picture quality Picture EQ 28 Repeat and shuffle play 30 Direct search play 31 Listing up tracks images video files Quick BrowZer 32 Viewing audio disc information 33 Advanced Operations USB Devices 33 Display items during playback 33 Repeat and shuffle play 34 Searching a track by ...

Страница 6: ...41 System setup 45 Using Optional Equipment 50 Auxiliary equipment 50 SiriusXM tuner U S models only 51 Additional Information 52 Precautions 52 Maintenance 55 Specifications 56 Troubleshooting 57 Language code area code list 62 ...

Страница 7: ...s and their file types Available functions differ depending on the format regardless of disc type The format symbols below appear next to the description of functions available for that format Tip For details on compression formats see page 54 Note Even compatible discs may not be playable on this unit depending on their recorded condition Disc symbol in manual Disc format VIDEO DVD VIDEO DVD R 1 ...

Страница 8: ...o skip a chapter track scene file Press and hold momentarily to reverse fast forward disc Press and hold to reverse fast forward track Radio Press to tune in stations automatically Press and hold to find a station manually ZAP button page 34 To enter the ZAPPIN mode Control dial SOUND ENTER button page 12 20 21 34 Rotate to adjust the volume adjust a setting Press to open the sound menu apply a se...

Страница 9: ... or folder move the cursor Press and hold to skip albums or folders continuously Play Pause page 14 15 16 17 23 Radio Press to receive stored stations Press and hold to store stations DSPL display SCRL scroll button page 25 33 50 Press to change display items Press and hold to scroll the display item AUX input jack page 50 To connect a portable audio video 6 device 1 If a SiriusXM tuner is connect...

Страница 10: ...ND button page 36 38 To open the sound menu VISUAL SETUP button page 23 27 28 29 30 31 38 41 To open the play mode visual setup menu SYSTEM SETUP button page 21 28 39 40 45 50 51 To open the system setup menu BACK button page 23 24 32 36 39 41 To return to the previous display move to the upper level exit the system setup menu or sound menu return to the menu on a VCD 1 1 2 3 4 5 7 8 6 qf qj qg qh...

Страница 11: ... menu on a DVD page 15 To open the menu on a disc BROWSE button page 20 32 To enter the Quick BrowZer mode 3 cursor ENTER buttons To move the cursor and apply a setting SRC source button 4 page 13 18 19 21 51 To turn on change the source Radio Disc USB AUX MODE button 4 page 13 19 21 35 36 50 Press to select the radio band FM AM select an auxiliary device connected to the AUX input jack front or A...

Страница 12: ...position is front left or select FRONT R if front right The clock display appears when the setting is complete With the card remote commander Press instead of rotating the control dial press instead of pressing the control dial Detaching the front panel You can detach the front panel of this unit to prevent theft 1 Press and hold The unit is turned off 2 Press the front panel release button then p...

Страница 13: ...ntil TUNER appears 2 Press repeatedly until the desired band FM1 FM2 FM3 AM1 or AM2 appears 3 Perform tuning To tune automatically Press Scanning stops when the unit receives a station Repeat this procedure until the desired station is received To tune manually Press and hold to locate the approximate frequency then press repeatedly to fine adjust to the desired frequency m M MODE SRC SOURCE OFF S...

Страница 14: ...are called titles When you play a DVD that contains several titles you can select a desired title using the DVD s top menu For DVDs that allow you to select items such as subtitle sound language s select these items using the DVD menu 1 Turn on your monitor then select the input source on your monitor corresponding to this unit 2 Insert the disc label side up Playback starts automatically If playb...

Страница 15: ...or then press to confirm Remote number buttons to move the cursor then press to confirm change audio language format channel page 26 1 Remote repeatedly until the desired item appears turn off change the subtitle language 1 Remote repeatedly until the desired item appears 2 change the viewing angle 1 Remote repeatedly until the desired angle number appears skip an album folder 3 Main unit ALBUM AL...

Страница 16: ...ect LIST UP VIDEO FILES then select the desired file page 32 Playing audio discs Depending on the disc some operations may be different or restricted Refer to the operating instructions supplied with your disc To stop playback Press for 1 second With the card remote commander press To eject the disc Press Note Discs in DTS format are not supported The sound is not output if the DTS format is selec...

Страница 17: ...vid avi and MPEG 4 mp4 Backup of data in a USB device is recommended Notes Connect the USB device after starting the engine Depending on the USB device malfunction or damage may occur if it is connected before starting the engine A large sized file may take time to start playing back To Press pause resume play after pause skip a track reverse fast forward track and hold skip an album Main unit ALB...

Страница 18: ...see Searching a track by listening to track passages ZAPPIN on page 34 Notes Do not use USB devices so large or heavy that they may fall down due to vibration or cause a loose connection Do not detach the front panel during playback of the USB device otherwise the data may be damaged This unit cannot recognize USB devices via a USB hub If a USB device contains multiple file types only the selected...

Страница 19: ...ts from the item last played If an iPod is already connected to start playback press repeatedly until USB appears IPD appears when iPod is recognized 1 To play videos of iPod with video use of the RC 202IPV is required 2 May not appear in the case of an iPod touch or iPhone being connected or that iPod was last played back using passenger control 2 Press repeatedly until the desired play mode appe...

Страница 20: ...F do not function About the Quick BrowZer function The Quick BrowZer function allows you to easily search for an item in an iPod containing many categories tracks For details see Listing up tracks images video files Quick BrowZer on page 32 Caution for iPhone When you connect an iPhone via USB telephone volume is controlled by iPhone itself In order to avoid sudden loud sound after a call do not i...

Страница 21: ...utton indication appears on the main unit Receiving stored stations 1 Select the band then press a number button to RDS FM stations with Radio Data System RDS service send inaudible digital information along with the regular radio program signal RDS services This unit automatically provides RDS services as follows Notes Depending on the country region not all RDS functions may be available RDS wil...

Страница 22: ... Blues SOFT R B Soft Rhythm and Blues LANGUAGE Foreign Language REL MUSC Religious Music REL TALK Religious Talk PERSNLTY Personality PUBLIC Public COLLEGE College WEATHER Weather NEWS News AFFAIRS Current Affairs INFO Information SPORT Sports EDUCATE Education DRAMA Drama CULTURE Culture SCIENCE Science VARIED Varied POP M Pop Music ROCK M Rock Music EASY M M O R Music LIGHT M Light classical CLA...

Страница 23: ...yback select LIST UP IMAGE FILES then select the desired file page 32 Tip You can also select a file to play using a list Quick BrowZer page 32 Using PBC functions Playback control The PBC menu assists your operation interactively while a PBC compatible VCD is played 1 Press while the unit is off The visual setup menu appears 2 Press to select CUSTOM SETUP then press The custom setup items appear ...

Страница 24: ...1 E g when playing a DVD Play mode menu items For details see List of play mode menu items on page 24 DVD Title number Total VCD Track number Total 1 JPEG Album number Total Xvid MPEG 4 Album folder number Total DVD Chapter number Total JPEG Image number Total Xvid MPEG 4 File number Total Elapsed playback time 2 Format Playback status PLAY PAUSE etc Current setting Options Selected item Selected ...

Страница 25: ...Elapsed playback time of the current title T Remaining time of the current title C Elapsed playback time of the current chapter C Remaining time of the current chapter VCD playback CHAPTER 31 To select a chapter to play IMAGE 31 To select an image to display FILE 31 To select a video file to play TIME 31 To check the elapsed playback time input time code AUDIO 15 26 To change the audio language fo...

Страница 26: ...displayed Configuring audio settings Note Discs in DTS format are not supported The sound is not output if the DTS format is selected Changing the audio language format For DVD the audio language can be changed if the disc is recorded with multilingual tracks For DVD you can change the audio format when playing a disc recorded in multiple audio formats e g Dolby Digital 1 During playback press rep...

Страница 27: ...tters in the program format display represent the following sound components and its position Front left Front right Center Rear left Rear right Rear monaural The rear component of the Dolby Surround processed signal and the Dolby Digital signal Low Frequency Effect signal The program format name and channel numbers appear as follow Example Dolby Digital 5 1 ch To hide the play mode menu press Adj...

Страница 28: ...e menu appears 2 Press to select CENTER ZOOM then press The current option appears 3 Press to select the desired option 1 1 6 then press The picture may become grainy The picture is magnified To hide the play mode menu press To scroll the picture press To restore the original scale select 1 in step 3 Notes Depending on the disc you may not be able to change the magnification When you resume playba...

Страница 29: ...u can store adjustments for both LIGHT ON and LIGHT OFF settings 1 During playback press The play mode menu appears 2 Press to select PICTURE EQ then press The current option appears 3 Press to select CUSTOM then press 4 Press to select the picture tone then press to adjust the level 5 Press To hide the play mode menu press NORMAL Normal picture quality CUSTOM User adjustable settings page 29 NIGH...

Страница 30: ...y will be canceled Repeat shuffle play cannot be set in the disc s menu top menu Setting from the play mode menu 1 During playback press The play mode menu appears Disc format Options OFF CHAPTER Repeats the current chapter TITLE Repeats the current title 1 OFF TRACK Repeats the current track OFF TRACK Repeats the current track ALBUM Repeats the current album OFF IMAGE Repeats the current image AL...

Страница 31: ...earch items differ depending on the disc format as follows Available only when playing VCD without PBC function 1 During playback press The play mode menu appears PLAY DVD VIDEO 12 67 018 034 T 1 35 55 OFF CHAPTER TITLE OFF MPEG 4 Disc Format Items TITLE Starts playing from a selected title CHAPTER Starts playing from a selected chapter TIME Starts playing from the point determined by the input ti...

Страница 32: ...press To move to upper level press 2 Press to select the desired item then press Playback starts With the main unit Rotate the control dial instead of pressing press instead of press the control dial instead of Selecting a file type If the disc contains multiple file types only the selected file type audio video image can be played The playback priority order of file type is initially set to audio...

Страница 33: ... list Quick BrowZer page 32 AdvancedOperations USB Devices Display items during playback Source Track name Artist name Album number Album name Track number Elapsed playing time Clock Album number is displayed only when the album is changed To change display items press For details on display items on the monitor see Viewing audio disc information on page 33 Notes Displayed items will differ depend...

Страница 34: ...ring playback After ZAPPIN appears in the display playback starts from a passage of the next track The passage is played for the set time and a beep sounds before the next passage starts 2 Press the control dial or when a track you want to listen is played back The track that you select returns to normal play mode from the beginning To search a track by ZAPPIN mode again repeat steps 1 and 2 Tips ...

Страница 35: ...RENTAL TV SHOW MUSIC VIDEO PLAYLIST VIDEO PODCAST May not appear depending on iPod setting Skipping albums podcasts genres playlists and artists Repeat and shuffle play 1 During playback press REP or SHUF on the main unit repeatedly until the desired option appears For audio playback A B To Press skip Main unit ALBUM ALBUM skip continuously Main unit and hold ALBUM ALBUM Select To play TRACK track...

Страница 36: ...ur preference 1 During reception playback press repeatedly until the desired setting item appears on the main unit 2 Press to adjust the level or select the desired option 3 Press With the main unit Press the control dial instead of rotate the control dial instead of pressing The setting items in the sound menu are indicated below Follow the page reference for details Select To play TRACK track re...

Страница 37: ... 49 to rear speakers This function allows rear speakers to work as a subwoofer even if it is not connected To set RBE press repeatedly until RBE appears then select the desired mode For details on this procedure see Adjusting the sound characteristics SOUND on page 36 Optimizing sound for the listening position Intelligent Time Alignment The unit can change the localization of sound by delaying th...

Страница 38: ...ed and REAR SUB is set to SUB OUT page 46 The listening position is set to FRONT L FRONT R FRONT or ALL page 37 The setting is configurable both from the sound menu page 36 and the visual setup menu page 41 By the sound menu Press repeatedly until POS SUB appears then select the subwoofer position For details on this procedure see Adjusting the sound characteristics SOUND on page 36 By the visual ...

Страница 39: ...distance is adjustable in 2 cm 13 16 in steps between 0 and 400 cm 0 and 13 1 10 ft 6 Press The setting is complete To set the other speakers repeat step 4 and 5 To hide the system setup display press With the main unit Press and hold the control dial instead of pressing rotate the control dial instead of pressing press the control dial instead of By the visual setup menu 1 From the visual setup m...

Страница 40: ...the control dial instead of pressing rotate the control dial instead of pressing press instead of press the control dial instead of Adjusting the speaker volume You can adjust the volume of each connected speaker 1 Press while the unit is off The system setup item appears on the main unit 2 Press to select SP SETUP then press 3 Press to select LEVEL ADJ 4 Adjust the volume of each speaker To adjus...

Страница 41: ... according to the disc RESET page 45 Resets all setting items Basic operation of visual setup You can set items in the menu by the following procedure E g when setting the aspect ratio to 4 3 PAN SCAN 1 Press while the unit is off The visual setup menu appears 2 Press to select DISPLAY SETUP then press The display setup items appear 3 Press to select MONITOR TYPE then press The options appear 4 Pr...

Страница 42: ...IO To change the soundtrack language SUBTITLE To change the subtitle language recorded on the disc Item Option Purpose MONITOR TYPE Selects an aspect ratio suitable for the connected monitor 16 9 To display the wide picture Suitable when connecting to a wide screen monitor or a monitor with a wide mode function 4 3 LETTER BOX To display a wide picture with bands on the upper and lower positions of...

Страница 43: ...y when the illumination control lead is connected LIGHT ON To show the night time use options LIGHT OFF To show the day time use options Item Option Purpose SLIDE SHOW TIME 5 sec 10 sec 20 sec 40 sec 60 sec To select the slide show interval FIXED To deactivate the slide show MULTI DISC RESUME ON To store the resume settings in memory for up to 5 discs OFF To not store the resume settings in memory...

Страница 44: ... DVD conforming to Audio DRC Dynamic Range Control STANDARD To select the standard setting WIDE RANGE To obtain the feeling of being at a live performance POSITION page 37 Sets the listening position to obtain the feeling of being in the center of the sound field wherever you sit in the car OFF To not set the listening position FRONT To set to center front ALL To set to the center of your car FRON...

Страница 45: ...age 48 R M Receive mode settings page 48 SND Sound settings page 49 Basic operation of system setup You can set items in the menu by the following procedure E g when setting the demonstration 1 Press while the unit is off The system setup item appears on the main unit 2 Press to select DEMO then press The option appears 3 Press to select ON or OFF then The setting is complete To hide the system se...

Страница 46: ...or PAL To set to PAL Except for U S models Unit off NTSC To set to NTSC U S models only RM Rotary Commander Changes the operative direction of the rotary commander controls NORM To use in the factory set position Any status REV To use on the right side of the steering column AUTO OFF Shuts off automatically after a desired time when the unit is off NO To deactivate the Auto Off function 30S 30M 60...

Страница 47: ...te the Black Out function M DSPL Motion Display ON To show moving patterns During radio reception disc USB playback OFF To deactivate the Motion Display DEMO Demonstration ON To activate the demonstration Unit off OFF To deactivate the demonstration DIMMER Changes the display brightness AUTO To dim the display automatically when you turn lights on Available only when the illumination control lead ...

Страница 48: ...ocal Seek Mode ON To only tune into stations with stronger signals During radio reception OFF To tune normal reception MONO Monaural Mode Selectsmonauralreception mode to improve poor FM reception ON To hear stereo broadcast in monaural During FM reception OFF To hear stereo broadcast in stereo BTM Best Tuning Memory page 21 During radio reception PARENTAL page 51 Sets the parental lock and edits ...

Страница 49: ...To deactivate the level adjustment DOLBY ADJ Dolby Level Adjust page 27 1 10 10 8 To select the level SP SETUP Speaker Setup LEVEL ADJ Level Adjust To select the level 6 6 13 steps Unit off HPF FREQ High Pass Filter Frequency To select the front rear speaker cut off frequency OFF 50HZ 60HZ 80HZ 100HZ 120HZ During radio reception playback LPF FREQ LowPassFilter Frequency 2 To select the subwoofer c...

Страница 50: ...ment Auxiliary equipment You can connect auxiliary devices to the unit and listen on your car speakers Up to 2 devices can be connected one to the AUX input jack stereo mini jack on the front and the other to the AUX AUDIO IN terminals on the rear The volume level is adjustable for any difference between the unit and the auxiliary device Connecting an auxiliary device 1 Turn off the auxiliary devi...

Страница 51: ...yback press BROWSE to enter the browse mode 2 Rotate the control dial to select the desired channel then press it Selecting categories 1 During playback press on the main unit to enter browse mode 2 Rotate the control dial to select the desired category then press it Parental control The channels containing unsuitable contents for children are preset to block To unblock the channel enter the passc...

Страница 52: ...e the unit will not operate properly To maintain high sound quality Do not splash liquid onto the unit or discs Notes on discs Do not expose discs to direct sunlight or heat sources such as hot air ducts nor leave it in a car parked in direct sunlight Before playing wipe the discs with a cleaning cloth from the center out Do not use solvents such as benzine thinner commercially available cleaners ...

Страница 53: ...tained in a disc 2 000 if a folder file names contain many characters this number may become less than 2 000 displayable characters for a folder file name 64 Joliet Romeo Notes on finalizing discs The following discs are required to be finalized to play on this unit DVD R DVD R DL in video mode VR mode DVD RW in video mode DVD R DVD R DL CD R CD RW The following discs can be played without finaliz...

Страница 54: ...ring playback or fast forward reverse of a VBR Variable Bit Rate WMA file elapsed playback time may not display accurately only for 64 kbps Note on WMA Playback of the following WMA files is not supported lossless compression copyright protected About AAC files AAC tag is 126 characters When naming an AAC file be sure to add the file extension m4a to the file name About JPEG files JPEG which stand...

Страница 55: ...2 and clean the connectors with a cotton swab Do not apply too much force Otherwise the connectors may be damaged You can connect to the following iPod models Update your iPod devices to the latest software before use Made for iPod touch 4th generation iPod touch 3rd generation iPod touch 2nd generation iPod touch 1st generation iPod classic iPod with video iPod nano 6th generation iPod nano 5th g...

Страница 56: ...neral Outputs Video output terminal Audio output terminals front rear sub switchable Power antenna aerial Power amplifier control terminal REM OUT Inputs Illumination control terminal AUX audio input terminals Remote controller input terminal Antenna aerial input terminal Parking break control terminal AUX input jack stereo mini jack USB signal input connector SiriusXM input terminal U S models on...

Страница 57: ...s blown Makes noise when the position of the ignition is switched The leads are not matched correctly with the car s accessory power connector The display disappears from does not appear in the display window The dimmer is set DIM ON page 47 The display disappears if you press and hold Press on the unit until the display appears The connectors are dirty page 55 The display disappears while the uni...

Страница 58: ...age 46 Picture does not fit in the screen The aspect ratio is fixed on the DVD Sound There is no sound sound skips sound cracks A connection has not been made correctly Check the connection to the connected equipment and set the input selector of the equipment to the source corresponding to this unit Defective or dirty disc Installation is not correct Install the unit at an angle of less than 45 i...

Страница 59: ...back or multi disc resume playback page 43 has taken effect Certain functions cannot be performed Depending on the disc you may not be able to perform operations such as stop search or repeat shuffle play For details see the manual supplied with the disc The soundtrack subtitle language or angle cannot be changed Use the DVD menu instead of the direct selection button on the card remote commander ...

Страница 60: ... Disconnect the USB device then change the source by pressing Indicates that the USB device is out of order or an unsupported device is connected READ The unit is reading all file album folder information on the disc Wait until reading is complete and playback starts automatically Depending on the disc structure it may take more than a minute USB NO SUPRT USB Not Support The connected USB device i...

Страница 61: ...t supported on this unit No playable data The disc does not contain playable data Playback prohibited by region code The DVD playback is prohibited due to the different region code The connected USB device is not supported For details on the compatibility of your USB device visit the support site If these solutions do not help improve the situation consult your nearest Sony dealer If you take the ...

Страница 62: ...avanese 1287 Georgian 1297 Kazakh 1298 Greenlandic 1299 Cambodian 1300 Kannada 1301 Korean 1305 Kashmiri 1307 Kurdish 1311 Kirghiz 1313 Latin 1326 Lingala 1327 Laothian 1332 Lithuanian 1334 Latvian Lettish 1345 Malagasy 1347 Maori 1349 Macedonian 1350 Malayalam 1352 Mongolian 1353 Moldavian 1356 Marathi 1357 Malay 1358 Maltese 1363 Burmese 1365 Nauru 1369 Nepali 1376 Dutch 1379 Norwegian 1393 Occi...

Страница 63: ...Chile 2092 China 2115 Denmark 2165 Finland 2174 France 2109 Germany 2248 India 2238 Indonesia 2254 Italy 2276 Japan 2304 Korea 2363 Malaysia 2362 Mexico 2376 Netherlands 2390 New Zealand 2379 Norway 2427 Pakistan 2424 Philippines 2436 Portugal 2489 Russia 2501 Singapore 2149 Spain 2499 Sweden 2086 Switzerland 2528 Thailand 2184 United Kingdom ...

Страница 64: ...ollowing 1 Read Troubleshooting in these Operating Instructions 2 Please contact U S A only Call 1 800 222 7669 URL http www SONY com Support site If you have any questions or for the latest support information on this product please visit the web site below http www sony asia com section support http www sony asia com caraudio ...

Отзывы: