background image

model name [LBT-GPX77/GPX55/MHC-GPX88/GPX77/GPX55/GPX33]

[4-449-052-

13

(1)] GB

12

GB

filename[D:\MASNI JOB 
FOLDER\SO130010\GB\4449052131\4449052131\05CON.fm]

masterpage:Left

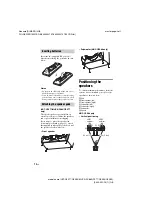
Insert the two supplied R6 (size AA) 
batteries, matching the polarities shown 
below.

Notes

• Do not mix an old battery with a new one or 

mix different types of batteries.

• If you do not use the remote control for a long 

period of time, remove the batteries to avoid 
damage from battery leakage and corrosion.

(LBT-GPX77/MHC-GPX88/GPX77 
only)

The speaker pads are pre-installed in 
vertical position to stabilize the speakers 
and to prevent them from slipping.
If you want to place the speakers in 
horizontal positioning (page 13), attach 
the supplied speaker pads to the bottom of 
the speakers as shown below.

– Front speaker

– Subwoofer (MHC-GPX88 only)

Positioning the 
speakers

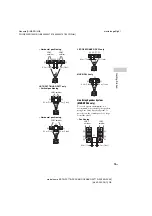
To obtain optimum performance from the 
system, we recommend you to place the 
speakers as shown below.

A

Unit

B

Front speaker (left)

C

Front speaker (right)

D

Subwoofer (left)

E

Subwoofer (right)

F

Subwoofer

G

Spacer

MHC-GPX88 only
– Vertical positioning

Inserting batteries

Attaching the speaker pads

45

A

C

B

D

E

SONY 
emblem

SONY 
emblem

0.3 m (1 foot)

0.3 m (1 foot)

Содержание LBT-GPX55

Страница 1: ...nstructions model name LBT GPX77 GPX55 MHC GPX88 GPX77 GPX55 GPX33 4 449 052 13 1 GB filename D MASNI JOB FOLDER SO130010 GB 4449052131 4449052131 01COV fm masterpage Cov Getting Started USB Transfer Tuner Bluetooth Sound Adjustment Disc USB Playback Other Operations Additional Information ...

Страница 2: ...found to comply with the limits set out in the EMC Directive using a connection cable shorter than 3 meters CAUTION The use of optical instruments with this product will increase eye hazard This appliance is classified as a CLASS 1 LASER product This marking is located on the rear exterior For customers in the United States Owner s Record The model and serial numbers are located on the rear of the...

Страница 3: ...pply cord or plug is damaged liquid has been spilled or objects have fallen into the apparatus the apparatus has been exposed to rain or moisture does not operate normally or has been dropped The following FCC statement applies only to the version of this model manufactured for sale in the U S A Other versions may not comply with FCC technical regulations NOTE This equipment has been tested and fo...

Страница 4: ...on s body excluding extremities hands wrists feet and ankles For customers in Australia Disposal of Old Electrical Electronic Equipment Applicable in the European Union and other European countries with separate collection systems License and Trademark Notice WALKMAN and WALKMAN logo are registered trademarks of Sony Corporation MPEG Layer 3 audio coding technology and patents licensed from Fraunh...

Страница 5: ...e radio 21 Bluetooth About the Bluetooth wireless technology 22 Listening to music wirelessly on a Bluetooth device 22 Setting the Bluetooth audio codecs 26 Setting Canceling Bluetooth standby mode 26 Sound Adjustment Adjusting the sound 27 Creating your own sound effect 27 Creating a party atmosphere DJ EFFECT 28 Other Operations Singing along 28 Changing the illumination pattern and color 29 Usi...

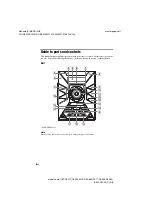
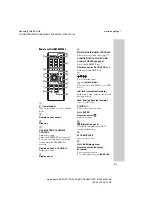
Страница 6: ...page Left Guide to parts and controls This manual mainly explains operations using the remote control but the same operations can also be performed using the buttons on the unit having the same or similar names Unit MHC GPX88 only Note When pressing the buttons on the unit press on the printings of the buttons S A B C N N R M F I H J K J L P Q O D E F G ...

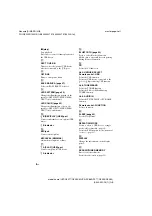
Страница 7: ...d effect page 27 FLANGER ISOLATOR SOUND FLASH PHASER page 28 Select the DJ EFFECT type Remote control DJ CONTROL Adjust the DJ EFFECT level G Select the menu items select folder Select a folder on an MP3 disc or a USB device m M rewind fast forward Hold down to find a point in a track or file during playback go back go forward Select a track or file TUNING Tune to the station you want Unit ENTER R...

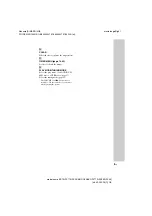
Страница 8: ...MIC jack Connect a microphone MIC LEVEL MIN MAX Adjust the microphone volume Q A PLAY USB port Connect an optional USB device A indicator R BLUETOOTH page 22 Press to select Bluetooth function Hold down to activate Bluetooth pairing during Bluetooth function S CD Select the CD function Unit USB USB SELECT Remote control USB Select the USB function Select the USB device connected to the A or B port...

Страница 9: ...masterpage Right X CLEAR Delete the last step from the program list Y TIMER MENU page 14 29 Set the clock and the timers Z PLAY MODE TUNING MODE Select the play mode of an AUDIO CD MP3 disc or a USB device page 17 Select the tuning mode page 21 The VOLUME and N buttons have a tactile dot Use the tactile dot as a reference when operating the system ...

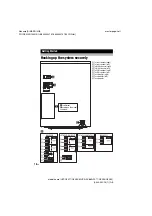
Страница 10: ...the system securely Getting Started 1 To front speaker right 2 To front speaker left 3 To HIGH speaker right 4 To HIGH speaker left 5 To LOW speaker right 6 To LOW speaker left 7 To subwoofer right 8 To subwoofer left 9 To subwoofer B is different depending on the model See below 1 8 7 2 1 2 7 8 6 5 4 3 9 2 1 2 1 1 2 MHC GPX88 LBT GPX77 MHC GPX77 LBT GPX55 MHC GPX55 MHC GPX33 ...

Страница 11: ...T GPX77 MHC GPX88 GPX77 only Connect the LED SPEAKER connector of the speaker to this terminal The lighting on the speakers will react according to the music source You can select the illumination pattern and color according to your preference page 29 Example C AUDIO IN jacks Use an audio cord not supplied to connect to the audio output jacks of the following equipment The sound is output through ...

Страница 12: ...PX77 only The speaker pads are pre installed in vertical position to stabilize the speakers and to prevent them from slipping If you want to place the speakers in horizontal positioning page 13 attach the supplied speaker pads to the bottom of the speakers as shown below Front speaker Subwoofer MHC GPX88 only Positioning the speakers To obtain optimum performance from the system we recommend you t...

Страница 13: ...y Line Array Speaker System MHC GPX88 only To create a party environment we recommend you to install your speakers using Line Array Speaker System It provides a wide sound space for a large room like a hall Positioning 45 A D E B C SONY emblem SONY emblem 0 3 m 1 foot 0 3 m 1 foot 45 A B C SONY emblem 0 3 m 1 foot 0 3 m 1 foot 45 A B C 45 SONY emblem 0 3 m 1 foot 0 3 m 1 foot A B C 45 F 0 3 m 1 fo...

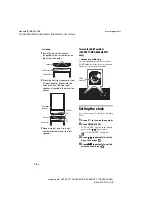
Страница 14: ... install another subwoofer and front left speaker Turning the SONY emblem LBT GPX77 MHC GPX88 GPX77 only Horizontal positioning After positioning the speakers turn the SONY emblem on the front speakers and subwoofers to horizontal position Setting the clock You cannot set the clock in Power Saving Mode 1 Press 1 to turn on the system 2 Press TIMER MENU If PLAY SET appears in the display panel pres...

Страница 15: ...he playback source or transferring destination USB memory select If the USB device has more than one memory for example internal memory and a memory card you can select which memory to use as a playback source or transferring destination Use the buttons on the unit to perform this operation Note You cannot select a memory during playback or transfer Make sure to select a memory before starting pla...

Страница 16: ...audio files are played back in different orders depending on the play mode Searching a track or audio file Track Search 1 Press SEARCH SEARCH lights up in the display panel 2 Audio files only Press to select the folder you want then press or N 3 Press to select the track or audio file you want then press or N The selected track or audio file starts playback Notes on disc For AUDIO CD This system c...

Страница 17: ...device FLDR SHUF shuffle all audio files in the folder on the USB device Note When you turn off the system the selected Shuffle Play is cleared and the play mode returns to Normal Play You can make a program of up to 25 steps in the order you want them to be played back 1 For CD function Press CD to select CD function For USB function Press USB repeatedly to select the USB device you want 2 When p...

Страница 18: ...sfer music from a sound source to a USB device connected to the B port The audio format of files transferred by this system is MP3 However you can also transfer WMA and AAC files from USB A Notes Do not remove the USB device during transfer or erase operations Doing so may corrupt the data on the USB device or damage the USB device itself MP3 WMA AAC files are transferred with the same bit rate as...

Страница 19: ...lect USB A and then connect a USB device you want to transfer to A port 3 For Synchronized transfer When playback is stopped press PLAY MODE on the remote control repeatedly to select the play mode you want Notes If you start transferring in Shuffle Play FLDR SHUF the selected play mode changes to FLDR automatically If you start transferring in Shuffle Play except FLDR SHUF Repeat Play or Program ...

Страница 20: ...new MP3 file is created transfer is disabled for the time being If you press REC TO USB B again after a few seconds a new MP3 file can be created Use the buttons on the unit to perform this operation 1 Connect a USB device to the A or B port 2 Press USB USB SELECT repeatedly until USB A or USB B lights up in the display panel when playback is stopped 3 Press or repeatedly to select the audio file ...

Страница 21: ...to transfer in MP3 format When connecting a Walkman to the system be sure to connect after the display Creating Library or Creating Database on the Walkman has disappeared Listening to the radio 1 Press FUNCTION repeatedly to select FM or AM band 2 For automatic scanning Press TUNING MODE repeatedly until AUTO lights up in the display panel Then press TUNING Scanning stops automatically when a sta...

Страница 22: ...COMPLETE appears in the display panel The station is stored To tune to a preset station Press TUNING MODE repeatedly until PRESET lights up in the display panel Then press TUNING repeatedly to select the preset number you want About the Bluetooth wireless technology Bluetooth wireless technology is a short range wireless technology that enables wireless data communication between digital devices B...

Страница 23: ...MHC GPX88 or LBT GPX77 GPX55 MHC GPX77 GPX55 GPX33 If passkey is required on the Bluetooth device enter 0000 6 Perform the Bluetooth connection on the Bluetooth device When pairing is completed and the Bluetooth connection is established Bluetooth device name appears in the display panel Depending on the Bluetooth device connection may start automatically after pairing is completed You can check t...

Страница 24: ...sional code below Data communication fees may be charged Two dimensional code for direct access Use a two dimensional code reader app Notes The app may not be available in some countries regions Depending on your smartphone you can use the NFC function without installing the app In this case the operations and specifications may be different For details refer to the operating instructions of your ...

Страница 25: ...ay need to start playback of an audio source on the Bluetooth device Notes When the system is not connected to any Bluetooth device the system will connect and playback from the last connected Bluetooth device automatically when you press N If you try to connect another Bluetooth device to the system the current connected Bluetooth device will be disconnected x For an NFC compatible smartphone Tou...

Страница 26: ...selected Notes You can enjoy high quality sound if the AAC is selected In case you cannot listen to AAC sound from your device select BT AAC OFF If you change this setting while the system is connected to a Bluetooth device the Bluetooth device will be disconnected To connect to the Bluetooth device perform the Bluetooth connection again Setting Canceling Bluetooth standby mode The system goes int...

Страница 27: ...pecific frequency bands and then store the setting in the memory as USER EQ 1 Press OPTIONS on the unit 2 Press repeatedly to select EQ EDIT then press 3 Press repeatedly to adjust the equalizer level then press 4 Repeat step 3 to adjust the level of other frequency bands and surround effect The user equalizer setting is stored when USER EQ appears in the display panel To bring up the user equaliz...

Страница 28: ...otes The DJ EFFECT is automatically turned off when you turn off the system or change the function or tuner band If you activate the DJ EFFECT during transfer the sound effect will not be transferred onto the USB device You cannot use MASTER VOLUME DJ CONTROL on the unit to adjust the volume when the DJ EFFECT is activated Press VOLUME on the remote control to adjust the volume Singing along MHC G...

Страница 29: ... both the Play Timer and the Recording Timer at the same time If you use either with the Sleep Timer the Sleep Timer has priority You can fall asleep when listening to music The system turns off after the preset time Press SLEEP repeatedly To cancel Sleep Timer press SLEEP repeatedly to select SLEEP OFF Tip To check the remaining time before the system turns off press SLEEP Make sure you have set ...

Страница 30: ...rns on before the preset time If the system is turned on at the preset time or if STANDBY flashes in the display panel the Play Timer and the Recording Timer will not play or transfer Do not operate the system from the time the system turns on until the playback or transferring starts Changing the display Press DISPLAY repeatedly while the system is turned off Demonstration The display changes and...

Страница 31: ...ment 1 Press VOLUME repeatedly until VOLUME MIN appears in the display panel 2 Connect an optional equipment page 10 3 Press FUNCTION repeatedly to select the function which corresponds to the connected equipment 4 Start playing the connected equipment 5 Press VOLUME repeatedly to adjust the volume Deactivating the buttons on the unit Child Lock You can deactivate the buttons on the unit except 1 ...

Страница 32: ...orded material on one side with digital audio material on the other side However since the audio material side does not conform to the Compact Disc CD standard playback on this product is not guaranteed Music discs encoded with copyright protection technologies This product is designed to play back discs that conform to the Compact Disc CD standard Recently various music discs encoded with copyrig...

Страница 33: ...There is severe hum or noise Move the system away from sources of noise Connect the system to a different wall outlet Install a noise filter commercially available to the power cord Turn off surrounding electrical equipment The timer does not function Check the timer setting and set the correct time page 29 Cancel the Sleep Timer function page 29 The remote control does not function Remove the obs...

Страница 34: ...tem can play back page 32 Remove the disc and wipe away the moisture on the disc then leave the system turned on for a few hours until the moisture evaporates The sound skips Wipe the disc clean page 38 Reload the disc Move the unit to a place with no vibration e g on top of a stable stand Move the speakers away from the unit or place them on separate stands When you listen to a track with bass so...

Страница 35: ... information on the websites about compatible USB devices page 15 Turn off the system and reconnect the USB device then turn on the system The music data itself contains noise or the sound is distorted Noise may have entered during the transferring process Delete the file and try transferring again The bit rate used when encoding audio files was low Send audio files with higher bit rate to the USB...

Страница 36: ...g instructions of each USB device or contact the manufacturer Tuner Severe hum or noise or stations cannot be received TUNED or ST flashes in the display panel Connect the antenna properly Change antenna location and its orientation to obtain good reception Connect a commercially available external antenna Consult your nearest Sony dealer if the supplied AM antenna has come off from the plastic st...

Страница 37: ...ngs Use the buttons on the unit to perform this operation 1 Unplug and plug the power cord back in 2 Press 1 to turn on the system 3 Hold down x and LED COLOR at the same time for about 3 seconds RESET appears in the display panel All user configured settings such as preset radio stations timer and the clock are reset to factory default setting Messages Disc Timer NO DISC There is no disc on the d...

Страница 38: ... procedure to protect the disc mechanism Use the buttons on the unit to perform this operation 1 Press 1 to turn on the system 2 Press CD 3 Remove the disc Press Z OPEN CLOSE to open and close the disc tray Wait until NO DISC appears in the display panel 4 Hold down CD and FLANGER for 3 seconds MECHA LOCK appears in the display panel 5 Unplug the power cord Notes on discs Before playing wipe the d...

Страница 39: ...d microwave ovens that are in use Locations where other electromagnetic waves occur Bluetooth devices and wireless LAN IEEE 802 11b g use the same frequency band 2 4 GHz When using your Bluetooth device near a device with wireless LAN capability electromagnetic interference may occur This could result in lower data transfer rates noise or inability to connect If this happens try the following reme...

Страница 40: ...channel at 5 ohms 100 Hz LBT GPX77 MHC GPX77 HIGH speakers Power Output rated 350 W 350 W at 4 ohms 1 kHz 1 THD RMS output power reference 600 W 600 W per channel at 4 ohms 1 kHz LOW speakers RMS output power reference 300 W 300 W 8 ohms 100 Hz LBT GPX55 MHC GPX55 Front speaker Power Output rated 350 W 350 W at 4 ohms 1 kHz 1 THD RMS output power reference 550 W 550 W per channel at 4 ohms 1 kHz S...

Страница 41: ...ction Tuning range USA and Brazilian models 87 5 MHz 108 0 MHz 100 kHz step Other models 87 5 MHz 108 0 MHz 50 kHz step AM tuner section Tuning range Pan American and Australia models 531 kHz 1 710 kHz 9 kHz step 530 kHz 1 710 kHz 10 kHz step Saudi Arabian model 531 kHz 1 602 kHz 9 kHz step Other models 531 kHz 1 602 kHz 9 kHz step 530 kHz 1 610 kHz 10 kHz step Bluetooth section Communication syst...

Страница 42: ...GPX55 GPX33 4 ohms SS GPX77 HIGH 4 ohms LOW 8 ohms Dimensions w h d Approx SS GPX88 360 mm 604 mm 330 mm 14 1 4 in 23 7 8 in 13 in SS GPX77 360 mm 604 mm 390 mm 14 1 4 in 23 7 8 in 15 3 8 in SS GPX55 GPX33 290 mm 395 mm 320 mm 11 1 2 in 15 5 8 in 12 5 8 in Mass Approx SS GPX88 12 2 kg 26 lb 15 oz SS GPX77 14 kg 30 lb 14 oz SS GPX55 GPX33 6 9 kg 15 lb 4 oz Quantity 2 pieces Subwoofer SS WGP88 for M...

Страница 43: ... Hz Power consumption MHC GPX88 350 W LBT GPX77 MHC GPX77 265 W LBT GPX55 MHC GPX55 255 W MHC GPX33 195 W Dimensions w h d excl speakers Approx 270 mm 363 mm 364 mm 10 3 4 in 14 3 8 in 14 3 8 in Mass excl speakers Approx HCD GPX88 GPX77 GPX55 GPX33 5 2 kg 11 lb 8 oz Supplied accessories Remote control 1 R6 Size AA batteries 2 FM lead AM loop antenna 1 Spacer MHC GPX88 only 2 Speaker pads MHC GPX88...

Страница 44: ... Corporation Printed in Malaysia model name LBT GPX77 GPX55 MHC GPX88 GPX77 GPX55 GPX33 4 449 052 13 1 GB filename D MASNI JOB FOLDER SO130010 GB 4449052131 4449052131 090BPG fm masterpage Bcov 4 4 4 9 0 5 2 1 3 ...

Отзывы: