Sony KP-51DS1U - большой диагональю 51 дюймов телевизор. Полное руководство пользователя доступно для скачивания бесплатно на manualshive.com. Получите инструкцию по эксплуатации, чтобы настроить и использовать этот продукт по максимуму.
R
4-205-772-
13
(1)
Instruction Manual
KP-51DS1UKP-51DS2U
©2002 by Sony Corporation
GB
Digital
Projection TV
Страница 1: ...R 4 205 772 13 1 Instruction Manual KP 51DS1U KP 51DS2U 2002 by Sony Corporation GB Digital Projection TV ...
Страница 2: ...ate plug fitted in accordance with the following instructions The wires in this mains lead are coloured in accordance with the following code Blue Neutral Brown Live As the colours of the wires in the mains lead of this apparatus may not correspond with the coloured markings identifying the terminals in your plug proceed as follows The wire which is coloured blue must be connected to the terminal ...
Страница 3: ...e Menu System 9 Adjusting colour Registration Convergence 10 Using the Menu System Adjusting the Picture 11 Changing the Screen Mode 12 Adjusting the Sound 13 Using the Sleep Timer 15 Manually Tuning the TV 16 Using the Further Programme Preset function 17 Locking Programmes 18 Skipping programme positions 19 Labelling a channel analogue channels only 20 Displaying subtitles for digital channels 2...
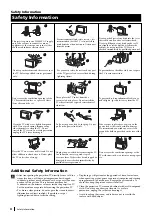
Страница 4: ...ct does fall into the cabinet do not operate the TV Have it checked immediately by qualified personnel For environmental and safety reasons it is recommended that the TV set is not left in standby mode when not in use Disconnect from the mains This set is to operate on a 220 240VAC supply only Take care not to connect too many appliances to the same power socket as this could result in fire or ele...
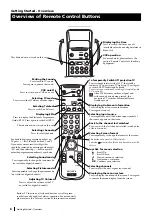
Страница 5: ...ries R6 type On Off Switch Standby indicator Volume control buttons Selecting input source S Video Input jack Video Input jack Audio Input jacks Auto Convergence button Headphone jack left side connectors right side connectors Press on the mark on the front of the projection TV to reveal the front connectors Programme up or down buttons selects TV channels Overview s ...
Страница 6: ...VCR operation For more details please refer to the section Remote Control of other Sony Equipment Besides TV functions all coloured buttons as well as green symbols are also used for Teletext operation For more details please refer to the Teletext section of this instruction manual Getting Started Overview To Temporarily Switch Off projection TV Press to temporarily switch off TV the standby indic...
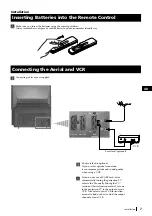
Страница 7: ...VCR The Scart lead is optional If you use this optional connection it can improve picture and sound quality when using a VCR If you do not use a SCART lead after automatically tuning the projection TV refer to the Manually Tuning the TV section of this instruction manual to tune in the projection TV to the output of your VCR Also refer to your VCR instruction manual to find out how to find the out...
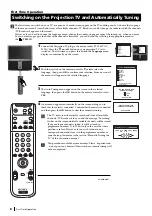
Страница 8: ... screen asking you to check that the aerial is connected Confirm that the aerial is connected and then press the OK button to start the automatic tuning The TV starts to automatically search and store all available channels TV Broadcast for you and the message Searching flashes on the screen until all available channels will be stored If any analogue channel is tuned it will be stored in programme...
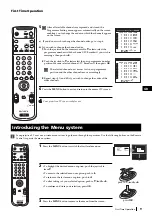
Страница 9: ...joystick to 4 or To enter to the selected menu or option push to z To return to the last menu or option push to Z To alter settings of your selected option push to 4 Z or z To confirm and store your selection press OK 3 Press the MENU button to remove the menu from the screen Your projection TV uses an on screen menu system to guide you through the operations Use the following buttons on the Remot...
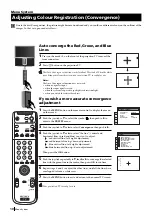
Страница 10: ...d blue you want to adjust red vertical line left right adjustment red horizonta line up down adjustment blue vertical line left right adjustment blue horizontal line up down adjustment Then press the OK button 5 Push the joystick repeatedly to 4 Z or z to converge the selected line with the green line in the centre then press OK to confirm 6 Repeat steps 4 and 5 to adjust the other lines until all...
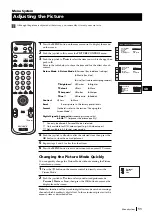
Страница 11: ...le for NTSC colour signal e g USA video tapes Not available in 4 3 format screen mode 4 Push the joystick to Z or z to alter the selected item then press the OK button to store the new adjustment 5 Repeat steps 3 and 4 to alter the other items 6 Press the MENU button to exit and return to the normal TV screen Changing the Picture Mode Quickly You can quickly change the Picture Mode without enterin...
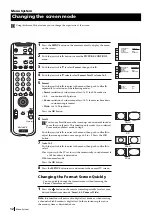
Страница 12: ...ick to z to enter to the menu then push to Z or z to select On if you wish the TV set to switch automatically to wide format if a 16 9 broadcast is detected or Off for normal mode Press the OK button 8 Press the MENU button to exit and return to the normal TV screen Changing the Format Screen Quickly You can quickly change the format screen without entering the Picture Control menu screen 1 Press ...
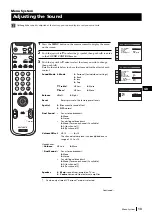
Страница 13: ...ect z Off normal Dual Sound For a stereo broadcast z Mono z Stereo For a bilingual broadcast z Mono for mono channel if available z A for channel 1 z B for channel 2 Volume Offset Z 12 z 12 The channel volume level can be adjusted over a range of 12 to 12 Headphones l Volume Z Less z More l Dual Sound For a stereo broadcast z Mono z Stereo For a bilingual broadcast z Mono for mono channel if avail...
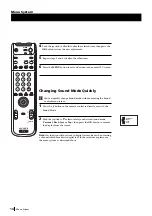
Страница 14: ...Control menu screen 1 Press the button on the remote control to directly access to the Sound Mode 2 Push the joystick to or 4 to select your desired sound mode Personal Rock Jazz or Pop then press the OK button to remove the display from the screen Note this function will not work in digital text mode or when viewing a channel which broadcasts digital text In those instances please use the menu sy...
Страница 15: ...f z 0 30 z 1 00 4 00 hours 4 Press the OK button 5 Press the MENU button to exit and return to the normal TV screen One minute before the projection TV switches into standby mode the indication 0 01 is displayed on the screen automatically Notes When watching the TV press the button on the remote control to display the time remaining To return to normal operation from standby mode press the TV but...
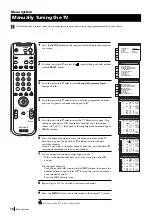
Страница 16: ...ystem Use this function to preset channels or a video input source one by one to the programme order of your choice Manually Tuning the TV S RM 892 PROGR MENU 1 4 7 2 5 8 0 3 6 9 VIDEO TV S RM 892 PROGR MENU 1 4 7 2 5 8 0 3 6 9 VIDEO TV PICTURE CONTROL Personal Wide Composite Picture Mode Contrast Reset Format Digital Signal Auto Programme Manual Programme Preset Further Programme Preset AV Label ...
Страница 17: ...e tune other channels b DECODER Push the joystick to or 4 to select AV3 then press the OK button The picture from the decoder connected to the Euro AV 3 on the back of the projection TV will appear on this programme number Repeat steps 4 and 5b to preset the AV3 output for other programme positions 6 Press the MENU button to exit and return to the normal TV screen Your projection TV is now ready f...
Страница 18: ...rs in black with symbol Menu System Menu System This feature enables you to prevent undesirable broadcasts appearing on the screen We suggest you use this function to prevent children from watching programmes you consider unsuitable Locking Programmes S RM 892 PROGR MENU 1 4 7 2 5 8 0 3 6 9 VIDEO TV PICTURE CONTROL Personal Wide Composite Picture Mode Contrast Reset Format Digital Signal Auto Prog...
Страница 19: ...rmal TV screen When changing channels TV Broadcasts with the PROGR buttons the skipped programme positions do not appear You can however still select them using the number buttons S RM 892 PROGR MENU 1 4 7 2 5 8 0 3 6 9 VIDEO TV PICTURE CONTROL Personal Wide Composite Picture Mode Contrast Reset Format Digital Signal Auto Programme Manual Programme Preset Further Programme Preset AV Label Preset P...
Страница 20: ... input video source using up to five characters letters or numbers Using this function you can easily identify which channel TV Broadcasts or video source you are watching Labelling a channel analogue channels only S RM 892 PROGR MENU 1 4 7 2 5 8 0 3 6 9 VIDEO TV S RM 892 PROGR MENU 1 4 7 2 5 8 0 3 6 9 VIDEO TV PICTURE CONTROL Personal Wide Composite Picture Mode Contrast Reset Format Digital Sign...
Страница 21: ...ose from English Welsh or Gaelic When you wish to cancel subtitles set to Off 5 Press the OK button to confirm your selection 6 Press the MENU button to exit and return to the normal TV screen When you select a digital channel which broadcasts subtitles the subtitles appear on the bottom of the screen in the chosen language S RM 892 PROGR MENU 1 4 7 2 5 8 0 3 6 9 VIDEO TV PICTURE CONTROL Personal ...
Страница 22: ...en If you have connected a decoder please remember to change back the Output to TV for correct unscrambling 5 Press the MENU button to exit and return to the normal TV screen The selected signal is available for your optional equipment connected to the appropriate Euro AV connector Menu System Menu System Using this function you can record on your VCR any signal coming from an external equipment c...
Страница 23: ...rm this character Select the other four characters in the same way 6 After selecting all the characters press the OK button 7 Repeat steps 4 to 6 if you wish to label other input sources 8 Press the MENU button to exit and return to the normal TV screen Whenever the equipment with the labeled input is selected for use the name appears for a few seconds on the screen S RM 892 PROGR MENU 1 4 7 2 5 8...
Страница 24: ...eturn to the normal TV screen Electronic Programme Guide EPG Electronic Programme Guide EPG The electronic Programme Guide EPG is a guide which provides programme information for all digital channels supporting EPG When looking for information you can search by theme sports art etc date or time e g broadcasts between 8 and 9 pm When you have found a programme you can go directly to this programme ...
Страница 25: ...the recording 9 If you do not wish to cancel or view the recording press the TV button whilst one of the displays are still on screen to leave your projection TV in standby mode The standby indicator on the front of the set will flash to show that the timer record operation is active If however you choose to change programmes you automatically cancel the recording Notes If your video recorder VCR ...
Страница 26: ...vated If however you wish to continue watching other programmes after setting a timer you can do so by changing programmes in the normal way If you are watching another programme when the timer is due to start a display will appear on screen advising you that if you change channels now you automatically cancel the recording 16 If you do not wish to cancel or view the recording press the TV button ...
Страница 27: ...d menu appears at the bottom of the teletext page Press the colour button red green yellow or blue on the remote control to access the corresponding page Index TELETEXT Programme News Sport Weather 25 153 101 98 Index TELETEXT Programme News Sport Weather 25 153 101 98 TELETEXT Index Programme News Sport Weather 25 153 101 98 TELETEXT Index Programme News Sport Weather 25 153 101 98 TELETEXT Index...
Страница 28: ...formation On some pages the TV programme will also be displayed You can view the other TV programmes available on the selected channel by pushing the joystick to Z or z 4 Alternatively you can use the numbered and coloured buttons on the remote control to directly enter the page number required and to display the various pages of text information 5 If when viewing the text pages you are requested ...
Страница 29: ...ck to Z or z to select the language in which you wish to hear the programme Push to 4 to return highlight to the top of the display Teletext Teletext This menu is a useful means of seeing what programme is on now and text on the digital channel you are watching Using the info menu screen Return Event Rec Wake Up S RM 892 PROGR MENU 1 4 7 2 5 8 0 3 6 9 VIDEO TV NOW NEXT 2 BBC TWO 09 00 09 15 School...
Страница 30: ...al to headphones To avoid picture distortion Do not connect equipment to F and G connectors at the same time Do not connect any equipment on the front connectors together with D connector Optional Connections Using the following instructions you can connect a wide range of optional equipment to this set Connecting Optional Equipment If you want to record signals from any external equipment connect...
Страница 31: ...nual and set the option Speaker to Centre in Remember that the maximum input level of this input is 30 W Be careful never to over this limit For mono equipment Connect the phono plug to the L G S I socket on the front of the TV and select the 2 input signal using the instructions on this page below Finally refer to the Adjusting the Sound section of this manual and select A on the sound menu scree...
Страница 32: ...ogramme Preset in the PRESET menu and select DECODER AV3 to each codified channel For more details please refer to the section Using the Further Programme Preset function of this instruction manual For more information on Smartlink please refer to the Instruction Manual of your VCR Smartlink Using the buttons underneath the cover of the remote control you can control other Sony equipment 1 Open th...
Страница 33: ...rojection TV so that you can view the screen from within the areas shown below Optimum Viewing Area Horizontal viewing area Optimum viewing position Vertical viewing area Optimum viewing position 60º 20º 20º 60º 1 9 m Minimum optimum distance 1 9 m Minimum optimum distance 1 9 m Minimum optimum distance ...
Страница 34: ...o input selectable audio video output selectable the same output source as 2 q2 connector PCMCIA socket MODEM connection Front Terminals 2 video input phono jack 2 audio inputs phono jacks q2 S video input 4 pin DIN Headphones jack minijack stereo Sound output 2 x 30 W music power 2 x 15 W RMS Centre SP input 30 W RMS using as the centre speaker Power consumption 165 W Standby Power consumption 0 ...
Страница 35: ...vailable using the Manually tuning the TV instruction in this manual If the problem continues contact your local installer Using the MENU system select the Picture Adjustment display Adjust the brightness picture and colour balance levels From the Picture Adjustment display select Reset to return to the factory settings Press the button repeatedly on the remote control until the RGB symbol is disp...
Страница 36: ... Moor 44 51 47 41 37 North West 28 Winter Hill 55 62 59 65 48 North East 29 Bilsdale West Moor 33 26 29 23 30 Caldbeck 30 34 28 32 56 31 Chatton 39 45 49 42 32 Pontop Pike 58 64 61 54 Scotland 33 Angus 57 63 60 53 34 Black Hill 40 46 43 50 37 35 Sandale 22 67 36 Caldbeck 28 32 56 37 Craigkelly 31 27 24 21 48 38 Darvel 33 26 23 29 39 Durris 22 28 25 32 67 40 Eitshal Lewis 33 26 23 29 41 Keelylang H...