60
3
Select the check box of the recorded data for which
you want to edit patient information.
You can only edit patient information for one
recorded data entry at a time. If multiple recorded
data entries are selected, patient information editing
will be disabled.
4
Select [Execute], and press the ENTER button.
The [Change] screen appears.
5
Edit each item as necessary, select [Change], and
press the ENTER button.
For details on each setting, see “Patient Information
and Data Storage Settings” (page 45).
The patient information is changed, and the
[Recording List] screen appears again.
If the recorded data includes proxy data, the proxy data
will also be edited.
Protecting Recorded Data
You can protect data to prevent accidental deletion.
Recorded data can be protected or protection can be
removed from the [Recording List] screen.
To select data for protection from the
[Recording List] screen
This section describes how to select recorded data for
protection in the [Recording List] screen. Both videos and
still images will be protected with this procedure.
1
Display the [Recording List] screen, select the
operation box, and press the ENTER button.
For details on displaying the [Recording List] screen,
see “Image Search” (page 54).
The [Operation] screen appears.
2
Select [Protect], and press the ENTER button.
The [Recording List] screen appears again.
3
Select the check boxes for the recorded data you want
to protect.
4
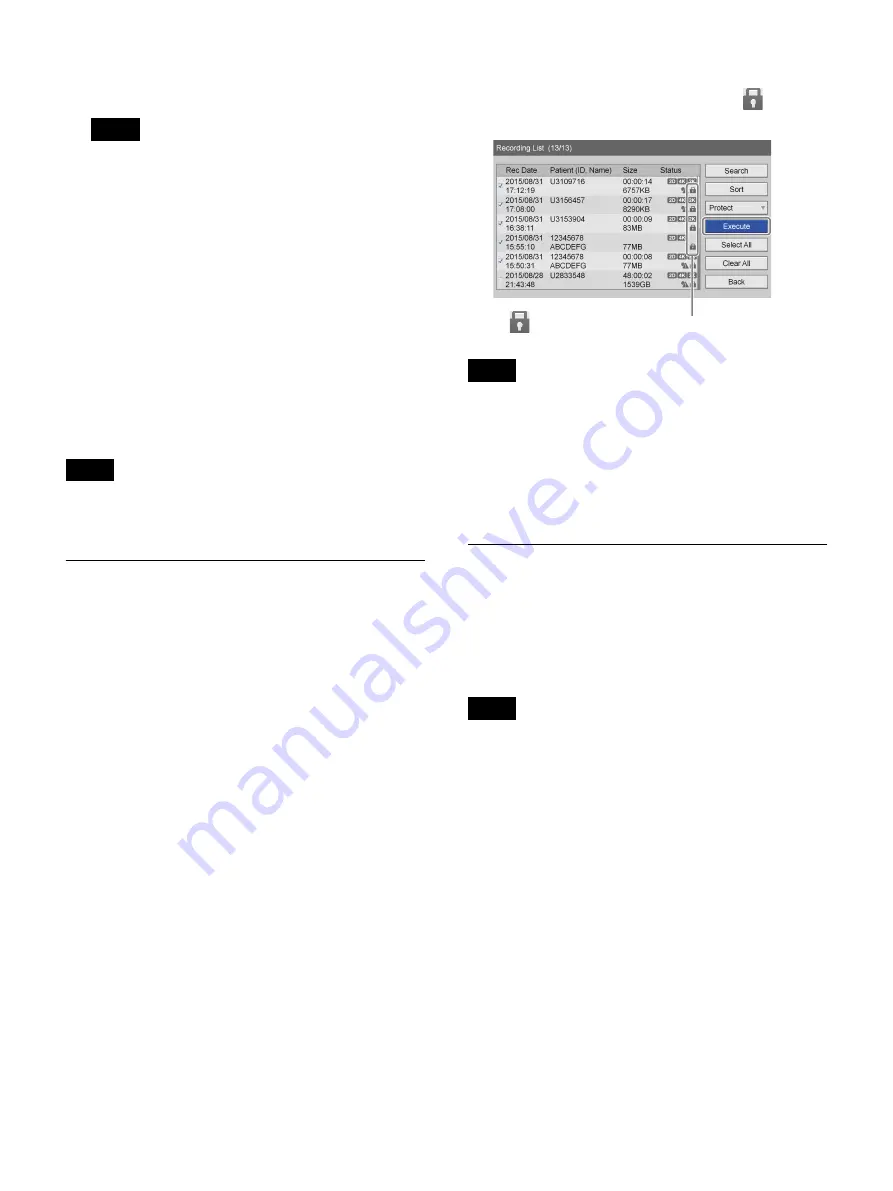
Select [Execute], and press the ENTER button.
The recorded data is protected, and the
icon
appears.
If the recorded data includes proxy data, the proxy data
will also be protected.
To remove protection
Select [UnProtect] in step
2
of the previous procedure,
and press the ENTER button. Perform the rest of the
procedure as shown.
Deleting Recorded Data
You can delete recorded data stored on the unit’s internal
hard disk for particular surgical procedures or
examinations.
Recorded data can be deleted from the [Recording List]
screen.
Recorded data that is deleted cannot be restored.
1
Display the [Recording List] screen, select the
operation box, and press the ENTER button.
For details on displaying the [Recording List] screen,
see “Image Search” (page 54).
The [Operation] screen appears.
2
Select [Delete], and press the ENTER button.
The [Recording List] screen appears again.
3
Select the check boxes for the recorded data you want
to delete.
Tip
Tip
Tip
Note
The
icon appears for recorded data that is protected.
Содержание HVO-3300MT
Страница 99: ......


