58
Invalid symbols and character strings for the
folder name
To select data for copying from the
[Recording List] screen
This section describes how to select recorded data for
copying onto external media in the [Recording List]
screen. You can select whether to copy videos, still
images, or both with this procedure.
• If the power supply is disconnected before the writing
of the data is complete, the validity of the written data
cannot be guaranteed.
• When recording to external media, the media can be
switched out up to 15 times for a single recorded data
entry. When this limit is exceeded, the “Exch. media
limit exceeded” message appears on the [Save to]
screen.
1
If you are copying to a BD/DVD disc or USB
memory device, insert the media into the unit.
2
Display the [Recording List] screen, select the
operation box, and press the ENTER button.
For details on displaying the [Recording List] screen,
see “Image Search” (page 54).
The [Operation] screen appears.
3
Select [Save to], and press the ENTER button.
The [Recording List] screen appears again.
4
Select the check boxes for the recorded data you want
to copy.
5
Select [Execute], and press the ENTER button.
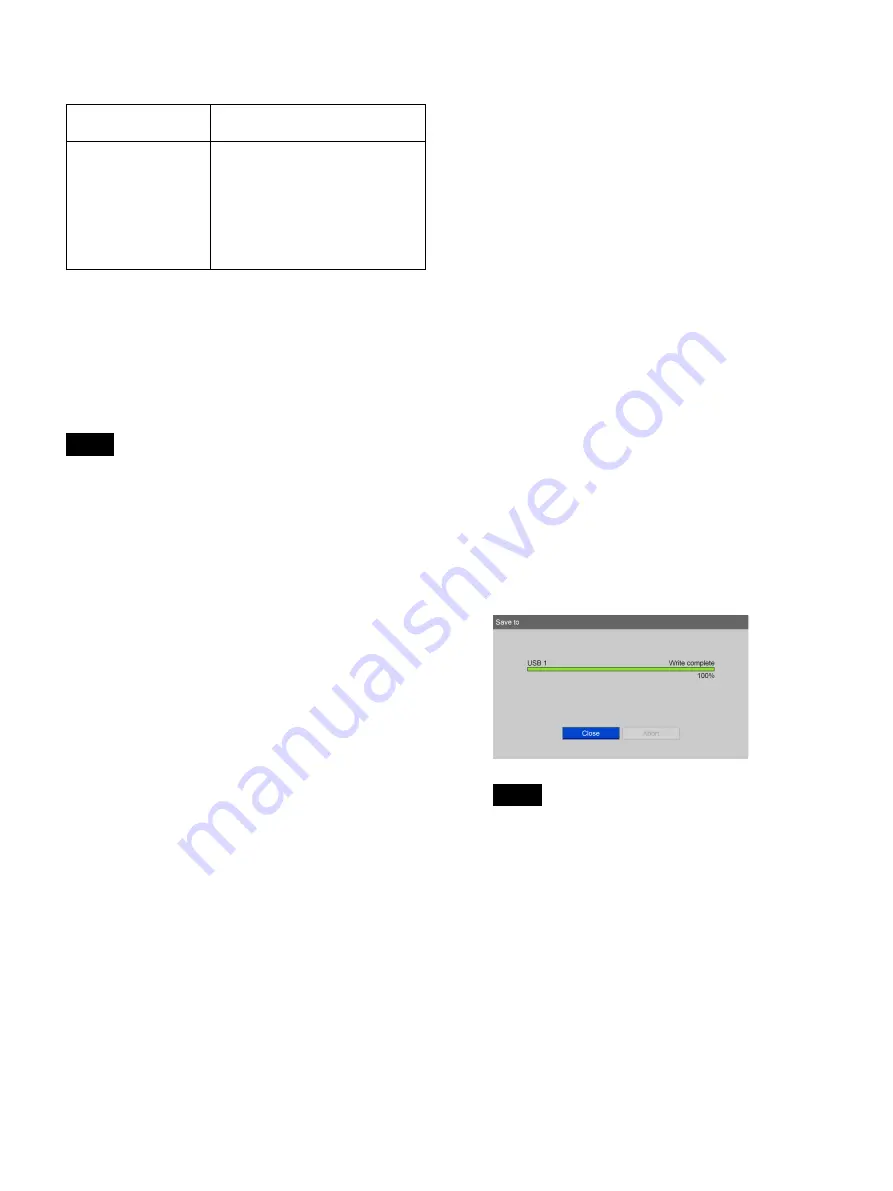
The [Save to] screen appears.
6
Configure save settings for the recorded data, select
[Execute], and press the ENTER button.
[External Media]
Select the storage destination.
You can select from [BD/DVD], [USB 1], [USB 2],
and [SERVER].
[File Server]
If [SERVER] is selected as the external storage
destination, select a file server (the server configured
for each doctor).
[Save Video]
This is enabled when recorded video data is selected.
Select the format of the recorded data you want to
save.
You can select from [Ch1 2D], [Ch1 3D], and [Ch2
2D]. (Multiple selections can be made.)
All of the check boxes are selected under default
settings.
[Save Still]
Select the check boxes of the storage formats for 3D
still images.
You can select from [3D], [2D], [Convert to 2D
DICOM], [2D Left], [Convert to 2D DICOM Left],
[2D Right], and [Convert to 2D DICOM Right].
(Multiple selections can be made.)
When “convert to DICOM” is selected, the specified
still image format is converted to DICOM before
saving.
All of the check boxes are selected under default
settings.
Copying of recorded data starts.
To cancel copying, select [Abort] and press the
ENTER button.
7
When copying is complete, press the ENTER button
while [Close] is selected.
The [Recording List] screen appears again.
To select data for copying from the
[Image List] (thumbnail display) screen
This section describes how to select thumbnail images of
recorded data in the [Image List] screen for copying onto
external media. The copying procedure is identical for
both videos and still images.
¥
/ : ? * " < > | . \
These will be replaced with
underscores (_).
AUX, CON, NUL,
PRN, COM0, COM1,
COM2, COM3, COM4,
COM5, COM6, COM7,
COM8, COM9, LPT1,
LPT2, LPT3, LPT4,
LPT5, LPT6, LPT7,
LPT8, LPT9
These will result in errors during
transfer.
If you want to use these in the
folder name, set [Folder Structure]
to a setting other than [Patient ID]
or [Patient Name]. Alternatively,
select [Patient ID] and set [Add 0
to Folder] to [Use].
Tips
Tip
Содержание HVO-3300MT
Страница 99: ......


