42
Operation Flow
This chapter describes how to record and play back
videos and capture still images while viewing the display
on the front panel of the unit and using only the buttons
on the front panel.
For details on recording preparation, recording, and
playback operations, see “Chapter 4 Recording and
Playback” (page 45).
Overview of recorded data
“Recorded data” on this unit refers to the data recorded
from the time a “new folder” is created (i.e., when
recording is started) to the time “close folder” is
performed. Recorded data entries include titles. A single
recorded data entry can include multiple titles. A title is
created whenever a stop operation is performed during
recording.
Titles can consist of video data or captured still images.
Up to 15,000 recorded data entries can be registered on
the unit.
A single recorded data entry can include up to 255 titles
for each Ch.
If an input signal is interrupted, a chapter separator will be
inserted when it is restored. When saving to external
media, files will be separated by chapters.
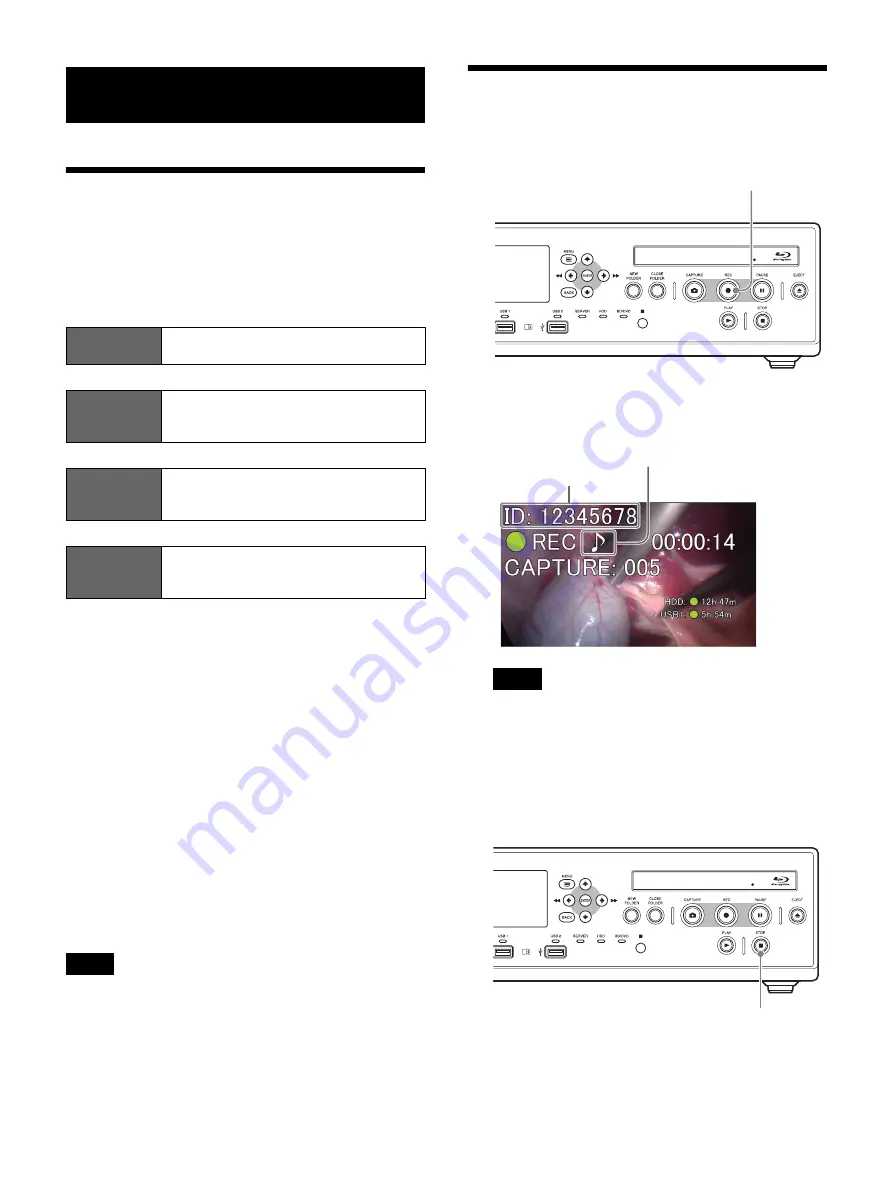
Step 1: Record
1
Press the
z
REC button.
Recording starts.
“REC” appears while recording is in progress.
If images are recorded and patient information has
not been entered in the [Recording Preparation]
screen, patient IDs will be automatically assigned.
The letter “U” appears at the beginning of
automatically assigned patient IDs.
2
Press the
x
STOP button to stop recording.
Recording stops, and “STOP” appears.
Chapter 3: Basic Recorder
Operations
Step 1:
Record
Use the buttons on front panel of the unit
to perform manual recording.
v
Step 2:
Capture Still
Images
Capture still images from live image
transmissions.
v
Step 3:
Quick
Playback
Play back recently recorded data.
v
Step 4:
End
Recording
End recording to the internal HDD, and
end transfer to external media.
Tip
Tip
z
REC button
Patient ID
This appears when audio is
also being recorded.
x
STOP button
Содержание HVO-3300MT
Страница 99: ......


