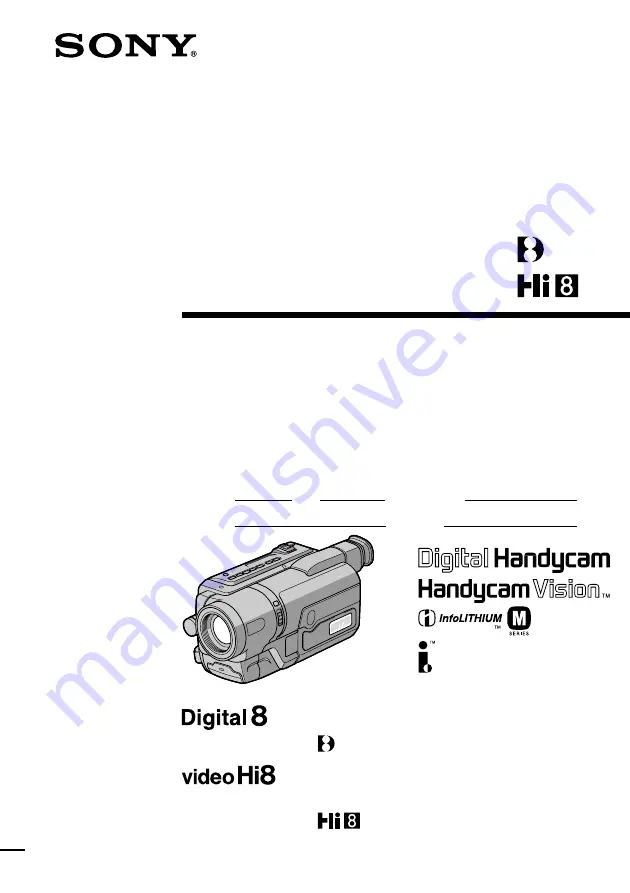
Sony DCR-TRV140 - Digital8 Camcorder With 2.5

©2002 Sony Corporation

Model No.

 -TRV

Model No.

 AC-

Serial No.

Serial No.

Operating Instructions

Before operating the unit, please read this manual thoroughly,
and retain it for future reference.

Owner’s Record

The model and serial numbers are located on the bottom. Record the
serial number in the space provided below. Refer to these numbers
whenever you call upon your Sony dealer regarding this product.

3-072-317-14 (1)

Digital
Video Camera Recorder 

DCR-TRV140 

DCR-TRV140

CCD-TRV107/TRV108/TRV308/TRV408/

TRV608 

Содержание DCR-TRV140 - Digital8 Camcorder With 2.5" LCD

Страница 1: ...n it for future reference Owner s Record The model and serial numbers are located on the bottom Record the serial number in the space provided below Refer to these numbers whenever you call upon your Sony dealer regarding this product 3 072 317 14 1 Digital Video Camera Recorder Video Camera Recorder DCR TRV140 DCR TRV140 CCD TRV107 TRV108 TRV308 TRV408 TRV608 ...

Страница 2: ... can help preserve our environment by returning your used rechargeable batteries to the collection and recycling location nearest you For more information regarding recycling of rechargeable batteries call toll free 1 800 822 8837 or visit http www rbrc org Caution Do not handle damaged or leaking Lithium Ion batteries This symbol is intended to alert the user to the presence of uninsulated danger...

Страница 3: ...n for help The supplied interface cable must be used with the equipment in order to comply with the limits for a digital device pursuant to Subpart B of Part 15 of FCC Rules For the customers in CANADA CAUTION TO PREVENT ELECTRIC SHOCK MATCH WIDE BLADE OF PLUG TO WIDE SLOT FULLY INSERT For the customers in the U S A If you have any questions about this product you may call Sony Customer Informatio...

Страница 4: ...oom p 26 The default settings is set to OFF To zoom greater than 20 select the digital zoom power in D ZOOM in the menu settings FADER p 43 Tape photo recording p 40 1 Picture effect p 64 Digital effect p 65 1 TITLE p 57 Function to give a natural appearance to your recordings Manual focus p 53 Functions to use in editing in the recording mode Wide mode p 41 Date and time p 19 4 ORC MENU p 109 4 F...

Страница 5: ...ery for Remote Commander 2 p 141 1 Contents of the recording cannot be compensated if recording or playback is not made due to a malfunction of the camcorder storage media etc 5 A V connecting cable 1 p 38 72 73 Stereo DCR TRV140 Monaural CCD TRV107 TRV108 TRV308 TRV408 TRV608 6 Shoulder strap 1 p 136 7 Lens cap 1 p 23 8 USB Cable 1 p 97 2 9 CD ROM SPVD 008 USB Driver 1 p 98 2 1 2 3 4 5 6 7 8 RMT ...

Страница 6: ...dvanced Recording Operations Recording a still image on a tape Tape Photo recording DCR TRV140 only 40 Using the wide mode 41 Using the fader function 43 Using special effects Picture effect 46 Using special effects Digital effect DCR TRV140 only 47 Using the PROGRAM AE function 50 Adjusting the exposure manually 52 Focusing manually 53 Interval recording DCR TRV140 only 54 Frame by frame recordin...

Страница 7: ...ewing images using your computer USB Streaming Windows users only 97 Customizing Your Camcorder Changing the menu settings 105 Troubleshooting Types of trouble and their solutions 113 Self diagnosis display 118 Warning indicators and messages 119 Additional Information About video cassettes 121 About the InfoLITHIUM battery pack 124 About i LINK 126 Using your camcorder abroad 128 Maintenance info...

Страница 8: ... the battery pack when using your camcorder outdoors p 13 3Close the cassette compartment by pressing the mark on the cassette compartment The cassette compartment automatically goes down Close the lid of the cassette compartment 1Open the lid of the cassette compartment and press ZEJECT The cassette compartment opens automatically 2Insert a cassette into the cassette compartment with its window f...

Страница 9: ...Remove the lens cap Viewfinder When the LCD panel is closed use the viewfinder placing your eye against its eyecup The picture in the viewfinder is black and white Adjust the viewfinder lens to your eyesight p 27 When you purchase your camcorder the clock setting is set to off If you want to record the date and time for a picture set the clock setting before recording p 19 C A M E R A V C R O F F ...

Страница 10: ...rs e g Set the POWER switch to CAMERA When you carry out an operation you can hear a beep sound to indicate that the operation is being carried out Before using your camcorder DCR TRV140 only With your digital camcorder we recommend using Hi8 Digital8 video cassettes Your camcorder records and plays back pictures only in the Digital8 system You cannot play back tapes recorded in the Hi8 standard 8...

Страница 11: ... 3 type 2 5 type Buit in light z z z z z Remote sensor z z z SteadyShot z z z z USB Streaming z z VF B L Viewfinder backlight z z z z z Date and time z z z z z DNR Digital Noise z z z z z Reduction Easy Dubbing z z z z z ORC Optimizing the z z z z z Recording Condition TBC Time Base Corrector z z z z z Data Code z Digital effect z Digital program editing z DV IN OUT jack z Frame recording z Hifi S...

Страница 12: ... affect the recording in any way Do not let your camcorder get wet Keep your camcorder away from rain and sea water Letting your camcorder get wet may cause your camcorder to malfunction Sometimes this malfunction cannot be repaired a Never leave your camcorder exposed to temperatures above 60 C 140 F such as in a car parked in the sun or under direct sunlight b Be careful when placing the camera ...

Страница 13: ...ng the battery pack Slide the battery pack down until it clicks To remove the battery pack Slide the battery pack out in the direction of the arrow while pressing V BATT down Step 1 Preparing the power supply V BATT release lever ...

Страница 14: ...ted in minutes on the display window When the remaining battery indicator changes to normal charge is completed To fully charge the battery full charge leave the battery pack attached for about one hour after normal charge is completed until FULL appears in the display window Fully charging the battery allows you to use the battery longer than usual 4 2 3 1 C A M E R A V C R O F F C H G POWER FULL...

Страница 15: ...ery pack in an ambient temperature of between 10 C to 30 C 50 F to 86 F If the power goes off although the battery remaining indicator indicates that the battery pack has enough power to operate Charge the battery pack fully again so that the indication on the battery remaining indicator is correct Charging time Battery pack Full charge normal charge NP FM30 supplied 145 85 NP FM50 150 90 NP FM70 ...

Страница 16: ...20 285 Approximate number of minutes when you use a fully charged battery pack Approximate continuous recording time at 25 C 77 F The battery life will be shorter if you use your camcorder in a cold environment Approximate number of minutes when recording while you repeat recording start stop zooming and turning the power on off The actual battery life may be shorter Playing time CCD TRV107 TRV108...

Страница 17: ...ttery life will be shorter if you use your camcorder in a cold environment The recording and playing time of a normally charged battery are about 90 of those of a fully charged battery What is the InfoLITHIUM The InfoLITHIUM is a lithium ion battery pack which can exchange data such as battery consumption with compatible electronic equipment This unit is compatible with the InfoLITHIUM battery pac...

Страница 18: ...et itself has been turned off Notes The AC power adaptor can supply power even if the battery pack is attached to your camcorder The DC IN jack has source priority This means that the battery pack cannot supply any power if the power cord is connected to the DC IN jack even when the power cord is not plugged into a wall outlet Place the AC power adaptor near a wall outlet While using the AC power ...

Страница 19: ...USH EXEC dial to adjust the desired year then press the dial 5 Set the month day and hour by turning the SEL PUSH EXEC dial and pressing the dial 6 Set the minute by turning the SEL PUSH EXEC dial and pressing the dial by the time signal The clock starts to operate 7 Press MENU to make the menu disappear The time indicator appears 2 4 1 7 3 6 MENU C LOCK SE T MENU END SE TUP MENU C LOCK SE T USB S...

Страница 20: ...10 seconds after you start recording Auto date function This function works only once a day Note on the time indicator The internal clock of your camcorder operates on a 12 hour cycle 12 00 AM stands for midnight 12 00 PM stands for noon Note on the auto date function CCD TRV107 TRV108 TRV308 TRV408 TRV608 only You can change the AUTO DATE setting by selecting ON or OFF in the menu settings The au...

Страница 21: ...ette in step 3 Notes Do not press the cassette compartment down Doing so may cause a malfunction Your camcorder records pictures in the Digital8 system 1 The recording time when you use your camcorder is half of the indicated time on Hi8 Digital8 tape If you select the LP mode in the menu settings the recording time is the 3 4 of the indicated time on Hi8 Digital8 tape 1 If you use standard 8 mm t...

Страница 22: ...22 To prevent accidental erasure Slide the write protect tab on the cassette to expose the red mark Step 3 Inserting a cassette ...

Страница 23: ...y turns off 5 Press START STOP Your camcorder starts recording The REC indicator appears The camera recording lamp located on the front of your camcorder lights up To stop recording press START STOP again The camera recording lamp lights up in the viewfinder when you record with the viewfinder Microphone R 1 Notes Fasten the grip strap firmly Do not touch the built in microphone during recording N...

Страница 24: ... The time code may not be written properly between scenes 1 Recording date and time DCR TRV140 only The recording date and time are not displayed while recording However they are recorded automatically onto the tape To display the recording date and time press DATA CODE on the Remote Commander during playback To set the counter to 0 00 00 CCD TRV107 TRV108 TRV308 TRV408 TRV608 only Press COUNTER R...

Страница 25: ...icators appear mirror reversed and others are not displayed The date appears mirror reversed when the auto date function is working However the date will be normal when recorded 2 1 DCR TRV140 only 2 CCD TRV107 TRV108 TRV308 TRV408 TRV608 only Adjusting the brightness of the LCD screen 1 In CAMERA mode select LCD BRIGHT in in the menu settings p 109 2 Turn the SEL PUSH EXEC dial to adjust the brig...

Страница 26: ...ingly results in better looking recordings T side for telephoto subject appears closer W side for wide angle subject appears farther away To use zoom grater than 20 Zoom greater than 20 is performed digitally To activate digital zoom select the digital zoom power in D ZOOM in the menu settings The digital zoom function is set to OFF as a default setting p 106 The picture quality deteriorates as th...

Страница 27: ...in the telephoto position or about 1 cm about 1 2 in away in the wide angle position To record pictures with the viewfinder Adjusting the viewfinder If you record pictures with the LCD panel closed check the picture with the viewfinder Adjust the viewfinder lens to your eyesight so that the indicators in the viewfinder come into sharp focus Lift up the viewfinder and move the viewfinder lens adjus...

Страница 28: ...r recording in Hi8 format j Tape counter indicator Remaining battery time indicator The remaining battery time indicator indicates the approximate recording time The indicator may not be correct depending on the conditions in which you are recording When you close the LCD panel and open it again it takes about 1 minute for the correct remaining battery time in minutes to be displayed Time code DCR...

Страница 29: ... you press EXPOSURE when shooting backlit subjects The backlight function will be canceled Shooting in the dark NightShot Super NightShot DCR TRV140 only Color Slow Shutter DCR TRV140 only The NightShot function enables you to shoot a subject in a dark place For example you can satisfactorily record the environment of nocturnal animals for observation when you use this function While your camcorde...

Страница 30: ... 107 Notes Do not use the NightShot function in bright places ex outdoors in the daytime This may cause your camcorder to malfunction Color Slow Shutter cannot be used in places of absolute 0 lux darkness When you keep NIGHTSHOT setting to ON in normal recording the picture may be recorded in incorrect or unnatural colors If focusing is difficult with the autofocus mode when using the NightShot fu...

Страница 31: ...hen press TIME or DATE to record the date and time Press DATE and or TIME again The date and or time indicator disappears When you purchase your camcorder the clock setting is set to off Set the date and time to your local time before using p 19 Note The date and time indicators recorded manually cannot be deleted If you do not record the date and time in the picture Record the date and time in th...

Страница 32: ...ode You can monitor the sound from the speaker Notes If you start recording after using the end search function occasionally the transition between the last scene you recorded and the next scene may not be smooth Once you eject the cassette after you have recorded on the tape the end search function does not work If a tape has a blank portion in the recorded portions DCR TRV140 only The end search...

Страница 33: ...2 Set the POWER switch to VCR 1 PLAYER 2 while pressing the small green button 3 Open the LCD panel while pressing OPEN 4 Press m to rewind the tape 5 Press N to start playback 6 To adjust the volume press either of the two VOLUME buttons The speaker on your camcorder is silent when the LCD panel is closed You can control playback using the Remote Commander supplied with your camcorder 3 To stop p...

Страница 34: ...el by lifting the LCD panel up by 7 degrees b To display the screen indicators Display function Press DISPLAY on your camcorder or the Remote Commander 1 supplied with your camcorder The indicators appear on the screen To make the indicators disappear press DISPLAY again 1 CCD TRV107 TRV408 DCR TRV140 only 2 DCR TRV140 only a b Playing back a tape 7 DISPLAY DISPLAY 1 DATA CODE 2 ...

Страница 35: ...a code function bars and appear if DCR TRV140 only A blank section of the tape is being played back The tape is unreadable due to tape damage or noise The tape was recorded by a camcorder without the date and time set Data code DCR TRV140 only When you connect your camcorder to the TV the data code appears on the TV screen Remaining battery time indicator during playback DCR TRV140 only The indica...

Страница 36: ...ewinding or M while advancing the tape To resume rewinding or advancing release the button To view the picture at slow speed slow playback CCD TRV107 TRV408 DCR TRV140 only Press y on the Remote Commander during playback For slow playback in the reverse direction press then press y on the Remote Commander 1 To resume normal playback press N To view the picture at double speed DCR TRV140 only Press...

Страница 37: ...r an output image from the DV IN OUT jack If slow playback lasts for about 1 minute CCD TRV107 TRV408 only Your camcorder automatically returns to normal speed When you play back a tape recorded in the LP mode CCD TRV107 TRV108 TRV308 TRV408 TRV608 only Noise may appear during the playback pause mode slow playback 3 or picture search When you play back a tape in reverse CCD TRV107 TRV108 TRV308 TR...

Страница 38: ...ower adaptor when monitoring the playback picture on the TV screen p 18 Refer to the operating instructions of your TV Open the jack cover Connect your camcorder to the TV using the A V connecting cable Then set the TV VCR selector on the TV to VCR CCD TRV107 TRV108 TRV308 TRV408 TRV608 DCR TRV140 Viewing the recording on TV S VIDEO OUT A V OUT S VIDEO VIDEO AUDIO IN Signal flow Yellow Red White A...

Страница 39: ... only Use an NTSC system RFU adaptor optional Refer to the operating instructions of your TV and the RFU adaptor If your TV is a stereo type CCD TRV107 TRV108 TRV308 TRV408 TRV608 only Connect the audio plug of the A V connecting cable supplied to the left white input jack of your TV If your TV has an S video jack Connect using an S video cable optional to obtain optimum quality screen images With...

Страница 40: ...uring the 7 seconds to record you cannot shoot another still image DCR TRV140 only You can record a still image like a photograph This mode is useful when you want to record an image such as a photograph You can record about 510 images in the SP mode and about 765 images in the LP mode on a tape which can record for 60 minutes in the SP mode 1 In the standby mode keep pressing PHOTO lightly until ...

Страница 41: ... CCD TRV107 TRV108 TRV308 TRV408 TRV608 You can record a cinema like picture CINEMA or a 16 9 wide picture to watch on the 16 9 wide screen TV 16 9FULL Refer to the operating instructions of your TV CINEMA Black bands appear on the screen during recording in the CINEMA mode a playing back on a normal TV b or a wide screen TV c If you set the screen mode of the wide screen TV to the zoom mode a pic...

Страница 42: ...with the video ID ID 1 ID 2 system you connect your camcorder to the S video jack on the TV ID 2 system DCR TRV140 only The ID 2 system sends a copyright protection signal with ID 1 signals inserted between video signals when you connect your camcorder to other equipment by the A V connecting cable In the wide mode CCD TRV308 TRV408 TRV608 DCR TRV140 only The SteadyShot function does not work If y...

Страница 43: ...nction MONOTONE When fading in the picture gradually changes from black and white to color When fading out the picture gradually changes from color to black and white 1 CCD TRV107 TRV108 TRV308 TRV408 TRV608 only 2 Fade in only 3 DCR TRV140 only FADER M FADER mosaic BOUNCE 2 OVERLAP 2 3 DOT 2 3 random dot STRIPE 1 WIPE 2 3 ...

Страница 44: ...r mode is indicated first of all 2 Press START STOP The fader indicator stops flashing After the fade in out is carried out your camcorder automatically returns to the normal mode To cancel the fader function Before pressing START STOP press FADER until the indicator disappears 1 CCD TRV107 TRV108 TRV308 TRV408 TRV608 only 2 Fade in only 3 DCR TRV140 only 1 FADER FADER t FADER t M FADER t STRIPE 1...

Страница 45: ...tor flashes quickly and the image you are shooting disappears from the screen Depending on the tape condition the image may not be recorded clearly The date time indicator and title do not fade in or fade out CCD TRV107 TRV108 TRV308 TRV408 TRV608 only Erase them before operating the fader function if they are not needed While using the bounce function you cannot use the following functions Focus ...

Страница 46: ...he picture is monochrome black and white SOLARIZE b The light intensity is clearer and the picture looks like an illustration SLIM c The picture expands vertically STRETCH d The picture expands horizontally PASTEL e The contrast of the picture is emphasized and the image looks like an animated cartoon MOSAIC f The picture is mosaic 1 In CAMERA mode select P EFFECT in in the menu settings p 106 2 S...

Страница 47: ...constant intervals LUMI LUMINANCEKEY You can swap a brighter area in a still image with a moving image TRAIL You can record the image so that an incidental image like a trail is left SLOW SHTR SLOW SHUTTER You can slow down the shutter speed The slow shutter mode is good for recording dark images more brightly OLD MOVIE You can add an old movie type atmosphere to images Your camcorder automaticall...

Страница 48: ...time of the incidental image SLOW SHTR Shutter speed The larger the shutter speed number the slower the shutter speed OLD MOVIE No adjustment necessary The more bars there are on the screen the stronger the digital effect The bars appear in the following modes STILL FLASH LUMI and TRAIL To cancel the digital effect function Set D EFFECT to OFF in the menu settings Using special effects Digital eff...

Страница 49: ...t work in the slow shutter mode The following functions do not work in the old movie mode Wide mode Picture effect PROGRAM AE When you set the POWER switch to OFF CHG The digital effect function is automatically canceled When recording in the slow shutter mode Auto focus may not be effective Focus manually using a tripod Shutter speed Shutter speed number Shutter speed SLOW SHTR 1 1 30 SLOW SHTR 2...

Страница 50: ...lesson This mode minimizes shake on fast moving subjects such as in tennis or golf BEACH SKI Beach ski This mode prevents people s faces from appearing dark in strong light or reflected light such as at a beach in midsummer or on a ski slope SUNSETMOON Sunset moon This mode allows you to maintain atmosphere when you are recording sunsets general night views fireworks displays and neon signs LANDSC...

Страница 51: ...nt subjects The following functions do not work in the PROGRAM AE mode Slow shutter Old movie Bounce Color Slow Shutter While setting NIGHTSHOT to ON the PROGRAM AE function does not work The indicator flashes Even if the PROGRAM AE function is selected You can adjust the exposure manually If you are recording under a discharge tube such as a fluorescent lamp sodium lamp or mercury lamp Flickering...

Страница 52: ...EXPOSURE The exposure indicator appears on the screen 2 Turn the SEL PUSH EXEC dial to adjust the brightness To return to the automatic exposure mode Press EXPOSURE Note When you adjust the exposure manually the backlight function does not work in CAMERA mode Your camcorder automatically returns to the automatic exposure mode if you change the PROGRAM AE mode if you slide NIGHTSHOT to ON 1 2 EXPOS...

Страница 53: ...background Shooting a stationary subject when using a tripod 1 In CAMERA mode press FOCUS The 9 indicator appears on the screen 2 Turn the SEL PUSH EXEC dial to sharpen focus To return to the autofocus mode Press FOCUS To focus precisely Adjust the zoom by first focusing at the T telephoto position and then shooting at the W wide angle position This makes focusing easier When you shoot close to th...

Страница 54: ...ime 30SEC y 1MIN y 5MIN y 10MIN 3 Turn the SEL PUSH EXEC dial to select REC TIME then press the dial 4 Turn the SEL PUSH EXEC dial to select the desired recording time then press the dial The time 0 5SEC y 1SEC y 1 5SEC y 2SEC 5 Turn the SEL PUSH EXEC dial to select RETURN then press the dial 9 MIN 59 S 10 MIN 10 MIN 9 MIN 59 S 1 S 1 S a b c 2 4 5 1 MENU MENU END CAMERA SET I NT REC I NTERVAL REC ...

Страница 55: ...REC to OFF in the menu settings To stop the interval recording momentarily and perform normal recording Press START STOP You can perform normal recording only once To cancel the normal recording press START STOP again On recording time There may be a discrepancy in recording time of up to 6 frames from the selected time When you set the POWER switch to OFF CHG The interval recording function is au...

Страница 56: ...PUSH EXEC dial to select ON then press the dial 5 Press MENU to erase the menu display The FRAM REC indicator lights up 6 Press START STOP to start cut recording The camcorder makes a recording for about six frames and returns to recording standby 7 Move the subject and repeat step 6 To cancel the cut recording Set FRAME REC to OFF in the menu settings Notes on cut recording The last recorded cut ...

Страница 57: ...2 until the title is laid out as desired 5 Press the SEL PUSH EXEC dial again to complete the setting 6 Press START STOP to start recording 7 When you want to stop recording the title press TITLE 1 2 3 4 TITLE S I Z E SMA L L VACATION S I Z E L ARGE PRESE T T I T L E HE L LO HAPPY B I RTHDAY HAPPY HOL I DAYS CONGRA TU L A T I ONS OUR SWEE T BABY WEDD I NG VACA T I ON THE END T I T L E END PRESE T ...

Страница 58: ... changes as follows SMALL y LARGE You cannot input 13 characters or more in LARGE size If you input more than 12 characters the title size returns to SMALL even if you select LARGE The title position changes as follows 1y 2y 3y 4y 5y 6y 7y 8y 9 The larger the position number the lower the title is positioned When you select the title size LARGE you cannot choose position 9 When you select the titl...

Страница 59: ... L E SE T CUS TOM1 SE T CUS TOM2 SE T T I T L E END CUS TOM1 SE T T I T L E SE T CUS TOM2 SE T T I T L E END RE TURN CUS TOM1 SE T T I T L E SE T CUS TOM2 SE T T I T L E END RE TURN _ _ _ _ _ _ _ _ _ _ _ _ _ _ _ _ _ _ _ _ T I T L E SE T ABCDE P 1 i ø F DM À È Ì ÒÙ Á É Í ÓÚ Â Ê Î ÆŒ ÃÕÑ ç ß Ä Ï ÖÜ Å FGH I J K LMNO PQRS T UVWXY Z 12345 67890 cP 2 C SE T T I T L E END _ _ _ _ _ _ _ _ _ _ _ _ _ _ _ _ ...

Страница 60: ... turns off The characters you have entered remain stored in memory Set the POWER switch to OFF CHG once and turn it to CAMERA again then proceed from step 1 We recommend setting the POWER switch to VCR 1 PLAYER 2 or removing the cassette so that your camcorder does not automatically turn off while you are entering title characters If you select The menu for selecting alphabet and Russian character...

Страница 61: ...peatedly until no indicator appears on the screen To turn on the built in light automatically Press LIGHT repeatedly until the indicator appears on the screen The built in light automatically turns on and off according to the ambient brightness CAUTION Be careful not to touch the lighting section because the plastic window and surrounding surfaces are hot while the light is on It remains hot for a...

Страница 62: ...ction while shooting in the AUTO mode The built in light may turn off when inserting or ejecting a cassette While the end search function is working the built in light is turned off When you use the conversion lens optional light from the built in light is blocked and may not illuminate the subject properly Replacing the bulb Use the Sony XB 3D halogen lamp optional The supplied halogen lamp is no...

Страница 63: ... To prevent possible burn hazard disconnect the power source before replacing and do not touch the bulb until the bulb becomes cool enough to handle for about 30 minutes or more Note To prevent the bulb from being smudged with finger prints handle it with a dry cloth etc If the bulb is smudged wipe it completely Using the built in light ...

Страница 64: ... EFFECT to OFF in the menu settings Note You cannot record pictures that you have processed using the picture effect function with this camcorder To record pictures that you have processed using the picture effect function record the pictures on the VCR using your camcorder as a player Pictures processed by the picture effect function Pictures processed by the picture effect function are not outpu...

Страница 65: ...ion Set D EFFECT to OFF in the menu settings Note You cannot record images that you have processed using the digital effect function with this camcorder To record images that you have processed using the digital effect function record the images on the VCR using your camcorder as a player Pictures processed by the digital effect function Pictures processed by the digital effect function are not ou...

Страница 66: ...Turn the dial downward To cancel the Tape PB ZOOM function Press PB ZOOM Note You cannot record pictures that you have processed using the Tape PB ZOOM function with this camcorder To record pictures that you have processed using the Tape PB ZOOM function record the pictures on the VCR using your camcorder as a player Pictures processed by the Tape PB ZOOM function Pictures processed by the Tape P...

Страница 67: ... ZERO SET MEMORY indicator disappears and the time code appears 5 Press N Playback starts from the counter s zero point Notes When you press ZERO SET MEMORY on the Remote Commander before rewinding the tape the zero set memory function is canceled There may be a discrepancy of several seconds from the time code If a tape has a blank portion in the recorded portions The zero set memory function may...

Страница 68: ... Commander repeatedly until the date search indicator appears The indicator changes as follows 3 When the current position is b press to search towards a or press to search towards c Your camcorder automatically starts playback at the point where the date changes Each time you press or the camcorder searches for the previous or next date To stop searching Press x Searching a recording by date Date...

Страница 69: ...by date Date search Note If one day s recording is less than 2 minutes your camcorder may not accurately find the point where the recording date changes If a tape has a blank portion in the recorded portions The date search function may not work correctly ...

Страница 70: ...to VCR 2 Press SEARCH MODE on the Remote Commander repeatedly until the photo search indicator appears The indicator changes as follows 3 Press or to select the photo for playback Each time you press or the camcorder searches for the previous or next photo Your camcorder automatically starts playback from the photo To stop searching Press x Searching for a photo Photo search Photo scan 3 PHOTO 01 ...

Страница 71: ... photo scan indicator appears The indicator changes as follows 3 Press or on the remote commander Each photo is played back for about 5 seconds automatically To stop scanning Press x If a tape has a blank portion in the recorded portions The photo search and photo scan functions may not work correctly 3 2 SEARCH MODE PHOTO 00 SCAN T T T T PHOTO SEARCH no indicator PHOTO SCAN DATE SEARCH ...

Страница 72: ... on the Remote Commander 2 1 Insert a blank tape or a tape you want to record over into the VCR and insert the recorded tape into your camcorder 2 Set the input selector on the VCR to LINE Refer to the operating instructions of your VCR for more information 3 Set the POWER switch to VCR 2 PLAYER 3 4 Play back the recorded tape on your camcorder 5 Start recording on the VCR Refer to the operating i...

Страница 73: ...the audio input jack on the TV If you connect the white plug the sound is L left signal If you connect the red plug the sound is R right signal If your VCR is a stereo type CCD TRV107 TRV108 TRV308 TRV408 TRV608 only Connect the audio plug of the A V connecting cable supplied to the left white input jack of your VCR If your VCR has an S video jack Connect using an S video cable optional to obtain ...

Страница 74: ...ormation 3 Set the POWER switch to VCR 4 Play back the recorded tape on your camcorder 5 Start recording on the VCR Refer to the operating instructions of your VCR for more information When you have finished dubbing a tape Press x on both your camcorder and the VCR You can connect one VCR only using the i LINK cable DV connecting cable See page 126 for more information about i LINK The following f...

Страница 75: ...ep 3 Selecting the title p 80 Step 4 Selecting the dubbing mode p 81 Step 5 Performing Easy Dubbing p 82 If you dub using the same VCR again you can skip step 2 If you do not need to put in a title you can skip step 3 Step 1 Connecting the VCR Connect the devices as illustrated in page 72 You can edit on VCRs that support the following systems 8 mm Hi8 Digital8 VHS S VHS VHSC S VHSC Betamax ED Bet...

Страница 76: ... to PLAYER on your camcorder 2 Turn the power of the connected VCR on then set the input selector to LINE When you connect a video camera recorder set its power switch to VTR VCR 3 Press EASY DUBBING to display the menu 4 Turn the SEL PUSH EXEC dial to select SETUP then press the dial 5 Turn the SEL PUSH EXEC dial to select PAUSE MODE then press the dial 6 Turn the SEL PUSH EXEC dial to select the...

Страница 77: ...N 3 0 0 0 0 0 NORMAL NORMAL 1 EASY DUB END EASY DUB END Dubbing a tape easily Easy Dubbing 2 Setting the IR SETUP code 1 Turn the SEL PUSH EXEC dial to select IR SETUP then press the dial 2 Turn the SEL PUSH EXEC dial to select the IR SETUP code of your VCR then press the dial Check the code in About the IR SETUP code p 78 CCD TRV608 ...

Страница 78: ...49 Magnavox 83 78 77 17 Marantz 21 33 35 Marta 47 Memorex 77 37 Minolta 42 8 About the IR SETUP code The IR SETUP code is stored in the memory of your camcorder Be sure to set the correct code depending on your VCR The default setting is Code number 3 Brand IR SETUP code Mitsubishi MGA 28 22 23 24 29 Multitech 23 80 32 NEC 21 33 35 Olympic 77 78 Optimus 22 Orion 60 Panasonic 16 17 78 77 Pentax 42 ...

Страница 79: ... recording the setting is correct When finished the indicator changes to COMPLETE 3 Setting your camcorder and the VCR to face each other Locate the Infrared rays emitter of your camcorder and face it towards the remote sensor of the VCR Set the devices about 30 cm 12 in apart and remove any obstacles between the devices When the VCR does not operate correctly After checking the code in About the ...

Страница 80: ...g 2 3 4 S I Z E SMA L L HELLO S I Z E L ARGE HE L LO HAPPY B I RTHDAY HAPPY HOL I DAYS CONGRA TU L A T I ONS OUR SWEE T BABY HELLO T I T L E HELLO T I T L E BB I NG U D Y S A E BB I NG U D Y S A E BB I NG U D Y S A E BB I NG U D Y S A E EASY DUBBING START T I T LE SEL MODE SEL SET UP OFF NORMAL 0 0 0 0 0 EASY DUBBING T I T LE SEL OFF 0 0 0 0 0 0 0 0 0 0 0 0 0 0 0 0 0 0 0 0 O L L E H Y A D H T R I ...

Страница 81: ...terval recording PREVIEW 1 Turn the SEL PUSH EXEC dial to select MODE SEL then press the dial 2 Turn the SEL PUSH EXEC dial to select the mode to dub then press the dial NORMAL you can record into the VCR normally PREVIEW you can make a time lapse dubbing by setting the camcorder to automatically playback and standby sequentially a Recording VCR b Waiting time VCR c Playback time camcorder 25 s 30...

Страница 82: ...ubbing during editing Press x on your camcorder To quit the Easy Dubbing function Your camcorder stops when dubbing is complete Then the display returns to START in the menu settings Press EASY DUBBING to quit the Easy Dubbing function Note If you set the background color to FADE in Step 3 the picture may not appear properly depending on the connected VCR You cannot record on the VCR when The tape...

Страница 83: ...ng the same VCR again you can skip steps 2 and 3 Using the Digital program editing function Operation 1 Making the program p 90 Operation 2 Performing Digital program editing dubbing a tape p 91 Step 1 Connecting the VCR You can connect both the A V connecting cable and the i LINK cable DV connecting cable When you use the A V connecting cable connect the devices as illustrated in page 73 When you...

Страница 84: ...L PUSH EXEC dial to select IR then press the dial 9 Turn the SEL PUSH EXEC dial to select IR SETUP then press the dial 0 Turn the SEL PUSH EXEC dial to select the IR SETUP code number of your VCR then press the dial Check the code in About the IR SETUP code p 78 Dubbing only desired scenes Digital program editing 4 6 10 5 1 3 MENU C A M E R A V C R O F F C H G POWER OTHERS BEEP COMMANDER D I SP L ...

Страница 85: ...EC if the button to cancel recording pause is z Select PB if the button to cancel recording pause is N 3 Setting your camcorder and the VCR to face each other Locate the infrared rays emitter of your camcorder and face it towards the remote sensor of the VCR Set the devices about 30 cm 12 in apart and remove any obstacles between the devices 1 2 ED I T SE T CONTROL AD J T ES T CUT I N CUT OUT I R ...

Страница 86: ...shed the indicator changes to COMPLETE When the VCR does not operate correctly After checking the code in About the IR SETUP code set the IR SETUP or the PAUSEMODE again Place your camcorder at least 30 cm 12 in away from the VCR Refer to the operating instructions of your VCR 2 3 MENU END V I DEO ED I T ED I T SET CONTROL ADJ TEST CUT I N CUT OUT I R SETUP PAUSEMODE I R TEST RETURN COMPLETE 0 00 ...

Страница 87: ...MODE I R TEST RETURN 0 00 00 00 I R i L I NK I R i L I NK i L I NK Dubbing only desired scenes Digital program editing Step 2 Setting the VCR to operate with the i LINK cable DV connecting cable When you connect using the i LINK cable DV connecting cable optional follow the procedure below 1 Set the POWER switch to VCR on your camcorder 2 Turn the power of the connected VCR on then set the input s...

Страница 88: ...CUTE then press the dial IN and OUT are recorded on an image for 5 times each to calculate the numerical values for adjusting the synchronization The EXECUTING indicator flashes on the screen When finished the indicator changes to COMPLETE 9 Rewind the tape in the VCR then start slow playback Take a note of the opening numerical value for each IN and the closing numerical value for each OUT 10 Cal...

Страница 89: ... I N CUT OUT I R SE TUP PAUSEMODE I R T ES T 0 RE TURN MENU END V I DEO ED I T V I DEO ED I T V I DEO ED I T V I DEO ED I T V I DEO ED I T 0 00 00 00 0 00 00 00 0 00 00 00 0 00 00 00 0 00 00 00 0 00 00 00 CONTROL Notes When you connect with the i LINK cable DV connecting cable you may not be able to operate the dubbing function correctly depending on the VCR Set CONTROL to IR in the menu settings ...

Страница 90: ...o operation buttons then pause playback 8 Press the SEL PUSH EXEC dial The OUT point of the first program is set then the bottom part of the program mark changes to light blue 9 Set the program by repeating steps 5 to 8 When the program is set the program mark changes to light blue You can set a maximum of 20 programs 6 8 9 5 7 4 STOP REW PLAY FF PAUSE REC OTHERS READY BEEP COMMANDER D I SP L AY V...

Страница 91: ...cted Note You cannot operate recording during Digital program editing On a blank portion of the tape You cannot set IN or OUT on a blank portion of the tape If there is a blank portion between IN and OUT on the tape The total time code may not be displayed correctly Operation 2 Performing Digital program editing Dubbing a tape Make sure that your camcorder and VCR are connected and that the VCR is...

Страница 92: ...he tape has run out The write protect tab on the cassette is set to lock The IR SETUP code is not correct when IR is selected The button to cancel recording pause is not correct when IR is selected NOT READY appears on the LCD screen when The program to operate Digital program editing has not yet been made i LINK is selected but the i LINK cable DV connecting cable is not connected The power of th...

Страница 93: ...t setting is LCD Only SP mode is available 1 Insert a blank tape or a tape you want to record over into your camcorder and insert the recorded tape into the VCR 2 Set the POWER switch to VCR on your camcorder 3 Press z REC and the button on its right simultaneously on your camcorder then immediately press X on your camcorder 4 Press N on the VCR to start playback The picture from a TV or VCR appea...

Страница 94: ...fect the dubbed picture If you record a playback pause picture with the DV IN OUT jack The recorded picture becomes rough And when you play back the picture using your camcorder the picture may jitter Before recording Make sure if the DV IN indicator appears on the screen by pressing DISPLAY The DV IN indicator may appear on both equipment Recording from video ...

Страница 95: ...specifying the insert start and end points Use the Remote Commander for this operation Connections are the same as in Recording from video on page 93 Insert a cassette containing the desired scene into the VCR This function is not available when the i LINK cable DV connecting cable is not used A A tape that contains the scene to be inserted B A tape before editing C A tape after editing a b c A B ...

Страница 96: ...t before the insert start point a then press X to set the VCR to the playback pause mode 3 On your camcorder locate the insert end point c by pressing m or M Then press X to set it to the playback pause mode 4 Press ZERO SET MEMORY on the Remote Commander The ZERO SET MEMORY indicator flashes and the end point of the insert is stored in memory 5 On your camcorder locate the insert start point b by...

Страница 97: ...ows XP Home Edition or Windows XP Professional standard installation However operation is not assured if the above environment is an upgraded OS If you are using Windows 98 you cannot capture sounds CPU Minimum 500 MHz Intel Pentium III or faster 800 MHz or faster recommended Application DirectX 8 0a or later Sound system 16 bit stereo sound card and speakers Memory 64 MB or more Hard disk Minimum...

Страница 98: ...al Installing the USB driver Before connecting your camcorder to your computer install the USB driver to the computer The USB driver is contained together with application software for viewing images on the CD ROM supplied with your camcorder Be sure to follow the steps before connecting the USB cable to your computer Connect the USB cable in step 8 If the USB driver has been registered incorrectl...

Страница 99: ...are installed Be sure to allow the installation to complete without interrupting it If the Files Needed screen appears Windows 2000 Professional and Windows XP users Set the CD ROM on the CD ROM driver then select Browse t My Computer t ImageMixer t sonyhcb sys and click the OK button The installation is completed proceed to Installing PIXELA ImageMixer Ver 1 0 for Sony on page 101 If you cannot i...

Страница 100: ...egory screen appears In this case click Switch to Classic View instead Windows 2000 Professional Select My Computer t Control Panel t System t Hardware tab and click the Device Manager button Windows 98 SE Windows Me Select My Computer t Control Panel t System and click the Device Manager tab 5 Select the devices underlined in the illustrations below and delete them Windows 98 SE Windows Me Window...

Страница 101: ...our computer and allow Windows to load While using your computer close all running applications 2 Insert the supplied CD ROM into the CD ROM drive of your computer The application software screen appears If the application software screen does not appear double click My Computer and then ImageMixer CD ROM Drive The application software screen appears after a while 3 Move the cursor to PIXELA Image...

Страница 102: ... the POWER switch to VCR DCR TRV140 PLAYER CCD TRV608 5 Select USB STREAM to ON in in the menu settings p 111 6 Select Start t Program t Pixela t ImageMixer t PIXELA ImageMixer Ver 1 0 for Sony on Windows 7 Click the input mode button in the left side of Start up screen 8 Select 9 Start playing back a tape on your camcorder The images recorded on a tape appears in the preview window Viewing images...

Страница 103: ... window Capturing images Capturing still images 1 Select 2 Click at the point to capture using the preview window The captured image appears on the thumbnail list window Capturing moving images 1 Select 2 Click at the start point to capture and click at the stop point to capture using the preview window The captured image appears on the thumbnail list window 1 2 1 2 Viewing images using your compu...

Страница 104: ...dure to correctly install the USB driver p 98 If any trouble occurs Close all running applications then restart it Carry out the following operations after quitting the application disconnect the USB cable turn on off the power Seeing the on line help operation manual of PIXELA ImageMixer Ver 1 0 for Sony PIXELA ImageMixer Ver 1 0 for Sony is provided with on line help operation manual 1 Click but...

Страница 105: ...For details see Selecting the mode setting of each item p 106 To make the menu display disappear Press MENU 1 CAMERA 2 3 4 VCR MENU MANUA L SE T PROGRAM AE P E F F ECT D E F F ECT AUTO SHTR MENU END MANUA L SE T MENU END MANUA L SE T PROGRAM AE P E F F ECT OTHERS WOR L D T I ME BEEP 0 HR P E F F ECT D E F F ECT OTHERS WOR L D T I ME BEEP REC L AMP RE TURN ON OF F D I SP L AY COMMANDER CAMERA PLAYE...

Страница 106: ...ffects using the various digital functions p 47 65 To automatically activate the electronic shutter when shooting in bright conditions To not automatically activate the electronic shutter even when shooting in bright conditions To deactivate digital zoom Up to 20 zoom is carried out To activate digital zoom More than 20 to 40 zoom is performed digitally p 26 To activate digital zoom More than 20 t...

Страница 107: ...ing function To set waiting time and recording time for Interval recording function p 54 POWER switch CAMERA CAMERA CAMERA CAMERA CAMERA Changing the menu settings Notes on the SteadyShot function CCD TRV308 TRV408 TRV608 DCR TRV140 only The SteadyShot function will not correct excessive camera shake Attachment of a conversion lens optional may influence the SteadyShot function SteadyShot does not...

Страница 108: ...re deterioration when editing To correct jitter To not correct jitter Set TBC to OFF when playing back a tape on which you have dubbed over and recorded the signal of a TV game or similar machine To reduce picture noise To reduce a conspicuous afterimage when the picture has a lot of movement POWER switch VCR VCR PLAYER PLAYER PLAYER Note on AUDIO MIX DCR TRV140 only When playing back a tape recor...

Страница 109: ...ife is reduced by about 10 percent during recording When you use power sources other than the battery pack BRIGHT is automatically selected 1 DCR TRV140 only 2 CCD TRV107 TRV108 TRV308 TRV408 TRV608 only 3 CCD TRV107 TRV308 TRV408 TRV608 DCR TRV140 only 4 CCD TRV107 TRV308 TRV408 TRV608 only Icon item REC MODE AUDIO MODE 1 ORC TO SET 2 ORC stands for Optimizing the Recording Condition Mode z SP LP...

Страница 110: ...r When you record in both the SP and LP modes on one tape or you record some scenes in the LP mode the playback image may be distorted or the time code may not be written properly between scenes 1 Noise may occur also when you play back on your camcorder tapes recorded in the LP mode on other camcorders or VCRs 2 When you record a tape in the LP mode on your camcorder recording is carried out in t...

Страница 111: ...AGE DEMO MODE Mode z OFF ON z ON OFF z NORMAL 2 z ENGLISH FRANÇAIS ESPAÑOL PORTUGUÊS z ON OFF Meaning To set the date or time p 19 To deactivate the USB Streaming function To activate the USB Streaming function To record the date for 10 seconds after recording has started To cancel the auto date function To display selected menu items in normal size To display selected menu items at twice the norm...

Страница 112: ...OFF z ON OFF z LCD V OUT LCD z ON OFF Meaning To set the clock to the local time Turn the SEL PUSH EXEC dial to set the time difference The clock changes by the time difference you set here If you set the time difference to 0 the clock returns to the originally set time To output the melody when you start stop recording or when an unusual condition occurs on your camcorder To output the beep inste...

Страница 113: ...ead c Install a fully charged battery pack p 13 14 The viewfinder lens is not adjusted c Adjust the viewfinder lens p 27 STEADYSHOT is set to OFF in the menu settings c Set it to ON p 107 16 9WIDE is set to ON in the menu settings 1 c Set it to OFF The wide mode is set to 16 9FULL 4 c Set it to OFF p 107 The setting is the manual focus mode c Press FOCUS to return to the autofocus mode p 53 Shooti...

Страница 114: ...just it p 38 EDIT is set to ON in the menu settings c Set it to OFF p 108 The video head may be dirty c Clean the heads using the Sony V8 25CLD cleaning cassette optional p 130 The video head may be dirty c Clean the heads using the Sony V8 25CLD cleaning cassette optional p 130 The stereo tape is played back with HiFi SOUND set to 2 in the menu settings 1 c Set it to STEREO p 108 The volume is tu...

Страница 115: ...corded on the cassette yet The tape has a blank portion in the beginning or middle The operating temperature is too low The battery pack is not fully charged c Charge the battery pack fully again p 13 14 The battery pack is completely dead and cannot be recharged c Replace with a new battery pack p 13 You have used the battery pack in an extremely hot or cold environment for a long time The batter...

Страница 116: ...corded portion p 91 The synchronization of your camcorder and the VCR is not adjusted c Adjust the synchronization of the VCR p 88 Your camcorder was connected to your computer with the USB cable before installing the USB driver so the driver was not recognized by the computer c Uninstall the unrecognized driver and then reinstall the driver p 99 The USB driver is not installed correctly c Uninsta...

Страница 117: ... p 140 The AC power adaptor is disconnected c Connect it firmly p 18 The battery pack is not installed properly c Install it properly Something is wrong with the battery pack c Contact your Sony dealer or local authorized Sony service facility The POWER switch is not set to OFF CHG c Set it to OFF CHG Set the date and time p 19 1 CCD TRV107 TRV108 TRV308 TRV408 TRV608 only 2 DCR TRV140 only 3 CCD ...

Страница 118: ...ur Sony dealer or local authorized Sony service facility and inform them of the 5 digit code example E 61 10 If you are unable to rectify the problem even if you try corrective actions a few times contact your Sony dealer or local authorized Sony service facility Your camcorder has a self diagnosis display function This function displays the current condition of your camcorder as a 5 digit code a ...

Страница 119: ... 2 You hear the melody or beep sound 3 This indicator appears in the viewfinder only The battery pack is dead or nearly dead Slow flashing The battery pack is nearly dead P 14 Depending on conditions the environment or the battery pack the warning indicator may flash even if there are 5 to 10 minutes battery remaining Fast flashing The battery pack is dead The battery pack is completely dead and c...

Страница 120: ...ched the end START STOP KEY Press START STOP to activate the ORC setting This message is displayed in white p 109 ORC The ORC setting is working This message is displayed in white p 109 DCR TRV140 only Q Z TAPE END 1 The tape has reached the end COPY INHIBIT 1 You tried to record a picture that has a copyright control signal p 121 1 You hear the melody or beep sound 2 The x indicator and CLEANING ...

Страница 121: ...alog system cannot be played back with your camcorder When you play back Playing back on a PAL recorded tape You can play back tapes recorded in the PAL video system on the LCD screen if the tape is recorded in the SP mode The picture appears neither in the viewfinder nor on the TV Copyright signal When you play back Using any other video camera recorder you cannot record on a tape that has record...

Страница 122: ... in the DV system set HiFi SOUND to the desired mode in the menu settings p 108 Sound from speaker HiFi Sound Playing back Playing back a dual Mode a stereo tape sound track tape STEREO Stereo Main sound and sub sound 1 Lch Main sound 2 Rch Sub sound You cannot record dual sound programs on your camcorder About video cassettes ...

Страница 123: ...ted according to the format in which the tape has been recorded This Hi8 system is an extension of the standard 8 mm system and was developed to produce higher quality pictures You cannot play back a tape recorded in the Hi8 system correctly on video recorders players other than a Hi8 video recorder player is a trademark is a trademark When you play back The playback mode SP LP and system Hi8 or s...

Страница 124: ...ely before you start taking shots Use the large capacity battery pack NP FM50 FM70 QM71 FM90 FM91 QM91 optional Frequently using the LCD panel or frequently operating playback fast forward or rewind wears out the battery pack faster We recommend using the large capacity battery pack NP FM50 FM70 QM71 FM90 FM91 QM91 optional Be certain to turn the POWER switch to OFF CHG when not taking shots or pl...

Страница 125: ...o discharge the battery pack on your camcorder leave your camcorder in CAMERA standby mode without a cassette inserted until the power goes off Battery life The battery life is limited Battery capacity drops little by little as you use it more and more and as time passes When the available battery time is shortened considerably a probable cause is that the battery pack has reached the end of its l...

Страница 126: ...at this unit is connected to but also with other devices via the directly connected equipment Note however that the method of operation sometimes varies according to the characteristics and specifications of the equipment to be connected and that operations and data transactions are sometimes not possible on some connected equipment Note Normally only one piece of equipment can be connected to thi...

Страница 127: ...econd or the amount of data that can be sent or received in one second For example a baud rate of 100Mbps means that 100 megabits of data can be sent in one second i LINK Functions on this unit For details on how to dub when this unit is connected to other video equipment having DV jacks see page 74 This unit can also be connected to other i LINK DV compatible equipment made by SONY e g VAIO serie...

Страница 128: ...anada Central America Chile Colombia Ecuador Guyana Jamaica Japan Korea Mexico Peru Surinam Taiwan the Philippines the U S A Venezuela etc PAL system Australia Austria Belgium China Czech Republic Denmark Finland Germany Holland Hong Kong Hungary Italy Kuwait Malaysia New Zealand Norway Poland Portugal Singapore Slovak Republic Spain Sweden Switzerland Thailand United Kingdom etc PAL M system Braz...

Страница 129: ...mcorder and leave it for about 1 hour with the cassette compartment open Your camcorder can be used again if the indicator does not appear when the power is turned on again Note on moisture condensation Moisture may condense when you bring your camcorder from a cold place into a warm place or vice versa or when you use your camcorder in a hot place as follows You bring your camcorder from a ski sl...

Страница 130: ...y b Very dirty DCR TRV140 mosaic pattern noise appears on the playback picture playback pictures do not move playback pictures are hardly visible playback pictures do not appear the x indicator and CLEANING CASSETTE message appear one after another on the screen If the above problem occurs clean the video heads with the Sony V8 25CLD cleaning cassette optional Check the picture and if the above pr...

Страница 131: ...power adaptor For DC or AC operation use the accessories recommended in these operating instructions If any solid object or liquid get inside the casing unplug your camcorder and have it checked by a Sony dealer before operating it any further Avoid rough handling or mechanical shock Be particularly careful with the lens Keep the POWER switch set to OFF CHG when you are not using your camcorder Do...

Страница 132: ...ur personal computer DCR TRV140 only When recording an image processed or edited by your personal computer with the i LINK cable DV connecting cable use a new Hi8 Digital8 tape AC power adaptor Unplug the unit from the wall outlet when you are not using the unit for a long time To disconnect the power cord pull it out by the plug Never pull the power cord itself Do not operate the unit with a dama...

Страница 133: ... C 140 F such as in a car parked in the sun or under direct sunlight Keep the battery pack dry Do not expose the battery pack to any mechanical shock Do not disassemble nor modify the battery pack Attach the battery pack to the video equipment securely Charging while some capacity remains does not affect the original battery capacity Note on dry batteries CCD TRV107 TRV408 DCR TRV140 only To avoid...

Страница 134: ...era CCD TRV107 TRV108 51 8 1 036 mm 2 40 6 8 in CCD TRV308 TRV408 TRV608 DCR TRV140 41 820 mm 1 5 8 32 3 8 in Color temperature Auto Minimum illumination CCD TRV308 TRV408 TRV608 0 4 lx lux F 1 4 CCD TRV107 TRV108 DCR TRV140 1 lx lux F 1 4 0 lx lux in the NightShot mode Objects unable to be seen due to the dark can be shot with infrared lighting Input output connectors S video output 4 pin mini DI...

Страница 135: ...V AC 50 60 Hz Power consumption 23 W Output voltage DC OUT 8 4 V 1 5 A in the operating mode Operating temperature 0 C to 40 C 32 F to 104 F Storage temperature 20 C to 60 C 4 F to 140 F Dimensions approx 125 39 62 mm 5 1 9 16 2 1 2 in w h d excluding projecting parts Mass approx 280 g 9 8 oz excluding power cord Battery pack Maximum output voltage DC 8 4 V Output voltage DC 7 2 V Capacity 5 0 Wh ...

Страница 136: ...EL PUSH EXEC dial p 19 105 7 Power zoom lever p 26 8 PHOTO button p 40 2 9 POWER switch p 14 0 START STOP button p 23 qa DC IN jack p 14 qs Hooks for shoulder strap p 136 1 CCD TRV608 DCR TRV140 only 2 DCR TRV140 only Camcorder qa qs 9 7 q 8 6 3 4 5 2 1 Attaching the shoulder strap Attach the shoulder strap supplied with your camcorder to the hooks for the shoulder strap ...

Страница 137: ...SUPER NIGHTSHOT p 29 2 button wa NIGHTSHOT switch p 29 ws Display window p 142 wd Camera recording lamp p 23 wf Tripod receptacle base Make sure that the length of the tripod screw is less than 5 5 mm 7 32 inch Otherwise you cannot attach the tripod securely and the screw may damage your camcorder Identifying the parts and controls qj qk qg qh wf wd wa w ql qf qd ws This button has a tactile dot 1...

Страница 138: ...e PB ZOOM button p 66 1 EASY DUBBING button p 75 2 ea DISPLAY button p 34 es END SEARCH button p 32 ed Viewfinder p 27 ef FADER button p 44 eg BACK LIGHT button p 29 eh FOCUS button p 53 ej MENU button p 19 105 ea ed es ej wk wl e wh wj wg ef eh eg This button has a tactile dot 1 DCR TRV140 only 2 CCD TRV107 TRV108 TRV308 TRV408 TRV608 only ...

Страница 139: ...eference Identifying the parts and controls ek DATE button p 31 1 el TIME button p 31 1 r COUNTER RESET button p 24 1 This button has a tactile dot 1 CCD TRV107 TRV108 TRV308 TRV408 TRV608 only ek el r CCD TRV608 ...

Страница 140: ...k p 38 72 73 rk RFU DC OUT RFU adaptor PC output jack p 39 2 rl DV IN OUT jack p 74 93 3 The DV IN OUT jack is i LINK compatible rd rs ra rh rj rk rl rg rf Attaching the lens cap Attach the lens cap to the grip strap as illustrated Fastening the grip strap Fasten the grip strap firmly 1 CCD TRV107 TRV308 TRV408 TRV608 DCR TRV140 only 2 CCD TRV107 TRV108 TRV308 TRV408 TRV608 only 3 DCR TRV140 only ...

Страница 141: ...ensor to control the camcorder after turning on the camcorder 7 ZERO SET MEMORY button p 67 96 8 START STOP button p 23 9 DATA CODE button p 34 0 Power zoom button p 26 Notes on the Remote Commander Point the remote sensor away from strong light sources such as direct sunlight or overhead lighting Otherwise the Remote Commander may not function properly Your camcorder works in the commander mode V...

Страница 142: ...lt in light indicator p 61 3 qf STBY REC indicator p 23 Video control mode indicator p 36 qg Tape counter indicator p 28 Time code indicator p 28 1 Self diagnosis display indicator p 118 Tape photo recording indicator p 28 1 qh Remaining tape indicator p 28 qj ZERO SET MEMORY indicator p 67 96 1 qk Search mode indicator p 32 68 70 1 END SEARCH indicator p 32 4 ql NIGHTSHOT indicator p 30 SUPER NIG...

Страница 143: ... wh FULL charge indicator p 14 wj Tape counter indicator p 28 DATE or TIME indicator p 20 31 4 Time code indicator p 28 1 Self diagnosis display indicator p 118 Identifying the parts and controls 1 DCR TRV140 only 2 CCD TRV308 TRV408 TRV608 DCR TRV140 only 3 CCD TRV107 TRV308 TRV408 TRV608 DCR TRV140 only 4 CCD TRV107 TRV108 TRV308 TRV408 TRV608 only ...

Страница 144: ... settings 105 Mirror mode 24 Moisture condensation 129 Monaural 39 MONOTONE 43 Mosaic fader 43 NIGHTSHOT 29 NTSC system 128 O P Q OLD MOVIE 47 Operation indicators 142 ORC 109 OVERLAP 43 Photo scan 71 Photo search 70 Picture effect 46 64 Picture search 36 Playback pause 36 PROGRAM AE 50 R Recording time 15 Recording and playback systems 121 Recording mode 23 Remaining battery time indicator 28 Rem...

Страница 145: ...145 Quick Reference ...

Страница 146: ......

Страница 147: ......

Страница 148: ...Sony Corporation Printed in Japan 307231714 ...

Отзывы: