background image

Ta
ble
 of
 

co
nte
n

ts

Op
e

rat

io

S

ear

ch

MENU/Settin

g

Se
ar

ch

In

de
x

121

GB

Copy

Copies all images in the internal memory to a memory card.

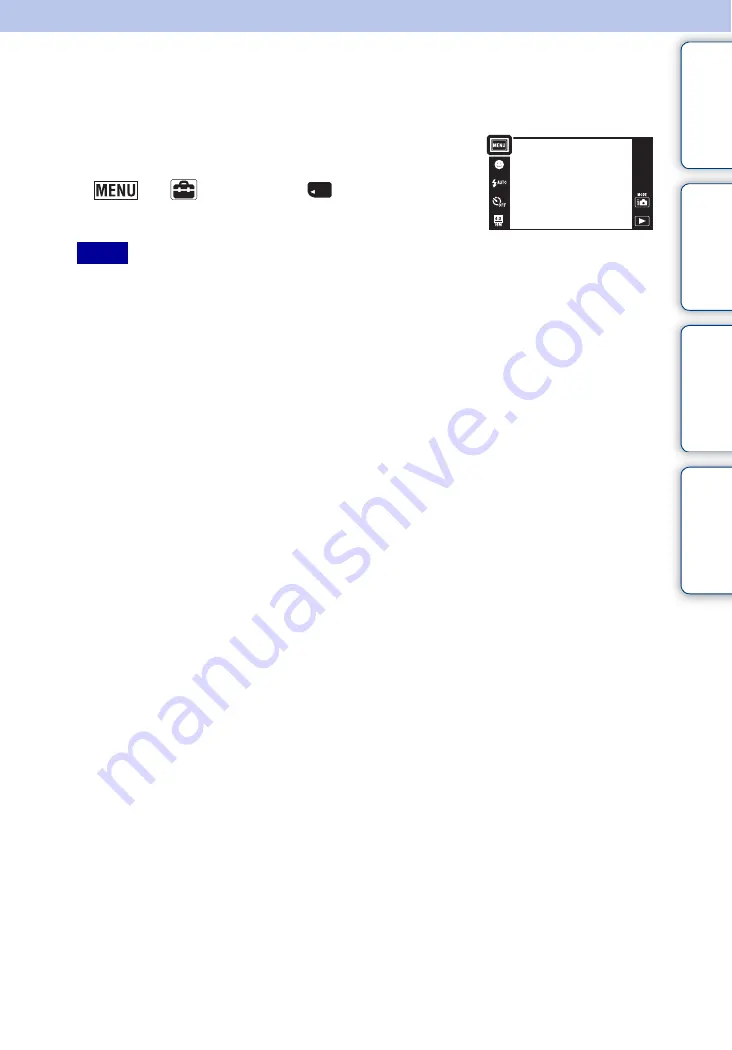
1

Insert a memory card with sufficient free capacity 
into the camera.

2


t


(Settings) 

t


 (Memory Card 

Tool) 

t

 [Copy] 

t

 [OK]

• Use a fully charged battery pack. If you attempt to copy image files using a battery pack with little 

remaining charge, the battery pack may run out, causing copying to fail or possibly corrupting the data.

• You cannot copy images individually.
• The original images in the internal memory are retained even after copying. To delete the contents of the 

internal memory, remove the memory card after copying, then format the internal memory ([Format] in 
[Internal Memory Tool]).

• A new folder is created on the memory card and all the data will be copied to it. You cannot choose a 

specific folder and copy images to it.

Notes

Содержание Cyber-shot DSC-T99C

Страница 1: ... 2010 Sony Corporation 4 198 779 11 1 GB Cyber shot Handbook DSC T99 T99D T99C T99DC Table of contents Operation Search MENU Settings Search Index ...

Страница 2: ...listing of MENU Settings items Search for information by keyword Marks and notations used in this handbook Table of contents Operation Search MENU Settings Search Index In this handbook the sequence of operations is shown by arrows t You should touch the items on the screen in the order indicated Marks are shown as they appear in the camera s default setting The default setting is indicated by Ind...

Страница 3: ...ck media slot You can use the Memory Stick Duo media by inserting it into the Memory Stick Duo media Adaptor sold separately Functions built into this camera This manual describes each of the functions of TransferJet compatible incompatible devices To check if your camera supports the TransferJet function check for the following mark on the bottom of the camera TransferJet compatible device Transf...

Страница 4: ...s Be careful when placing the camera near a window or outdoors Do not press against the LCD screen The screen may be discolored and that may cause a malfunction Images may trail across on the LCD screen in a cold location This is not a malfunction Be careful not to bump the lens and be careful not to apply force to it On moisture condensation If the camera is brought directly from a cold to a warm...

Страница 5: ...1 Names of parts 16 List of icons displayed on the screen 17 Using the touch panel 19 Customizing MENU items 21 Using the internal memory 22 Shooting REC Mode 23 Intelligent Auto Adjustment 24 Sweep Panorama 25 Movie Mode 27 Program Auto 28 Scene Selection 29 Underwater Sweep Panorama 32 Zoom 33 Viewing Viewing still images 34 Playback Zoom 35 Wide Zoom 36 Temporarily Rotated Display 37 Viewing mo...

Страница 6: ...ems 14 TV Viewing an image on a Standard Definition SD TV 125 Viewing an image on a High Definition HD TV 126 Computer Using with your computer 128 Using the software 129 Connecting the camera to the computer 131 Uploading images to a media service 133 Printing Printing still images 135 Troubleshooting Troubleshooting 136 Warning indicators and messages 144 ...

Страница 7: ...h MENU Settings Search Index 7GB Others Using the camera abroad 149 Memory card 150 Battery pack 152 Battery charger 153 TransferJet standard 154 Number of still images and recordable time of movies 155 Precautions 156 Index Index 157 ...

Страница 8: ... Snap 29 Twilight Portrait 29 Smile Shutter 41 Scene Recognition 62 Face Detection 65 Anti Blink 68 Red Eye Reduction 97 Shooting panoramic images Sweep Panorama 25 Shooting close to objects Macro 53 Close Focus 53 Shooting moving objects Movie Mode 27 Hi Speed Shutter 30 Burst Settings 52 Shooting without blur High Sensitivity 29 Hi Speed Shutter 30 2 second delay self timer 45 ISO 55 Shooting wi...

Страница 9: ...17 Displaying enlarged images Playback Zoom 35 Trimming Resize 81 Displaying full screen images Wide Zoom 36 Temporarily Rotated Display 37 Image Size Panorama Image Size 49 Editing images Paint 80 Retouch 81 Playing back a series of images in order Slideshow 73 Printing images with the date PMB Picture Motion Browser 129 Changing date and time settings Area Setting 123 Date Time Setting 124 Initi...

Страница 10: ...Table of contents Operation Search MENU Settings Search Index 10GB Viewing on TVs Viewing an image on a Standard Definition SD TV 125 Viewing an image on a High Definition HD TV 126 ...

Страница 11: ...elow indicates settings that can be changed while indicates settings that cannot be changed A setting may be fixed or restricted depending on the shooting mode For details see the page for each item The icons below and indicate the available modes MENU items Shooting REC Mode Menu items Easy Mode Movie shooting scene Smile Shutter Flash Self Timer Shooting Direction Image Size Panorama Image Size ...

Страница 12: ...B Underwater Sweep Panorama is displayed only when Housing is set to On Only the items that are available for each mode are displayed on the screen The four menu items displayed below differ according to each mode Anti Blink Display Settings Notes REC Mode Menu items ...

Страница 13: ... settings that can be changed while indicates settings that cannot be changed Only the items that are available for each mode are displayed on the screen The four menu items displayed below differ according to each mode MENU items Viewing View Mode Menu items Memory card Internal Memory Date View Folder view Still Folder view Movie Folder View Easy Mode Calendar Image Index Slideshow Delete Send b...

Страница 14: ...t desired setting Setting items Categories Items Shooting Settings AF Illuminator Grid Line Disp Resolution Digital Zoom Auto Orientation Scene Recog Guide Red Eye Reduction Blink Alert Main Settings Beep LCD Brightness Language Setting Display color Demo Mode Initialize COMPONENT Video Out Housing USB Connect LUN Settings Download Music Format Music Power Save TransferJet Eye Fi Calibration Conti...

Страница 15: ...tings have been entered from shooting mode Memory Card Tool appears only when a memory card is inserted in the camera while Internal Memory Tool appears only when a memory card is not inserted Memory Card Tool Format Create REC Folder Change REC Folder Delete REC Folder Copy File Number Internal Memory Tool Format File Number Clock Settings Area Setting Date Time Setting Notes Categories Items ...

Страница 16: ...L Hook for wrist strap M Battery insertion slot N Tripod receptacle O Battery Memory card cover P Multi connector Q Battery eject lever R Memory card slot S Access lamp T TransferJet mark 78 113 Using the wrist strap Attach the strap and place your hand through the loop to prevent the camera from being dropped Using the paint pen The paint pen is used when operating the touch panel It attaches to ...

Страница 17: ...ng back 1 Display Indication Scene Recognition icon White balance DRO Destination Scene Recognition Vibration warning Movie shooting scene Playback zoom Recording Playback Media Memory card internal memory Eye Fi Mode display 8 8 Image number Number of images recorded in date range selected folder Image size Panorama image size TransferJet settings Database file full Database file error warning Re...

Страница 18: ...able time Face Detection Soft Skin Effect Database file full Database file error warning Image size Panorama image size AF range finder frame Spot metering cross hairs ISO400 ISO number 2 0EV Exposure Value 125 Shutter speed F3 5 Aperture value Display Indication Focus Red eye reduction z AE AF lock NR slow shutter 125 Shutter speed F3 5 Aperture value ISO400 ISO number 2 0EV Exposure Value Close ...

Страница 19: ... pressing the shutter button halfway down brings the frame into focus If there is a face in the frame in addition to the focus the brightness and hue are also automatically optimized You cannot use this function when using the Digital Zoom shooting in close focus mode or in Easy Mode You cannot use this function when Landscape Twilight Gourmet Fireworks or Underwater mode is selected in the Scene ...

Страница 20: ...Displays hides the operation buttons Touch the left side of the LCD screen and drag left to hide the operation buttons drag from left to right to display the operation buttons Displays the next previous image Drag the LCD screen to the right or left during playback To change the image continuously drag to the right or left and continue pressing that side Displays the image index screen Drag up on ...

Страница 21: ...mize t OK 3 Select a MENU icon and drag it to the desired position on the left side of the LCD screen The MENU icon in the customization area is replaced 4 To cancel touch You cannot customize the MENU icon in Easy Mode Note Customization area zTaking advantage of customization Not only can you swap MENU icons but you can also swap MENU icons inside the customization area and reduce the number of ...

Страница 22: ...ry card to the internal memory By making a USB connection between the camera and a computer with a cable you can import data stored in the internal memory to a computer However you cannot export data on a computer to the internal memory When a memory card is inserted Recording Images are recorded on the memory card Playback Images on the memory card are played back Menu Settings etc Various functi...

Страница 23: ...tically Sweep Panorama Allows you to shoot a panoramic image after composing images Movie Mode Allows you to record movies Program Auto Allows you to shoot with the exposure adjusted automatically both the shutter speed and the aperture value Also you can select various settings using the menu Scene Selection Allows you to shoot with preset settings according to the scene Underwater Sweep Panorama...

Страница 24: ...when the scene is recognized For details see page 62 Scene Recognition icon and guide zIf you shoot a still image of a subject that is difficult to focus on The shortest shooting distance is approximately 8 cm 3 1 4 inches 1 cm 13 32 inches in Intelligent Auto Adjustment or Easy Mode W 50 cm 1 ft 7 3 4 inches T from the lens Shoot in the Close focus mode when you shoot a subject closer than the sh...

Страница 25: ...hly Under low light conditions panoramic images may be blurred or the shooting may not be successful Under lights that flicker such as fluorescent lights the brightness or color of the combined image will not always be the same When the whole angle of panoramic shooting and the AE AF locked angle are very different in brightness color and focus the shooting will not be successful If this happens c...

Страница 26: ...ly varied shapes or scenery is concentrated along a screen edge the image composition may fail In such case adjust the frame composition so that the section is in the center of the image then shoot again Radius as short as possible Horizontal direction Vertical direction zScrolling the panoramic images for display Scroll panoramic images by touching while panoramic images are being displayed Touch...

Страница 27: ... Search MENU Settings Search Index 27GB Movie Mode Allows you to record movies 1 Lower the lens cover to switch to shooting mode 2 REC Mode t Movie Mode 3 Press the shutter button 4 To stop shooting press the shutter button again ...

Страница 28: ...gram Auto Allows you to shoot with the exposure adjusted automatically both the shutter speed and the aperture value Also you can select various settings using the menu 1 Lower the lens cover to switch to shooting mode 2 REC Mode t Program Auto 3 Press the shutter button ...

Страница 29: ...s the clear sky and trees and flowers in vivid colors Twilight Portrait Allows you to shoot sharp images of people with the night view in the background without compromising the atmosphere Twilight Allows you to shoot night scenes at far distance without losing the dark atmosphere of the surroundings High Sensitivity Allows you to shoot images without a flash under low light conditions reducing bl...

Страница 30: ...Allows you to record clear images preventing sunken colors in snowy scenes or other places where the whole screen appears white Fireworks Allows you to record fireworks in all their splendor Underwater Allows you to shoot underwater in natural colors in housing such as Marine Pack Hi Speed Shutter Allows you to capture fast moving subjects outdoors or in other bright places The shutter speed becom...

Страница 31: ...icons indicate modes that are available Some functions are not available depending on the Scene Selection mode 1 Flash for White Balance cannot be selected 2 You can use Underwater White Balance instead of White Balance 3 Off for Soft Skin Effect is not available 4 When touched for Face Detection cannot be selected Functions you can use in Scene Selection Flash Self Timer Smile Shutter Burst Setti...

Страница 32: ... If this happens move the camera faster to record a full panoramic image Since several images are stitched together the stitched part will not be recorded smoothly Under low light conditions panoramic images may be blurred or the shooting may not be successful Under lights that flicker the brightness or color of the combined image will not always be the same When the whole angle of panoramic shoot...

Страница 33: ...ges up to 4 1 Lower the lens cover to switch to shooting mode 2 Move the zoom W T lever Move the zoom W T lever to the T side to zoom in and move to the W side to zoom out When the zoom scale exceeds 4 see page 94 The camera zooms slowly while shooting a movie Zoom is locked to the W side in Sweep Panorama and Underwater Sweep Panorama modes Notes T side W side ...

Страница 34: ...mage index screen during playback Drag up zViewing images taken with a different camera This camera creates an Image Database File on the memory card for recording and playing images If the camera detects images not registered in the Image Database File on the memory card a registration screen with the message Files found which were not recognized Import files will be displayed To view unregistere...

Страница 35: ...ched at the center You can also enlarge the image by moving the zoom W T lever to the T side 3 Adjust the zoom scale and position The image is further enlarged each time you touch the screen Button Operation method Action Drag up down right left Changes the zoom position Changes the zoom scale Cancels playback zoom Shows the displayed area of the whole image zTo save enlarged images You can save a...

Страница 36: ...ratio are played over the entire LCD screen In this case the top and bottom of the image will be slightly cropped 1 Press the Playback button to switch to playback mode 2 Touch Wide Zoom 3 To cancel Wide Zoom touch Wide Zoom again Wide Zoom is not available for the following image files Movies Panoramic images 16 9 images Note ...

Страница 37: ...on the screen 1 Press the Playback button to switch to playback mode 2 Select a vertically oriented image t touch Temporarily Rotated Display 3 To cancel the display touch Temporarily Rotated Display again Temporarily Rotated Display is not available for the following images Movies Panoramic images Horizontal orientation images Touching cancels Temporarily Rotated Display Notes ...

Страница 38: ...o play back some images shot using other cameras Button Operation method Action Jumps to the start of the movie m Fast rewind Touch u or the LCD screen Normal playback Pause M Fast forward Volume control Adjust the volume with or Note zTo display only movies on the index screen You can view only movie thumbnails on the index screen by touching t View Mode t Folder view Movie When a movie file is p...

Страница 39: ...ilable in Easy Mode Shooting Smile Shutter Touch Smile Image Size t Image Size t Select Large or Small Flash t Flash t Select Auto or Off Self Timer t Self Timer t Select Off or On Exit Easy Mode t Exit Easy Mode t OK zOn Scene Recognition Scene Recognition operates in Easy Mode This function lets the camera automatically recognize the shooting conditions and shoot the image The camera recognizes ...

Страница 40: ...he camera is in Movie Mode 1 Lower the lens cover to switch to shooting mode 2 REC Mode t Movie Mode 3 Movie shooting scene t desired mode When the buttons are not displayed on the left side of the LCD screen touch Auto Adjusts the setting automatically Underwater Allows you to shoot a movie underwater in natural colors using the housing such as Marine Pack ...

Страница 41: ...in Shooting using the Smile Shutter ends automatically when either the memory card or internal memory becomes full Smiles may not be detected correctly depending on the conditions You cannot use the Digital Zoom function The Smile Shutter function is not available in the following situations In Sweep Panorama mode In Underwater Sweep Panorama mode In Movie Mode Notes Smile Detection Sensitivity in...

Страница 42: ...Smile Detection is performed only for that face To perform smile detection for a different face touch that face page 66 If the camera cannot detect a smile set the Smile Detection Sensitivity to Slight Smile 1 Do not cover the eyes with the bangs Do not obscure the face by hat masks sunglasses etc 2 Try to orient the face in front of the camera and be as level as possible Keep the eyes narrowed 3 ...

Страница 43: ...ma modes Flash is set to Off Auto Flashes when shooting in low light or backlit conditions On Flash always operates Slow Synchro Flash always operates The shutter speed is slow in a dark place to clearly shoot the background that is out of flash light Off Flash does not operate Notes zWhen the White circular spots appears in flash photos This is caused by particles dust pollen etc floating close t...

Страница 44: ... Search Index 44GB Flash In Easy Mode select the Flash setting from 1 Lower the lens cover to switch to shooting mode 2 t Easy Mode t OK 3 t Flash t desired mode Auto Flashes when shooting in low light or backlit conditions Off Flash does not operate ...

Страница 45: ...lashes and a beep sounds until the shutter operates To cancel touch 2sec Sets the self timer to a 2 second delay Self portrait One Person Sets the self timer to Self portrait timer When the camera detects the specified number of faces a beep sounds and the shutter operates 2 seconds later Self portrait Two People Notes zAutomatic shooting with Self portrait timer Point the lens at yourself so your...

Страница 46: ...ra shake occurs frequently under low light or slow shutter speed conditions such as those encountered in Twilight Portrait or Twilight mode In such a case shoot with the below tips in mind Shoot with a 2 second delay self timer and stabilize the camera by holding your arms firmly at your side after pressing the shutter button Use a tripod or place the camera on a flat surface to hold the camera st...

Страница 47: ...r setting from 1 Lower the lens cover to switch to shooting mode 2 t Easy Mode t OK 3 t Self Timer t desired mode Off Does not use the self timer On Sets the self timer to a 10 second delay When you press the shutter button the self timer lamp flashes and a beep sounds until the shutter operates To cancel touch ...

Страница 48: ...ion in which the camera will be panned when shooting in Sweep Panorama or Underwater Sweep Panorama modes 1 Lower the lens cover to switch to shooting mode 2 Shooting Direction t desired direction Right Pan from left to right Left Pan from right to left Up Pan from down to up Down Pan from up to down ...

Страница 49: ...e When the buttons are not displayed on the left side of the LCD screen touch When you print still images recorded at a 16 9 aspect ratio or panoramic images both sides may be cut off When shooting still images Image size Usage guidelines LCD screen 4320 3240 For prints up to A3 size Images are displayed in 4 3 aspect ratio 3648 2736 2592 1944 For prints up to L 2L A4 size 640 480 For e mail attac...

Страница 50: ...de of the LCD screen touch A telephoto image is produced when the VGA image size is selected When shooting in Sweep Panorama Underwater Sweep Panorama modes Standard Shoots at 4912 1080 Horizontal Shoots at 3424 1920 Vertical Wide Shoots at 7152 1080 Horizontal Shoots at 4912 1920 Vertical When shooting movies Movie image size Average bit rate Usage guidelines 1280 720 Fine 9 Mbps Shoots highest q...

Страница 51: ...tail Image size is shown by the number of pixels Although you cannot see the differences on the screen of the camera the fine detail and data processing time differ when the image is printed or displayed on a computer screen Description of the pixels and the image size 1 Image size 14M 4320 pixels 3240 pixels 13 996 800 pixels 2 Image size VGA 640 pixels 480 pixels 307 200 pixels Many pixels Fine ...

Страница 52: ...ld down the shutter button The Burst mode is not available in Easy Mode Sweep Panorama Movie Mode or Smile Shutter The flash is set to Off When recording with the self timer only a single image can be shot The recording interval becomes longer depending on the setting for the image size When the battery level is low or when the internal memory or the memory card is full the Burst stops Focus White...

Страница 53: ... the Smile Shutter function is activated In Easy Mode When Self Timer is set to Self portrait One Person or Self portrait Two People Note the following points when using the Close focus mode You cannot use the Scene Recognition or Face Detection functions This mode is cancelled if you turn off the power or switch the shooting mode to another one The flash mode settings you can use in this mode are...

Страница 54: ...eft side of the screen 3 Touch to adjust exposure t OK You can also adjust the exposure by touching z of the adjustment bar and dragging to the right or left If you shoot a subject in extremely bright or dark conditions or when you use the flash the exposure adjustment may not be effective Note zAdjusting the exposure for better looking images Overexposure too much light Whitish image Lower EV set...

Страница 55: ...es an image sensor that receives light Even when the exposure is the same images differ depending on the ISO sensitivity High ISO sensitivity Records a bright image even in dark locations while increasing shutter speed to reduce blur However the image tends to become noisy Low ISO sensitivity Records a smoother image However when the exposure is insufficient the image may become darker zHints for ...

Страница 56: ... for a cloudy sky or a shady location Fluorescent White Balance 1 Fluorescent White Balance 2 Fluorescent White Balance 3 Fluorescent White Balance 1 Adjusts for white fluorescent lighting Fluorescent White Balance 2 Adjusts for natural white fluorescent lighting Fluorescent White Balance 3 Adjusts for day white fluorescent lighting n Incandescent Adjusts for places under incandescent lamp or unde...

Страница 57: ...e screen under the same lighting conditions as you will shoot the subject 2 t White Balance t One Push Set t Capture The screen momentarily turns black and when the white balance has been adjusted and stored in the memory the recording screen is displayed again If the indicator flashes while shooting the white balance is either not set or cannot be set Use automatic white balance Do not shake or s...

Страница 58: ...justed to Auto One Push or One Push Set One Push Set is unable to be selected while charging the flash The white references loaded using White Balance and Underwater White Balance are stored separately Auto Automatically adjusts the color tones for underwater conditions to make the colors appear natural Underwater 1 Adjusts for underwater conditions where blue is strong Underwater 2 Adjusts for un...

Страница 59: ...Easy Mode When Self Timer is set to Self portrait One Person or Self portrait Two People When you adjust focus by touching the LCD screen Multi AF Focuses on a subject in all ranges of the finder frame automatically When you press the shutter button halfway down in still image shooting mode a green frame is displayed round the area that is in focus When the Face Detection function is active AF ope...

Страница 60: ...tion Search MENU Settings Search Index 60GB zQuickly choosing the priority subject Touching the screen displays a frame and then pressing the shutter button halfway down brings the frame into focus Touch to release the focus ...

Страница 61: ...uto Adjustment mode When the Smile Shutter function is activated In Easy Mode When Self Timer is set to Self portrait One Person or Self portrait Two People Multi Divides into multiple regions and measures each region The camera determines a well balanced exposure Multi pattern metering Center Measures the center of the image and determines the exposure based on the brightness of the subject there...

Страница 62: ...rait Twilight using a tripod Backlight or Backlight Portrait it automatically changes the settings and shoots another image When you shoot two images consecutively the mark on the icon will turn green When two frames are shot the two images are displayed side by side immediately after shooting When Anti Blink is displayed 2 images are taken automatically and the image with the eyes open is selecte...

Страница 63: ...mode the camera shoots two images consecutively with the settings differing as follows when it recognizes Twilight Twilight Portrait Twilight using a tripod Backlight or Backlight Portrait scenes which tends to blur You can select the desired image from the two images shot When Flash is set to Auto First Image Second Image Shoots in Slow Synchro Shoots with sensitivity increased and shake reduced ...

Страница 64: ...h to shooting mode 2 t Soft Skin Effect t desired mode Depending on the REC mode this is set using buttons displayed on the left side of the screen Off is not available when Scene Selection is set to Soft Skin mode The Soft Skin Effect may not be visible depending on the subject Off Does not use the Soft Skin Effect Low Adds light Soft Skin Effect Mid Adds moderate Soft Skin Effect High Adds stron...

Страница 65: ...lti The Face Detection function does not work when using the Digital Zoom Up to 8 faces of your subjects can be detected Adults and children may not be recognized correctly depending on the conditions During Smile Shutter shooting Face Detection is automatically set to Auto even if it is set to When touched When touched Detects the face when an area with a face is touched on the screen Auto Select...

Страница 66: ... s hairstyle etc When the Smile Shutter function is used with the Face Detection frame selected Smile Detection is performed only on the selected face In Easy Mode or when Self Timer is set to Self portrait One Person or Self portrait Two People the priority face cannot be selected 1Touch a face you want to set as the priority face during Face Detection The touched face is selected as the priority...

Страница 67: ...n the light and dark parts of an image 1 Lower the lens cover to switch to shooting mode 2 REC Mode t Program Auto 3 t DRO t desired mode Depending on shooting conditions it may not be possible to obtain correction effects Only ISO AUTO or values from ISO 80 to ISO 800 can be set for the ISO value when DRO plus is set Off Does not adjust DRO standard Adjusts the brightness and contrast of the imag...

Страница 68: ...desired mode Anti Blink does not function in the following situations When using the flash During burst shooting When the Face Detection function does not work When the Smile Shutter function is activated Sometimes Anti Blink function does not work depending on the situation When the Anti Blink function is set to Auto but only images with the subject s eyes closed are recorded the message Blinked ...

Страница 69: ...screen in shooting mode 1 Lower the lens cover to switch to shooting mode 2 t Display Settings t desired mode On Displays the operation buttons Off Does not display the operation buttons zTo display the operation buttons when Display Settings is set to Off Touch the left side of the LCD screen and drag right to display the operation buttons ...

Страница 70: ...ightness increases automatically The shooting mode also changes to Easy Mode Notes zFunctions available in Easy Mode Viewing When a memory card is inserted in the camera View Mode is set to Date View Delete Deletes the currently displayed image Zoom Enlarges the displayed image Drag up down right or left or touch to change the zoom position Touch to change the zoom magnification Touch Delete Singl...

Страница 71: ...left side of the LCD screen touch 4 Select the month you want to display with then touch the desired date Drag the thumbnails of images for the selected date up or down to change the page Touch an image to return to the single image screen for that image This item is not displayed when the internal memory is used to record images Note Images for the selected date zDisplaying calendar by dragging t...

Страница 72: ... Index When the buttons are not displayed on the left side of the LCD screen touch 3 Touch the screen and drag up or down to change the page Touch an image on the index screen to return to the single image screen for that image zChanging the number of images in index In single image mode you can change the number of image thumbnails by touching t Number of images in index t 12 up or 28 up ...

Страница 73: ...mage to start playback 2 Touch Slideshow t Continuous Playback 3 To end continuous playback touch the LCD screen and then touch Exit Continuous Playback Touch or on the LCD screen to adjust the movie volume Continuous Playback Plays back all the images in succession from the displayed image to the very last image Slideshow with music Plays back still images in succession along with effects and mus...

Страница 74: ...iew Effects Selects the playback speed and mood for slideshows If the playback time of a movie is long an image is taken from it and displayed Simple A simple slideshow switching images at a preset interval The playback interval is adjustable in Interval and you can thoroughly enjoy your images Nostalgic A moody slideshow reproducing the atmosphere of a movie scene Stylish A stylish slideshow proc...

Страница 75: ...all the images have been played back the slideshow ends zSelecting background music You can transfer a desired music file from your CDs or MP3 files to the camera to play back during slideshow To transfer music install the Music Transfer software supplied to your computer For details see pages 129 and 130 You can record up to four pieces of music on the camera The 4 preset pieces Music1 Music4 can...

Страница 76: ...layed image in single image mode Multiple Images Allows you to select and delete multiple images Do as the following after step 2 1Touch the image you want to delete Repeat the above steps until there are no more images to be deleted Touch an image with a mark again to release the mark 2Touch OK t OK All Images on This Date All in This Folder Deletes all images in the selected date range or folder...

Страница 77: ...images When you select Multiple Images you can switch the single image screen and the index screen by touching Touch on the index screen to return to the single image screen and touch on the single image screen to return to the index screen You can also switch between index and single image modes in Protect Send by TransferJet or DPOF ...

Страница 78: ...ages can be transferred at once First set TransferJet to On by selecting t Settings t Main Settings page 113 While aboard an airplane set TransferJet to Off by selecting t Settings t Main Settings page 113 In addition always follow all regulations governing the location in which the camera is being used The connection is cut if transfer cannot be made within about 30 seconds If this happens select...

Страница 79: ...r depending on the angle at which the TransferJet marks are aligned It may be necessary to alter the position angle of the camera until communication can be obtained Sending and receiving data is easier if the TransferJet marks are aligned with both cameras parallel to each other as shown in the figure zUsing separately sold TransferJet compatible devices Using separately sold TransferJet compatib...

Страница 80: ...pen supplied 4 Touch the button t select the saved image size You cannot paint or put stamps on panoramic images and movies Button Action 1 Save Saves the image in VGA or 5M format in the internal memory or on a memory card 2 Pen Paint characters or graphics 3 Eraser Make corrections 4 Stamp Apply a stamp to the image 5 Thickness Stamps Select the pen or eraser thickness or the stamp 6 Color Selec...

Страница 81: ...ge Touch t set the point with v V b B t t select an image size to save with t t OK The quality of trimmed images may deteriorate The image size that you can trim may vary depending on the image Red Eye Correction Corrects the red eye phenomenon caused by flash After red eye correction is completed touch OK You may not be able to correct the red eye phenomenon depending on the image Unsharp masking...

Страница 82: ...w Movie Displays movies Note zViewing images taken with a different camera This camera creates an Image Database File on the memory card for recording and playing images If the camera detects images not registered in the Image Database File on the memory card a registration screen with the message Files found which were not recognized Import files will be displayed To view unregistered images regi...

Страница 83: ...otects the currently displayed image in single image mode Multiple Images You can select and protect multiple images After step 2 perform the following 1Select an image to be protected then touch it Repeat the above steps until there are no more images to be protected Touch an image with a mark again to release the mark 2Touch OK t OK Set All on This Date Protects all images in the date range or f...

Страница 84: ...k to a maximum 999 images This Image Orders printing the currently displayed image in single image mode Multiple Images You can select and order printing multiple images After step 2 perform the following 1Select an image to be printed then touch it Repeat the above steps until there are no more images to be printed Touch an image with a mark again to release the mark 2Touch OK t OK Set All on Thi...

Страница 85: ...entation image in vertical orientation 1 Press the Playback button to switch to playback mode 2 t Rotate 3 t OK You cannot rotate movies and protected still images You may not be able to rotate images shot with other cameras When viewing images on a computer the image rotation information may not be reflected depending on the software Notes ...

Страница 86: ... Adjust the volume by touching or t You can also adjust the volume by touching z on the volume adjustment bar and dragging to the right or left zAdjusting the volume during playback of a movie or slideshow Movie playback Touch the LCD screen to display the operation buttons touch and then or to adjust the volume Slideshow Touch the screen to display the volume control screen then touch or to adjus...

Страница 87: ...reen in viewing mode 1 Press the Playback button to switch to playback mode 2 t Display Settings t desired mode On Displays the operation buttons Off Does not display the operation buttons zTo display the operation buttons when Display Settings is set to Off Touch the left side of the LCD screen and drag right to display the operation buttons ...

Страница 88: ...ata This sets whether or not to display the exposure data of the currently displayed file 1 Press the Playback button to switch to playback mode 2 t Exposure data t desired mode On Displays the exposure data on the LCD screen Off Does not display the exposure data Exposure data ...

Страница 89: ...arch Index 89GB Number of images in index Sets the number of images displayed in the index screen 1 Press the Playback button to switch to playback mode 2 t Number of images in index t desired mode 12 up Displays 12 up images 28 up Displays 28 up images ...

Страница 90: ...ck button to switch to playback mode 2 t View Mode t Folder view Still or Folder view Movie 3 t Select Folder t select the folder with t OK This item is not displayed when the internal memory is used to record images Note zViewing images across multiple folders When multiple folders are created and the first or last image in the folder is displayed the following indicators appear Moves to the prev...

Страница 91: ...to reach the center of the subject You cannot use the AF illuminator in the following situations In Sweep Panorama mode In Underwater Sweep Panorama mode When Landscape Twilight Pet Fireworks or Hi Speed Shutter mode is selected in Scene Selection When Housing is set to On When Self Timer is set to Self portrait One Person or Self portrait Two People When you use AF illuminator the normal AF range...

Страница 92: ...nce to the grid lines you can easily set a subject in a horizontal vertical position 1 Lower the lens cover to switch to shooting mode 2 t Settings t Shooting Settings t Grid Line t desired mode On Displays the grid lines The grid lines are not recorded Off Does not display the grid lines ...

Страница 93: ...reen If you select High the power runs out faster than in standard mode 1 Lower the lens cover to switch to shooting mode 2 t Settings t Shooting Settings t Disp Resolution t desired mode Standard Displays an image on the LCD screen in a standard image resolution High Displays an image on the LCD screen in a high quality image resolution ...

Страница 94: ...rtrait One Person or Self portrait Two People The smart zoom is not available when the image size is set to 14M or 16 9 11M The Face Detection function does not work when using the Digital Zoom The supported zoom ratio differs depending on the image size Smart Enlarges the image digitally within the range where the image will not be distorted according to the image size Smart zoom Precision Enlarg...

Страница 95: ...sired mode Black is displayed to the left and right of vertical orientation images Depending on the shooting angle of the camera the orientation of the image may not be recorded correctly You cannot use Auto Orientation when Underwater is selected in Scene Selection or when shooting movies On Records the image with the correct orientation Off Does not use Auto Orientation Notes zRotating images af...

Страница 96: ...guide is displayed next to the Scene Recognition icon when Scene Recognition is activated 1 Lower the lens cover to switch to shooting mode 2 t Settings t Shooting Settings t Scene Recog Guide t desired mode On Displays the Scene Recognition Guide Off Does not display the Scene Recognition Guide Scene Recognition Guide ...

Страница 97: ... use the Face Detection function Red Eye Reduction does not work even when you select Auto Red Eye Reduction is set to Off when High Sensitivity mode is selected in Scene Selection or when the Smile Shutter function is activated Auto When the Face Detection function is activated the flash strobes automatically to reduce the red eye phenomenon On The flash always strobes to reduce the red eye pheno...

Страница 98: ...ubject s eyes closed is recorded while Face Detection is activated the message Blinked eye detected is displayed 1 Lower the lens cover to switch to shooting mode 2 t Settings t Shooting Settings t Blink Alert t desired mode Auto Displays the Blinked eye detected message Off Does not display the message ...

Страница 99: ...u operate the camera 1 t Settings t Main Settings t Beep t desired mode Shutter Turns on the shutter sound when you press the shutter button High Turns on the beep shutter sound when you operate the touch panel press the shutter button If you want to lower the beep volume select Low Low Off Turns off the beep shutter sound ...

Страница 100: ... the battery power may decrease faster If you do not operate the camera for a certain period of time while the power is on the LCD screen becomes dark If the camera temperature rises when shooting movies LCD Brightness is set to Normal Normal Sets the LCD screen to normal brightness Bright Sets the LCD screen to high brightness This function is useful when viewing images in bright outside light No...

Страница 101: ...contents Operation Search MENU Settings Search Index 101GB Language Setting Selects the language to be used in the menu items warnings and messages 1 t Settings t Main Settings t Language Setting t desired mode ...

Страница 102: ...peration Search MENU Settings Search Index 102GB Display color Sets the color of the screen display 1 t Settings t Main Settings t Display color t desired mode Black Sets the background color of the LCD screen White Pink ...

Страница 103: ...e t OK Pressing the shutter button during the Smile Shutter demonstration operates the shutter but no image is recorded During a demonstration if the number of images saved in the internal memory increases the camera may automatically delete the images Demo Mode1 A demonstration of the shooting functions will be performed Demo Mode2 Automatically starts the Smile Shutter demonstration when no oper...

Страница 104: ...ttings Search Index 104GB Initialize Initializes the setting to the default setting Even if you execute Initialize the images are retained 1 t Settings t Main Settings t Initialize t OK Be sure not to turn off the camera while initializing Note ...

Страница 105: ... you connect to the camera using an HD Output Adaptor Cable sold separately Use a Type3 compliant HD Output Adaptor Cable sold separately 1 t Settings t Main Settings t COMPONENT t desired mode HD 1080i Select this item to connect the camera to a 1080i capable High Definition TV SD Select this item to connect the camera to a TV that is not compatible with an HD 1080i signal ...

Страница 106: ...o equipment The TV color systems differ depending on the country and region To view images on a TV screen check the TV color system of the country or region of use page 149 1 t Settings t Main Settings t Video Out t desired mode NTSC Sets the video output signal to NTSC mode e g for the USA Japan PAL Sets the video output signal to PAL mode e g for Europe China ...

Страница 107: ...so to the operating instructions supplied with the housing 1 t Settings t Main Settings t Housing t desired mode Objects cannot be brought into focus by touching the screen Some functions are limited and the icon positions on the LCD screen change When Housing is set to On View Mode is set to Date View On Changes the function of the buttons Off Does not change any functions Notes ...

Страница 108: ...sired mode You cannot import movies when PTP MTP is selected To import movies to the computer select Mass Storage Mass Storage Establishes a Mass Storage connection between the camera and a computer or other USB device PTP MTP When you connect the camera to a computer the AutoPlay Wizard appears and the still images in the recording folder on the camera are imported to the computer with Windows 7 ...

Страница 109: ... uploading images to a media service using PMB Portable Multi The images both on the memory card and in the internal memory are displayed Select this setting when you connect the camera to a computer Single When the memory card is inserted into the camera the images on the memory card are displayed when it is not inserted the images in the internal memory are displayed Select this setting in cases...

Страница 110: ... in the CD ROM supplied to change background music tracks 1 t Settings t Main Settings t Download Music The message Change slideshow music Connect to PC is displayed 2 Make a USB connection between the camera and a computer then start Music Transfer 3 Follow the instructions on the screen to change music files ...

Страница 111: ...d and cannot be played 1 t Settings t Main Settings t Format Music t OK zRestoring the music preset at the factory to the camera You can use Music Transfer in the CD ROM supplied to reset music files to the preset ones 1Execute Download Music then make a USB connection between the camera and a computer 2Start Music Transfer then restore the default music For details on using Music Transfer see the...

Страница 112: ...mode The camera does not turn off automatically in the following situations During slideshow When playing back movies During Eye Fi connection Stamina Proactively saves the battery power If the camera is not operated for a certain period of time the power turns off automatically In shooting mode the LCD screen automatically goes dark before the power turns off Standard If the camera is not operate...

Страница 113: ...on always follow all regulations governing the location in which the camera is being used The connection is cut if transfer cannot be made within about 30 seconds If this happens select Yes and again align two TransferJet marks on the camera and another device Memory Stick with TransferJet and camera models with TransferJet are not sold in some countries and regions due to local laws and regulatio...

Страница 114: ...ohibited such as while aboard an airplane If the Eye Fi card is inserted set Eye Fi to Off When the uploading function of the Eye Fi card is set to Off is displayed on the LCD screen 1 Set the wireless LAN access point settings or the transferring direction settings of the Eye Fi card For details refer to the operating instructions supplied with the Eye Fi card 2 After the settings are finished in...

Страница 115: ... or turn the power of the camera off and on again If the error icon is still displayed the Eye Fi card may be corrupted For details contact Eye Fi Inc Wireless LAN communication may be interrupted by the other communication devices If data reception is insufficient move the camera closer to the access point For details on content that can be uploaded refer to the operating instructions supplied wi...

Страница 116: ...opriate points where you touch 1 t Settings t Main Settings t Calibration 2 Using the paint pen touch the center of the mark displayed on the screen in order If you touch Cancel to stop calibration mid way any adjustments made up to that point are not applied If you fail to touch the right spot the calibration is not performed Touch the center of the mark again Notes ...

Страница 117: ...amera to format any memory card being used with this camera for the first time Note that formatting will erase all data recorded on the memory card This data cannot be restored Be sure to backup any important data to a PC or other storage location 1 t Settings t Memory Card Tool or Internal Memory Tool t Format t OK Note that formatting permanently erases all data including even protected images N...

Страница 118: ...Folder t OK This item is not displayed when the internal memory is used to record images When you insert a memory card that was used with other equipment into the camera and shoot images a new folder may be automatically created Up to 4 000 images can be stored in one folder When the folder capacity is exceeded a new folder is automatically created Notes zOn the folders After a new folder is creat...

Страница 119: ...ttings t Memory Card Tool t Change REC Folder 2 Select the folder in which you want to store images using t OK This item is not displayed when the internal memory is used to record images You cannot select the following folder as a recording folder 100 folder A folder with a number that has either sssMSDCF or sssMNV01 only You cannot move recorded images to another folder Notes ...

Страница 120: ...using t OK This item is not displayed when the internal memory is used to record images If you delete the folder set as the recording folder using Delete REC Folder the folder that has the largest folder number is selected as the next recording folder You can delete only empty folders If a folder contains images or even files that cannot be played back by the camera first delete these images and f...

Страница 121: ...tery pack with little remaining charge the battery pack may run out causing copying to fail or possibly corrupting the data You cannot copy images individually The original images in the internal memory are retained even after copying To delete the contents of the internal memory remove the memory card after copying then format the internal memory Format in Internal Memory Tool A new folder is cre...

Страница 122: ...ed mode Series Assigns numbers to files in sequence even if the recording folder or the memory card is changed When the replaced memory card contains a file with a number higher than the last assigned number a number one higher than the largest number is assigned Reset Starts from 0001 each time the folder is changed When the recording folder contains a file a number one higher than the largest nu...

Страница 123: ...urrently set area differs from your home area you must make the Area Setting Destination You use the camera set to the time at your destination Set the destination area zChanging Area Setting Setting a frequently visited destination lets you easily adjust the time when you visit that destination 1Touch the Destination area 2Select the area using 3Touch Daylight Savings icon then select Daylight Sa...

Страница 124: ... Date Time Setting t desired mode The camera does not have a feature for superimposing dates on images By using PMB in the CD ROM supplied you can print or save images with the date Date Time Format You can select the date and time display format Daylight Savings You can select Daylight Savings On Off Date Time You can set the date and time Note ...

Страница 125: ...ble for multi use terminal supplied 3 Turn on the TV and set the input 4 Press Playback button to turn on the camera Images shot with the camera appear on the TV Touch displayed on the LCD screen of this camera to select the desired image When you play back a single image no icons are displayed on the TV You cannot play back images in Easy Mode during TV output When you shoot movies while the came...

Страница 126: ...ot with the camera appear on the TV Touch displayed on the LCD screen of this camera to select the desired image Before you use this function select t Settings t Main Settings to select HD 1080i for COMPONENT When you play back a single image no icons are displayed on the TV Images shot in VGA image size cannot be played back in HD format You cannot play back images in Easy Mode during TV output W...

Страница 127: ...rd By connecting a Sony TV compatible with PhotoTV HD using an HD Output Adaptor Cable sold separately a whole new world of photos can be comfortably enjoyed in breathtaking Full HD quality PhotoTV HD allows for a highly detailed photo like expression of subtle textures and colors For details see the operating instructions of the TV ...

Страница 128: ...gle computer at the same time some devices including the camera may not operate depending on the types of USB devices you are using Connecting the camera using a USB interface that is compatible with Hi Speed USB USB 2 0 compliant allows advanced transfer high speed transfer as the camera is compatible with Hi Speed USB USB 2 0 compliant When your computer resumes activity from suspend or sleep mo...

Страница 129: ...on the desktop For the detailed operation method see the following PMB support page English only http www sony co jp pmb se or click PMB Help To start up PMB from the Start menu select Start t All Programs t PMB If PMB was installed on your computer and if you re install PMB using the supplied CD ROM you can start up all the applications from PMB Launcher To start up PMB Launcher double click PMB ...

Страница 130: ...xport PC Sync in the Manipulate menu and click Export You can save and print images with the date You can display images stored on a computer by shooting date in a calendar display You can correct Red Eye Reduction etc still images and change the shooting date and time You can create discs with CD or DVD disc writing drive You can upload images to a network service An internet connection environme...

Страница 131: ...k button 3 Connect the camera to your computer When a USB connection is established for the first time your computer automatically runs a program to recognize the camera Wait for a while PMB allows you to easily import images For details on PMB functions see the PMB Help Importing images to a computer without using PMB When the AutoPlay Wizard appears after making a USB connection between the came...

Страница 132: ...yed Perform the procedures from step 1 to 3 below before Disconnecting the USB cable Removing a memory card Inserting a memory card into the camera after copying images from the internal memory Turning off the camera 1 Double click the disconnect icon on the tasktray 2 Click USB Mass Storage Device t Stop 3 Confirm the device on the confirmation window then click OK Drag and drop the icon of the m...

Страница 133: ...y the next time you use PMB Portable 1 Make a USB connection between the camera and a computer When you connect the camera and your computer AutoPlay Wizard appears Click to close the AutoPlay Wizard for any unnecessary drives If the desired AutoPlay Wizard does not appear click Computer in Windows XP My Computer t PMBPORTABLE then double click PMBP_Win exe 2 Click PMB Portable In Windows XP click...

Страница 134: ...rver In order to use PMB Portable to enjoy the benefits of the image uploading service or other services the services provided by these and other websites you must consent to the following Some websites require registration procedures and or fees to use their services In using such services you must comply with the terms and conditions established by the websites concerned Services may be terminat...

Страница 135: ...h the camera to a photo printing service shop As long as the shop supports photo printing services conforming to DPOF you can make a Print order mark on images in advance on the viewing menu so that you do not have to reselect them when you print them out at the shop You cannot print images stored in the internal memory at a print shop directly from the camera Copy the images to a memory card page...

Страница 136: ...ended battery pack The power turns off suddenly Depending on the camera and battery temperature the power may turn off automatically to protect the camera In this case a message is displayed on the LCD screen before the power turns off If you do not operate the camera for a certain period of time while the power is on and Power Save is set to Standard or Stamina the camera turns off automatically ...

Страница 137: ...lashes quickly again this may indicate a battery pack problem If the lamp flashes slowly the charger is in standby mode and charging has temporarily stopped Charging stops temporarily and standby mode results when the temperature is outside the range suitable for charging Charging resumes and the CHARGE lamp lights when the temperature returns to the range suitable for charging It is recommended t...

Страница 138: ...tance Landscape mode or Twilight mode or Fireworks mode is selected in the Scene Selection when shooting still images Zoom does not work You cannot use the zoom during Sweep Panorama or Underwater Sweep Panorama mode You cannot use the Smart zoom depending on the image size page 94 You cannot use the Digital Zoom in Movie Mode or when the Smile Shutter function is activated Cannot select the Face ...

Страница 139: ...ge 129 The F value and shutter speed flash when you press and hold the shutter button halfway down The exposure is incorrect Correct the exposure page 54 The image colors are not correct Adjust the White Balance page 56 White or purple streaks appear in bright areas of the subject or the whole screen of the image becomes reddish This phenomenon is called smearing This is not a malfunction Smearing...

Страница 140: ...tings is set to Off Left and right sides of the screen are shown in black Auto Orientation is set to On page 95 The buttons and icons no longer appear If you touch the top right of the screen during shooting the buttons and icons will momentarily disappear The buttons and icons will reappear when you take your finger off the screen Display Settings in shooting or viewing menu is set to Off Touch t...

Страница 141: ...r computer without passing through a USB hub or other device Cannot import images Connect the camera and your computer correctly making a USB connection page 131 When you shoot images with a memory card formatted by a computer you may not be able to import the images to a computer Shoot using a memory card formatted by the camera page 117 After making a USB connection PMB does not start automatica...

Страница 142: ...h edges cut off Depending on your printer all the edges of the image may be cut off Especially when you print an image shot with the image size set to 16 9 the lateral end of the image may be cut off When printing images using your printer cancel the trimming or borderless settings Consult the printer manufacturer as to whether the printer provides these functions or not When having images printed...

Страница 143: ...d leave it for about an hour before using it The camera becomes warm when you use it for a long time This is not a malfunction The Clock Set screen appears when you turn on the camera Set the date and time again page 124 The internal rechargeable backup battery has discharged Insert a charged battery and set aside for 24 hours or more with the power left off The date or time is incorrect The Area ...

Страница 144: ...ced a format error or an unformatted memory card is inserted Format the internal memory or the memory card page 117 The inserted memory card cannot be used with the camera or the data is damaged Insert a new memory card E 61 ss E 62 ss E 91 ss A camera malfunction has occurred Initialize the camera page 104 then turn the power on again E 94 ss There is a malfunction when writing or deleting data R...

Страница 145: ... again page 117 Buffer overflow If you use a memory card that has been recorded and erased repeatedly or that was formatted on a different camera the data writing speed may be too slow First back up any data on the card to a computer and then reformat the card before using it page 117 The writing speed of the memory card you are using is not sufficient for movie recordings Use a Memory Stick PRO H...

Страница 146: ...that is protected as read only on a computer Cannot display file An error occurred while the image was playing back No guarantees are made for playing back on this camera files containing images which were processed on a computer or images which were shot using other cameras Read only folder You have selected a folder that cannot be set as a recording folder on the camera Select another folder pag...

Страница 147: ...ases where images have been deleted on a PC etc The necessary Image Database File is created after the memory card is formatted The number of images exceeds that for which date management in a database file by the camera is possible To register additional images in the Image Database File delete images in Date View It is not possible to record to the camera s Image Database File or play back using...

Страница 148: ...recording movies Connection failed Check the TransferJet reception port and transfer data correctly page 16 Some files were not sent Some files were not received Either communication was cut off during image transfer or transfer was cut off because device memory is full Check the available memory capacity and try transferring data using TransferJet again ...

Страница 149: ...l camera Check the following lists for the TV color system of the country or region where the camera is used NTSC system Bahama Islands Bolivia Canada Central America Chile Colombia Ecuador Jamaica Japan Korea Mexico Peru Surinam Taiwan the Philippines the U S A Venezuela etc PAL system Australia Austria Belgium China Croatia Czech Republic Denmark Finland Germany Holland Hong Kong Hungary Indones...

Страница 150: ...r the following conditions High temperature locations such as the hot interior of a car parked in direct sunlight Locations exposed to direct sunlight Humid locations or locations with corrosive substances present Note on using the memory card adaptor sold separately When inserting a memory card into a memory card adaptor make sure the memory card is inserted facing in the correct direction then i...

Страница 151: ...tick Micro media To use a Memory Stick Micro media with the camera be sure to insert the Memory Stick Micro media into an M2 Adaptor as large as of Duo size If you insert a Memory Stick Micro media into the camera without an M2 Adaptor as large as of Duo size you might not be able to remove it from the camera Do not leave the Memory Stick Micro media within the reach of small children They might a...

Страница 152: ...a car or under direct sunlight When the battery pack terminals become dirty the camera may not turn on the battery pack may not charge or other symptoms may occur In these cases gently wipe away any dirt with a soft cloth How to store the battery pack Fully discharge the battery pack before storing and store it in a cool dry place To maintain the battery pack s function fully charge the battery pa...

Страница 153: ...he battery pack being charged and then insert the same battery pack into the battery charger again until it clicks When the CHARGE lamp flashes again this may indicate a battery error or that a battery pack other than the specified type has been inserted Check that the battery pack is the specified type If the battery pack is the specified type remove the battery pack replace it with new one or an...

Страница 154: ...given below TransferJet standard Conforms to PCL Spec Rev 1 0 Protocol Class Name communication type SCSI Block Device Target OBEX Push Server OBEX Push Client Use the SCSI communication protocol above when connecting to a TransferJet compatible device sold separately Or use the OBEX communication protocol when sharing data between cameras ...

Страница 155: ...r approximately 29 minutes or up to approximately 2 GB of data at one time Units hour minute second The recordable time of movies may vary depending on the shooting conditions temperature etc Still images Capacity Size Internal memory Memory card formatted with this camera Approx 32 MB 2 GB 4 GB 8 GB 16 GB 32 GB 14M 5 301 605 1225 2496 4932 10M 7 402 808 1637 3334 6588 5M 10 582 1168 2366 4819 952...

Страница 156: ...ce with a dry cloth To prevent damage to the finish or casing Do not expose the camera to chemical products such as thinner benzine alcohol disposable cloths insect repellent sunscreen or insecticide Do not touch the camera with any of the above on your hand Do not leave the camera in contact with rubber or vinyl for a long time On operating temperatures Your camera is designed for use under the t...

Страница 157: ...128 Recommended environment 128 Windows computer 128 Connecting Computer 131 TV 125 Copy 121 Create REC Folder 118 Customize 21 D Date Time Setting 124 Delete 76 Delete REC Folder 120 Demo Mode 103 Digital Zoom 94 Disp Resolution 93 Display color 102 Display Settings Shooting 69 Viewing 87 Download Music 110 DPOF 84 DRO 67 E Easy Mode Shooting 39 Viewing 70 EV 54 Exposure 54 Exposure data 88 Eye F...

Страница 158: ... Transfer 129 N Names of parts 16 NTSC 106 Number of images in index 89 Number of still images 155 O Optical zoom 33 94 OS 128 P Paint 80 PAL 106 Panorama 25 Panorama Image Size 49 PC 128 Pet 29 Pixel 51 Playback Movies 38 Still images 34 Playback Zoom 35 PMB 129 PMB Portable 133 Power Save 112 Precision digital zoom 94 Print 84 135 Print order mark 135 Program Auto 28 Protect 83 PTP 108 R REC Mod...

Страница 159: ...porarily Rotated Display 37 Touch panel 19 TransferJet 113 TransferJet standard 154 Trimming Resize 81 Troubleshooting 136 TV 125 126 Twilight 29 Twilight Portrait 29 U Underwater 30 Underwater Sweep Panorama 32 Underwater White Balance 58 Unsharp masking 81 USB Connect 108 USB jack 131 Using the camera abroad 149 V VGA 49 Video Out 106 View Mode 82 Volume Settings 86 W Warning indicators and mess...

Страница 160: ... BE IMPLIED FOR ANY OTHER USE ADDITIONAL INFORMATION INCLUDING THAT RELATING TO PROMOTIONAL INTERNAL AND COMMERCIAL USES AND LICENSING MAY BE OBTAINED FROM MPEG LA LLC SEE HTTP WWW MPEGLA COM On GNU GPL LGPL applied software The software that is eligible for the following GNU General Public License hereinafter referred to as GPL or GNU Lesser General Public License hereinafter referred to as LGPL ...

Отзывы: