background image

26

Other functions

Using optional equipment

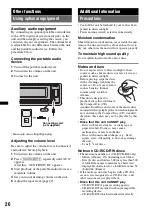
Auxiliary audio equipment

By connecting an optional portable audio device 
to the AUX input jack (stereo mini jack) on the 
unit and then simply selecting the source, you 
can listen on your car speakers. The volume level 
is adjustable for any difference between the unit 
and the portable audio device. Follow the 
procedure below:

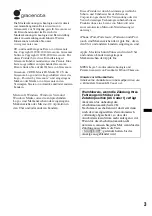
Connecting the portable audio 
device

1

Turn off the portable audio device.

2

Turn down the volume on the unit.

3

Connect to the unit.

*

Be sure to use a straight type plug.

Adjusting the volume level

Be sure to adjust the volume for each connected 
audio device before playback.

1

Turn down the volume on the unit.

2

Press 

(SOURCE/OFF)

 repeatedly until “AUX” 

appears.
After that, “AUX FRONT IN” appears.

3

Start playback of the portable audio device at a 
moderate volume.

4

Set your usual listening volume on the unit.

5

Adjust the input level (page 22).

Additional Information

Precautions

• Cool off the unit beforehand if your car has been 

parked in direct sunlight.

• Power antenna (aerial) extends automatically.

Moisture condensation

Should moisture condensation occur inside the unit, 
remove the disc and wait for about an hour for it to 
dry out; otherwise the unit will not operate properly.

To maintain high sound quality

Do not splash liquid onto the unit or discs.

Notes on discs

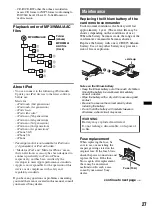
• Do not expose discs to direct sunlight or heat 

sources such as hot air ducts, nor leave it in a car 
parked in direct sunlight.

• Before playing, wipe the discs 

with a cleaning cloth from the 
center out. Do not use solvents 
such as benzine, thinner, 
commercially available 
cleaners.

• This unit is designed to 

playback discs that conform to 
the Compact Disc (CD) 
standard. DualDiscs and some of the music discs 
encoded with copyright protection technologies do 
not conform to the Compact Disc (CD) standard, 
therefore, these discs may not be playable by this 
unit.

Discs that this unit CANNOT play

– Discs with labels, stickers, or sticky tape or 

paper attached. Doing so may cause a 
malfunction, or may ruin the disc.

– Discs with non-standard shapes (e.g., heart, 

square, star). Attempting to do so may damage 
the unit.

– 8  cm  (3 

1

/

4

 in) discs.

Notes on CD-R/CD-RW discs

• The maximum number of: (CD-R/CD-RW only)

– folders (albums): 150 (including root folder)
– files (tracks) and folders: 300 (may less than 300 

if folder/file names contain many characters)

– displayable characters for a folder/file name: 32 

(Joliet)/64 (Romeo)

• If the multi-session disc begins with a CD-DA 

session, it is recognized as a CD-DA disc, and 
other sessions are not played back.

Discs that this unit CANNOT play

– CD-R/CD-RW of poor recording quality.
– CD-R/CD-RW recorded with an incompatible 

recording device.

– CD-R/CD-RW which is finalized incorrectly.

Connecting cord

(not supplied)
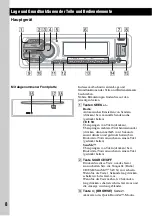
Содержание CDX-GT650UI - Fm/am Compact Disc Player

Страница 1: ...isplay see page 6 Zum Deaktivieren der Demo Anzeige DEMO schlagen Sie bitte auf Seite 6 nach Pour annuler la démonstration DEMO reportez vous à la page 6 Per annullare la dimostrazione DEMO vedere pagina 6 Om de demonstratie DEMO te annuleren zie pagina 6 DE GB 4 193 831 21 1 CDX GT650UI FR IT NL FM MW LW Compact Disc Player FM MW LW Compact Disc Player ...

Страница 2: ...sources For more detailed information about recycling of this product please contact your local Civic Office your household waste disposal service or the shop where you purchased the product Applicable accessory Remote commander Disposal of waste batteries applicable in the European Union and other European countries with separate collection systems This symbol on the battery or on the packaging i...

Страница 3: ... Microsoft Corporation in the United States and or other countries Warning if your car s ignition has no ACC position Be sure to set the Auto Off function page 25 The unit will shut off completely and automatically in the set time after the unit is turned off which prevents battery drain If you do not set the Auto Off function press and hold SOURCE OFF until the display disappears each time you tu...

Страница 4: ...sfer in your computer 15 Registering a USB device using SensMe Setup 15 Transferring tracks to the USB device using Content Transfer 15 Playing tracks in the channel SensMe channels 16 iPod Playing back iPod 17 Display items 17 Skipping albums podcasts genres playlists and artists 18 Repeat and shuffle play 18 Operating an iPod directly Passenger control 18 Searching for a track Searching a track ...

Страница 5: ... setup items SET 24 Other functions Using optional equipment 26 Auxiliary audio equipment 26 Additional Information Precautions 26 Notes on discs 26 Playback order of MP3 WMA AAC files 27 About iPod 27 Maintenance 27 Removing the unit 28 Specifications 29 Troubleshooting 30 Error displays Messages 32 Support site If you have any questions or for the latest support information on this product pleas...

Страница 6: ...ppears then press it 3 Rotate the control dial to select DEMO OFF then press it The setting is complete 4 Press BACK The display returns to normal reception play mode Preparing the card remote commander Remove the insulation film Tip For how to replace the battery see page 27 Setting the clock The clock uses a 24 hour digital indication 1 Press and hold the select button The setup display appears ...

Страница 7: ...ight then gently pull out the left end of the front panel Notes Do not drop or put excessive pressure on the front panel and display window Do not subject the front panel to heat high temperature or moisture Avoid leaving it in a parked car or on a dashboard rear tray Do not detach the front panel during playback of the USB device otherwise USB data may be damaged Attaching the front panel Place t...

Страница 8: ...uously press then press again within about 1 second and hold reverse fast forward a track press and hold SensMe To skip tracks press reverse fastforward a track press and hold B SOURCE OFF button Press to turn on the power change the source Radio CD USB SensMe 1 AUX Press for 1 second to turn off the power Press for more than 2 seconds to turn off the power and the display disappears C BROWSE butt...

Страница 9: ...UM during MP3 WMA AAC playback To skip albums change SensMe channels press skip albums continuously press and hold 3 REP 2 page 13 14 18 4 SHUF page 13 14 18 6 PAUSE To pause playback To cancel press again N DSPL display SCRL scroll button page 11 13 14 17 18 To change display items press scroll the display item press and hold O AUX input jack page 26 To connect a portable audio device P RESET but...

Страница 10: ... To attenuate the sound To cancel press again G SEL select button The same as the select button on the unit H MODE button Press to select the radio band FM MW LW Press and hold to enter cancel the passenger control I M m buttons To control CD USB SensMe the same as 1 2 ALBUM on the unit Setup sound setting etc can be operated by M m J SCRL scroll button To scroll the display item K Number buttons ...

Страница 11: ...approximate frequency then press SEEK repeatedly to fine adjust to the desired frequency manual tuning RDS Overview FM stations with Radio Data System RDS service send inaudible digital information along with the regular radio program signal Display items A Radio band Function B TA TP 1 C Frequency 2 Program service name Preset number Clock RDS data 1 TA flashes during traffic information TP light...

Страница 12: ...FM reception press a number button 1 to 6 on which a local station is stored 2 Within 5 seconds press again a number button of the local station Repeat this procedure until the local station is received Selecting PTY 1 Press and hold AF TA PTY during FM reception The current program type name appears if the station is transmitting PTY data 2 Rotate the control dial until the desired program type a...

Страница 13: ...r SHUF OFF USB devices For details on the compatibility of your USB device visit the support site MSC Mass Storage Class and MTP Media Transfer Protocol type USB devices compliant with the USB standard can be used Corresponding codec is MP3 mp3 WMA wma AAC m4a and AAC mp4 Backup of data in a USB device is recommended Note Connect the USB device after starting the engine Depending on the USB device...

Страница 14: ... Management files may not be played During playback or fast forward reverse of a VBR Variable Bit Rate MP3 WMA AAC file elapsed playing time may not display accurately Playback of the following MP3 WMA AAC files is not supported lossless compression copyright protected Repeat and shuffle play 1 During playback press 3 REP or 4 SHUF repeatedly until the desired setting appears After 3 seconds the s...

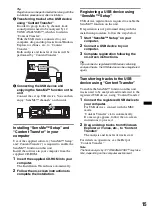
Страница 15: ...een instructions to complete the installation Registering a USB device using SensMe Setup USB device registration is required to enable the SensMe function on the unit If registration is not performed along with the installation procedure follow the steps below 1 Start SensMe Setup on your computer 2 Connect a USB device to your computer 3 Complete registration following the on screen instructions...

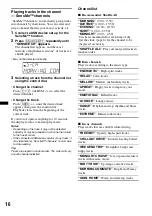
Страница 16: ...evice contains many tracks it may take time for SensMe channels to start due to data reading Tip Tracks are played in random order The order will vary at each channel selection Channel list x Recommended Shuffle All x Basic channels Plays tracks according to the music type x In car channels Plays tracks that are suitable while driving MORNING 5 00 9 59 DAYTIME 10 00 15 59 EVENING 16 00 18 59 NIGHT...

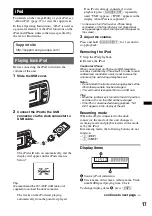
Страница 17: ...ol the logo will not appear on the screen 3 Adjust the volume Press and hold SOURCE OFF for 1 second to stop playback Removing the iPod 1 Stop the iPod playback 2 Remove the iPod Caution for iPhone When you connect an iPhone via USB telephone volume is controlled by iPhone itself In order to avoid sudden loud sound after a call do not increase the volume on the unit during a telephone call Notes D...

Страница 18: ...isplay item Press DSPL The display items change as follows Track name t Artist name t Album name t MODE IPOD t Clock To exit the passenger control Press and hold MODE Then MODE AUDIO will appear and the play mode will change to resuming mode Notes The volume can be adjusted only by the unit If this mode is canceled the repeat setting will be turned off To Do this Skip Press 1 2 ALBUM press once fo...

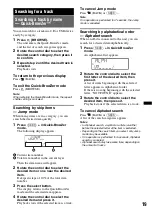
Страница 19: ...r mode and the selected item appears 4 Rotate the control dial to select the desired item and press it Playback starts if the selected item is a track To cancel Jump mode Press BACK or SEEK Note If no operation is performed for 7 seconds the Jump mode is canceled Searching by alphabetical order Alphabet search When an iPod is connected to the unit you can search for a desired item alphabetically 1...

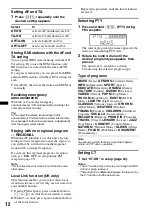
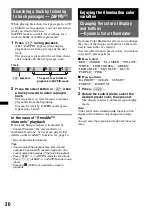
Страница 20: ...ips You can select the playback time from about 6 seconds 15 seconds 30 seconds page 25 You cannot select the passage of the track to playback Press SEEK in ZAPPIN mode to skip a track Press 1 2 ALBUM in ZAPPIN mode to skip album Pressing BACK also confirms a track to playback Enjoying the illumination color variation Changing the color of display and buttons Dynamic Color Illuminator Dynamic Colo...

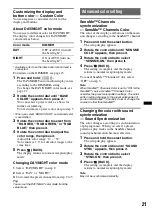
Страница 21: ...nced color setting SensMe Channels synchronization SensMe Channels Color The color of the display and buttons on the main unit changes according to the SensMe channel 1 Press and hold the select button The setup display appears 2 Rotate the control dial until SENSME COLR appears then press it 3 Rotate the control dial to select SENSME ON then press it 4 Press BACK The setting is complete and the d...

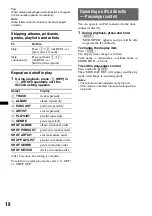
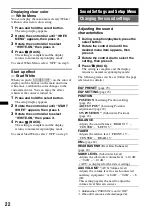
Страница 22: ... on step 3 Sound Settings and Setup Menu Changing the sound settings Adjusting the sound characteristics 1 During reception playback press the select button 2 Rotate the control dial until the desired menu item appears then press it 3 Rotate the control dial to select the setting then press it 4 Press BACK The setting is complete and the display returns to normal reception play mode The following ...

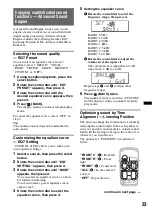
Страница 23: ...hen press it 3 Rotate the control dial until BASE appears then press it You can select an equalizer curve as a basis for further customizing To not customize a preset equalizer curve skip to step 5 4 Rotate the control dial to select the equalizer curve then press it 5 Setting the equalizer curve 1Rotate the control dial to select the frequency range then press it BAND1 63 Hz BAND2 160 Hz BAND3 40...

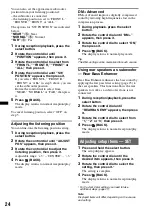
Страница 24: ...normal reception play mode DM Advanced DM Advanced improves digitally compressed sound by restoring high frequencies lost in the compression process 1 During playback press the select button 2 Rotate the control dial until DM appears then press it 3 Rotate the control dial to select ON then press it 4 Press BACK The display returns to normal play mode Tip The DM setting can be memorized for each s...

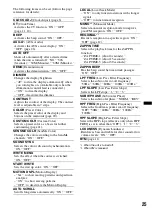
Страница 25: ...ITE MENU Sets the effect when the source is switched ON OFF START WHITE Sets the start up color ON OFF MOTION DSPL Motion Display SA to show moving patterns and spectrum analyzer ON to show moving patterns OFF to deactivate the Motion Display AUTO SCROLL Scrolls long items automatically ON OFF LOCAL Local Seek Mode ON to only tune into stations with stronger signals OFF to tune normal reception MO...

Страница 26: ...uality Do not splash liquid onto the unit or discs Notes on discs Do not expose discs to direct sunlight or heat sources such as hot air ducts nor leave it in a car parked in direct sunlight Before playing wipe the discs with a cleaning cloth from the center out Do not use solvents such as benzine thinner commercially available cleaners This unit is designed to playback discs that conform to the C...

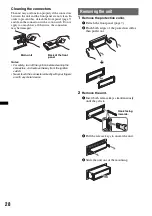
Страница 27: ...t may occur Fuse replacement When replacing the fuse be sure to use one matching the amperage rating stated on the original fuse If the fuse blows check the power connection and replace the fuse If the fuse blows again after replacement there may be an internal malfunction In such a case consult your nearest Sony dealer Folder album MP3 WMA AAC file track MP3 WMA AAC You can connect to the followi...

Страница 28: ... off the ignition before cleaning the connectors and remove the key from the ignition switch Never touch the connectors directly with your fingers or with any metal device Removing the unit 1 Remove the protection collar 1Detach the front panel page 7 2Pinch both edges of the protection collar then pull it out 2 Remove the unit 1Insert both release keys simultaneously until they click 2Pull the re...

Страница 29: ...egative ground earth Dimensions Approx 178 50 180 mm 7 1 8 2 7 1 8 in w h d Mounting dimensions Approx 182 53 162 mm 7 1 4 2 1 8 6 1 2 in w h d Mass Approx 1 3 kg 2 lb 14 oz Supplied accessory Card remote commander RM X151 Parts for installation and connections 1 set Optional accessory equipment USB connection cable for iPod RC 100IP Your dealer may not handle some of the above listed accessories ...

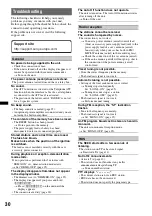
Страница 30: ...ppears if you press and hold SOURCE OFF tPress SOURCE OFF on the unit until the display appears The connectors are dirty page 28 Support site http support sony europe com The Auto Off function does not operate The unit is turned on The Auto Off function activates after turning off the unit tTurn off the unit Radio reception The stations cannot be received The sound is hampered by noises The connec...

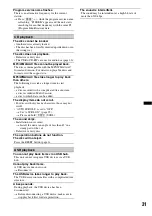
Страница 31: ...d tree structure a disc recorded in Multi Session a disc to which data can be added The display items do not scroll For discs with very many characters those may not scroll AUTO SCROLL is set to OFF tSet A SCRL ON page 25 tPress and hold DSPL SCRL The sound skips Installation is not correct tInstall the unit at an angle of less than 45 in a sturdy part of the car Defective or dirty disc The operat...

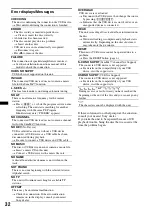
Страница 32: ...or a USB cable has been disconnected during playback tBe sure to connect a USB device and USB cable NO MUSIC The disc or USB device does not contain a music file tInsert a music CD in this unit tConnect a USB device with a music file in it NO NAME A disc album artist track name is not written in the track NOT FOUND There is no item beginning with the selected letter in Alphabet search NO TP The un...

Страница 33: ......

Страница 34: ... werden durch falsches Entsorgen gefährdet Materialrecycling hilft den Verbrauch von Rohstoffen zu verringern Weitere Informationen zum Recycling dieses Produkts erhalten Sie bei Ihrer Gemeindeverwaltung den kommunalen Entsorgungsbetrieben oder dem Geschäft in dem Sie das Produkt gekauft haben Geeignetes Zubehör Fernbedienung Entsorgung von gebrauchten Batterien und Akkus anzuwenden in den Ländern...

Страница 35: ...n Ländern Warnhinweis wenn die Zündung Ihres Fahrzeugs nicht über eine Zubehörposition ACC oder I verfügt Aktivieren Sie unbedingt die Abschaltautomatik Seite 28 Nach dem Ausschalten wird das Gerät dann nach der voreingestellten Zeit automatisch vollständig abgeschaltet so dass der Autobatterie kein Strom mehr entzogen wird Wenn Sie die Abschaltautomatik nicht aktivieren müssen Sie jedes Mal wenn ...

Страница 36: ...t Transfer auf dem Computer 16 Registrieren eines USB Geräts mit SensMe Setup 16 Übertragen von Titeln auf das USB Gerät mit Content Transfer 17 Wiedergeben von Titeln in einem Channel SensMe channels 17 iPod Wiedergabe mit einem iPod 18 Informationen im Display 19 Überspringen von Alben Podcasts Genres Playlists und Interpreten 19 Repeat und Shuffle Play 20 Direktes Bedienen eines iPod Direkte St...

Страница 37: ...ptionen SET 28 Weitere Funktionen Verwenden gesondert erhältlicher Geräte 29 Zusätzliche Audiogeräte 29 Weitere Informationen Sicherheitsmaßnahmen 30 Hinweise zu CDs 30 Wiedergabereihenfolge von MP3 WMA AAC Dateien 30 Der iPod 30 Wartung 31 Ausbauen des Geräts 32 Technische Daten 32 Störungsbehebung 33 Fehleranzeigen Meldungen 35 Support Website Wenn Sie Fragen haben oder die neuesten Support Info...

Страница 38: ...d drücken Sie anschließend den Steuerregler Die Einstellung ist damit abgeschlossen 4 Drücken Sie BACK Die Anzeige wechselt wieder in den normalen Empfangsmodus bzw Wiedergabemodus Vorbereiten der Kartenfernbedienung Entfernen Sie die Isolierfolie Tipp Informationen zum Austauschen der Batterie finden Sie auf Seite 31 Einstellen der Uhr Die Uhr zeigt die Uhrzeit im 24 Stunden Format digital an 1 H...

Страница 39: ...chtig heraus Hinweise Lassen Sie die Frontplatte nicht fallen und drücken Sie nicht zu stark auf die Frontplatte und das Display Schützen Sie die Frontplatte vor Hitze bzw hohen Temperaturen und vor Feuchtigkeit Lassen Sie sie nicht in geparkten Autos auf dem Armaturenbrett oder auf der Hutablage liegen Nehmen Sie die Frontplatte nicht ab während die Wiedergabe am USB Gerät läuft Andernfalls könne...

Страница 40: ...tel hintereinander drücken dann innerhalb von 1 Sekunde erneut drücken und gedrückt halten bzw Rückwärts Vorwärtssuchen in einem Titel gedrückt halten SensMe Überspringen von Titeln drücken bzw Rückwärts Vorwärtssuchen in einem Titel gedrückt halten B Taste SOURCE OFF Drücken Sie diese Taste um das Gerät einzuschalten bzw die Tonquelle Radio CD USB SensMe 1 AUX zu wechseln Wenn Sie die Taste 1 Sek...

Страница 41: ... 2 ALBUM während der MP3 WMA AAC Wiedergabe Überspringen von Alben Wechseln von SensMe Channels drücken bzw Überspringen mehrerer Alben hintereinander gedrückt halten 3 REP 2 Seite 14 15 20 4 SHUF Seite 14 15 20 6 PAUSE Anhalten der Wiedergabe Zum Beenden der Funktion drücken Sie die Taste erneut N Taste DSPL Anzeige SCRL Bildlauf Seite 11 13 15 19 20 Wechseln der Informationen im Display drücken ...

Страница 42: ...ie die Taste erneut G Taste SEL Auswählen Diese Taste entspricht der Auswahltaste am Gerät H Taste MODE Auswählen des Radiofrequenzbereichs FM UKW MW LW drücken Einschalten Ausschalten der direkten Steuerung gedrückt halten I Tasten M m Beim Steuern von CD USB und SensMe Funktionen entsprechen diese Tasten den Tasten 1 2 ALBUM am Gerät Konfiguration Klangeinstellung usw können Sie mit M m vornehme...

Страница 43: ...ender gespeichert wird wird auch die AF TA Einstellung gespeichert Seite 12 Einstellen gespeicherter Sender 1 Wählen Sie den Frequenzbereich aus und drücken Sie eine Stationstaste 1 bis 6 Automatisches Einstellen von Sendern 1 Wählen Sie den Frequenzbereich aus und starten Sie mit SEEK die Suche nach dem Sender Der Suchlauf stoppt wenn ein Sender empfangen wird Wiederholen Sie diesen Vorgang bis d...

Страница 44: ... wird Wenn Sie den Empfangsbereich des betreffenden Regionalsenders verlassen stellen Sie während des Empfangs eines UKW Senders bei der Konfiguration REG OFF ein Seite 29 Hinweis Diese Funktion steht in Großbritannien und in einigen anderen Regionen nicht zur Verfügung Lokalsenderfunktion nur Großbritannien Mithilfe dieser Funktion können Sie andere Lokalsender auswählen auch wenn diese zuvor nic...

Страница 45: ...n Sie OPEN 2 Drücken Sie Z Die CD wird ausgeworfen 3 Schließen Sie die Frontplatte Informationen im Display A Tonquelle B Titelname 1 CD Interpretenname 1 Interpretenname 1 Albumnummer 2 Albumname 1 Titelnummer Verstrichene Spieldauer Uhrzeit 1 Die Informationen einer CD TEXT bzw einer MP3 WMA AAC Datei werden angezeigt 2 Die Albumnummer wird nur beim Wechseln des Albums angezeigt Zum Wechseln der...

Страница 46: ...B Gerät zu erstellen Hinweis Lassen Sie den Motor an bevor Sie das USB Gerät anschließen Bei manchen USB Geräten kann es zu Fehlfunktionen und Beschädigungen kommen wenn Sie zuerst das Gerät anschließen und dann den Motor anlassen Wiedergabe mit einem USB Gerät 1 Schieben Sie die USB Abdeckung auf 2 Schließen Sie das USB Gerät an den USB Anschluss an Verwenden Sie zum Anschließen falls Sie ein Kab...

Страница 47: ...ernfalls kann es zu Fehlfunktionen kommen Je nach Menge der aufgezeichneten Daten kann es etwas dauern bis die Wiedergabe beginnt DRM Dateien digitale Rechteverwaltung werden unter Umständen nicht wiedergegeben Bei der Wiedergabe bzw beim Vorwärts Rückwärtssuchen in einer VBR MP3 WMA AAC Datei variable Bitrate wird die verstrichene Spieldauer möglicherweise nicht richtig angezeigt Die Wiedergabe f...

Страница 48: ...Gerät an Sie können die Wiedergabe mit SensMe channels auf diesem Gerät starten Installieren von SensMe Setup und Content Transfer auf dem Computer Sie müssen die mitgelieferte Software SensMe Setup und Content Transfer verwenden um die SensMe Funktion auf diesem Gerät nutzen zu können Installieren Sie die Software von der mitgelieferten CD ROM auf dem Computer 1 Legen Sie die mitgelieferte CD ROM...

Страница 49: ...htig erkannt 3 Wählen Sie mit dem Steuerregler einen Titel aus der Channel Liste aus Wechseln des Channel Drücken Sie 1 2 ALBUM um den gewünschten Channel auszuwählen Wechseln des Titels Drücken Sie SEEK bis der gewünschte Titel angezeigt wird und drücken Sie dann den Steuerregler Die Wiedergabe startet am Anfang des aktuellen Titels Wenn Sie 10 Sekunden lang keine Funktion ausführen erscheint im ...

Страница 50: ...chieben Sie die USB Abdeckung auf 2 Schließen Sie den iPod über das USB Kabel mit Dock Anschluss an den USB Anschluss an Der iPod schaltet sich automatisch ein und im iPod Display erscheint die unten abgebildete Anzeige Tipp Zum Anschließen des Dock Anschlusses empfehlen wir das USB Kabel RC 100IP nicht mitgeliefert FREEWAY Schnelle dynamische Titel CHILLOUT DRIVE Intonierte heilende Balladen WEEK...

Страница 51: ...ennen der über einen USB Hub angeschlossen ist Tipps Sofern der Zündschlüssel in der Position ACC oder I steht und das Gerät eingeschaltet ist wird der iPod geladen Wenn der iPod während der Wiedergabe vom Gerät getrennt wird erscheint NO DEV im Display des Geräts Wiedergabefortsetzung Wenn der iPod an den Dock Anschluss angeschlossen ist wird an diesem Gerät als Modus die Wiedergabefortsetzung ei...

Страница 52: ...O erscheint und das Gerät schaltet in die Wiedergabefortsetzung Hinweise Die Lautstärke lässt sich nur mit diesem Gerät einstellen Wenn dieser Modus deaktiviert wird wird auch die Wiederholeinstellung deaktiviert Einstellung Funktion TRACK Wiederholtes Wiedergeben eines Titels ALBUM Wiederholtes Wiedergeben eines Albums PODCAST Wiederholtes Wiedergeben eines Podcasts ARTIST Wiederholtes Wiedergebe...

Страница 53: ...in Element in der Nähe des gewünschten Elements auszuwählen Das Gerät durchsucht die Elemente in Schritten von 10 der Gesamtzahl an Elementen 3 Drücken Sie die Auswahltaste Im Display erscheint wieder die Anzeige für den Quick BrowZer Modus und das ausgewählte Element wird angezeigt 4 Drehen Sie den Steuerregler um das gewünschte Element auszuwählen und drücken Sie den Steuerregler Die Wiedergabe ...

Страница 54: ...ächsten Titel Die Passage wird die eingestellte Anzahl an Sekunden lang wiedergegeben danach ist ein Klicken zu hören und die Wiedergabe der nächsten Passage beginnt 2 Drücken Sie die Auswahltaste oder ZAP sobald eine Passage aus einem Titel wiedergegeben wird den Sie ganz hören möchten Der ausgewählte Titel wird im normalen Wiedergabemodus ab dem Anfang wiedergegeben Wenn Sie im ZAPPIN Modus eine...

Страница 55: ...ur zur Verfügung wenn die Steuerleitung für die Beleuchtung angeschlossen ist Einzelheiten zu DIMMER finden Sie auf Seite 28 1 Halten Sie COLOR gedrückt Die individuelle DAY NIGHT Displayfarbe variiert je nach der Einstellung von DIMMER Informationen zum Ändern des DAY NIGHT Farbmodus finden Sie auf Seite 23 2 Drehen Sie den Steuerregler bis BASE COLOR angezeigt wird und drücken Sie anschließend d...

Страница 56: ...r bis SOUND SYNC angezeigt wird und drücken Sie anschließend den Steuerregler 3 Drehen Sie den Steuerregler um SYNC ON auszuwählen und drücken Sie anschließend den Steuerregler 4 Drücken Sie BACK Die Einstellung ist damit abgeschlossen und im Display erscheint wieder die Anzeige für den normalen Empfangsmodus bzw Wiedergabemodus Hinweis Wird möglicherweise nicht richtig synchronisiert Anzeigen kla...

Страница 57: ...tellung ist damit abgeschlossen und im Display erscheint wieder die Anzeige für den normalen Empfangsmodus bzw Wiedergabemodus Folgende Optionen können eingestellt werden Einzelheiten finden Sie jeweils auf den angegebenen Seiten EQ7 PRESET Seite 26 EQ7 SETTING Seite 26 POSITION POSITION Einstellen der Hörposition Seite 27 ADJUST POS 1 Feineinstellen der Hörposition Seite 27 SW POSITION 1 Position...

Страница 58: ...nquelle aus und drücken Sie die Auswahltaste 2 Drehen Sie den Steuerregler bis EQ7 SETTING angezeigt wird und drücken Sie anschließend den Steuerregler 3 Drehen Sie den Steuerregler bis BASE angezeigt wird und drücken Sie anschließend den Steuerregler Sie können eine Equalizer Kurve als Grundlage für individuelle Einstellungen auswählen Wenn Sie eine voreingestellte Equalizer Kurve nicht individue...

Страница 59: ...n Sie anschließend den Steuerregler Wenn Sie in Schritt 3 oben FRONT L FRONT R FRONT oder ALL auswählen können Sie die Position des Tiefsttonlautsprechers einstellen Wählen Sie durch Drehen des Steuerreglers NEAR NORMAL oder FAR aus und drücken Sie anschließend den Steuerregler 5 Drücken Sie BACK Die Anzeige wechselt wieder in den normalen Empfangsmodus bzw Wiedergabemodus Wenn Sie die Hörposition...

Страница 60: ...ten Farbe müssen Sie weitere Schritte ausführen Seite 23 Hinweis Die angezeigten Optionen unterscheiden sich je nach Tonquelle und Einstellung Folgende Optionen können eingestellt werden Einzelheiten finden Sie jeweils auf den angegebenen Seiten CLOCK ADJ Uhr einstellen Seite 6 CT Uhrzeit Zum Einstellen der CT Funktion ON OFF Seite 12 13 BEEP Zum Einstellen des Signaltons ON OFF AUX A 1 AUX Audio ...

Страница 61: ...ter werden angezeigt OFF Die bewegte Anzeige wird deaktiviert AUTO SCROLL Zum Einstellen des automatischen Bildlaufs für lange Informationen ON OFF LOCAL Lokaler Suchmodus ON Nur Sender mit starken Signalen werden eingestellt OFF Normaler Empfang beim Einstellen von Sendern MONO 2 Monauraler Modus Zum Verbessern des UKW Empfangs durch Auswahl des monauralen Empfangsmodus ON OFF REGIONAL 2 Zum Besc...

Страница 62: ...en kann das Gerät beschädigt werden 8 cm CDs Hinweise zu CD Rs CD RWs Höchstzahl an nur CD Rs CD RWs Ordnern Alben 150 einschließlich Stammordner Dateien Titeln und Ordnern 300 gegebenenfalls weniger als 300 wenn die Ordner Dateinamen viele Zeichen enthalten anzeigbaren Zeichen für einen Ordner Dateinamen 32 Joliet 64 Romeo Wenn eine Multisession CD mit einer CD DA Session beginnt wird sie als CD ...

Страница 63: ...nn die Sicherung durchbrennt überprüfen Sie den Stromanschluss und tauschen die Sicherung aus Brennt die neue Sicherung ebenfalls durch kann eine interne Fehlfunktion vorliegen Wenden Sie sich in einem solchen Fall an Ihren Sony Händler Reinigen der Anschlüsse Das Gerät funktioniert möglicherweise nicht ordnungsgemäß wenn die Anschlüsse zwischen dem Gerät und der Frontplatte verschmutzt sind Um di...

Страница 64: ...enz 25 kHz Empfindlichkeit MW 26 µV LW 45 µV CD Player Signal Rauschabstand 120 dB Frequenzgang 10 20 000 Hz Gleichlaufschwankungen Unterhalb der Messgrenze USB Player Schnittstelle USB Full Speed Maximale Stromstärke 500 mA Endverstärker Ausgänge Lautsprecherausgänge Lautsprecherimpedanz 4 8 Ohm Maximale Ausgangsleistung 52 W 4 an 4 Ohm Allgemeines Ausgänge Audioausgänge vorne hinten Ausgang für ...

Страница 65: ...as Problem sich nicht beheben lässt besuchen Sie folgende Support Website Allgemeines Das Gerät wird nicht mit Strom versorgt Prüfen Sie die Verbindung oder Sicherung Wenn Sie das Gerät ausschalten und die Anzeige ausgeblendet ist können Sie es nicht mit der Kartenfernbedienung bedienen tSchalten Sie das Gerät ein Die Motorantenne wird nicht ausgefahren Die Motorantenne hat kein Relaiskästchen Es ...

Страница 66: ...nur monaural zu hören Das Gerät ist in den monauralen Empfangsmodus geschaltet tStellen Sie MONO OFF ein Seite 29 RDS Der Sendersuchlauf SEEK startet nach ein paar Sekunden Radioempfang Der Sender ist kein Verkehrsfunksender TP oder die Sendesignale sind zu schwach tDeaktivieren Sie TA Seite 12 Es sind keine Verkehrsdurchsagen zu hören Aktivieren Sie TA Seite 12 Der Sender sendet keine Verkehrsdur...

Страница 67: ...orrekt ein Eine leere CD wurde eingelegt Die CD kann aufgrund eines Problems nicht wiedergegeben werden tLegen Sie eine andere CD ein Das USB Gerät wurde nicht automatisch erkannt tSchließen Sie es erneut an Drücken Sie Z um die CD herauszunehmen FAILURE Die Lautsprecher Verstärkeranschlüsse sind nicht korrekt tSchlagen Sie in der Installations Anschlussanleitung zum jeweiligen Modell nach wie die...

Страница 68: ... SOURCE OFF die Tonquelle tZeigt an dass das USB Gerät nicht einwandfrei funktioniert oder dass ein nicht unterstütztes Gerät angeschlossen ist READ Das Gerät liest gerade alle Titel und Albuminformationen von der CD ein tBitte warten Sie bis das Einlesen abgeschlossen ist Die Wiedergabe beginnt danach automatisch Je nach CD Struktur kann das Einlesen länger als eine Minute dauern RESET Dieses Ger...

Страница 69: ......

Страница 70: ...turelles Pour toute information supplémentaire au sujet du recyclage de ce produit vous pouvez contacter votre municipalité votre déchetterie ou le magasin où vous avez acheté le produit Accessoire compatible télécommande Elimination des piles et accumulateurs usagés Applicable dans les pays de l Union Européenne et aux autres pays européens disposant de systèmes de collecte sélective Ce symbole a...

Страница 71: ...es pays régions Avertissement au cas où le contact de votre voiture ne dispose pas d une position ACC Veillez à activer la fonction Auto Off page 26 L appareil s éteint alors complètement et automatiquement à l issue d un délai défini une fois l appareil mis hors tension afin d éviter que la batterie ne se décharge Si vous n activez pas la fonction Auto Off appuyez sur la touche SOURCE OFF et main...

Страница 72: ...Inscription d un périphérique USB à l aide de SensMe Setup 16 Transfert de plages vers le périphérique USB à l aide de Content Transfer 16 Lecture de plages par canal SensMe channels 17 iPod Lecture sur un iPod 18 Rubriques d affichage 18 Saut d albums de podcasts de genres de listes de lecture et d artistes 19 Lecture répétée et aléatoire 19 Utilisation directe d un iPod Commande passager 19 Rech...

Страница 73: ... SET 26 Autres fonctions Utilisation d un appareil en option 28 Appareil audio auxiliaire 28 Informations complémentaires Précautions 28 Remarques sur les disques 28 Ordre de lecture des fichiers MP3 WMA AAC 29 A propos de l iPod 29 Entretien 29 Retrait de l appareil 30 Spécifications 31 Dépannage 32 Affichage des erreurs et messages 34 Site d assistance Si vous avez des questions ou si vous souha...

Страница 74: ...te de réglage pour sélectionner DEMO OFF puis appuyez dessus Le réglage est terminé 4 Appuyez sur BACK L affichage revient au mode de réception lecture normal Préparation de la mini télécommande Retirez la feuille isolante Conseil Pour obtenir des informations sur la façon de remplacer la pile reportez vous à la page 29 Réglage de l horloge L horloge numérique fonctionne suivant un cycle de 24 heu...

Страница 75: ... gauche vers l extérieur Remarques N exercez pas de pression excessive sur la façade ou sur la fenêtre d affichage et ne la laissez pas tomber N exposez pas la façade à des températures élevées ou à l humidité Evitez de la laisser dans un véhicule en stationnement sur le tableau de bord ou la plage arrière Ne retirez pas la façade pendant la lecture d un périphérique USB sinon les données de ce pé...

Страница 76: ...auter des plages en continu appuyez une première fois puis une seconde fois dans un délai d environ 1 seconde et maintenez la touche enfoncée d avancer de reculer rapidement dans une plage appuyez sur la touche et maintenez la enfoncée SensMe Permettent de sauter des plages appuyez d avancer de reculer rapidement dans une plage appuyez sur la touche et maintenez la enfoncée B Touche SOURCE OFF App...

Страница 77: ...er des stations appuyez sur la touche et maintenez la enfoncée CD USB SensMe 1 2 ALBUM pendant une lecture MP3 WMA AAC Permettent de changer de canaux SensMe appuyez de sauter des albums en continu appuyez sur la touche et maintenez la enfoncée 3 REP 2 page 14 15 19 4 SHUF page 14 15 19 6 PAUSE Permet d interrompre la lecture Appuyez de nouveau sur cette touche pour annuler N Touche DSPL affichage...

Страница 78: ... annuler G Touche SEL sélection Identique à la touche de sélection de l appareil H Touche MODE Appuyez sur cette touche pour sélectionner la bande radio FM MW PO LW GO Appuyez sur la touche et maintenez la enfoncée pour activer désactiver la commande passager I Touches M m Permettent de commander le lecteur CD le périphérique USB SensMe identiques aux touches 1 2 ALBUM de l appareil La configurati...

Страница 79: ... est également page 12 Réception des stations mémorisées 1 Sélectionnez la bande puis appuyez sur une touche numérique 1 à 6 Recherche automatique des fréquences 1 Sélectionnez la bande puis appuyez sur SEEK pour rechercher la station Le balayage s interrompt lorsque l appareil capte une station Répétez cette procédure jusqu à ce que vous captiez la station souhaitée Conseil Si vous connaissez la ...

Страница 80: ...ration en cours de réception FM page 27 Remarque Cette fonction est inopérante au Royaume Uni et dans certaines autres régions Fonction de liaison locale Royaume Uni uniquement Cette fonction vous permet de sélectionner d autres stations locales de la région même si elles ne sont pas associées à vos touches numériques 1 En cours de réception FM appuyez sur une touche numérique 1 à 6 sur laquelle u...

Страница 81: ...ro de plage temps de lecture écoulé horloge 1 Les informations d un CD TEXT MP3 WMA AAC sont affichées 2 Le numéro de l album s affiche uniquement lorsque l album est modifié Pour changer de rubrique d affichage B appuyez sur DSPL Conseil Les paramètres affichés peuvent différer selon le type de disque le format d enregistrement et les réglages NEWS Nouvelles AFFAIRS Dossiers d actualité INFO Info...

Страница 82: ...copies de sauvegarde des données contenues dans le périphérique USB Remarque Raccordez le périphérique USB après avoir démarré le moteur Selon le périphérique USB son raccordement avant le démarrage du moteur peut entraîner un dysfonctionnement ou des dégâts Lecture d un périphérique USB 1 Faites glisser le cache USB 2 Raccordez le périphérique USB au connecteur USB Si vous utilisez un câble pour ...

Страница 83: ... car cela pourrait entraîner des problèmes de fonctionnement Selon la quantité de données enregistrées la lecture peut mettre quelques instants à démarrer Il est possible que des fichiers DRM Gestion des droits numériques ne puissent être lus Lors de la lecture ou pendant l avance ou le retour rapide d un fichier MP3 WMA AAC VBR Débit variable le temps de lecture écoulée qui s affiche peut être in...

Страница 84: ...1 Insérez le CD ROM fourni dans l ordinateur L assistant d installation s exécute automatiquement 2 Procédez comme indiqué à l écran pour terminer l installation Inscription d un périphérique USB à l aide de SensMe Setup Pour activer la fonction SensMe sur l appareil il est nécessaire d inscrire le périphérique USB Si vous n avez pas effectué l inscription lors de la procédure d installation procé...

Страница 85: ...e soit classée dans un canal qui ne correspond pas à son humeur Si le périphérique USB raccordé contient de nombreuses plages le démarrage de SensMe channels peut être fastidieux en raison de la lecture des données Conseil Les plages sont lues dans un ordre aléatoire L ordre varie à chaque sélection d un canal Liste des canaux x Recommandé Shuffle All x Canaux de base Pour lire les plages correspo...

Страница 86: ... 3 Réglez le volume Appuyez sur la touche SOURCE OFF et maintenez la enfoncée pendant 1 seconde pour arrêter la lecture Retrait de l iPod 1 Arrêtez la lecture de l iPod 2 Retirez l iPod Avertissement concernant l iPhone Lorsque vous connectez un iPhone via un raccordement USB le volume du téléphone est contrôlé par l iPhone lui même Afin d éviter un son fort soudain après un appel n augmentez pas ...

Страница 87: ...hage changent de la façon suivante Nom de plage t Nom de l artiste t Nom d album t MODE IPOD t Horloge Pour quitter la commande passager Appuyez sur la touche MODE et maintenez la enfoncée MODE AUDIO apparaît alors et le mode de lecture est remplacé par le mode de reprise de la lecture Remarques Le volume peut être réglé uniquement avec l appareil Si ce mode est annulé le réglage de lecture répété...

Страница 88: ...ionné apparaît 4 Tournez la molette de réglage pour sélectionner l élément souhaité puis appuyez dessus La lecture commence si l élément sélectionné est une plage Pour annuler le mode de saut Appuyez sur BACK ou SEEK Remarque Si vous n exécutez aucune opération pendant 7 secondes le mode de saut est annulé Recherche par ordre alphabétique Recherche alphabétique Lorsqu un iPod est raccordé à l appa...

Страница 89: ...nseils Vous pouvez sélectionner une durée de lecture d environ 6 secondes 15 secondes 30 secondes page 27 Vous ne pouvez pas sélectionner le passage de la plage à lire Appuyez sur SEEK en mode ZAPPIN pour sauter une plage Appuyez sur 1 2 ALBUM en mode ZAPPIN pour sauter un album Une pression sur la touche BACK confirme également une plage à lire Changement de couleur de l éclairage Changement de c...

Страница 90: ...e de couleur DAY NIGHT 1 Sélectionnez DAY NIGHT à l étape 2 2 Sélectionnez DAY ou NIGHT 3 Personnalisez le canal prédéfini de l étape 2 à l étape 5 Conseil Vous pouvez accéder au mode de couleur DAY NIGHT à partir du menu de configuration Réglage avancé de la couleur Synchronisation des canaux SensMe Couleur des canaux SensMe La couleur de l affichage et des touches de l unité principale change en...

Страница 91: ...appuyez dessus 3 Tournez la molette de réglage pour sélectionner WHITE ON puis appuyez dessus 4 Appuyez sur BACK Une fois le réglage terminé la fenêtre d affichage revient au mode de réception lecture normal Pour annuler le menu blanc sélectionnez OFF à l étape 3 Effet au démarrage Démarrage en blanc Quand vous appuyez sur SOURCE OFF la couleur de l affichage et des touches de l unité principale v...

Страница 92: ...églage jusqu à ce que la courbe de l égaliseur souhaitée s affiche puis appuyez dessus 4 Appuyez sur BACK L affichage revient au mode de réception lecture normal Pour annuler la courbe de l égaliseur sélectionnez OFF à l étape 3 Conseil Il est possible de mémoriser le réglage de la courbe de l égaliseur pour chaque source Personnalisation de la courbe de l égaliseur EQ7 Setting Le paramètre CUSTOM...

Страница 93: ...de votre position et simuler un champ acoustique naturel donnant l impression d être au centre de l action quelle que soit votre place dans la voiture Les options de POSITION sont indiquées ci dessous Vous pouvez également définir la position approximative du caisson de graves par rapport à votre position d écoute si le caisson de graves est raccordé la position d écoute est réglée sur FRONT L FRO...

Страница 94: ...rdé aucun 1 En cours de réception lecture appuyez sur la touche de sélection 2 Tournez la molette de réglage jusqu à ce que REARBAS ENH s affiche puis appuyez dessus 3 Tournez la molette de réglage pour sélectionner 1 2 ou 3 puis appuyez dessus 4 Appuyez sur BACK L affichage revient au mode de réception lecture normal Réglage des paramètres de configuration SET 1 Appuyez sur la touche de sélection...

Страница 95: ...TO SCROLL Permet de faire défiler automatiquement les rubriques longues ON OFF LOCAL Mode de recherche locale ON pour syntoniser uniquement les stations dont les signaux sont plus puissants OFF pour syntoniser en réception normale MONO 2 Mode mono Permet de sélectionner le mode de réception mono pour améliorer une réception FM médiocre ON OFF REGIONAL 2 Permet de restreindre la réception à une rég...

Страница 96: ...tomatiquement Condensation Si de la condensation se produisait dans l appareil retirez le disque et attendez environ une heure que l humidité se soit évaporée Si cela se produit l appareil ne fonctionne pas correctement Pour conserver un son de haute qualité Ne renversez pas de liquide sur l appareil ou sur les disques Remarques sur les disques N exposez pas les disques à la lumière directe du sol...

Страница 97: ... la pile par une pile au lithium CR2025 neuve L utilisation de tout autre type de pile présente un risque d incendie ou d explosion Remarques sur la pile au lithium Tenez la pile au lithium hors de la portée des enfants En cas d ingestion de la pile consultez immédiatement un médecin Essuyez la pile avec un chiffon sec pour assurer un bon contact Veillez à respecter la polarité lors de l installat...

Страница 98: ...nettoyez les connecteurs à l aide d un coton tige N exercez pas une pression trop forte sinon les connecteurs peuvent être endommagés Remarques Pour plus de sécurité coupez le moteur avant de nettoyer les connecteurs et retirez la clé de contact Ne touchez jamais les connecteurs directement avec les doigts ou avec un objet métallique Retrait de l appareil 1 Retirez le tour de protection 1Retirez l...

Страница 99: ...nviron 182 53 162 mm l h p Poids environ 1 3 kg Accessoires fournis Mini télécommande RM X151 Composants destinés à l installation et au raccordement 1 jeu Appareils accessoires en option Câble de connexion USB pour iPod RC 100IP Il est possible que votre revendeur ne dispose pas de certains accessoires décrits ci dessus Veuillez vous adresser à lui pour tout renseignement complémentaire La concep...

Страница 100: ...ny europe com L affichage disparaît de la fenêtre d affichage ou il ne s affiche pas Le régulateur de luminosité est réglé sur DIMMER ON page 27 L affichage est désactivé si vous maintenez la touche SOURCE OFF enfoncée tMaintenez de nouveau la touche SOURCE OFF de l appareil enfoncée jusqu à ce que l affichage apparaisse Les connecteurs sont sales page 30 La fonction Auto Off est inopérante L appa...

Страница 101: ...disques suivants exige un délai de démarrage plus long disques comportant une hiérarchie de dossiers complexe disques enregistrés en multisession disques auxquels il est possible d ajouter des données Les rubriques d affichage ne défilent pas Pour les disques contenant un grand nombre de caractères le défilement peut être inopérant La fonction AUTO SCROLL est réglée sur OFF tRéglez A SCRL ON page ...

Страница 102: ...SB a été déconnecté en cours de lecture tRaccordez un périphérique USB et un câble USB NO MUSIC Le disque ou le périphérique USB ne contient pas de fichiers de musique tInsérez un CD de musique dans le lecteur tRaccordez un périphérique USB contenant des fichiers de musique NO NAME Aucun nom de disque d album d artiste de plage n est écrit dans la plage NOT FOUND Aucun élément commençant par la le...

Страница 103: ......

Страница 104: ...uta a conservare le risorse naturali Per informazioni più dettagliate circa il riciclaggio di questo prodotto potete contattare l ufficio comunale il servizio locale di smaltimento rifiuti oppure il negozio dove l avete acquistato In caso di smaltimento abusivo di apparecchiature elettriche e o elettroniche potrebbero essere applicate le sanzioni previste dalla normativa applicabile valido solo pe...

Страница 105: ...a relativa all installazione su un auto sprovvista della posizione ACC accessoria sul blocchetto di accensione Assicurarsi di impostare la funzione di spegnimento automatico pagina 27 L apparecchio si spegne completamente e in modo automatico dopo l intervallo di tempo impostato dal relativo spegnimento per evitare lo scaricamento della batteria Se non viene impostata la funzione di spegnimento au...

Страница 106: ...positivi USB Riproduzione del contenuto di un dispositivo USB 14 Voci del display 15 Riproduzione ripetuta e in ordine casuale 15 Ascolto di musica adatta al proprio stato d animo SensMe 16 Prima di utilizzare la funzione SensMe 16 Installazione di SensMe Setup e di Content Transfer sul computer 16 Registrazione di un dispositivo USB utilizzando SensMe Setup 17 Trasferimento di brani sul dispositi...

Страница 107: ...azione dell audio in base alla posizione di ascolto con Time Alignment Listening Position 25 Regolazione della posizione di ascolto 26 DM Advanced 26 Uso dei diffusori posteriori come subwoofer Rear Bass Enhancer 26 Regolazione delle voci di impostazione SET 26 Altre funzioni Uso di apparecchi opzionali 28 Apparecchio audio ausiliario 28 Informazioni aggiuntive Precauzioni 28 Note sui dischi 28 Or...

Страница 108: ...emere la manopola 3 Ruotare la manopola di controllo per selezionare DEMO OFF quindi premere la manopola L impostazione è completata 4 Premere BACK Il display torna al modo di ricezione riproduzione normale Preparazione del telecomando a scheda Rimuovere la pellicola di protezione Suggerimento Per informazioni su come sostituire la pila vedere pagina 29 Impostazione dell orologio L orologio mostra...

Страница 109: ...za Note Non fare cadere il pannello anteriore né esercitare eccessiva pressione su quest ultimo e sulla finestra del display Non esporre il pannello anteriore a calore temperature elevate o umidità Evitare di lasciarlo all interno di auto parcheggiate oppure su cruscotti e ripiani posteriori Non rimuovere il pannello anteriore durante la riproduzione del dispositivo USB Diversamente è possibile ch...

Страница 110: ...e i brani premere per saltare i brani in modo continuo premere quindi premere di nuovo entro 1 secondo e tenere premuto per mandare avanti o indietro rapidamente un brano tenere premuto SensMe Per saltare i brani premere per mandare avanti o indietro rapidamente un brano tenere premuto B Tasto SOURCE OFF Premere questo tasto per accendere l apparecchio cambiare sorgente Radio CD USB SensMe 1 AUX P...

Страница 111: ...uzione di file MP3 WMA AAC Per saltare gli album cambiare i canali SensMe premere per saltare gli album in modo continuo tenere premuto 3 REP 2 pagina 14 15 19 4 SHUF pagina 14 15 19 6 PAUSE Per effettuare una pausa durante la riproduzione Per annullare l operazione premere di nuovo il tasto N Tasto DSPL display SCRL scorrimento pagina 11 13 15 19 20 Per cambiare le voci del display premere per sc...

Страница 112: ...nullare l operazione premere di nuovo il tasto G Tasto SEL selezione Equivale al tasto di selezione sull apparecchio H Tasto MODE Premere per selezionare la banda radio FM MW LW Tenere premuto per impostare disattivare il controllo passeggero I Tasti M m Per controllare CD USB SensMe Stessa funzione dei tasti 1 2 ALBUM sull apparecchio È possibile utilizzare le impostazioni le impostazioni dell au...

Страница 113: ...Selezionare la banda quindi premere SEEK per ricercare la stazione La ricerca si arresta non appena l apparecchio riceve una stazione Ripetere questa procedura fino alla ricezione della stazione desiderata Suggerimento Se si conosce la frequenza della stazione che si desidera ascoltare tenere premuto SEEK per individuare la frequenza approssimativa quindi premere più volte SEEK per sintonizzarsi e...

Страница 114: ...redefinite di questo apparecchio limitano la ricezione a una regione specifica in modo che la stazione sintonizzata non venga sostituita da una stazione regionale dal segnale più potente Se si intende lasciare tale area di ricezione regionale impostare REG OFF nelle impostazioni durante la ricezione FM pagina 27 Nota Questa funzione non è disponibile nel Regno Unito e in altre aree Funzione Local ...

Страница 115: ...re OPEN 2 Premere Z Il disco viene espulso 3 Chiudere il pannello anteriore Voci del display A Sorgente B Titolo del brano 1 nome del disco dell artista 1 nome dell artista 1 numero di album 2 titolo dell album 1 numero del brano tempo di riproduzione trascorso orologio 1 Vengono visualizzate le informazioni di un file CD TEXT MP3 WMA AAC 2 Il numero dell album viene visualizzato solo quando si ca...

Страница 116: ...dard USB Il codec corrispondente è MP3 mp3 WMA wma AAC m4a e AAC mp4 Si consiglia di eseguire copie di backup dei dati contenuti nel dispositivo USB Nota Collegare il dispositivo USB dopo l accensione del motore Diversamente a seconda del dispositivo USB potrebbe verificarsi un problema di funzionamento o un danno Riproduzione del contenuto di un dispositivo USB 1 Fare scorrere il coperchio USB 2 ...

Страница 117: ...a del dispositivo USB del formato di registrazione e delle impostazioni effettuate Per ulteriori informazioni visitare il sito di assistenza Di seguito è riportato il numero massimo di dati visualizzabili cartelle album 128 file brani per cartella 500 Non lasciare il dispositivo USB all interno di auto parcheggiate onde evitare problemi di funzionamento A seconda della quantità di dati registrati ...

Страница 118: ...aggruppare i brani per canale è necessario analizzare le caratteristiche audio dei brani mediante 12 TONE ANALYSIS caricato in Content Transfer Con il dispositivo USB collegato al computer trascinare i brani da Risorse del computer o iTunes ecc a Content Transfer Sia l analisi che il trasferimento dei brani saranno eseguiti mediante Content Transfer 4Collegamento del dispositivo USB e uso della fu...

Страница 119: ...chiedere un po di tempo a seconda del computer in uso Riproduzione di brani del canale SensMe channels La funzione SensMe channels raggruppa automaticamente i brani in canali a seconda delle loro caratteristiche audio Sarà quindi possibile selezionare e riprodurre il canale più adatto al proprio stato d animo alle attività che si stanno svolgendo ecc 1 Collegare un dispositivo USB impostato per la...

Страница 120: ...e la seguente schermata MORNING 5 00 9 59 DAYTIME 10 00 15 59 EVENING 16 00 18 59 NIGHT 19 00 23 59 MIDNIGHT 0 00 4 59 Brani consigliati peri vari momenti della giornata Impostare l orologio pagina 6 per il canale affinché sia visualizzato correttamente SHUFFLE ALL consente di riprodurre tutti i brani analizzati in ordine casuale ENERGETIC brani vivaci e travolgenti RELAX brani rilassanti MELLOW b...

Страница 121: ...sione è impostata sulla posizione ACC accessoria e l apparecchio è acceso l iPod viene ricaricato Se l iPod viene scollegato durante la riproduzione nel display dell apparecchio viene visualizzato NO DEV Modo di ripristino Se l iPod è collegato al connettore dock sull apparecchio viene impostato il modo di ripristino e la riproduzione viene avviata nel modo impostato sull iPod Nel modo di ripristi...

Страница 122: ...le categorie di ricerca 2 Ruotare la manopola di controllo per selezionare la categoria di ricerca desiderata quindi premerla per confermare 3 Ripetere il punto 2 fino a quando non viene selezionato il brano desiderato Viene avviata la riproduzione Per tornare al display precedente Premere BACK Per annullare il modo Quick BrowZer Premere BROWSE Nota Impostando il modo Quick BrowZer l impostazione ...

Страница 123: ...fabetica viene annullata La ricerca alfabetica potrebbe richiedere un po di tempo a seconda del numero di brani Ricerca di un brano tramite ascolto di porzioni di brani ZAPPIN È possibile ricercare il brano che si desidera ascoltare durante la riproduzione in sequenza di brevi porzioni di brani contenuti in un CD o un dispositivo USB Il modo ZAPPIN è particolarmente adatto per la ricerca di un bra...

Страница 124: ...o colore DAY NIGHT cambia nel modo seguente Disponibile solo se è collegato il cavo di controllo dell illuminazione Per ulteriori dettagli sul DIMMER vedere pagina 27 1 Tenere premuto COLOR Il colore personalizzato DAY NIGHT del display varia a seconda dell impostazione del DIMMER Per cambiare il modo colore DAY NIGHT vedere pagina 22 2 Ruotare la manopola di controllo fino a visualizzare BASE COL...

Страница 125: ...azione 2 Ruotare la manopola di controllo fino a visualizzare SOUND SYNC quindi premere la manopola 3 Ruotare la manopola di controllo per selezionare SYNC ON quindi premere la manopola 4 Premere BACK L impostazione è completata e il display torna al modo di ricezione riproduzione normale Nota È possibile che la sincronizzazione non sia corretta Visualizzazione a colori più nitida White Menu È pos...

Страница 126: ...uotare la manopola di controllo fino a visualizzare EQ7 PRESET quindi premere la manopola 3 Ruotare la manopola di controllo fino a visualizzare la curva dell equalizzatore desiderata quindi premere la manopola 4 Premere BACK Il display torna al modo di ricezione riproduzione normale Per annullare la selezione della curva dell equalizzatore selezionare OFF al punto 3 Suggerimento È possibile memor...

Страница 127: ... Premere due volte BACK La curva dell equalizzatore viene memorizzata in CUSTOM e il display torna al modo di riproduzione ricezione normale Ottimizzazione dell audio in base alla posizione di ascolto con Time Alignment Listening Position L apparecchio è in grado di modificare la localizzazione dell audio ritardando l emissione sonora dai singoli diffusori in base alla posizione dell ascoltatore d...

Страница 128: ...nare ON quindi premere la manopola 4 Premere BACK Il display torna al modo di riproduzione normale Suggerimento È possibile memorizzare l impostazione DM per ciascuna sorgente Uso dei diffusori posteriori come subwoofer Rear Bass Enhancer Rear Bass Enhancer consente di ottimizzare i suoni bassi applicando il filtro passa basso pagina 27 ai diffusori posteriori Questa funzione consente di utilizzar...

Страница 129: ... OFF START WHITE Consente di impostare il colore di avvio ON OFF MOTION DSPL display in movimento SA per visualizzare i modelli in movimento e l analizzatore spettrale ON per visualizzare i modelli in movimento OFF per disattivare il display in movimento AUTO SCROLL Consente di fare scorrere automaticamente le voci composte da molti caratteri ON OFF LOCAL modo di ricerca locale ON per sintonizzare...

Страница 130: ...ettrica si estende automaticamente Formazione di condensa Se all interno dell apparecchio si è formata della condensa rimuovere il disco e attendere per circa un ora fino a quando non si asciuga Diversamente l apparecchio non funzionerà correttamente Per mantenere una qualità audio elevata Non bagnare l apparecchio o i dischi Note sui dischi Non esporre i dischi alla luce solare diretta o a fonti ...

Страница 131: ...ormali la pila dura circa 1 anno il ciclo di vita può risultare più breve in funzione delle condizioni di utilizzo Quando la pila si scarica il raggio d azione del telecomando a scheda risulta ridotto Sostituire la pila con una pila al litio CR2025 nuova L uso di pile diverse potrebbe comportare il rischio di incendi o esplosioni Cartella album File MP3 WMA AAC brano MP3 WMA AAC continua alla pagi...

Страница 132: ...cchio potrebbe non funzionare correttamente Per evitare questo problema aprire il pannello anteriore rimuoverlo pagina 7 quindi pulire i connettori con un cotton fioc Non esercitare forza eccessiva Diversamente i connettori potrebbero venire danneggiati Note Per motivi di sicurezza spegnere il motore prima di pulire i connettori e rimuovere la chiave dal blocchetto di accensione Non toccare mai di...

Страница 133: ...nsioni circa 178 50 180 mm l a p Dimensioni di montaggio circa 182 53 162 mm l a p Peso circa 1 3 kg Accessori in dotazione Telecomando a scheda RM X151 Elementi per l installazione e i collegamenti 1 set Accessori apparecchi opzionali Cavo di collegamento USB per iPod RC 100IP È possibile che il rivenditore non tratti alcuni degli accessori di cui sopra Per ulteriori informazioni rivolgersi al ri...

Страница 134: ...europe com Il display viene disattivato non viene visualizzato nella finestra del display L attenuatore di luminosità è impostato su DIMMER ON pagina 27 Il display scompare tenendo premuto SOURCE OFF tPremere SOURCE OFF sull apparecchio fino a visualizzare il display I connettori sono sporchi pagina 30 La funzione di spegnimento automatico non è operativa L apparecchio è acceso La funzione di speg...

Страница 135: ... di seguito l avvio della riproduzione necessita di un tempo maggiore dischi registrati con una struttura ad albero complessa dischi registrati in multisessione dischi ai quali è possibile aggiungere dati Le voci del display non scorrono Per i dischi che presentano molti caratteri tali voci potrebbero non scorrere La funzione AUTO SCROLL è impostata su OFF tImpostare A SCRL ON pagina 27 tTenere pr...

Страница 136: ...ti un dispositivo o un cavo USB tAccertarsi di collegare un dispositivo e un cavo USB NO MUSIC Il disco o il dispositivo USB non contiene file musicali tInserire un CD musicale nell apparecchio tCollegare un dispositivo USB contenente file musicali NO NAME Il brano non contiene il titolo di un disco album brano il nome dell artista NOT FOUND Durante la ricerca alfabetica non sono state trovate voc...

Страница 137: ......

Страница 138: ...band met het recyclen van dit product neemt u contact op met de gemeentelijke instanties het bedrijf of de dienst belast met de verwijdering van huishoudafval of de winkel waar u het product hebt gekocht Accessoire waarop dit van toepassing is Afstandsbediening Verwijdering van oude batterijen in de Europese Unie en andere Europese landen met afzonderlijke inzamelingssystemen Dit symbool op de bat...

Страница 139: ...contactslot van de auto geen ACC positie heeft Zorg ervoor dat u de functie voor automatisch uitschakelen instelt pagina 27 Hiermee wordt het apparaat na de ingestelde tijdsduur automatisch volledig uitgeschakeld nadat u het apparaat hebt uitgeschakeld Zo voorkomt u dat de accu leegraakt Als u de functie voor automatisch uitschakelen niet instelt houdt u SOURCE OFF ingedrukt totdat het scherm verd...

Страница 140: ...n 14 Display items 15 Herhaaldelijk en willekeurig afspelen 15 Genieten van muziek die bij uw stemming past SensMe 16 Voordat u de functie SensMe in gebruik neemt 16 SensMe Setup en Content Transfer op uw computer installeren 16 Een USB apparaat registreren met SensMe Setup 17 Tracks overzetten naar het USB apparaat met Content Transfer 17 Tracks op het kanaal afspelen SensMe channels 17 iPod Een ...

Страница 141: ...luid optimaliseren door middel van Time Alignment Listening Position 25 De luisterpositie aanpassen 26 DM Advanced 26 De achterluidsprekers als subwoofer gebruiken Rear Bass Enhancer 26 Instelitems aanpassen SET 26 Andere functies Optionele apparaten gebruiken 28 Randapparatuur voor audio 28 Aanvullende informatie Voorzorgsmaatregelen 28 Opmerkingen over disks 28 Afspeelvolgorde van MP3 WMA AAC be...

Страница 142: ...F door de regelknop te draaien en er vervolgens op te drukken Het instellen is voltooid 4 Druk op BACK Het display keert terug naar de normale ontvangst weergavestand De kaartafstandsbediening voorbereiden Verwijder het beschermende laagje Tip Zie pagina 29 voor meer informatie over het vervangen van de batterij De klok instellen De digitale klok werkt met een 24 uurs aanduiding 1 Houd de selectie...

Страница 143: ...e linkerzijde van het voorpaneel voorzichtig naar u toe Opmerkingen Laat het voorpaneel niet vallen en druk niet te hard op het voorpaneel en het display Stel het voorpaneel niet bloot aan hitte hoge temperaturen of vocht Laat het voorpaneel niet achter in een geparkeerde auto of op het dashboard de hoedenplank Verwijder het voorpaneel niet terwijl het USB apparaat wordt afgespeeld anders kunnen d...

Страница 144: ...nen 1 seconde nogmaals indrukken en vasthouden een track snel terug vooruitspoelen ingedrukt houden SensMe Tracks overslaan indrukken teruggaan snel vooruit in een track ingedrukt houden B SOURCE OFF toets Druk op deze toets als u het apparaat wilt inschakelen een andere bron wilt kiezen Radio CD USB SensMe 1 AUX Houd de toets 1 seconde ingedrukt als u het apparaat wilt uitschakelen Houd de toets ...

Страница 145: ...tijdens het afspelen van MP3 WMA AAC Albums overslaan andere SensMe kanalen kiezen indrukken albums blijven overslaan ingedrukt houden 3 REP 2 pagina 14 15 19 4 SHUF pagina 14 15 19 6 PAUSE Afspelen onderbreken Druk nogmaals als u wilt annuleren N DSPL display SCRL rollen toets pagina 11 13 15 19 20 Display items wijzigen indrukken het display item rollen ingedrukt houden O AUX ingang pagina 28 Ee...

Страница 146: ...maals als u wilt annuleren G SEL select toets Dezelfde functie als de selectietoets op het apparaat H MODE toets Indrukken als u de radioband wilt selecteren FM MW LW Ingedrukt houden als u de passagiersbediening wilt inschakelen annuleren I M m toetsen CD USB SensMe bedienen dezelfde functie als de toetsen 1 2 ALBUM op het apparaat Installatie geluidsinstelling enz kunnen worden bediend met M m J...

Страница 147: ...tvangen Herhaal deze procedure tot de zender van uw keuze wordt ontvangen Tip Als u de frequentie kent van de zender die u wilt beluisteren houdt u SEEK ingedrukt tot de frequentie ongeveer is bereikt en vervolgens stemt u nauwkeurig op de gewenste frequentie af door herhaaldelijk op SEEK te drukken handmatig afstemmen RDS Overzicht FM zenders met de RDS dienst radiogegevenssysteem sturen onhoorba...

Страница 148: ...overgeschakeld naar een andere regionale zender met een sterkere frequentie Wanneer u het ontvangstgebied van het regionale programma verlaat stelt u tijdens FM ontvangst REG OFF in bij de instellingen pagina 27 Opmerking Deze functie werkt niet in het Verenigd Koninkrijk en sommige andere gebieden Local Link functie alleen voor het Verenigd Koninkrijk Met deze functie kunt u andere lokale zenders...

Страница 149: ...nummer verstreken speelduur klok 1 De informatie over een CD TEXT MP3 WMA AAC wordt weergegeven 2 Het albumnummer wordt alleen weergegeven als het album wordt gewijzigd Als u de display items B wilt wijzigen drukt u op DSPL Tip De weergegeven items zijn afhankelijk van het disktype de opname indeling en de instellingen NEWS Nieuws AFFAIRS Actualiteiten INFO Informatie SPORT Sport EDUCATE Educatiev...

Страница 150: ... en AAC m4a en AAC mp4 U kunt het beste een reservekopie van de gegevens op een USB apparaat maken Opmerking Sluit het USB apparaat aan nadat u de motor hebt gestart Afhankelijk van het USB apparaat kan storing of schade ontstaan wanneer het apparaat wordt aangesloten voordat de motor wordt gestart Een USB apparaat afspelen 1 Verschuif de klep van de USB aansluiting 2 Sluit het USB apparaat aan op...

Страница 151: ...n het USB apparaat de opname indeling en de instellingen Ga naar de ondersteunings site voor meer informatie Het maximumaantal gegevens dat kan worden weergegeven is als volgt mappen albums 128 bestanden tracks per map 500 Laat een USB apparaat niet in een geparkeerde auto achter omdat dit een storing tot gevolg kan hebben Het kan enige tijd duren voordat het afspelen wordt gestart afhankelijk van...

Страница 152: ...aat met Content Transfer Tracks kunnen alleen op verschillende kanalen worden gegroepeerd als patronen van het geluid van tracks zijn geanalyseerd door 12 TONE ANALYSIS geladen in Content Transfer Sleep terwijl het USB apparaat is aangesloten op uw computer tracks van Windows Explorer of iTunes enz naar Content Transfer Content Transfer voert zowel de analyse als de overdracht van tracks uit 4Het ...

Страница 153: ...ankelijk van de computeromgeving wat tijd in beslag nemen Tracks op het kanaal afspelen SensMe channels SensMe channels groepeert tracks op hun melodie automatisch in kanalen U kunt een kanaal selecteren en afspelen dat past bij uw stemming activiteit enz 1 Sluit een USB apparaat aan dat is ingesteld voor de SensMe functie 2 Druk herhaaldelijk op SOURCE OFF tot SENSME CH wordt weergegeven De lijst...

Страница 154: ...s volgt op het scherm van de iPod weergegeven MORNING 5 00 9 59 DAYTIME 10 00 15 59 EVENING 16 00 18 59 NIGHT 19 00 23 59 MIDNIGHT 0 00 4 59 Tracks die voor ieder tijdstip van de dag worden aanbevolen Stel de klok pagina 6 in zodat het kanaal nauwkeurig wordt weergegeven SHUFFLE ALL Speelt alle geanalyseerde tracks in willekeurige volgorde ENERGETIC Vrolijke tracks RELAX Kalme tracks MELLOW Melanc...

Страница 155: ...ositie is gezet en het apparaat is ingeschakeld wordt de iPod opgeladen Als de iPod wordt losgekoppeld tijdens het afspelen wordt NO DEV op het display van het apparaat weergegeven De stand Resuming Wanneer de iPod is aangesloten op de dockconnector wordt de stand van dit apparaat gewijzigd in de stand Resuming en wordt het afspelen gestart in de stand die is ingesteld met de iPod In de stand Resu...

Страница 156: ...g deze met een druk op de regelknop 3 Herhaal stap 2 tot de gewenste track is geselecteerd Het afspelen wordt gestart Terugkeren naar het vorige display Druk op BACK De Quick BrowZer stand verlaten Druk op BROWSE Opmerking Wanneer u de Quick BrowZer stand opent wordt de instelling voor herhaaldelijk willekeurig afspelen geannuleerd Zoeken door items over te slaan Jump stand Wanneer er veel items i...

Страница 157: ...ken kan wat tijd in beslag nemen afhankelijk van het aantal tracks Zoeken naar een track door te luisteren naar een gedeelte van een track ZAPPIN U kunt zoeken naar een track die u wilt beluisteren door korte gedeelten van tracks op een CD of USB apparaat op volgorde af te spelen De ZAPPIN stand is geschikt voor het zoeken naar een track in de standen voor willekeurige volgorde of willekeurige vol...

Страница 158: ...urveranderingen van het display voor DAY NIGHT zijn de volgende Alleen beschikbaar wanneer de bedieningskabel voor de verlichting is aangesloten Zie pagina27 voor informatie over de DIMMER 1 Houd COLOR ingedrukt De speciale DAY NIGHT kleurweergave varieert uitgaande van de DIMMER instelling Zie pagina 22 als u de DAY NIGHT kleurstand wilt wijzigen 2 Draai de regelknop tot BASE COLOR wordt weergege...

Страница 159: ...Draai de regelknop tot SOUND SYNC wordt weergegeven en druk op de regelknop 3 Selecteer SYNC ON door de regelknop te draaien en druk op de regelknop 4 Druk op BACK De instelling is voltooid en het display keert terug naar de normale ontvangst weergavestand Opmerking Zal misschien niet juist worden gesynchroniseerd Heldere kleur weergeven White Menu U kunt het menu duidelijker weergeven White zonde...

Страница 160: ...t terug naar de normale ontvangst weergavestand U kunt de equalizercurve annuleren door OFF te selecteren in stap 3 Tip Voor iedere bron kan de equalizercurve in het geheugen worden opgeslagen De equalizercurve aanpassen EQ7 Setting Met CUSTOM bij EQ7 kunt u uw eigen equalizerinstellingen maken 1 Selecteer een bron en druk op de selectietoets 2 Draai de regelknop tot EQ7 SETTING wordt weergegeven ...

Страница 161: ...eeft dat u er middenin zit waar u ook in de auto zit De opties voor POSITION worden hieronder genoemd U kunt ook de subwooferpositie bij benadering instellen vanaf uw luisterpositie als de subwoofer is aangesloten de luisterpositie is ingesteld op FRONT L FRONT R FRONT of ALL De opties voor SW POSITION worden hieronder genoemd NEAR A Dichtbij NORMAL B Normaal FAR C Ver 1 Druk tijdens ontvangst wee...

Страница 162: ... als subwoofer gebruiken Rear Bass Enhancer Rear Bass Enhancer laat de bass sound toenemen door de instelling van het laagdoorlaatfilter pagina 27 op de achterluidsprekers toe te passen Door middel van deze functie kunnen de achterluidsprekers werken als subwoofer als er geen subwoofer is aangesloten 1 Druk tijdens ontvangst weergave op de selectietoets 2 Draai de regelknop tot REARBAS ENH wordt w...

Страница 163: ...WHITE MENU Stelt het effect in wanneer een andere bron wordt gekozen ON OFF START WHITE Stelt de opstartkleur in ON OFF MOTION DSPL Bewegingsdisplay SA bewegende patronen en spectrum analyzer weergeven ON bewegende patronen weergeven OFF het bewegingsdisplay uitschakelen AUTO SCROLL Lange items automatisch laten rollen ON OFF LOCAL lokale zoekfunctie ON alleen afstemmen op krachtige zenders OFF af...

Страница 164: ... elektrisch bediende antenne schuift automatisch uit Condensvorming Als er vocht condenseert in het apparaat verwijdert u de disk en wacht u ongeveer een uur tot het apparaat is gedroogd anders kan de werking van het apparaat worden verstoord Hoge geluidskwaliteit behouden Mors geen vloeistof op het apparaat of de disks Opmerkingen over disks Stel een disk niet bloot aan direct zonlicht of warmteb...

Страница 165: ...andsbediening vervangen Onder normale omstandigheden gaat de batterij ongeveer 1 jaar mee Afhankelijk van de gebruiksomstandigheden kan de levensduur korter zijn Wanneer de batterij verzwakt wordt het bereik van de kaartafstandsbediening kleiner Vervang de batterij door een nieuwe CR2025 lithiumbatterij Bij een andere batterij bestaat er brand of explosiegevaar Map album MP3 WMA AAC bestand track ...

Страница 166: ...rkomen door het voorpaneel pagina 7 los te maken en de aansluitingen te reinigen met een wattenstaafje Gebruik hierbij niet te veel kracht Anders kunnen de aansluitingen worden beschadigd Opmerkingen Uit veiligheidsoverwegingen moet u de motor uitschakelen en de sleutel uit de contactschakelaar halen voordat u de aansluitingen reinigt Raak de aansluitingen nooit rechtstreeks aan met uw vingers of ...

Страница 167: ...g Bijgeleverd accessoire Kaartafstandsbediening RM X151 Onderdelen voor installatie en aansluitingen 1 set Optionele accessoires apparatuur USB verbindingskabel voor iPod RC 100IP Het is mogelijk dat niet alle vermelde accessoires verkrijgbaar zijn bij uw Sony handelaar Neem contact op met uw Sony handelaar voor meer informatie Wijzigingen in ontwerp en technische gegevens voorbehouden zonder voor...

Страница 168: ...nstratie gestart tStel DEMO OFF in pagina 27 Ondersteuningssite http support sony europe com Het display verdwijnt van verschijnt niet in het display venster De dimmer is ingesteld op DIMMER ON pagina 27 Het display verdwijnt als u op SOURCE OFF drukt en deze toets ingedrukt houdt tHoud SOURCE OFF op het apparaat ingedrukt tot het display verschijnt De aansluitingen zijn vuil pagina 30 De functie ...

Страница 169: ...bestanden worden minder snel afgespeeld dan andere bestanden Bij de volgende disks duurt het langer voordat het afspelen wordt gestart disks opgenomen met een ingewikkelde structuur disks die in Multi Session meerdere sessies zijn opgenomen disks waaraan gegevens kunnen worden toegevoegd De display items rollen niet Bij sommige disks met heel veel tekens zullen de tekens misschien niet rollen AUTO...

Страница 170: ... USB kabel is losgeraakt tijdens het afspelen tHet is belangrijk dat u een USB apparaat en een USB kabel aansluit NO MUSIC De disc of het USB apparaat bevat geen muziekbestanden tPlaats een muziek CD in het apparaat tSluit een USB apparaat aan waarop muziekbestanden staan NO NAME Er is geen naam voor de disk artiest track of het album naar de track geschreven NOT FOUND Er is geen item dat begint m...

Страница 171: ......

Страница 172: ...hls zur ldentifikation lhres Eigentums dienen caraudio Geräte Pass Dieser Geräte Pass dient als Eigentumsnachweis für Ihr caraudio Gerät im Falle eines Diebstahls Wir empfehlen den Geräte Pass nicht im Fahrzeug aufzubewahren um Missbrauch zu verhindern Modellbezeichnung CDX GT650UI Seriennummer SERIAL NO Sony Corporation Printed in Thailand http www sony net Register your product online now at Reg...

Отзывы: