56
Dubbing (HDD
y
DVD)
Before Dubbing
In this section, “dubbing” refers to “copying
a recorded title on the internal hard disk
drive (HDD) to another disc, or vice versa.”
Before you start, read the following
precautions, which are common to all
dubbing methods.
Before you start…
• After you dub a title on the HDD to a
DVD, the title cannot be edited on the
DVD. Edit the title on the HDD
beforehand.
• Do not connect or disconnect any cables
while dubbing.
• For titles containing scenes with various
aspect ratios, dub on to DVD-RWs/DVD-
Rs (VR mode) when dubbing from the
HDD to DVDs.
b
• Titles containing copy protection signals are
moved. For details on “Move” function, see
“Dubbing restriction” on page 92.
• No other operations are available during
dubbing.
• Timer recordings do not start while dubbing.
Before you start dubbing, check the Timer List
for any timer recordings that are due to start
during a dubbing.
• Depending on the DVD, the aspect ratio may
change when the title is dubbed.
Dubbing from the HDD to
a DVD (HDD
t
DVD)
You can select the titles you want to dub at
1× speed using Dubbing List.
1
Insert the DVD that you are going to
dub to.
See “Playing Discs and Recorded
Programmes” on page 40.
2
Press HDD.
3
Press TITLE LIST.
4
Press the red button (“Edit”) to select
“Dubbing,” and press
.
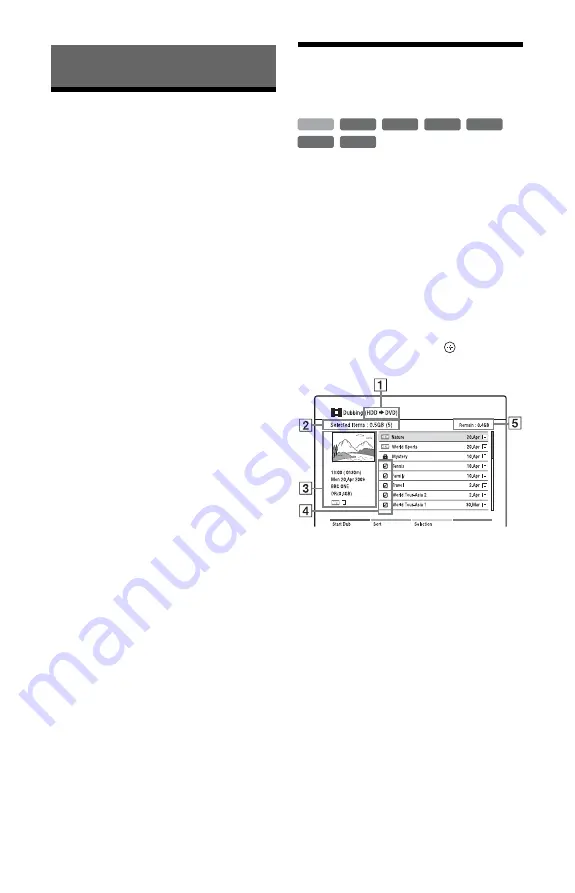
The Dubbing List appears.
A
Direction of dubbing
B
Total size (number) of the
selected titles
C
Detailed information of the
selected title
D
Check mark
E
Available space on the disc to be
dubbed (approximate)
+
RW
-RW
VR
-RW
Video
-R
VR
+
R
HDD
-R
Video


