


Chapter 2: Getting Started
11
G
e
tting Star
ted
Screen Layout and Icons
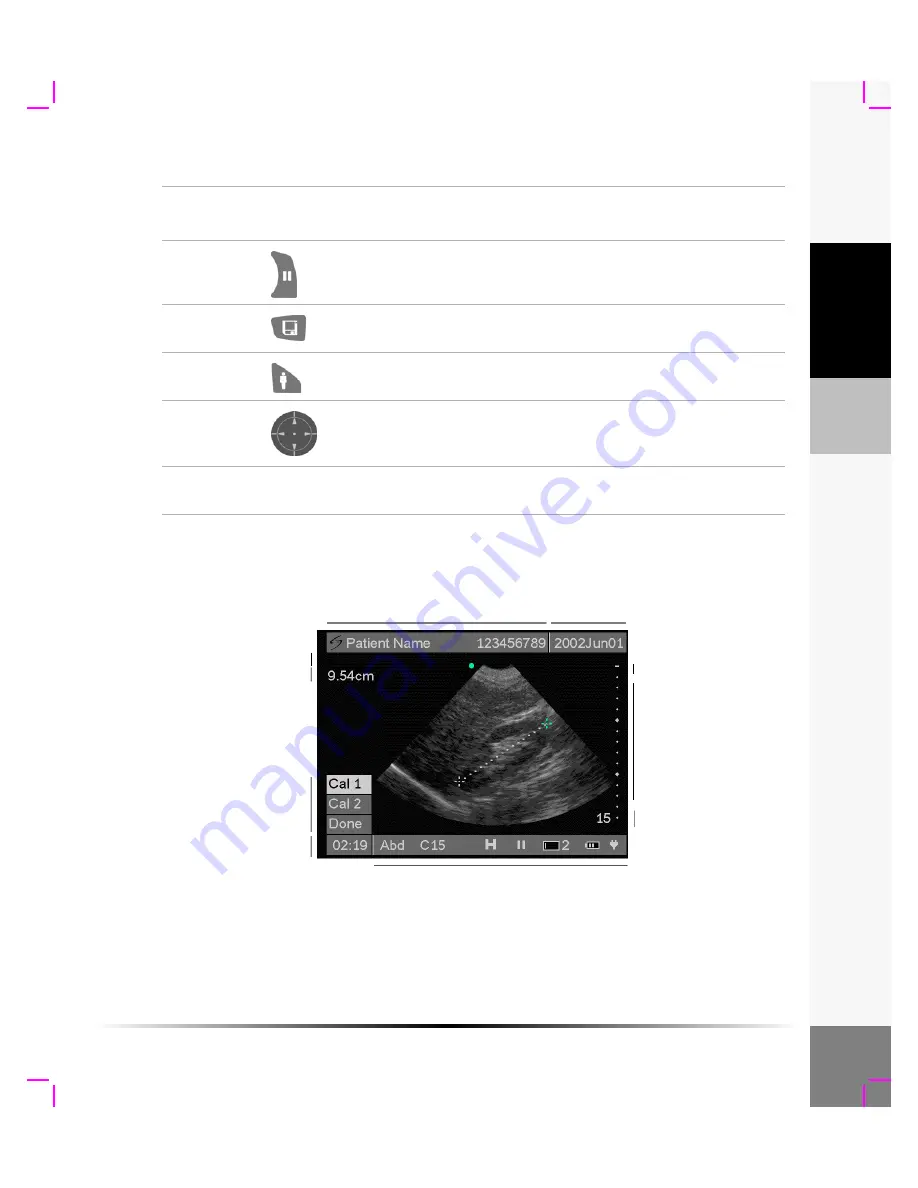
The following figure shows the screen layout and system icons.
Figure 3 Screen Layout and Icons
Freeze
Press to freeze an image. Measurements can be made on a frozen
image. Press freeze again to unfreeze the image.
Save
Press to save an image to the internal memory. Storage capacity is
up to 74 images.
Patient
Press to access Patient Information, Exam Type, Image Review, and
System Set-up. Press again to return to imaging.
Directional
Controller
Use to navigate on-screen menus, adjust caliper position, and enter
data. Use the right, left, up, or down arrows to highlight menu items.
Press the center to select.
Touch
Screen
Use stylus to tap on-screen menu options, position calipers, and
enter data. The touch screen is not active during live imaging.
Table 1: System Controls (Continued)
System
Control
Icon
Description
Date
Patient name/ID
Depth
System status
Time
Measurement
On-screen
menu
Depth markers
Skin line
Calculation
Содержание iLook
Страница 1: ...iLook USER GUIDE...
Страница 2: ......
Страница 3: ...iLook USER GUIDE...
Страница 8: ...vi...
Страница 28: ...20 Chapter 2 Getting Started Getting Started...
Страница 40: ...32 Chapter 3 The Exam Exam...
Страница 64: ...56 Chapter 5 Safety Safety...
Страница 88: ...80 Chapter 8 References References...
Страница 94: ...86 Chapter 9 Glossary Glossary...
Страница 100: ...92 Index Index...
Страница 101: ......
Страница 102: ...P02651 04...