


SonicWall Switch Getting Started Guide
Configuring from the Firewall
48
2 On the
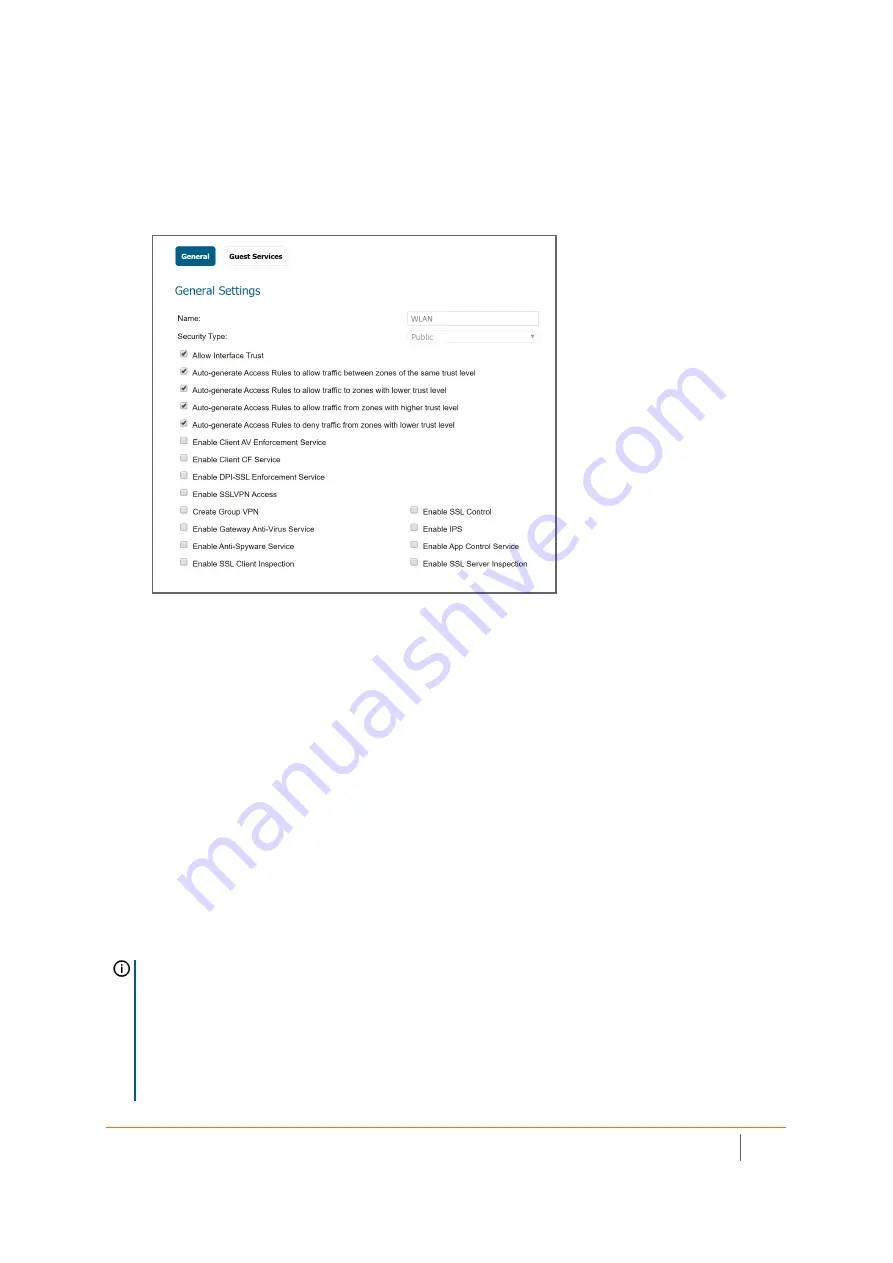
General
page, under
General Settings
, select the
Allow Interface Trust
option to automate the
creation of Access Rules to allow traffic to flow between the interfaces within the zone, regardless of the
interfaces to which the zone is applied.
For example, if the WLAN zone has both the
X1
and
X2
interfaces assigned to it, selecting
Allow Interface
Trust
creates the necessary access rules to allow hosts on these interfaces to communicate with each
other.
3 Select the checkboxes to enable security services on this zone. Minimally, you would select
Enable
Gateway Anti-Virus Service
,
Enable IPS
, and
Enable Anti-Spyware Service
, if your wireless clients are all
running
Spyware Service
. If your wireless clients are all running
SonicWall Client Anti-Virus
, select
Enable Client .
4 In the
Guest Services
page, optionally configure guest Internet access. For information about Guest
Services, see S
onicOS 6.5.4 Connectivity Administation
the documentation.
5 In
Wireless
under
SonicPoint/SonicWave Settings
, select
Only allow traffic generated by a SonicPoint/
SonicWave
to allow only traffic from SonicPoints/SonicWaves to enter the WLAN zone interfaces,
providing maximum security.
6 When finished, click
OK
.
Configuring the SonicWave Settings:
When a SonicWave AP is initially connected to an interface, the firewall uses a default provisioning profile to
create a SonicWave AP entry. It can take up to five minutes for the entry to be created.
You can modify the SonicWave AP entry to configure the access point name, radio frequency mode,
authentication type, and other settings specific to your SonicWave AP.
TIP:
For deployments of multiple SonicWaves that need the same provisioning settings, you can create a
custom provisioning profile in the upper section of
Access Points > Base Settings
page in the
MANAGE
view. In
System Setup | Network > Zones
page, you can edit the WLAN zone and specify this profile on the
Wireless
page. Any SonicWaves connecting to an interface in the WLAN zone can then be provisioned with the assigned
profile.
You might want to use the new
Floor Plan View
and
Topology View
features as well. See the
SonicOS 6.5.4
Connectivity Administration
documentation for more information.
Содержание SWS12 Series
Страница 1: ...SonicWall Switch Getting Started Guide...


