POWER SUPPLY P3226
DESCRIPTION
Switched 25 VA power supply unit to install on DIN rail, designed
to make installation more flexible if used in combination with the
PC3110 input modules and with the PC3810 telecontrol module
for external audio source.
It can be used in any system:
To supply the system in combination with one or several
PC3110 audio input modules.
For systems that only use the SONELCO Prestige series
tuners as sound sources.
As a power supply unit for any type of Prestige Line system
GENERAL CHARACTERISTICS
Power supply unit to install on DIN rail
Connection to network via screw-strips
320V – 50/60Hz nominal network voltage
Permanent connection to network (no switch)
Output voltage indication led
25W maximum power
16V stabilised and regulated output voltage.
Output protected against shortcuts
Internal fuse for network input protection
CE labelled (UNE-EN60065 and CEM))
-
-
-
-
-
-
-
-
-
-
-
-
-
CONNECTION
The power supply unit will be installed in an electric distribution
box on a standardised 35 mm wide rail, according to standard
DIN/EN50022.
The connection to the 220/230V electricity supply mains will be
made with at least 1 sq.mm. section wires and double insula-
tion.
Sonelco recommends installing a specific general switch for the
sound installation. (See installation example).
4FA037301
TERMINALS:
L- Phase (220/230 V AC)
N- Neutral (220/230 V AC)
- Earth (protection conductor)
2- Positive - Nominal 16 V DC voltage output / 1.5 A maximum
4- Supply and signal earth.
CONNECTION TO THE NETWORK:
Screw in the mains supply and
earth cables to the L, N and Earth terminal strips.
CONNECTION TO THE LINE:
(See diagramme). Connect the line 2 and
4 cables following the order indicated in the terminals, making sure to
fasten them tightly.
START-UP:
Once the apparatus is installed connect the mains switch of
the installation in order to supply electricity to the apparatus and check
that the ON led is lit (2).
OPERATION INCIDENTS:
Notice: Any handling of the power supply should only be carried out by
specialised technical personnel and with the mains switch of the audio
installation disconnected.
A.- LED 2 (ON) DOES NOT LIGHT UP WHEN CONNECTING THE
MAINS SUPPLY SWITCH
1. Please check the existence of voltage in the network, and the correct
connection of the network cables.
2. Disconnect strips 2, 4. If the led lights up, the power supply is ok,
indicating a short-circuit in the supply output (2, 4) and the cabling
should be revised.
B.- THE LED (ON) flashes.
1. The apparatus enters in a protected mode due to an excessive load
on its supply terminals. Revise the cabling of the installation and the
number of modules connected to this power supply. It may be that the
maximum power that the device can supply is being exceeded.
IMPORTANT NOTE: Before connecting this apparatus to
the mains electricity supply, the Mains Switch of that
installation should be switched off in order to allow the connec-
tions to be made with safety guarantees. Under no circumstances
should the source be handled outside its built-in box whilst con-
nected to the alternate current. Please make sure that the earth
connection is appropriately connected.
1
4
3
3
2
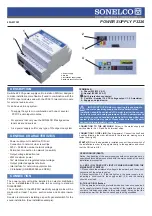
1. Power supply
2. ON led
3. Installation supply strips
4. Network connection strips


