background image

9

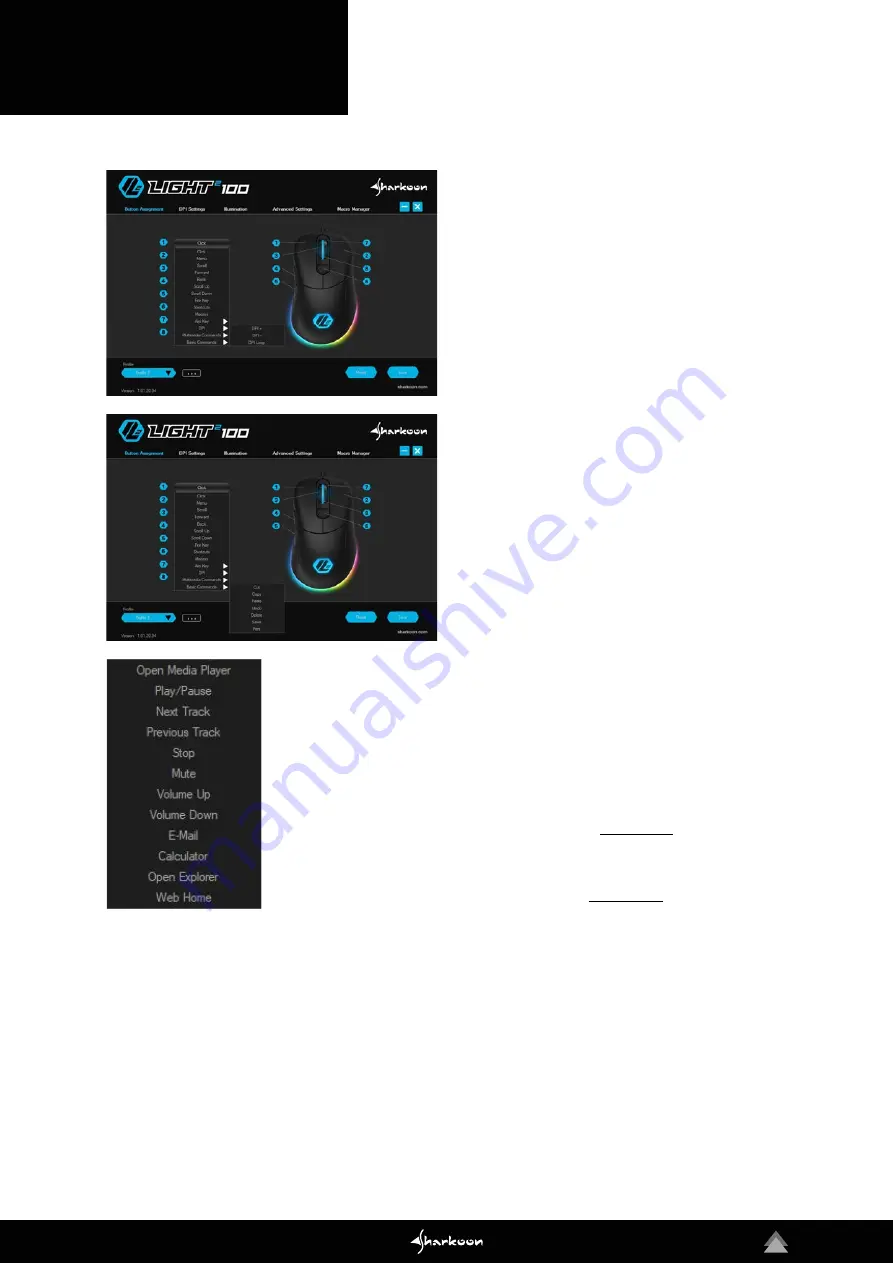
8.  Button Assignment

The Light² 100 has eight freely configurable buttons, 
which can be re-assigned via the software. To change 
the assignment of a button, select the desired button 
from the list which is on the left next to the illustration 
of the Light² 100. Click on the corresponding field for the 
button which is to be changed and choose a function 
from the dropdown list:

Click:

 Corresponds to the single left click. At least one 

button of the Light² 100 must be assigned with this 
function. 


Menu:

 This corresponds to the context menu, selected, 

by default, with a right-click. 

Scroll:

 Enables vertical and horizontal scrolling of 

scrollable 

elements. 


Forward/Back: 

For structured navigation back and 

forth in the Web or in file managers. 


Scroll Up/Scroll Down: 

Moves the scrollable element 

either up or down. 


Fire Key: 

Opens the menu for setting the fire key fun-

ction. With this function, a command can be quickly 
repeated when the corresponding mouse button is 
pressed. Up to 255 repetitions are possible. 

Shortcuts:

 Allows the assignment of a keyboard key or keyboard combination to the 

chosen mouse button. Please note that certain keys, depending on the keyboard lay-
out and keyboard type, may be excluded from the assignment.   


Macros:

 Assigns a recorded macro to the chosen mouse button. The macro is  

executed when the button is pressed. 

Aim Key:

 When the mouse button is held down, the DPI are increased or decreased to 

the value that you have previously selected.    


DPI:

  Here are commands for selecting the DPI steps. 

Please note:

 When changing to 

a new DPI step, the illumination flashes briefly. 


Multimedia Commands:

 This allows different Windows programs and functions to be 

opened and also has controls for the media player. 

Please note:

 The selected media 

player can be changed at any time in Windows Default Apps. However, not every me-
dia player is supported by Windows and incompatibilities may occur.     

Basic Commands: 

This comprises some basic Windows commands.

Содержание LIGHT2 100

Страница 1: ...Manual...

Страница 2: ...1 5 Cable and Connectors 4 1 6 Package Contents 4 2 Connecting the Gaming Mouse 5 3 Overview 5 4 Shortcuts 6 5 Selecting the Polling Rate 6 6 Software Installation 7 7 Software Overview 8 8 Button As...

Страница 3: ...000 Inches Per Second 100 Max Acceleration 20 g Mouse Feet 3 Pure PTFE 1 2 Button Properties Number of Buttons 6 Programmable Buttons 6 Durable Omron Switches in Left and Right Mouse Buttons Operatin...

Страница 4: ...rofiles Capacity of Onboard Memory 64 kB Number of Profiles 5 1 5 Cable and Connector Connector USB Gold Plated USB Plug Ultraflexible Cable Textile Braided Cable Cable Length 180 cm 1 6 Package Conte...

Страница 5: ...5 2 Connecting the Gaming Mouse 3 Overview Left Mouse Button Scroll Wheel Right Mouse Button DPI Switch Thumb Button 1 Thumb Button 2 Polling Rate Switch G G...

Страница 6: ...llow Profile 5 Purple Thumb button 1 Thumb button 2 Scroll wheel hold for 3 seconds Reset to Factory Default The polling rate can be altered using a switch on the underside of the Light 100 Three leve...

Страница 7: ...on Finish to complete the installation The Light 100 symbol will then appear in the taskbar The software has now been successfully installed To start the gaming software double click on the Light 100...

Страница 8: ...for the sensitivity and speed of the mouse Macro Manager In the menu Macro Manager different macros can be recorded modified or deleted These are saved separately but are then available for use in any...

Страница 9: ...nction a command can be quickly repeated when the corresponding mouse button is pressed Up to 255 repetitions are possible Shortcuts Allows the assignment of a keyboard key or keyboard combination to...

Страница 10: ...ottom DPI 1 to DPI 7 To deactivate a step click in the box which is on the left next to the DPI step name The check will disappear The empty box indicates that the DPI step is deactivated The step wil...

Страница 11: ...rs is fluid This effect can also be adjusted for brightness and frequency Single Color Marquee The illumination moves from the left side of the mouse across the rear and then up to the scroll wheel Th...

Страница 12: ...recision can be activated With thisoption thefasterthemouseismoved thefasterthe mouse pointer moves Scroll Speed When scrolling with the scroll wheel the screen moves according to the chosen value Wit...

Страница 13: ...nce for pressing the button and once for releasing it If the relevant option has been activated the duration and delay of key inputs will also be displayed Options On the right next to the macro edito...

Страница 14: ...dassignedalocationonthePC When LoadProfile is selected a profile which is already saved on the PC can be imported into the onboard memory of the mouse All the settings of the currently active profile...

Страница 15: ...handling Sharkoon assumes no liability All named products and descriptions are trademarks and or registered trademarks of the respective manufac turers and are accepted as protected As a continuing po...

Отзывы: