DEALER SET-UP INSTRUCTIONS for SNAPPER
21" CAST ALUMINUM REAR DISCHARGE WALK BEHIND MOWERS
This SNAPPER Walk Behind Mower uses a handle engine control bail system to kill the engine for the SAFETY
of the operator. These mowers are designed for quick set-up. The checklist on Page 4 should be filled out by
the dealer as the items are checked off and/or performed and the Consumer/Operator Product Registration card
filled out and sent to the Customer Service department at SNAPPER when completed. CAUTION: Cutting blades
are extremely sharp. Wear heavy leather gloves when handling or working with blades. Be careful to avoid
cutting yourself on sharp edges of blade.
STEP 1:
Remove unit from carton. Remove packing
material from unit and unfold handles. Do this carefully to
prevent cables from hanging up or becoming kinked.
STEP 2:
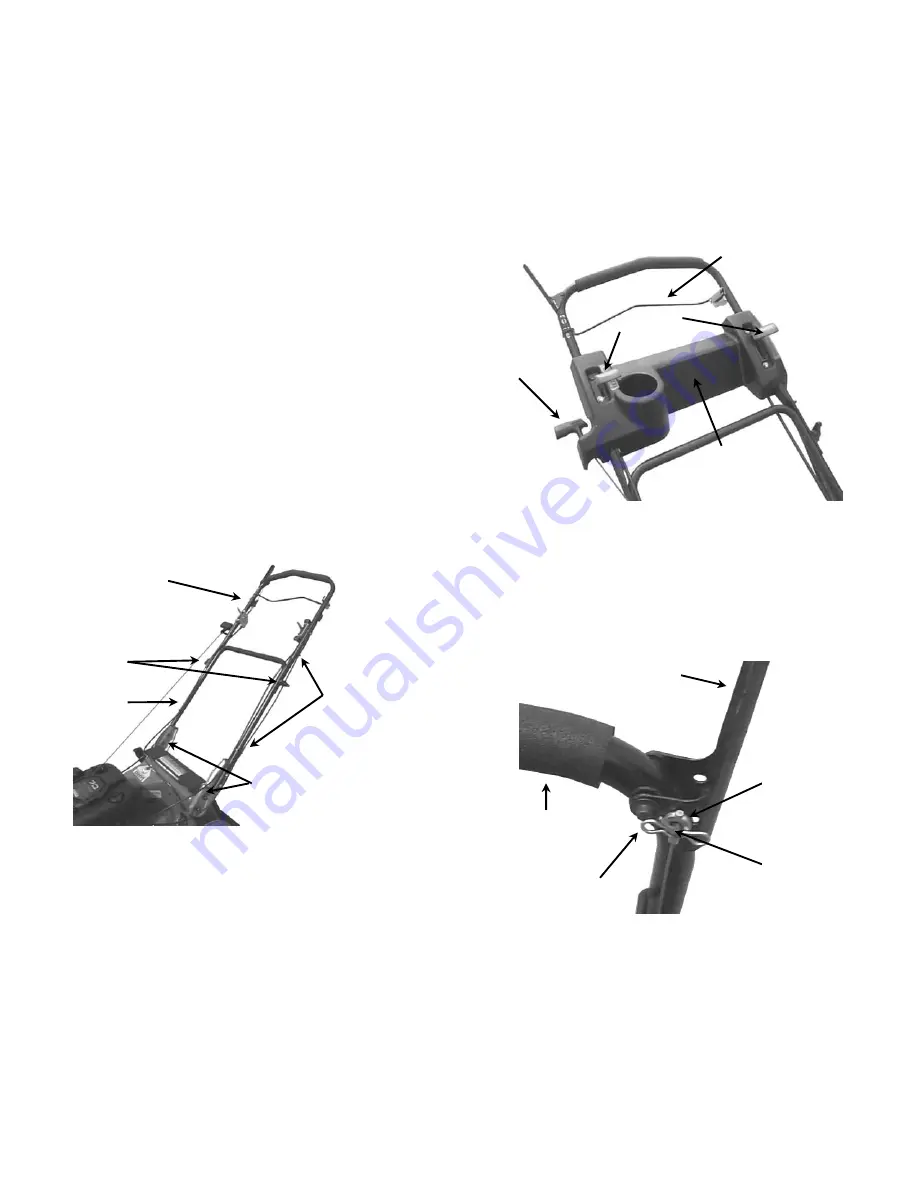
The bolts attaching the lower handle to the
handle brackets are for shipping purposes only. Remove
those bolts, and insert two curved head bolts out through
each handle bracket and lower handle tube, securing
with internal lock washers and nylon lock nuts. Tighten
securely. See Figure 1.
STEP 3:
Remove the two shipping bolts (one each side)
attaching the upper handle to the lower handle. Replace
each with a curved head bolt, inserting out through each
side, and securing with an internal lock washer and a
plastic T-knob nut. Tighten securely. See Figure 1.
STEP 4:
Secure control cables along each side of handle
assembly with four cable clips, positioning them as
shown in Figure 1. Make sure that cables are set into
relief loops in cable clips. Once clips are installed, make
sure that all controls operate without binding.
FIGURE 1
STEP 5:
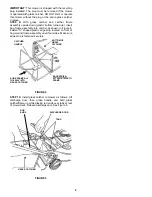
Pull blade control bail against handle and at the
same time, pull engine rope handle and slip pull cord into
rope guide located on handle. See Figure 2.
STEP 6:
Install Operator Console onto upper handle with
four 1/4-20 x 1/2” torx screws. Also, firmly press control
knobs onto engine speed and ground speed control levers.
(NOTE: Both knobs are identical.) See Figure 2.
FIGURE 2
STEP 7:
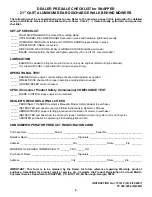
Remove hairpin from cable mounting stud on
back of wheel control lever. Slip ring end of cable onto
stud, and replace hair pin. See Figure 3.
FIGURE 3
STEP 8:
Tip mower back against the upper handle to gain
access to cutting blade. Remove foam shipping block
from cutting blade. This must be removed before starting
the engine.
INSTRUCTION No. 7101612 (I.R. 8/21/2007)
TP 300-5284-IR-WB-N
BLADE CONTROL
RECOIL ROPE
HANDLE
CONTROL
KNOBS
OPERATOR
CONSOLE
LOWER
HANDLE
UPPER
HANDLE
CABLE CLIPS
(2 EACH SIDE)
HANDLE BRACKETS
HAIR PIN
CABLE
RING END
WHEEL
DRIVE
CONTROL
UPPER
HANDLE
STUD
T-KNOB
NUTS


