background image

Содержание 130.887660

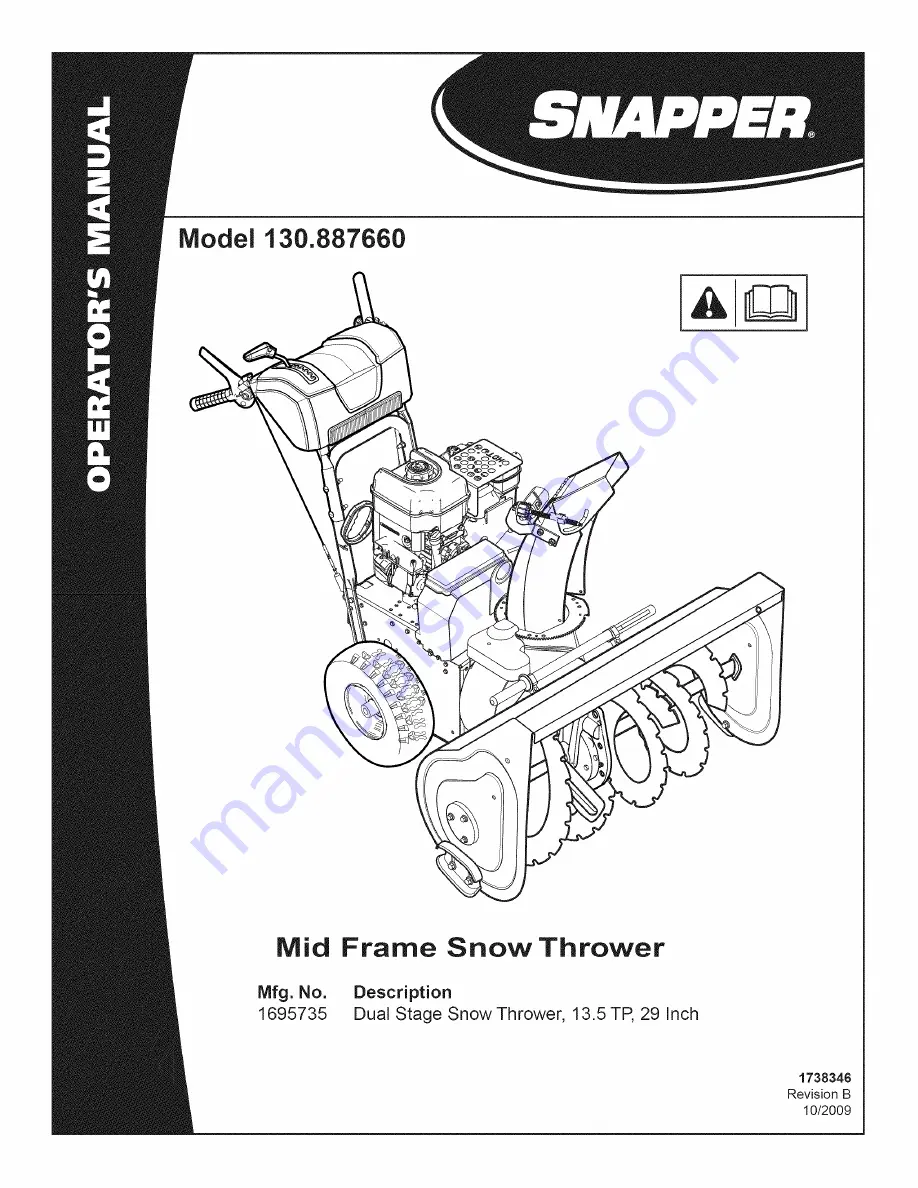
Страница 1: ...Model 130 887660 Mid Mfg No 1695735 Frame Snow Thrower Description Dual Stage Snow Thrower 13 5 TP 29 inch 1738348 Revision B 10 2009 ...

Страница 2: ...e these instructions for future reference Product identificationTag Product Identification Tag Ill IIIIIII IIiil lllll Ilill lllll Model Modele Model III lllllil Ilill lllll Illll IIIIIIlill III Serial Serie Serie Briggs Stratton Power Products Group L L C Milwaukee WI 53201 USA When contactingyour authorized dealer for replacement parts service or informationyou MUST have these numbers Recordyour...

Страница 3: ...UBRICATE AUGER GEAR BOX 19 LUBRICATE AUGER SHAFT FITTINGS 19 LUBRICATE CONTROL LEVER LINKAGE 19 LUBRICATE DISCHARGE CHUTE ANDDEFLECTOR 19 ENGINE MAINTENANCE 20 CHANGE THESPARK PLUG 21 ADJUST SKIDHEIGHT 22 BELT ADJUSTMENT 23 BELT GUIDE ADJUSTMENT 23 SPEED CONTROL ROD ADJUSTMENT 24 CHECK ANDADJUST THECABLES 24 AUGER CONTROL CABLE ADJUSTMENT 24 TRACTION CONTROL CABLE ADJUSTMENT 25 CHUTE ROTATION MOTO...

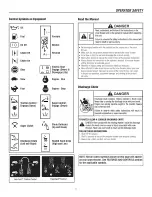
Страница 4: ...injury i_ CAUTIONindicates a hazardwhich if not avoided could result in minor or moderate injury NOTICEindicates a situation that couldresult in damage to the product WARNING U S A Models Certain componentsinthis productand its related accessories containchemicalsknown to the state of of California to causecancer birth defects or other repro ductive harm Wash hands after handing Hazard Symbols and...

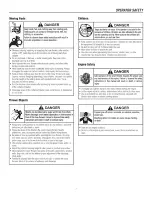
Страница 5: ...anual if thesnowthrower will bestoredfor anextended period Maintainor replace safetyandinstructionlabelsasnecessary Neverattempt to makemajorrepairsonthesnowthrowerunlessyouhave beenproperlytrained Improper servicingof thesnowthrower canresult in hazardous operation equipmentdamage andvoidingof theproduct warranty Discharge Chute DANGER Discharge chutecontains rotating impeller to throwsnow Never ...

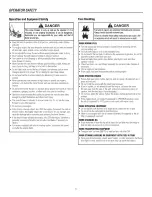
Страница 6: ...ormodelsequipped withelectricstartingmotors disconnect thepower cordaftertheenginestarts FuelHandling DANGER Fuelanditsvaporsareextremely flammable andexplosive Alwayshandlefuelwithextreme care Failureto observethesesafetyinstructionscancausea fire Ior explosion whichwill resultin severeburnsor death WHENADDINGFUEL Turnoffengineandletcool at least2 minutesbeforeremoving thefuel capandaddingfuel o ...

Страница 7: ... Beaware of yourenvironment whileoperatingthesnowthrower Running overitemssuchas gravel doormats newspapers toys androckshidden undersnow canall bethrownfromthechuteor jamintheauger o Useextreme cautionwhenoperatingonor crossinggraveldrives walks or roads o Adjustthecollectorhousingheightto cleargravelorcrushedrocksurface o Neveroperate thesnowthrowernearglassenclosures automobiles window wells dr...

Страница 8: ...hrower mustbeproperlymaintained to ensure safe operationand performance Failure to observethe safety instructionsin this manualcould resultin deathor serious injury Whenperforming anymaintenance or repairsonthesnowthrower shutOFF theengine disconnect sparkplugwire andkeepthewire away fromthe plugto prevent someone fromaccidently startingtheengine Check shearboltsandotherhardware atfrequentinterval...

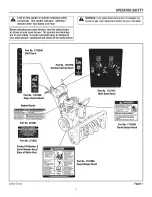
Страница 9: ... not hands Risque d amputation Tout contact avec des pi_ces en mouvement _ r tat_deut de la geulotta provoquera de graves b_esse_es Arr_tar le _qotaur avant de d_gager Ja goulefle d djecttan Utiliser Foutil de dggagement gas les matas_ Part No 1737865 ChuteDanger Decal ProductID Humber Serial HumberDecal Rearof Motor Box Amputation Hazard Risque d amputation ceet_t wg_ a_ger wgz xo_t contac_ _vec ...

Страница 10: ...jectfueldirectlyintothecarburetor manifold to ensure faststartsin coolweather D Safety Key Mustbeinserted to startengine Pullout to stop Do notturnsafety key E Starter CordHandle Used to starttheenginemanually F ON OFFSwitch Usedto startandstoptheengine G Fuel Tankand Cap Fill thefueltankto approximately 1 1 2 in 38mm belowthetopof theneckto allowfor fuelexpansion H 0il Fill Cap Extended Dipstick ...

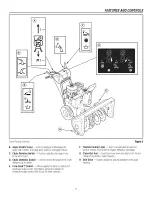
Страница 11: ...heangleof thechute deflector upor down E Free Hand TM Control Afterengaging thetractioncontrol left hand andaugercontrol righthand allowstheoperator to release theaugercontrolleverto usetheothercontrols Figure3 F TractionControlLever Usedto propelsnowthrower for wardor reverse Pushdownto engage release to disengage G Clean Out Tool Usedto remove snowanddebrisfromthedis chargechuteandthe augerhousi...

Страница 12: ... positionto controltheangleof thechutedeflector See Discharge Chuteand Deflector in thissection Free Hand TM Control CAUTION Before operating makesurethe area in front of the snow throweris cJearof bystandersor obstacJes 4 Fullypressandholdtheaugercontrollever C to engage auger rotation Releasing theaugercontrolleverwill disengage theauger unless the Free Hand TM controlhasbeen activated Fullypres...

Страница 13: ... dischargechuteand before making repairsor adjustments Whenleaving the machine remove the safetykey Toreducethe riskof fire keep the machine clean and free from spilledgas oil and debris WHEELLOCKOUT KNOB Eachwheelis secured to theaxlewitha lockoutpin Theunitwasshipped withthe lockoutpin inthelockedposition Foreaseof maneuverability disconnect thelockoutpinasfollows 1 Pulltheknob A Figure5 out to ...

Страница 14: ...d thatfuelstabilizerbeadded to thefuel eachtimethatgasoline is addedtothefueltank NOTE Winter grade gasoline has highervolatility to improve starting Be certain containeris clean and free from rustor other foreign particles Never use gasoline that may be stale from longperiodsof storagein the container _IL AUTION DO NOTuse gasoline containingany amountof alcohol as it cancauseseriousdamageto the e...

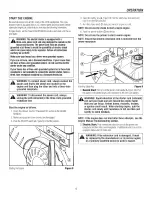
Страница 15: ...acle first Start the engineas follows 1 Check theoillevel See the Check Add Oil section intheENGINE MANUAL 2 Make sure equipment drivecontrols aredisengaged 3 Push theON OFF switch A Figure 8 totheONposition Starting theEngine Figure8 4 Insertthesafetykey A Figure9 intothesafety keyslotandpush fullyin to theRUNposition 5 Turnthechokeknob B fully clockwise if engineis cold NOTE Donot use the choke ...

Страница 16: ... does notstart after three attempts see the Engine Manual Troubleshooting section STOPTHEENGINE Before stoppingtheengine for afewminutesto helpdry offanymoisture on theengine NOTE Donot lose the safety key Keepthe safety key in a safe place The enginewill notstart withoutthe safety ignitionkey _ ARNING Gasolineand vaporsare extremely flammable and explosive Fire or explosion can cause severe burns...

Страница 17: ...th previously taken 3 Snowshouldbedischarged downwind whenever possible 4 Fornormalusage setthe skids1 8 inch 3 mm belowthe scraper bar Forextremely hard packed snowsurfaces the skidsmaybead justedupward to ensurecleaning efficiency 5 Ongravelorcrushed rocksurfaces theskidsshouldbesetat 1 1 4 inch 32mm belowthescraper bar see AdjustSkidHeight inthe MAINTENANCE sectionof this manual Rocks andgravel...

Страница 18: ...cate AugerShaft Fittings SNOWTHROWER Lubricate ChuteRotation GearandDeflector Mechanism Remove All Snowand SlushoffSnowThrower to Prevent Freezing of Auger or Controls v CheckTirePressure L_______ i i i Oil Check OiI Change ENGINE Check andReplace SparkPlug NOTE The warrantyon this snowthrowerdoes not coveritems that have beensubjectedto operator abuse or negligence To receivefull value from the w...

Страница 19: ...Figure 14 LUBRICATE AUGERSHAFTFITTINGS 1 Usingahandgrease gun lubricate theaugershaftfittings B Figure 14 every ten 10 operating hours Each timea shearpinis replaced theaugershaft C MUSTbegreased See AugerShear PinReplace ment section 2 Forstorage orwhenreplacing shearpins remove shearpinsand lubricate augershaftfittings B Rotate augers several timesonthe shaftandreinstalltheshearpins LUBRICATE CO...

Страница 20: ...e17 Be sureoriginalcontainer is marked A P I service SF orhigher Do notuse SAE10W40 oil asit maynotprovideproperlubrication See Chart for oil recommendations Drain Oil Positionsnowthrowersothattheoil drainplug A Figure 18 is lowestpointonengine Whentheengineis warm remove oil drain plugandoil fill capanddrainoil intoasuitablecontainer Replace oil drainplugandtightensecurely Refillcrankcase withthe...

Страница 21: ...accessed 6 Toinstallthesnowhood first make surethattheprimerbuttonhose andtheignitionwireareconnected 7 Mountthesnowhoodto theengine andsecure withthemounting screws 8 Connect thechokecontrolknob A Figure21 withthechokeshaft onthecarburetor B Makesurethechoke controlknobis properly installed Ifthechokecontrolknobis notinstalled correctly thechoke will notoperate 9 Installthesafetykey C Removing th...

Страница 22: ...parkplugwire before making any repairs or adjustments ADJUSTSKiD HEIGHT Thissnowthroweris equipped withtwoheightadjustskids secured to the outsideoftheaugerhousing These elevate thefrontofthesnowthrower Whenremoving snowfromahardsurface areasuchasa paveddriveway orwalk adjusttheskidsupto bringthefrontofthesnowthrower down Whenremoving snowfromrockor uneven construction raisethefrontof thesnowthrow...

Страница 23: ...beltwhichis oppositeidlerpulley B Figure25 Beltshould deflectabout1 2 inch 12 5mm withmoderate pressure Youmay haveto moveidlerpulleymorethanonceto obtainthecorrectten sion 6 Release theauger drivecontrollever The auger muststopwithin 5 seconds 7 Ifaugerdoesnotoperateproperly stopengineandrecheck drive linkageadjustments 8 Reinstall beltcover B Figure24 Tighten screw A 9 Whenever beltsareadjusted ...

Страница 24: ... 1 32 0 8mm clearance 2 Toadjust loosenthenut C by holdingtheadjusting flats D and turningthenut Then turntheadjusting flatsandholdthe adjust mentscrew E Theadjustment screwis a phillipsscrewandthe headcanbeheldorturnedby inserting ascrewdriver throughthe spring F 3 Holdtheadjustingflatsandtightenthenut 4 Starttheengine andchecktheauger Theaugermustnotbeengaged unlesstheaugerdrivecontrolleveris de...

Страница 25: ...ook D canberemoved 6 Remove the Z hookfromthecableadjustment bracket Movethe Z hookdownto thenextadjustment hole 7 Pullthetractiondrivecableupthroughthecableadjustment bracket 81Putthecablebootoverthecableadjustment bracketi 9 Tochecktheadjustment depress thedriveleverandcheckthelength of thedrivespring A Figure31 Incorrectadjustment thelength of thedrivespringis aminimum3 inches 76mm anda maximum...

Страница 26: ...ng Use of a harder grade shearpinwill reducetheprotectionprovidedbythe shearpin _WARNING Donot go nearthe dischargechuteor auger when the engine is running Do notrun the engine if any coveror guard is removed Undermostcircumstances if theaugerstrikesanobjectwhichcould cause damage to theunit theshearpinwill break Thisprotects thegear boxandotherpartsfromdamage Theshearpins AandB Figure33 arelocate...

Страница 27: ...and experience to perform the job Donot inflate the tires above the recommendedpressure Donotweld or heat a wheel and tire assembly Heat can cause an increase in air pressure resultingin an explosion Welding can structurallyweaken or deform the wheel Do not standin front or over the tire assembly when inflating Use appropriate tool that allows youto standto one side NOTICE Check side of tire for m...

Страница 28: ...reall nuts bolts andscrews aresecurely fastened Inspect allvisiblemovingpartsfor damage breakage andwear Replace if necessary 7 Touch upall rustedorchippedpaintsurfaces sandlightlybefore painting 8 Coverthebaremetalpartsof thesnowthrowerhousingauger and theimpellerwithrustpreventative 9 If possible storeyoursnowthrowerindoorsandcoverit to give protection fromdustanddirt 10 Onmodelswithfolding hand...

Страница 29: ... position Enginefails to start position Outof fuel Fill fueltank Choke OFF coldengine TurnchokeON setthrottleto FAST Engine flooded Turnchoketo OFF try starting Nospark Checkgap Gapsparkplug cleanelectrode or replace plugas necesary Waterin fuel oroldfuel Draintank Dispose of fuel atanauthorized hazardous wastefacility Fillwith freshfuel Enginestarts hard or runs Fuelmixturetoo rich Movechoketo OF...

Страница 30: ...damaged MAINTENANCE sectionof this manual or seeauthorized dealer Unit fails to discharge Augercontrolcablenotadjusted Adjustaugercontrolcable Refer to CableAdjustment in theMAINTENANCE snow correctly sectionof thismanual Broken shearpin Replace shearpin Refer to AugerShear PinReplacement inthe MAINTENANCE sectionof thismanual Discharge chuteclogged Stopengineimmediately Alwaysusetheclean outtoolt...

Страница 31: ...e time warranty service is requested the manufacturing date of the product will be used to determine warranty eligibility We welcome warranty repair and apologize to you for being inconvenienced Warranty service is available only through servicing dealers authorized by Briggs Stratton or BSPPG LLC Most warranty repairs are handled routinely but sometimes requests for warranty service may not be ap...

Страница 32: ...n emissions related parts is as follows Any warranted part that is not scheduled for replacement as required maintenance in the owner s manual supplied is warranted for the warranty period stated above If any such part fails during the period of warranty coverage the part will be repaired or replaced by B S at no charge to the owner Any such part repaired or replaced under the warranty will be war...

Страница 33: ...ing for individual gas engine models is labeledin accordancewith SAE Society of Automotive Engineers code J1940 Small Engine Power Torque Rating Procedure and rating performance has beenobtained and corrected in accordance with SAEJ1995 Revision 2002 05 Torquevalues are derived at 3060 RPM horsepower valuesare derived at 3600 RPM Actual gross en gine power will be lower and is affected by among ot...

Страница 34: ...34 ...

Страница 35: ...35 ...

Страница 36: ...Briggs Stratton Power Products Group LLC Copyright 2009 Briggs Stratton Corporation Milwaukee WI USA All Rights Reserved www BRIGGSandSTRATTON com www snapper com 36 ...

Отзывы: