General Information
Windows (Applicable Features / Operations)
20
1.6.9 Printing / Printer Setup
Selecting
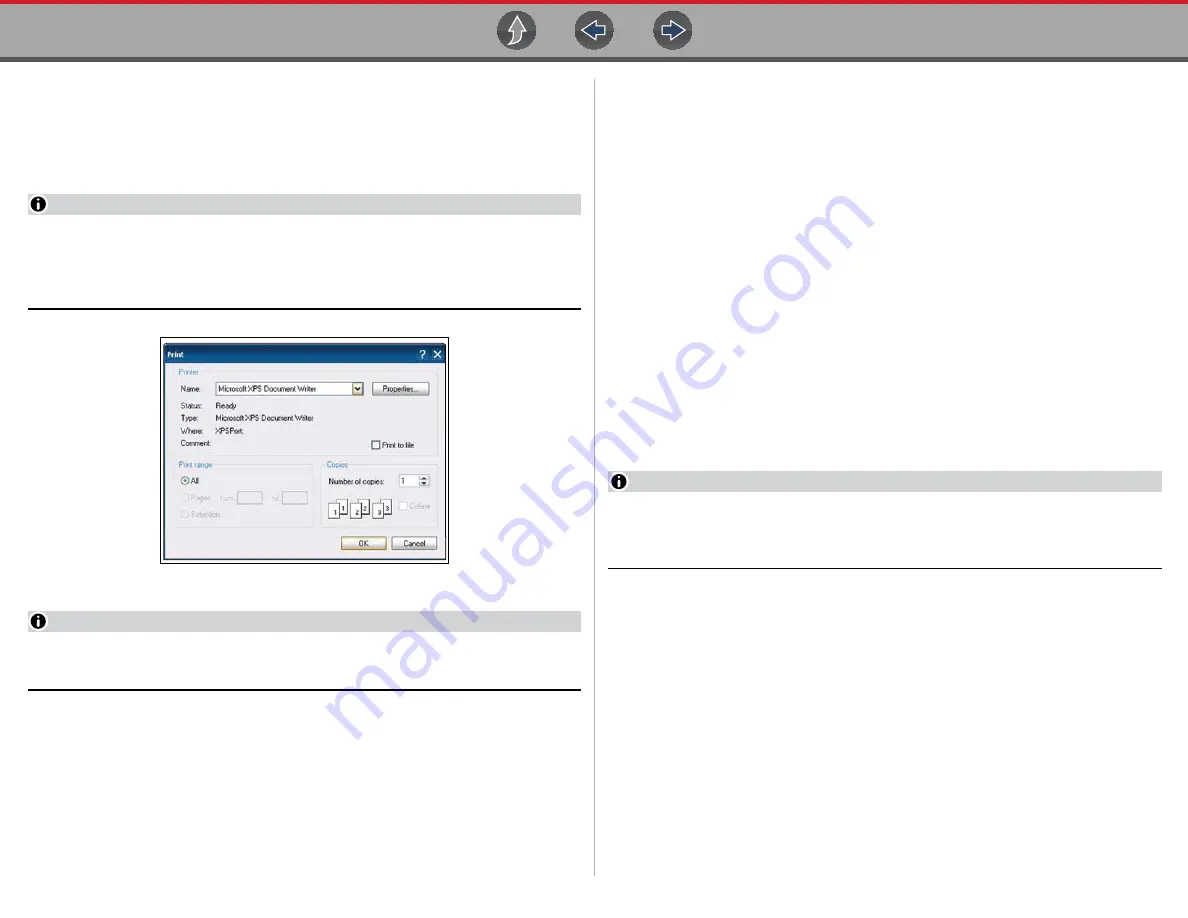
opens a standard Windows Print dialog box.
To print, a printer must installed and set as the system default printer. The following
sections provide basic instructions for local printer setup.
NOTE
The factory default printer setting is (.XPS file format). From the standard
Windows print dialog box, you can name the file and specify the location that it
is saved to. The file can then be viewed onscreen using the Windows XPS
Viewer.
Figure 1-16
Typical Print dialog box
NOTE
To print a code scan Vehicle System Report, Adobe Reader must first be
installed. See
Checking/Installing Adobe® Reader
The following is intended as a basic printer setup instruction only. Printer setup will
vary. For specific instructions and details, refer to your printer setup information and
the online Windows printer setup help information.
There are three basic methods to connect a printer to the diagnostic tool, using a
USB cable, connecting over a Wireless Network and Direct Wireless connection.
Basic connection instruction are provided in the following sections.
USB Printer Setup
1.
Turn the printer on.
2.
Connect the USB cable from the printer to the diagnostic tool.
3.
Windows should automatically detect and install the printer.
4.
Follow the onscreen instructions to install the printer and then set the printer as
the default printer. See
.
If the printer driver files are not automatically installed, you will have to manually
install the printer driver files. Printer driver files may be supplied with the printer (e.g.
CD or memory stick), or check the printer manufacturer’s website to download the
files. Follow the manufacturer’s instructions for driver installation.
Wireless Printer Setup
If your printer is Wi-Fi enabled, you may have options to connect the diagnostic tool
to the printer using an existing Wi-Fi network (through a router), or connect directly
to the printer wirelessly.
Connecting to an existing Wi-Fi network is the most common method, as this allows
you to connect to the printer and stay connected to the Internet (if applicable).
NOTE
You may only connect to one network, therefore when connecting directly to
your wireless printer, any other active wireless connection will be
disconnected.
Wi-Fi Network Connection
Use the following instructions (as a guide) if you choose to connect the diagnostic
tool to the printer through your existing network.
1.
Turn your printer on and make sure it is setup per the manufacturers
instructions.
2.
Connect the printer to your wireless network. A password may be required
when connecting to a protected network. Note the printer connection IP
address when it connects to the network.
3.
From the diagnostic tool, select the
Windows
icon on the desktop (lower left).
4.
Select
Devices and Printers
(right-side menu).
5.
Select
Add a Printer
from the toolbar.
6.
Select
Add Network, Wireless or Bluetooth Printer
”.
Содержание Zeus
Страница 1: ...User Manual ZEEMS342A Rev F TM Start BC ...


