background image

Use

58

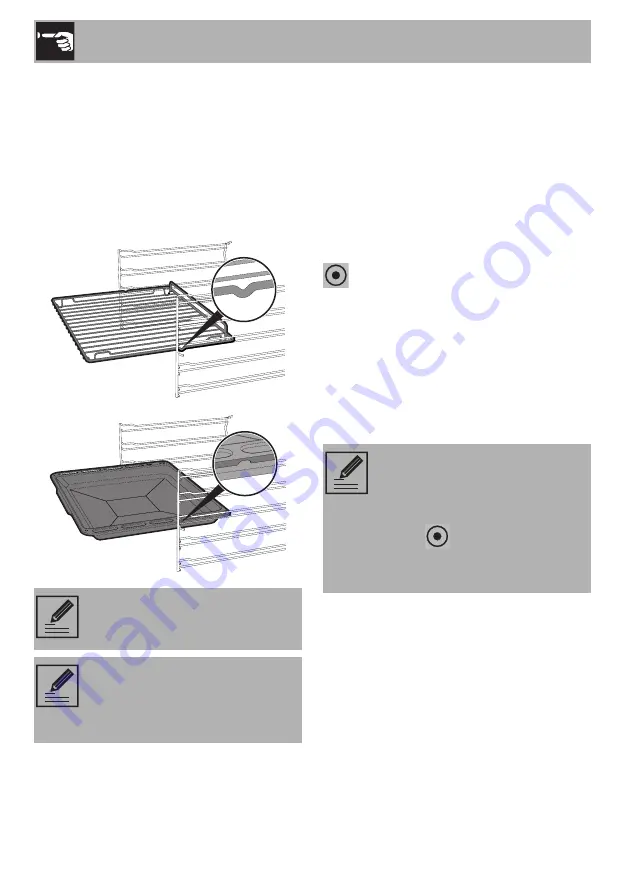
Racks and trays

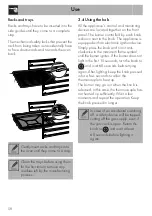
Racks and trays have to be inserted into the 
side guides until they come to a complete 
stop.

The mechanical safety locks that prevent the 
rack from being taken out accidentally have 
to face downwards and towards the oven 
back.

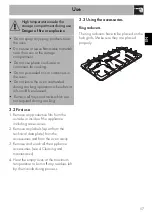
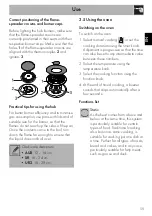
3.4 Using the hob

All the appliance’s control and monitoring 
devices are located together on the front 
panel. The burner controlled by each knob 
is shown next to the knob. The appliance is 
equipped with an electronic ignition device. 
Simply press the knob and turn it anti-
clockwise to the maximum flame symbol, 
until the burner ignites. If the burner does not 
light in the first 15 seconds, turn the knob to 

 and wait 60 seconds before trying 

again. After lighting, keep the knob pressed 
in for a few seconds to allow the 
thermocouple to heat up.
The burner may go out when the knob is 
released: In this case, the thermocouple has 
not heated up sufficiently. Wait a few 
moments and repeat the operation. Keep 
the knob pressed in longer.

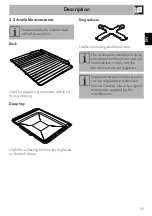
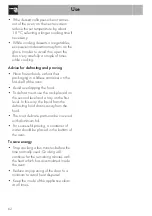
Gently insert racks and trays into 
the oven until they come to a stop.

Clean the trays before using them 
for the first time to remove any 
residues left by the manufacturing 
process.

In case of an accidental switching 
off, a safety device will be tripped, 
cutting off the gas supply, even if 
the gas cock is open. Return the 

knob to 

 and wait at least 

60 seconds before lighting it 
again.

Содержание Mista Aesthetic B601GMXI9

Страница 1: ...6 Using the storage compartment 61 3 7 Cooking advice 61 4 Cleaning and maintenance 64 4 1 Instructions 64 4 2 Cleaning the appliance 64 4 3 Removing the door 65 4 4 Cleaning the door glazing 66 4 5 R...

Страница 2: ...pervised Keep children under the age of 8 away from the appliance when it is in use Cleaning and maintenance must not be carried out by unsupervised children Make sure that the flame spreader crowns a...

Страница 3: ...y out installation and assistance interventions according to the standards in force Do not try to repair the appliance yourself or without the intervention of a qualified technician Do not pull the ca...

Страница 4: ...of the hob All pans must have smooth flat bottoms If any liquid does boil over or spill remove the excess from the hob Take care not to spill acid substances such as lemon juice or vinegar on the hob...

Страница 5: ...tion check that the tightening torque of gas connections is between 10 Nm and 15 Nm At the end of the installation check for any leaks with a soapy solution never with a flame Have the electrical conn...

Страница 6: ...ery other use is considered inappropriate The appliance is not designed to operate with external timers or with remote control systems 1 4 Disposal This appliance must be disposed of separately from o...

Страница 7: ...lly before using the appliance 1 7 How to read the user manual This user manual uses the following reading conventions 1 Sequence of instructions for use Standalone instruction Plastic packaging Dange...

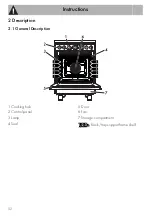
Страница 8: ...Instructions 52 2 Description 2 1 General Description 1 Cooking hob 2 Control panel 3 Lamp 4 Seal 5 Door 6 Fan 7 Storage compartment Rack tray support frame shelf...

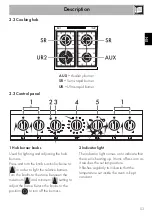
Страница 9: ...e to in order to light the relative burners Turn the knobs to the zone between the maximum and minimum setting to adjust the flame Return the knobs to the position to turn off the burners 2 Indicator...

Страница 10: ...ture knob 2 4 Other parts Shelves The appliance features shelves to position trays and racks at different heights The insertion heights are indicated from the bottom upwards see 2 1 General Descriptio...

Страница 11: ...ove Ring reducer Useful when using small cookware Some models are not provided with all accessories The accessories intended to come into contact with food are made of materials that comply with the p...

Страница 12: ...ld catch fire if overheated Be very careful Improper use Risk of damage to surfaces Do not cover the bottom of the oven cavity with aluminium or tin foil sheets If you wish to use greaseproof paper pl...

Страница 13: ...3 3 Using the accessories Ring reducers The ring reducers have to be placed on the hob grids Make sure they are placed properly High temperature inside the storage compartment during use Danger of fi...

Страница 14: ...nites If the burner does not light in the first 15 seconds turn the knob to and wait 60 seconds before trying again After lighting keep the knob pressed in for a few seconds to allow the thermocouple...

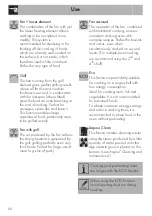
Страница 15: ...ng the oven Switching on the oven To switch on the oven 1 Select manual cooking or set the cooking duration using the timer knob Adjustment is progressive so that the time can also be set to any inter...

Страница 16: ...grilling perfectly even very thick foods Perfect for large cuts of meat e g shin of pork Fan assisted The operation of the fan combined with traditional cooking ensures consistent cooking even with c...

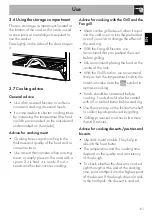
Страница 17: ...d even when it is put into the cold oven or into the preheated oven if you wish to change the effect of the cooking With the Fan grill function we recommend that you preheat the oven before grilling W...

Страница 18: ...st shelf of the oven Avoid overlapping the food To defrost meat use the rack placed on the second level and a tray on the first level In this way the liquid from the defrosting food drains away from t...

Страница 19: ...ibs 1 5 Fan with grill 4 260 10 10 Bacon 0 7 Grill 5 250 260 7 8 Pork fillet 1 5 Fan with grill 4 250 260 10 5 Beef fillet 1 Grill 5 250 260 10 7 Salmon trout 1 2 Fan assisted 2 150 160 35 40 Delicate...

Страница 20: ...s on the hob Improper use Risk of damage to surfaces Do not use steam jets to clean the appliance Do not use cleaning products containing chlorine ammonia or bleach on parts made of steel or that have...

Страница 21: ...parts before cleaning For easier cleaning we recommend removing The door The rack tray support frames The seal 4 3 Removing the door For easier cleaning it is recommended to remove the door and place...

Страница 22: ...roll In case of stubborn dirt wash with a damp sponge and an ordinary detergent 4 6 Removing the internal glass panes For easier cleaning the internal glazing panes of the door can be removed 1 Remove...

Страница 23: ...owards the inside of the oven to unhook it from its groove A then slide it out of the seats B at the back When cleaning is complete repeat the above procedures to put the rack tray support frames back...

Страница 24: ...mbol and the temperature knob to the symbol 2 Set a cooking time of 18 minutes using the digital programmer 3 At the end of the cooking time the timer will switch the oven heating elements off and the...

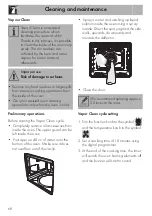
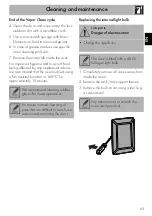
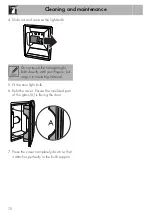
Страница 25: ...we recommend that the oven is dried using a fan assisted function at 160 C for approximately 10 minutes Replacing the internal light bulb 1 Completely remove all accessories from inside the oven 2 Rem...

Страница 26: ...e new light bulb 6 Refit the cover Ensure the moulded part of the glass A is facing the door 7 Press the cover completely down so that it attaches perfectly to the bulb support Do not touch the haloge...

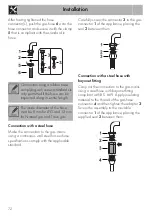
Страница 27: ...he hose itself Make the connection to the gas mains using a rubber hose whose specifications comply with current standards verify that the reference standard is stamped on the hose Carefully screw the...

Страница 28: ...cing the seal 2 between them Connection with a steel hose with bayonet fitting Carry out the connection to the gas mains using a steel hose with bayonet fitting compliant with B S 669 Apply insulating...

Страница 29: ...ow for the regular combustion of gas and the necessary air change in the room itself The air vents protected by grilles must be the right size to comply with current regulations and positioned so that...

Страница 30: ...through wall Air Combustion products Extractor fan 5 2 Adaptation to different types of gas In case of operation with other types of gas the burner nozzles must be changed and the minimum flame adjus...

Страница 31: ...out Repeat the operation on all gas cocks Adjusting the minimum setting for LPG Tighten the screw located at the side of the cock rod clockwise all the way Lubricating the gas cocks Over time the gas...

Страница 32: ...rrect values in the Burner and nozzle specifications tables Natural gas G20 20 mbar AUX SR UR2 Rated heating capacity kW 1 0 1 8 4 2 Nozzle diameter 1 100 mm 72 97 145 Pre chamber printed on nozzle X...

Страница 33: ...second person Pressure on the open door Risk of damage to the appliance Never use the oven door to lever the appliance into place when fitting Avoid exerting too much pressure on the door when open H...

Страница 34: ...e as shown in figures A and C relative to the installation classes Any wall units positioned above the worktop of the appliance must be at a minimum distance of at least 750 mm If a hood is installed...

Страница 35: ...he appliance The appliance must sit level on the floor to ensure stability Screw or unscrew the bottom part of the foot until the appliance is stable and level on the floor The appliance must be insta...

Страница 36: ...of the appliance 2 Adjust the height of the 4 feet 3 Assemble the fastening bracket 4 Align the base of the hook on the fastening bracket with the base of the slot on the wall fastening plate The anti...

Страница 37: ...side of the appliance to the bracket holes 7 Move the bracket onto the wall and mark the position of the holes to be drilled in the wall 8 After drilling the holes in the wall use wall plugs and screw...

Страница 38: ...mber and brand name is visibly positioned on the appliance Do not remove this plate for any reason Perform the ground connection using a wire that is 20 mm longer than the other wires The upstand prov...

Страница 39: ...on Do not bend or trap the power cable The appliance must be installed according to the installation diagrams Do not try to unscrew or force the threaded elbow of the fitting You may damage this part...

Страница 40: ......
Отзывы: