EN
17
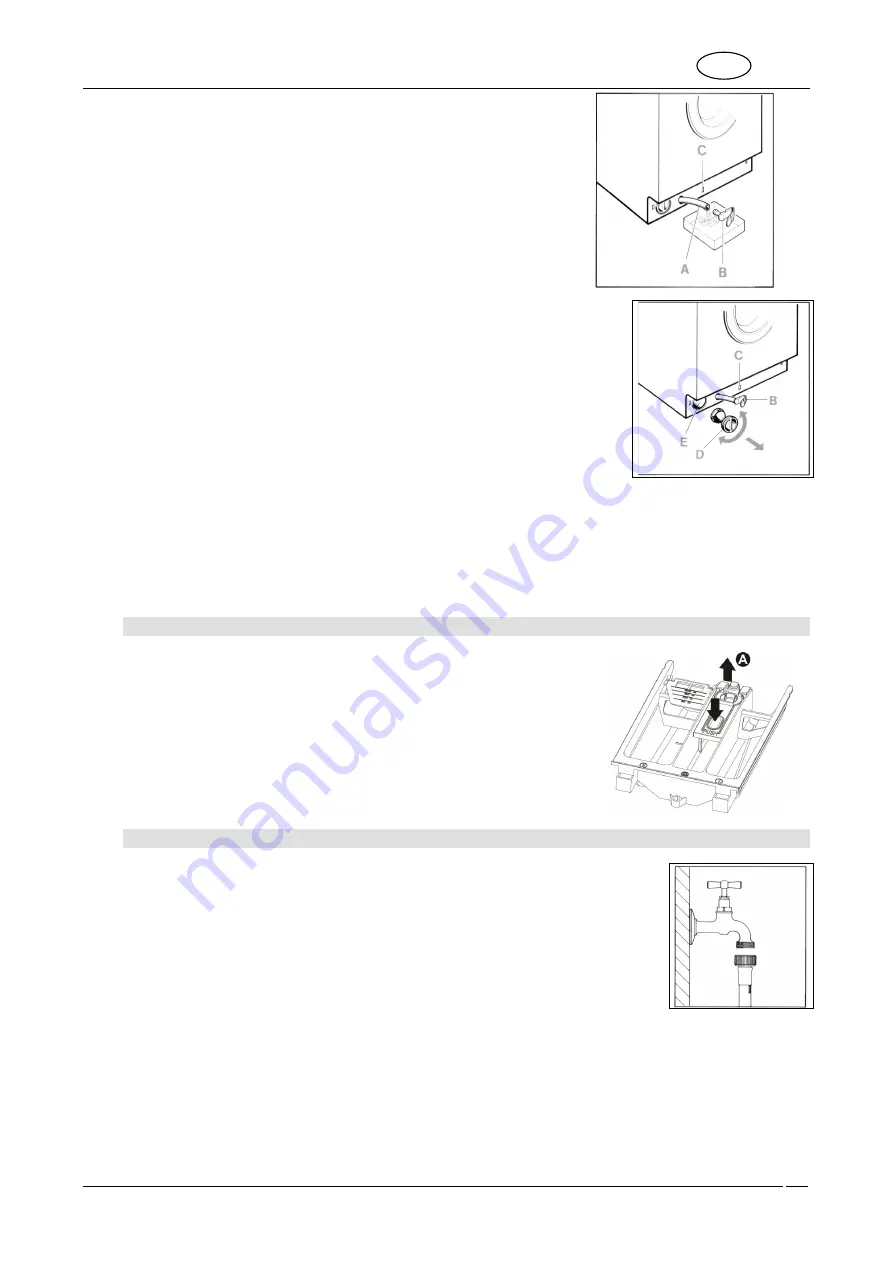
3. Extract the drain hose ”A”.
Warning: if the hose is hot, the water is hot or boiling hot. Place a
shallow container on the floor and remove the plug “B” to drain off
the water.
Depending on the amount of water in the appliance, the container
may have to be emptied several times.
When no more water is coming out, close the hose again by push-
ing the plug “B” firmly back into place.
4. Unscrew the cover of the pump “D” by turning it to the left.
Clean the pump and remove any foreign bodies.
Also check the inside “E”, making sure that the impeller turns freely; any foreign
bodies stuck in it must be removed.
5. Screw the cover back on the pump.
Secure the drain house by snapping the plug back into place "C".
Depending on the model, replace the plinth as follows:
Built-in/completely concealed model - Fit the bottom of the plinth first. Push it towards the cabinet and put the
plugs back into place.
Free-standing model – Fit the bottom of the plinth first and then push it towards the cabinet until it snaps into
place.
5.5 CLEANING THE DETERGENT DRAWER
The detergent drawer should be kept clean, removing all solid deposits.
To simplify this operation, completely remove the detergent drawer (pull the
drawer fully out, press in the zone marked PUSH and then remove com-
pletely).
Remove the siphon "A" and clean all parts with hot water.
Fully re-insert the siphon and remove any detergent deposits before putting
the drawer back in position.
5.6 CLEANING THE WATER INTAKE FILTERS
The machine is fitted with a filter which protects the water intake valves.
The filter is in the fitting on the intake hose which is connected to the tap
The filter must be cleaned if the washing machine is not taking in water or the amount of
water is insufficient.
To clean, proceed as follows:
•
Remove the mains plug to disconnect the appliance from the electricity
supply.
•
Turn off the water tap.
•
Unscrew the intake hose fitting from the tap.
•
Unscrew the intake hose fitting from the tap.
•
Clean the filter with water, with the aid of a small brush.
•
When screwing the intake hose fitting back into place, check that the filter is positioned correctly.
Содержание LST127-2
Страница 26: ...ca 82kg 820mm 16mm 560mm 596mm 150mm 58mm 820mm 1 9 A B 2 ...
Страница 29: ...1 1 2 2 3 3 1 1 2 2 3 3 1 1 7 8 9 2 1 2 4 3 5 6 ...
Страница 30: ...9 10 11 ...


