-40-
No. JXC
※
-OMT0002-C
6.2 Wiring
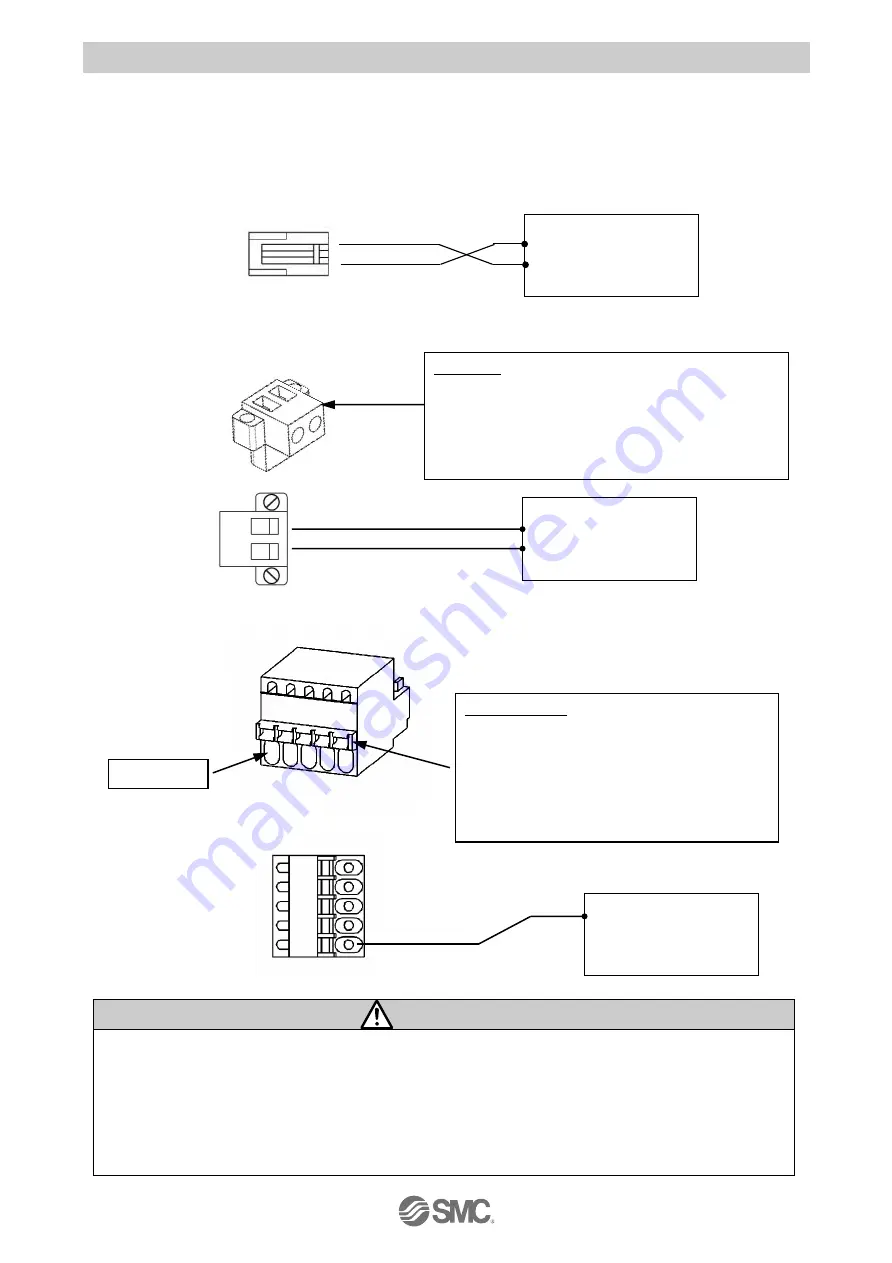
Connect the main control power supply, motor drive and motor control power supply while referring
to (1) to (3) below, and then insert into the controller C PWR, Cl and M PWR.
(1) Wiring of the power supply connector
Connect the main control power supply 24V and 0V to the main control power supply connector
+24V and 24-0V terminals.
Connect the motor drive and motor control power supply 24V and 0V to the motor drive power
connector M24V and 0V terminals.
Connect the motor drive and motor control power supply 24V to the motor control power supply
connector C24V terminal.
Caution
(1) Do not use a power supply with
“inrush current protection” for the motor drive and motor control
power supply. The power supply capacity should be greater than the
“Momentary maximum
power consumption
” of the actuator specifications.
(2) Connector ‘CI3 4’ must be connected even when Axis 3 and 4 are not used.
If not, a "Modbus Error" alarm will be generated.
(3)The motor power and motor control power supply should be powered at the same time or prior to
the main control power supply.
If the sequence of these power supplies is different then a "ModbusError" alarm will be generated.
24V Motor drive and
motor control
power supply
0V
M24V
0V
Open/close lever
Press the open/ close lever with a flat blade
screwdriver and insert the wire into the wire entry.
- Dedicated flat blade screwdriver (recommended)
Phoenix Contact (Part No: SZS0.4×2.0)
Wire entry
24V
0V
Motor drive and
motor control
power supply
C 24V
EMG1/EMG3
LKRLS1/LKRLS3
Motor control power supply connector
EMG2/EMG4
LKRLS2/LKRLS4
M3 screw
Screw type terminal.
Loosen the screws using a flat blade screwdriver.
Insert the wires in the wire inlet.
Tightening torque: 0.5 to 0.6Nm
+24V
24-0V
24V
Main control
power
supply
0V


