Page 7 of 18
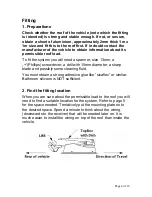
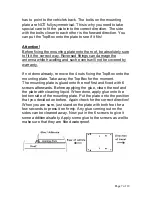
has to point to the vehicle's back. The bolts on the mounting
plate are NOT fully symmetrical. This is why you need to take
special care to fit the plate into the correct direction. The side
with the bolts closer to each other is the forward direction. You
can put the TopBox onto the plate to see if it fits!
Attention!
Before fixing the mounting plate onto the roof, be absolutely sure
to fit it the correct way. Reversed fittings can damage the
antenna while travelling and such events will not be covered by
warranty.
If not done already, remove the 4 nuts fixing the TopBox onto the
mounting plate. Take away the TopBox for the moment.
The mounting plate is glued onto the roof first and fixed with 6
screws afterwards. Before applying the glue, clean the roof and
the plate with cleaning liquid. When done, apply glue onto the
bottom side of the mounting plate. Put the plate onto the position
that you decided on before. Again check for the correct direction!
When you are sure, just stand on the plate with both feet for a
few seconds to press it on firmly. Any glue coming out on the
sides can be cleaned away. Now put in the 6 screws to give it
some additional safety. Apply some glue to the screws as well to
make sure that they are fitted waterproof.
Содержание OYSTER DIGITAL CI
Страница 1: ...Version 1 2008 Installation Instructions OYSTER DIGITAL CI...
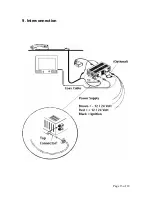
Страница 13: ...Page 13 of 18 9 Interconnection...


