Installing the SMART Hub SE240
11
Connecting the SMART Hub SE240
After mounting the SMART Hub SE240, connect it to your SMART product and peripheral devices.
1.
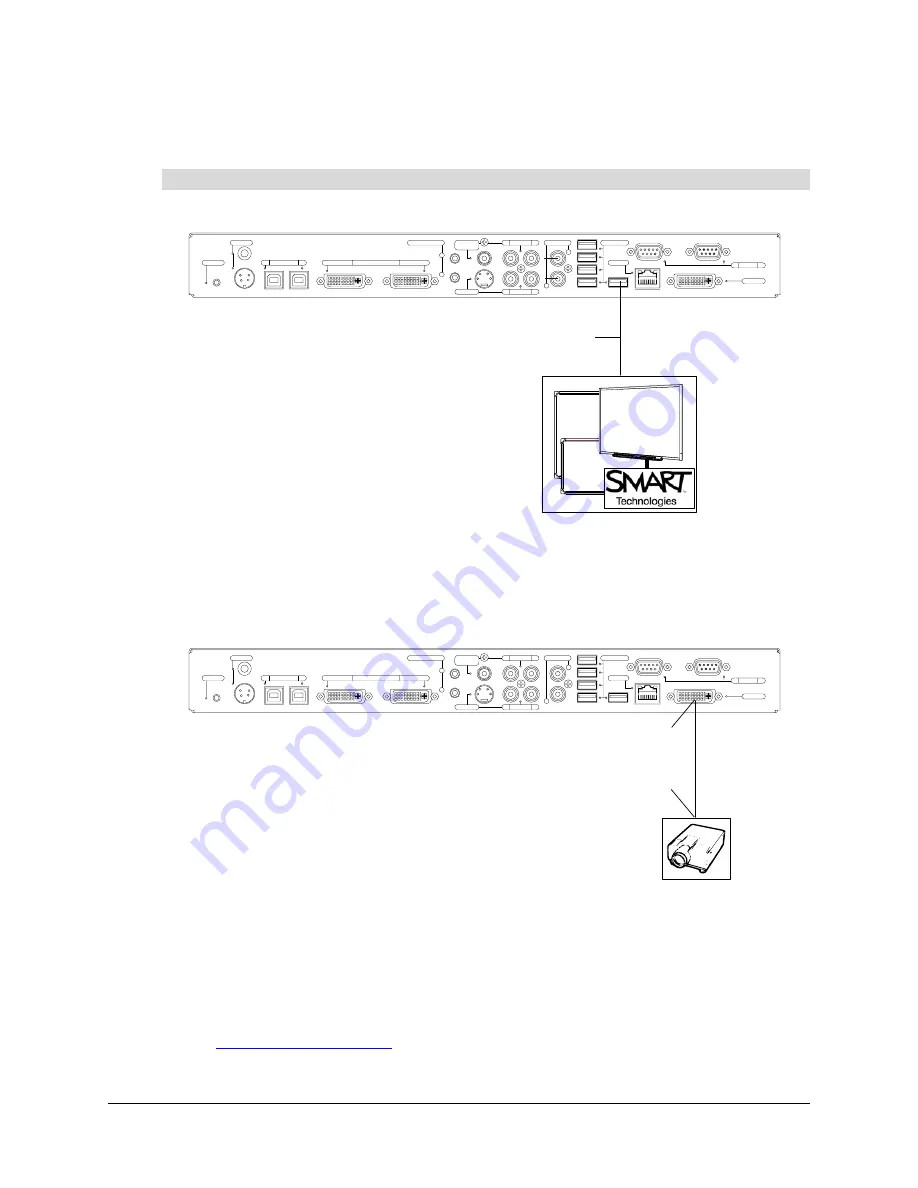
Connect the SMART Hub SE240 to your SMART product.
NOTE:
Use a cable (rather than a wireless solution) to connect the SMART Hub SE240 to
your SMART product.
If your SMART product has a serial connector rather than a USB connector, use the USB to
serial adapter provided with the SE240S model.
2.
Connect the SMART Hub SE240 to your SMART product’s projector or display.
NOTES
–
The SMART Hub SE240 includes two video cables (page 2). Use these cables to connect
the SMART Hub SE240 to your projector or display.
–
SMART recommends using a DVI cable, when possible, for optimal performance.
–
You can connect multiple SMART products to a single SMART Hub SE240. All SMART
products connected to the unit share a common display. For more information, contact
To connect the SMART Hub SE240
L
R
12V DC
Reset
Computer
2
1
Video In
Computer 1
Computer Audio
2
1
Composite
Video
S-video
Audio In
L
R
Audio In
L
R
Audio Out
USB
Network
RS-232
B
A
Video Out
Computer 2
USB Cable (provided with
your SMART product)
L
R
12V DC
Reset
Computer
2
1
Video In
Computer 1
Computer Audio
2
1
Composite
Video
S-video
Audio In
L
R
Audio In
L
R
Audio Out
USB
Network
RS-232
B
A
Video Out
Computer 2
DVI Male Connector
DVI or VGA Connector
Содержание SE240
Страница 1: ...Installation and User s Guide SMART Hub SE240 ...
Страница 4: ...ii Important Information ...
Страница 10: ...4 About the SMART Hub SE240 ...
Страница 20: ...14 Installing the SMART Hub SE240 ...
Страница 50: ...44 Configuring the SMART Hub SE240 ...
Страница 90: ...84 Troubleshooting the SMART Hub SE240 ...
Страница 92: ...86 Regulatory Compliance ...
Страница 99: ......


