


30
Setting up the Projector
Making Fine Adjustments to the Projected Image
When you’ve properly positioned the projector in the mirror stand, make fine adjustments to obtain
a correctly projected image on the interactive whiteboard. An aligned image fits squarely on the
interactive screen with a margin of about 1/2" (1.3 cm) on all sides. If your projection room is small,
you may have to use one or two mirrors to project the correct image size onto the screen. Angle or
adjust the mirrors until you have a square image on the screen.
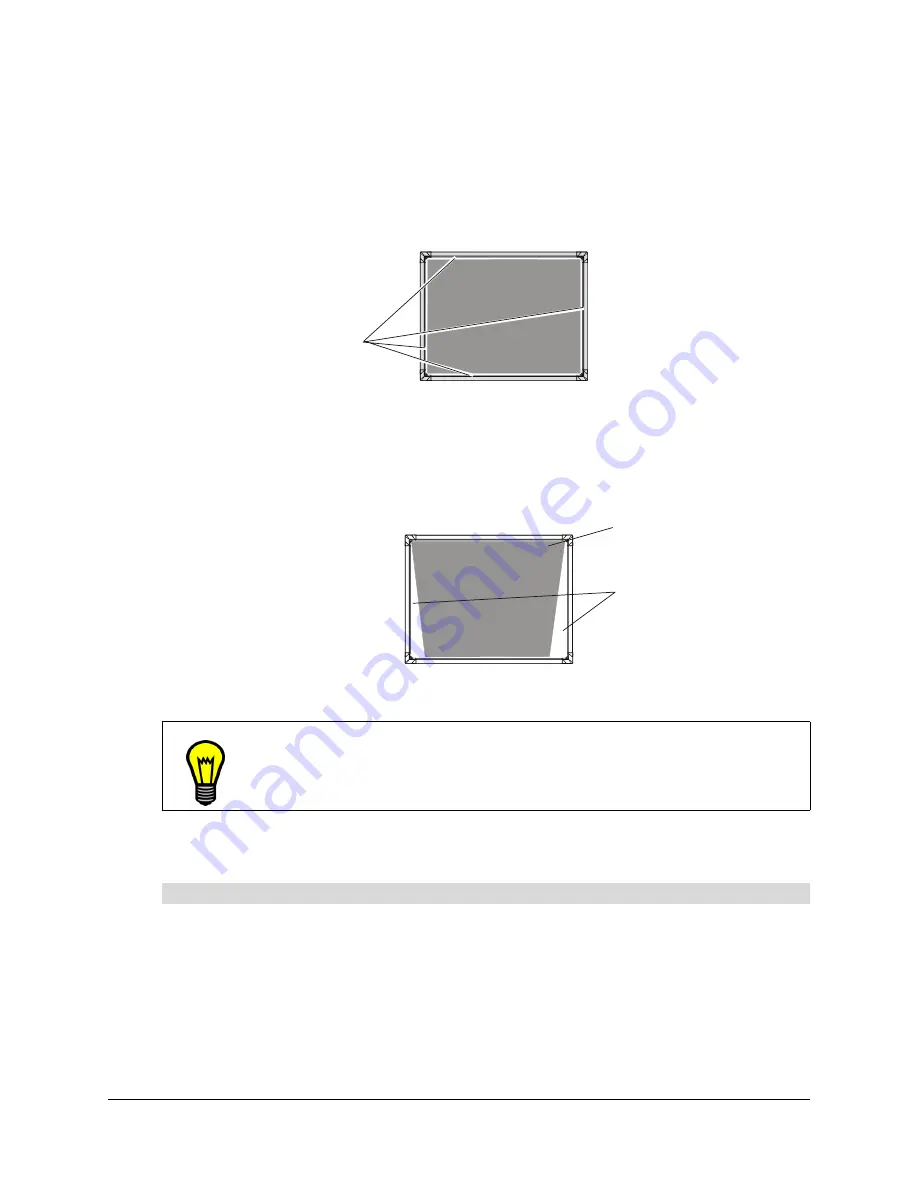
Correctly Aligned Projected Image
A common problem is a keystone image, which is an image whose sides aren’t parallel. You can
fix this by raising or lowering the projector at the front or back. Conversely, the top or bottom edges
might not be parallel. In this case, move the back of the projector sideways.
Keystone Image
The image adjustments you make depend on your projector. Use the following information to
adjust the image. Remember to use small, slow movements until you’re satisfied with the image.
1. Correct the image size by moving the projector (or the mirror stand) until the image correctly
fills the interactive screen.
2. If possible, correct the image’s horizontal and vertical position by using the corresponding
functions on the projector (refer to your projector’s manual for details). Alternatively, correct
the image’s horizontal and vertical position by adjusting the height and position of the projector
platform or stand.
3. Create a clear image by adjusting the projector’s focus function.
TIP
Don’t use your projector’s electronic keystone correction feature. If you need to
adjust a keystone image, adjust the feet to raise or lower the projector, or adjust an
image with uneven top or bottom edges by moving the back of the projector from
side to side.
To align the projected image
1/2" (1.3 cm) Margin
Computer Image
Margin Areas
Содержание In-WallRear Projection Interactive Whiteboard
Страница 1: ...In WallRear Projection SMART Board TM Installation Guide Interactive Whiteboard...
Страница 14: ...8 Preparing to Install Your Interactive Whiteboard...
Страница 42: ...36 Preparing Your Interactive Whiteboard for Use...
Страница 48: ...42 Using and Maintaining the Interactive Whiteboard...
Страница 62: ...56 Appendix B Restoring the Projector Settings...
Страница 64: ...58 Waste Electrical and Electronic Equipment Regulations...


