Reinforcing a SMART Board™ 600i Series Interactive Whiteboard System Wall Mount Installation With a Backer Board
1 of 3
Reinforcing a SMART Board™ 600i Series Interactive Whiteboard
System Wall Mount Installation With a Backer Board
If your SMART Board™ 600i series interactive whiteboard system mounting bracket doesn’t align with a wall stud, install a
backer board to reinforce your wall mount installation. Install a backer board on wall studs, and then mount your SMART
Board on a backer board to ensure that it is securely mounted.
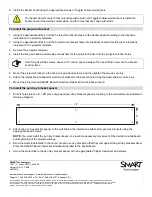
1. Cut the 3/4" plywood to a dimension of 36" × 24". This piece of plywood will serve as the backer board for the Unifi™
projector and interactive whiteboard monitor bracket. Drill 6 pilot holes into the backer board using the appropriate drill
bit. Drill the holes according to the measurements indicated on the following diagram.
2. Using a studfinder, locate a stud near the center of the wall where you want to mount the backer board.
3. Using a pencil and a carpenter’s level, draw a vertical line on the wall to mark the centerline of the stud.
4. Draw a horizontal line (Recommended Height Line) on the wall 75.5" from the floor, intersecting the vertical line drawn
in step 4. Use a carpenter’s level to ensure that the line is level.
Tools and Materials Required
•
36" × 24" piece of 3/4" plywood
(backer board)
•
4" × 28" piece of 3/4" plywood
(pentray bracket spacer)
•
Phillips® No.1 and No.2
screwdrivers
•
Ruler
•
Tape measure
•
Carpenter’s level
•
Electric drill
•
Toggler® hollow-wall anchors
•
Masking tape
•
Stud finder
•
Pencil
•
Appropriate wood screws, washers
and drill bits
•
Mounting template (included with
your SMART Board interactive
whiteboard)
To install the backer board
36"
16"
16"
36"
24"
Pilot Hole


