Introduction
The KDX-200 extends any DVI-D signal, keyboard,
mouse and audio up to 200 feet with two CAT5
cables.
Features
Top image quality at all resolutions.
Video resolutions up to 1920 x 1200 @ 60Hz
(1280 x 1024 @ 75Hz) on all distances up to the
maximum distance.
User selectable: DCC-Information used from the
remotely located monitor, from the locally located
monitor or from an internal DDC table.
Basic device to remotely locate monitor, keyboard/
mouse and audio.
Supports PS2-keyboard/mouse.
Compatible with all operating systems.
Compatible with all major KVM switches.
Rack mount options (19”): mount up to 4 devices
in a 19”/1U rack mount kit. This saves expensive
rack space.
Supports stereo sound.
Applications
Sharing:
Sharing:
Sharing:
Sharing:
Sharing: Enables easy access to one server from
remote location.
Security:
Security:
Security:
Security:
Security: Safeguards the servers by storing
them in a secure and climate controlled
environment.
Saving:
Saving:
Saving:
Saving:
Saving: Saves equipment costs, physical space
and utilities expense.
Productivity:
Productivity:
Productivity:
Productivity:
Productivity: Increases productivity by
facilitating testing and performance evaluation of
software and equipment, on multiple servers.
Multimedia:
Multimedia:
Multimedia:
Multimedia:
Multimedia: Can be used in multimedia
presentations where the presentation information
is broadcasted to various KVMs.
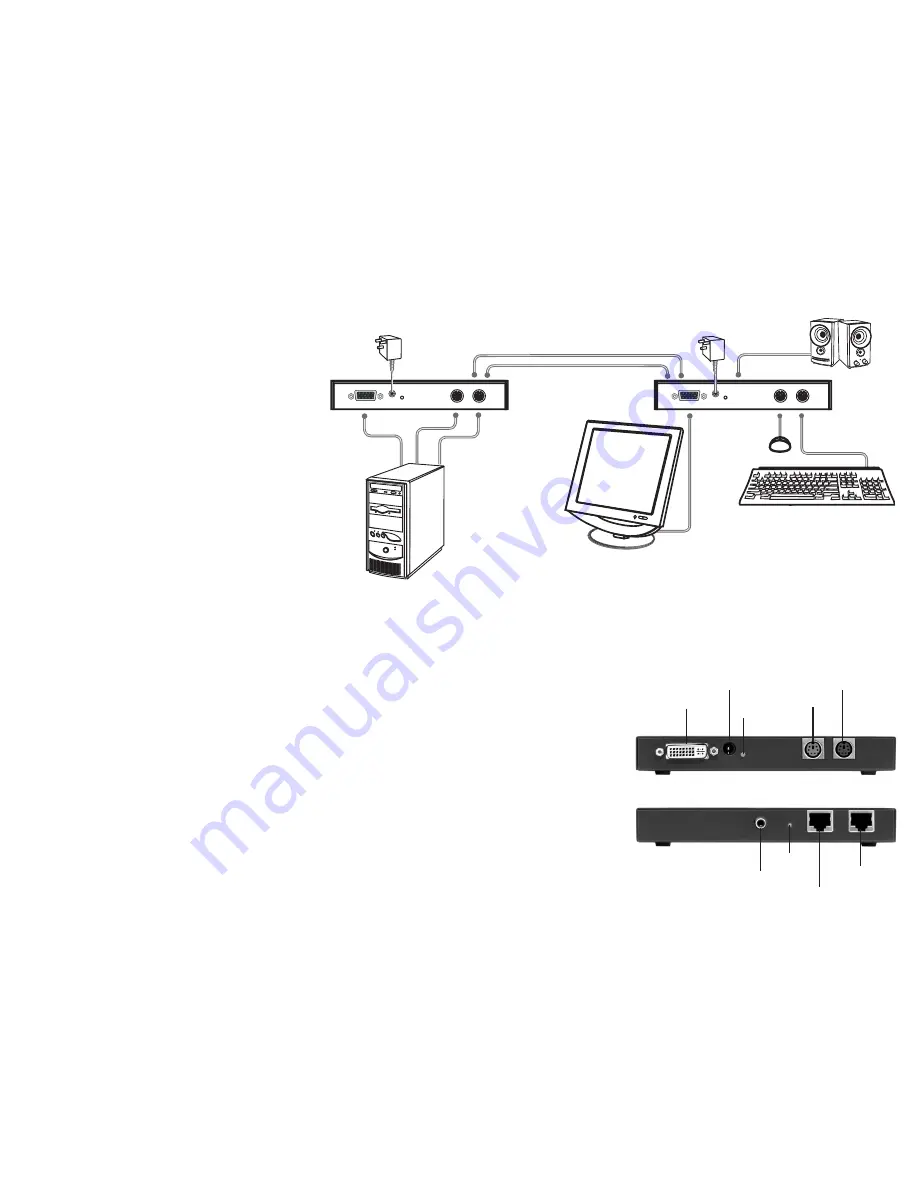
Installation
1
11
11 .Before installing any SmartAvi products, verify that
the computer’s DVI, mouse, keyboard, and sound
all work properly when connected directly.
2
22
22. Power off computer and monitor.
3
33
33. Using included cables, connect the DVI, mouse,
keyboard , and sound from the PC to the KDX-TX200.
4
44
44. Connect and run two shielded CAT5 cables from
the KDX-TX200 to the KDX-RX200’s location.
5
55
55. Plug in the DVI monitor, mouse, keyboard, and
sound to the KDX-RX200.
6
66
66. Connect the power supplies to the transmitter and
receiver.
7
77
77. Turn on the computer and monitor.
Installation Diagram
5V
KDX-TX200
MOUSE
DVI-D
KEYBOARD
Power
CAT5 Cable
DVI-D
Power
CAT5 Cable
KDX-RX200
MOUSE
KEYBOARD
AUDIO
Front and Rear View
DVI CAT5
DATA CAT5
LED
Mouse
Keyboard
Audio
LED
DVI-D
Power


