

Alert receiver Model M1 FCC ID:KUTM1
1. INTRODUCTION
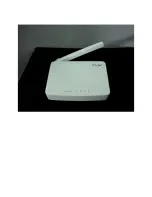
The Receiver Monitor Model M1 is designed to work with the Skylink sensors 106 series. When the
sensor is triggered, it will beep or siren and flash.
In this package, you should find a Alert receiver, AC Adapter, mounting accessories and user’s
instructions.
Please follow the instructions below to setup your Alert receiver.
2. INSTALLATION
Install 4 AAA batteries (not included) to the unit. Plug in the AC adapter to the unit, the green LED
will on.
PROGRAMMING
You need to do the programming in order to add the sensors to communicate with the Alert receiver.
1. Press and hold the learn button for 5 seconds, until both green LED and zone 1 red LED
flash. You may now release the learn button.
2. If you would like to program the sensor to zone 1, activate the sensor while the zone 1 red LED is
flashing. Activate the sensor, the LED on the Zone#1 will off indicating it has learned the sensor
successful.
3. If you would like to program the sensor to other zones, press the learn button again, until the red LED
flashes at the zone you want to program the sensor to, then activate the sensor.
4. Once the sensor is programmed, the green LED will be steadily on and none of the red zone LEDs will
be on.
CLEAR THE PROGRAMMED UNIT
You cannot delete one learned device from the Alert receiver in each zone at a time. You must
clear all the learned sensors that are currently communicating with the Alert receiver in that zone,
then re-program the ones you want to keep.
1. Remove the adapter from the receiver.
2. Open the back cover, press and hold the learn button. Do not release the learn button until step 4.
3. While holding onto the learn button, plug in the adapter to the receiver.
4. You may release the learn button when the LEDs on the receiver are on.
5. You have erased all sensors from the receiver.
TESTING
After the sensor is installed in place, and the Receiver Monitor is powered up, you may test the
operation of both units.
Set the Receiver Monitor to Alert Mode. If the activated sensor is programmed to zone 1, zone 1 LED
should flash and emit a single beep continuously.
The zone LED will keep flashing until the sensor is back to standby condition (i.e. closed door).
If the activated sensor is programmed to zone 4, zone 4 LED will flash, and the Main Console will
emit a continuous “4 beeps”.
Set the Receiver Monitor to Chime Mode. If the activated sensor is programmed to zone 1, zone 1 LED
should flash and emit a single chime. The zone LED will keep flashing until the sensor is back to standby
condition (i.e. closed door).
MODE SELECTION
Содержание M1
Страница 3: ......


