4.3 Sensor to Use
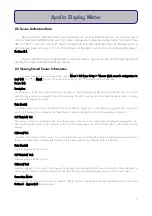
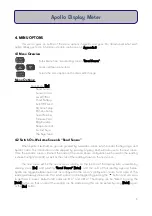
This menu option allows you to change which sensor configuration Apollo uses to show the reading.
Choose the sensor number by using the
tu
buttons, and [Enter] to confirm. A message will confirm
which sensor is now selected. If you do not wish to make any changes, press [Esc], and a message will
appear to confirm no changes were made. Using the incorrect configuration will result in an inaccurate
reading, and this option needs to be changed according to which sensor you are taking readings from.
You may choose from up to 6 different configurations (i.e. 6 different sensors). We recommend you
label your sensors according to which configuraton they correspond to on Apollo. In order to view the sensor
configuration, follow the steps shown in Chapter 2.2.
4.4 Level Offset
This menu option allows you to temporarily "offset" the reading shown in the "Read Sensor" option by
a given value. This is useful if, for example you have a standard source of light, and you wish to compare the
output of other light sources by this standard. The readings on Apollo will then be offset by this amount. This
option is also useful if you find the sensor has a reading of more than 0.00 in complete darkness, and wish
to offset the readings by this amount.
To offset a reading from a standard source of light, [Enter] this menu option, and then place the
sensor directly facing the light source. The reading will now show in milliVolts rather than the units shown in
"Read Sensor" option – this is the "raw" reading from the sensor, and the reading with least error potential.
Once you have a stable reading, press [Enter] to accept the offset value. You will need to keep the sensor
facing the light source and still whilst Apollo obtains the offset value. A message will confirm this change, and
likewise if [Esc] is pressed, a message will confirm that no change has been made..
To offset a reading that is shown when the sensor is in complete darkness, follow the same steps, but
ensure the sensor is covered completely, and can receive no radiation at all during the "offsetting" stage.
Over time, the "dark" reading of many sensors drift. This procedure is a temporary "fix", but we thoroughly
recommend sending the sensor to be re-calibrated by the manufacturer every year: two years maximum.
If you press [Esc] during this stage, you will exit the menu, and a message will confirm that no changes
have been made, and you will be returned to the main menu.
If you have set an offset value, this will be indicated on the "Read Sensor" option by an asterix (*) on
the lower line of the screen. The Level Offset is automatically "forgotten" when Apollo is switched off, In order
to turn the offset off whilst keeping Apollo on, go to Menu > Level Offset, and then press [Esc]. This will then
make Apollo "forget" the offset, and the asterix will disappear fron the "Read Sensor" option, indicating it is a
"true" reading rather than an adjusted one.
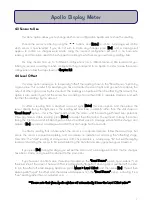
**Please note that when Apollo switches off automatically it loses the Level Offset value**
7
Apollo Display Meter
Содержание APOLLO SKA 400
Страница 21: ...APPENDIX 3 MENU NAVIGATION TREE 18...


