


SDP660 – USER MANUAL
TNM-U-E-0114
Jun 15 (Iss. 1.4)
Page 19
GETTING STARTED
2
GETTING STARTED
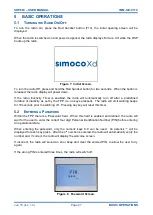
This User Manual covers the basic operation of the Simoco SDP660 Digital Portable radio.
The radio is software programmable and can be customised to the operational requirements of a
customer’s specific needs. Simoco representatives can help in programming the radio facilities to
meet a customer’s present and future requirements.
Users should check with their Simoco dealer or system administrator about the features
programmed into the radio and specifically about:
Whether any preset conventional channels are programmed into the radio?
Which buttons have been programmed to access other features?
The optional accessories that may be required?
2.1
P
REPARING THE
R
ADIO
F
OR
U
SE
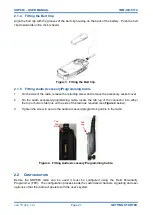
2.1.1
Charging the Battery
WARNING
LITHIUM BATTERIES. THIS EQUIPMENT USES LITHIUM ION
BATTERIES. REFER TO THE PERSONAL SAFETY PAGES.
Your radio is powered by a 2200 mAh Lithium Ion battery. To avoid damage and comply with
warranty terms, the battery should be charged with a Simoco Standard Battery charger.
For best performance, new batteries should be charged for 5 hours before initial use.
2.1.1.1
Procedure
This charging procedure assumes that the PAR-600CRG1 Single Rapid Charger is used. For full
details on this charger, please refer to TNM-U-E-0118, PAR-600CRG1 Single Rapid Charger
–
SDP650/660 Instructional Manual
[3]
.
1
Connect the AC power adapter to an AC mains supply and to the socket on the back of the
charger.
2
Switch on the mains power. The Red LED on the charger will flash briefly. The charger is
now in standby mode.
3
Switch the radio off.
4
Place the battery pack, or the radio with the battery attached, into the charging slot on the
charger.
5
Check that the Red LED on the charger is illuminated.
6
The fast charging process will be initiated. When the battery pack is fully charged, the Green
LED on the charger will be illuminated (see
Table 3
overleaf).