background image


42 


Timer Settings 


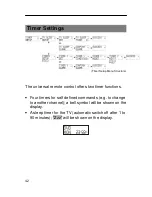
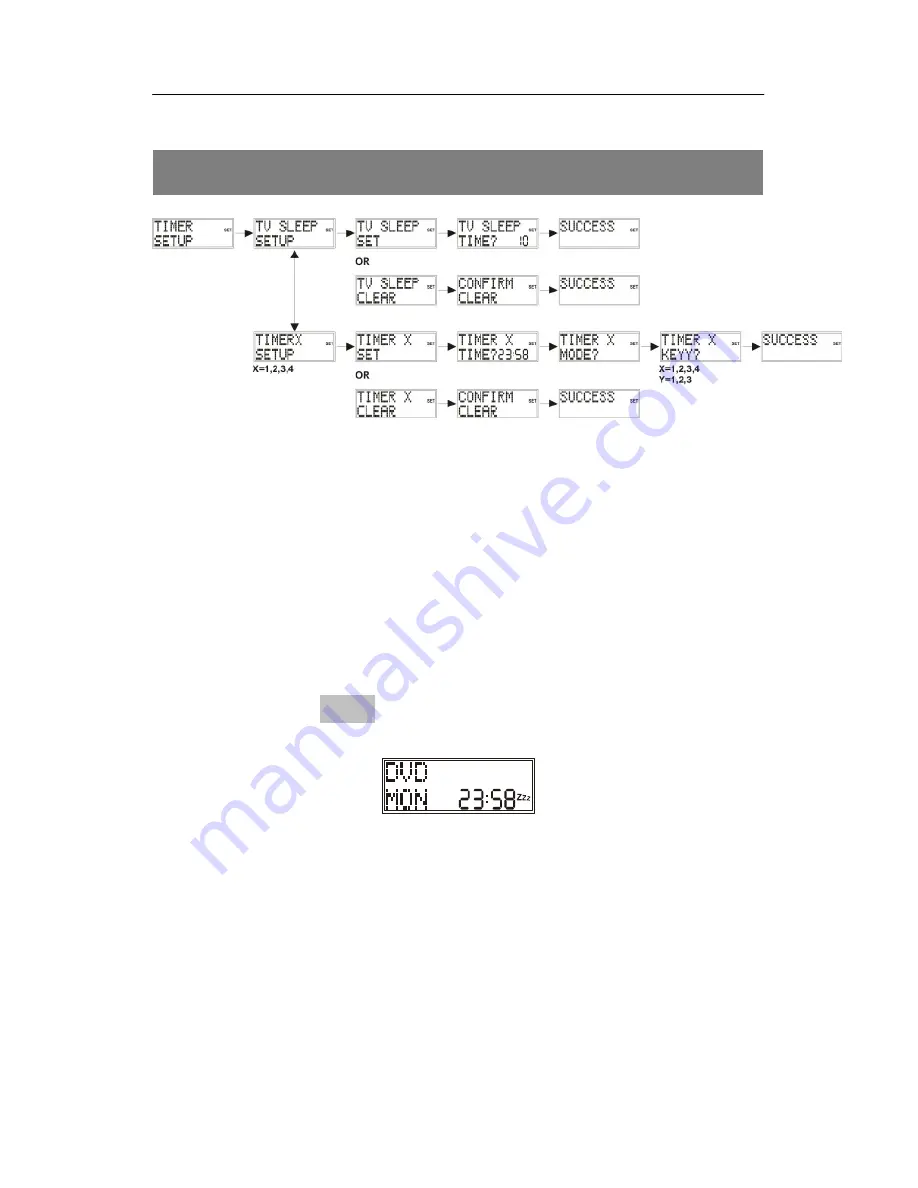
          (Timer Setup Menu Structure) 


The universal remote control offers two timer functions. 
 

  Four timers for self defined commands (e.g. to change 

to another channel); a bell symbol will be shown on the 
display.


  A sleep timer for the TV (automatic switch off after 1 to 

90 minutes); "Zzz" will be shown on the display.  


Содержание URC 101 DT

Страница 1: ... Operation and Safety Notes 3A Universal ReMOte COntROl 33137_Universal Fernbedienung_Cover_LB3A indd 2 08 06 0 Last Information Update Tietojen tila Informationsstatus 06 2009 Ident No 062009 3A IAN 33137 COMAG Handels AG Zillenhardtstraße 41 D 73037 Göppingen 3A 33137_Universal Fernbedienung_Cover_LB3A indd 1 08 06 09 12 29 ...

Страница 2: ...code and city Telephone no with area code Universal Remote Control Signature of buyer Please cut this card and enclose it to the returning good from purchase d a t e 3 6 m onths Guarantee COMAG Service Centre Unit 1 Longs Industrial Estate Englands Lane Gorleston Great Yarmouth Norfolk NR31 6BE Service Hotline 00 44 0 8708 900137 E mail info comag ag co uk ...

Страница 3: ...Universal Remote Control 10 in 1 10 in 1 10 in 1 10 in 1 Instruction manual Version 2 2_GB 08 06 2009 Technical data design equipment and items supplied subject to change ...

Страница 4: ...s not describe in detail how to use the remote control with your device Please see the information and instructions in the manual for your device Everyone who starts uses cleans disposes of this remote control must fully understand the contents of this instruction manual This instruction manual is a component of the product Always store the instruction manual near the remote control ...

Страница 5: ...e instruction manual with the corresponding button number and sometimes with a picture of the button e g EXIT button 16 The navigation buttons 13 will be shown using the symbols and Using the buttons you can go one step forward or backwards in the menus Information that appears on the screen will be shown either as a picture of the display e g Or as text with a grey background e g CODE SETUP Where...

Страница 6: ...Inserting the batteries 12 Button layout 14 Using your remote control 17 Menu Navigation 19 Cancelling an action 20 Code Functions 21 Choosing device codes via the display 21 Entering a device code from the code list 23 Manual code search 24 Code search by manufacturer name 26 Identifying the code 28 Using combi devices 28 System set up options Punch Through 31 Programming Punch Through VOL MUTE o...

Страница 7: ... 44 Programming the command timers 45 Learn Function 49 Using the learn function 49 Programming commands 51 Deleting commands 53 Macros 55 Programming macros 56 Building in delays 57 Carrying out macros 58 Deleting macros 58 ALL OFF Function 60 After use 61 Cleaning the remote control 61 Not using the remote control for an extended period of time 61 Hints and Tips Troubleshooting 62 Glossary 64 Di...

Страница 8: ...tronic devices It is intended exclusively for this use and may only be used for this purpose It may only be used as described in this instruction manual Any other usage not as intended can lead to damage to the remote control or to devices Important safety instructions Avoiding suffocation Never allow children to play with the plastic bag or other packaging Keep the plastic bag or other packaging ...

Страница 9: ...our eyes never manipulate or damage the device s safety system Avoiding damage Never sit on the remote control and do not place any heavy objects on it Clean the remote control regularly Do not use any harsh products when cleaning the remote control Always use qualified professionals to repair and service the remote control Do not expose the remote control to dust strong sunlight moisture high tem...

Страница 10: ...t changed correctly they could explode Only replace batteries with the same or equivalent type Never attempt to recharge batteries as they could explode Store batteries in a cool dry place Direct intense heat can damage the batteries Never put the remote control on a powerful heat source Never short circuit the batteries Never throw the batteries into fire If the remote control is not going to be ...

Страница 11: ...following categories of safety warnings Danger Instructions with the word DANGER warn about possible bodily injury Warning Instructions with the word WARNING warn about possible damage to property or the environment Useful advice about using the remote control ...

Страница 12: ...ing No 1 No 2 Universal Remote Control LR 03 AAA 1 5V Batteries May differ from shown No Quantity Explanation 1 1 Universal Remote Control 2 1 pair LR 03 AAA 1 5V Batteries 1 1 1 Base not shown Instruction manual not shown Code List with device codes not shown ...

Страница 13: ...d be remote controls for practically any type of consumer electronic device The description on source button 2 TV VCR CBL ASAT DSAT DVD AUX1 CD AMP AUX2 are for convenience only With the exception of the button you can use all the buttons with each device in Flex Mode Further instructions about Flex Mode can be found on page 21 in the Code Functions chapter ...

Страница 14: ... cover press the lock Lift and remove the battery compartment cover Insert both batteries into the compartment paying close attention to the polarity Replace the cover Settings after changing the batteries When the batteries are correctly inserted the display is switched on It will show the active mode TV the day of the week and the time ...

Страница 15: ...ntrol offers functions that your device might not be able to use Some special functions of your device may not be supported by the remote control In this case it can learn the commands from your original remote control using the learning function and transfer them to itself It may be that some of the functions of the device must be implemented differently on the universal remote than on the origin...

Страница 16: ...14 Button layout ...

Страница 17: ... if available 6 Mute button 7 VOL Volume control up down 8 TELETEXT Colour buttons for operating Teletext functions 9 Operating buttons for Video Recorder CD DVD Record This button must be pressed twice to start recording Stop Pause Play Fast Forward Rewind 10 Turn Teletext on Device specific on some devices this button will also be used for turning Teletext on and off Stop at a specific Teletext ...

Страница 18: ...unctions 16 Exit or go back a step in menus and device functions 17 Programming mode and shift function button 18 Enter two digit numbers in combination with the number buttons 19 Turn the devices on and off Transmitting and receiving diode Behind the transparent cover is the transmitting diode which sends the infra red signals and the receiving diode which learns the codes of other remote control...

Страница 19: ...you wish to program to this source button The description of the corresponding source button 2 is shown on the first line e g The code that has been programmed to the device is shown on the second line as long as the source button 2 is pressed Setup Shift Button After briefly pressing the setup button 17 the active device group e g DVD will appear on the first line next to the sign for the activat...

Страница 20: ...this takes about 30 seconds and stops the transmission This prevents the batteries from being drained unnecessarily Display after pressing buttons Every time a button is pressed the symbol transmitting appears on the display Settings after changing the batteries When the batteries are correctly inserted the display is switched on It will show the active mode TV the day of the week and the time TV ...

Страница 21: ...SETUP LEARN SETUP MACRO SETUP EXIT SETUP To open a menu press OK 12 To select between the sub menus press the navigation buttons and 1 CODE SETUP to programme device codes by inputting a code or by using the search function 2 SYSTEM SETUP for time date and altering volume etc 3 TIMER SETUP to program timers 4 LEARN SETUP to learn functions 5 MACRO SETUP to program macros 6 EXIT SETUP to exit the s...

Страница 22: ...l an action wait about 25 seconds the time is dependant on where the action was stopped until the setup menu closes itself automatically and appears on the display Whilst the remote control is carrying out a function will be shown on the display ...

Страница 23: ... Menu Structure Choosing device codes via the display Turn the device on Hold down the setup 17 button for about 3 seconds until is shown Press OK 12 appears on the display Press OK 12 will be shown on the display Press the appropriate source button 2 TV VCR CBL ASAT DSAT DVD AUX1 CD AMP AUX2 The display will then show ...

Страница 24: ...lphabetical entry will be shown with the first code e g Select the manufacturer of your device using the navigation keys 13 The first code of this manufacturer will be shown Select the device code of your manufacturer using the navigation keys 13 Test the remote control in conjunction with your device Use according to your device type the POWER 19 VOL 7 CH 11 AV 4 mute 6 Video text 10 the six play...

Страница 25: ...n the code list included with this instruction manual Turn the device on Hold down the setup 17 button for about 3 seconds until is shown Press OK 12 will then appear on the display Select the menu using the navigation buttons 13 Press OK 12 The display will show Press the appropriate source button 2 TV VCR CBL ASAT DSAT DVD AUX1 CD AMP AUX2 The description of the source button will be shown on th...

Страница 26: ...rrect the corresponding error message will be shown on the display The remote control will then revert back to normal use Manual code search Using the manual search you can find all codes for a device even those that are not included in the code list Turn the device on Hold down the setup 17 button for about 3 seconds until is shown Press OK 12 will then appear on the display Select the menu using...

Страница 27: ...he display will show Carry out a functional test by pressing the CH 11 or the PLAY 9 button only for video recorders several times up to 350 times until the device changes the channel or otherwise responds accordingly The code search begins with the current saved code During the search the display will show along with the chosen type of device If you miss the code you can go backwards step by step...

Страница 28: ...election limited to the manufacturers listed Turn the device on Hold down the setup 17 button for about 3 seconds until is shown Press OK 12 will then appear on the display Select the menu using the navigation buttons 13 Press OK 12 will then be shown on the display Press the desired source button 2 TV VCR CBL ASAT DSAT DVD AUX1 CD AMP AUX2 The display will show Select the device type that is to b...

Страница 29: ...e following list selection limited to the listed manufacturers 1 Philips 2 Sony 3 Thomson 4 Saba 5 Grundig 6 Beko If the manufacturer of your device is not listed above use a different method to search for the code select the device code from the display manual code search The display will show Carry out a functional test by pressing the CH 11 or the PLAY 9 button only for video recorders several ...

Страница 30: ...d press OK 12 to save the code The confirmation message will be shown The remote control will revert back to normal use Identifying the code If you wish to know which code is saved to a particular source button 2 simply press this source button e g and hold down The display will show the chosen type of device and the device code Using combi devices Combi devices are for example a TV with video rec...

Страница 31: ...er combi devices only require one code First you must select the part of the device that you wish to use next Example The device is a combined DVD recorder Video recorder The device code is stored under the source button To operate the DVD part of the combi device press and hold the source button for longer than a second To switch to using the video recorder in the combi device briefly press the s...

Страница 32: ...evice code onto two source buttons Operate one part of the device with one of the two source buttons Use the learn function to transfer the desired functions of the other part of the device onto the other source button ...

Страница 33: ...ed Image transmission devices that connect to a TV e g DVD VCR SAT CBL often do not have their own volume control If the universal remote control is currently operating such a device and the VOL Volume or Mute buttons are pressed then they will operate the volume control of the TV Settings for the punch through function time date backlighting and system reset System Setup Menu Structure ...

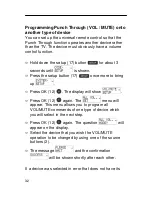
Страница 34: ...e setup button 17 once more to bring up Press OK 12 The display will show Press OK 12 again The menu will appear This menu allows you to program all VOL MUTE commands of one type of device which you will select in the next step Press OK 12 again The question will appear on the display Select the device that you wish the VOL MUTE operation to be changed by using one of the source buttons 2 The mess...

Страница 35: ...ill only use its own VOL MUTE functions The Punch Through function for this device will be disabled The universal function cannot be turned off in mode If you have chosen another mode for the VOL MUTE function as described in the previous chapter you cannot turn the universal function off for this mode Hold down the setup 17 button for about 3 seconds until is shown Press the setup button 17 once ...

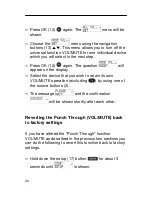
Страница 36: ...lect the device that you wish to retain its own VOL MUTE operation excluding by using one of the source buttons 2 The message and the confirmation will be shown shortly after each other Reverting the Punch Through VOL MUTE back to factory settings If you have altered the Punch Through function VOL MUTE as described in the previous two sections you can do the following to revert this function back ...

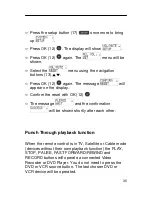
Страница 37: ...he reset with OK 12 The message and the confirmation will be shown shortly after each other Punch Through playback function When the remote control is in TV Satellite or Cable mode devices without their own playback function the PLAY STOP PAUSE FAST FORWARD REWIND and RECORD buttons will operate a connected Video Recorder or DVD Player You do not need to press the DVD or VCR source button The last...

Страница 38: ...36 This punch through operation will not work if the programmed TV SAT or Cable code has its own video recorder functions e g in a TV video combi device ...

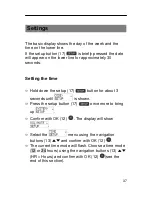
Страница 39: ...etting the time Hold down the setup 17 button for about 3 seconds until is shown Press the setup button 17 once more to bring up Confirm with OK 12 The display will show Select the menu using the navigation buttons 13 and confirm with OK 12 The current time mode will flash Choose a time mode 12 or 24 hours using the navigation buttons 13 HR Hours and confirm with OK 12 see the end of this section ...

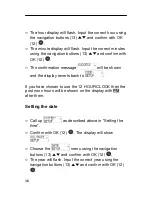
Страница 40: ...sage will be shown and the display reverts back to If you have chosen to use the 12 HOUR CLOCK then the post noon hours will be shown on the display with PM after them Setting the date Call up as described above in Setting the time Confirm with OK 12 The display will show Choose the menu using the navigation buttons 13 and confirm with OK 12 The year will flash Input the correct year using the nav...

Страница 41: ...ut the correct day using the navigation buttons 13 and confirm with OK 12 The confirmation message will be shown and the display reverts back to Backlight Each time a button is pressed the backlight of the display and buttons turns on The standard factory setting will leave the light on for 10 seconds You can turn the backlight off or extend its duration to up to 60 seconds Please note that using ...

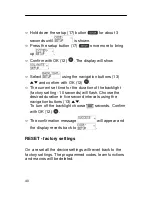
Страница 42: ...he duration of the backlight factory setting 10 seconds will flash Choose the desired duration in five second intervals using the navigation buttons 13 To turn off the backlight choose 00 seconds Confirm with OK 12 The confirmation message will appear and the display reverts back to RESET factory settings On a reset all the device settings will revert back to the factory settings The programmed co...

Страница 43: ...irm with OK 12 The display will show Select using the navigation buttons 13 and confirm with OK 12 The message will appear Confirm that you wish to revert back to the factory settings with OK 12 Whilst the factory settings are being restored will appear on the display This action will delete all previously saved settings ...

Страница 44: ...l remote control offers two timer functions Four timers for self defined commands e g to change to another channel a bell symbol will be shown on the display A sleep timer for the TV automatic switch off after 1 to 90 minutes Zzz will be shown on the display ...

Страница 45: ... menu Press OK 12 The display will show Press OK 12 The minutes will flash on the display Enter the time after which the TV should automatically turn itself off by using the navigation buttons 13 Press OK 12 The confirmation message will appear along with the TV timer symbol Zzz on the display Leave the remote control in such a position so that there is nothing between it and the device ...

Страница 46: ...ow Press OK 12 The message appears Press OK 12 The confirmation message will appear Command timer With the command timer you can program functions that will be automatically carried out at a specific moment within the next 24 hours Up to four commands can be saved but the first command must always be the selection of a source button 2 In order to use this timer the time must be set in the remote c...

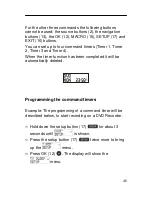
Страница 47: ...r 1 Timer 2 Timer 3 and Timer 4 When the timer function has been completed it will be automatically deleted Programming the command timers Example The programming of a command timer will be described below to start recording on a DVD Recorder Hold down the setup button 17 for about 3 seconds until is shown Press the setup button 17 twice more to bring up the menu Press OK 12 The display will show ...

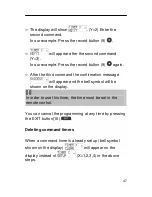
Страница 48: ...will flash Input the minutes using the navigation buttons 13 and press OK 12 When is displayed X 1 2 3 4 the input of commands will start First select the source button 2 of the device on which the command should be carried out In our example if the DVD Recorder is programmed to this button Press OK 12 The first input request will be shown X 1 2 3 4 Y 1 Enter the first command In our example Selec...

Страница 49: ...command the confirmation message will appear and the bell symbol will be shown on the display In order to use this timer the time must be set in the remote control You can cancel the programming at any time by pressing the EXIT button 16 Deleting command timers When a command timer is already set up bell symbol shown on the display will appear on the display instead of X 1 2 3 4 in the above steps...

Страница 50: ...48 Follow the steps as described above The display will show Press OK 12 The message will appear Press OK 12 The confirmation message will appear ...

Страница 51: ...o 150 commands Learn Setup Menu Structure Using the learn function Use new batteries in both remote controls If you are starting the programming from the beginning in particular after first use all previously saved commands will be deleted Only commands from the original remote control can be programmed onto the source buttons 2 If the original remote control is programmed onto a source button 2 a...

Страница 52: ...ctions can be performed on the TV volume mute search through channels Please do not attempt to transfer the functions of an original remote control to your universal remote control if the original has been programmed with the code of another TV This could lead to errors during the programming First carry out a test where you program and test two or three commands Before you program in your command...

Страница 53: ...acing each other 15 to 50mm apart on the table The infra red diodes must be positioned so they are exactly facing each other Original remote control 15 to 50 mm apart Universal remote control Hold down the setup button 17 for about 3 seconds until is shown Press the setup button 17 three more times to bring up the menu ...

Страница 54: ...d macro 15 buttons Then the screen will show Press the button on the original remote control of which the function is to be transferred to the universal remote control Hold this button down until either the message or appears The following question will appear If you wish to carry out more learning functions then confirm with OK 12 The request will appear again on the screen Carry on as described ...

Страница 55: ...bring up Select the menu using the navigation buttons 13 and press OK 12 Select the source button 2 from which you wish to delete a command Confirm the subsequent request with OK 12 The message and the confirmation will appear shortly after each other The remote control will then revert back to normal use Deleting commands from all source buttons Hold down the setup button 17 for about 3 seconds u...

Страница 56: ...ress OK 12 to bring up Choose the mode using the navigation buttons 13 Press OK 12 The following request appears Confirm by pressing OK 12 again The message and the confirmation will appear shortly after each other The remote control will then revert back to normal use ...

Страница 57: ... macro can involve different devices This way you can then e g turn on the TV select the desired channel turn on the video recorder and start recording by simply pressing the macro button 15 and the corresponding number button or The setup 17 and macro 15 buttons cannot be used in a macro If you wish to cancel the macro programming press the setup button 17 The macro will not be saved in this inst...

Страница 58: ...e selected number button 3 Press the source button 2 for the device with which the command should begin The input request will appear with the number of the step 02 for the second step Carry out the function that you wish to save as a macro You can press up to 9 further buttons and you may also change the device using the source buttons 2 When all the steps have been carried out press the button 1...

Страница 59: ...hieve a waiting time of greater than nine seconds Choosing a device also requires one storage space Channels with double digits also require two storage spaces When entering the steps as described above where the time delay should be built in press the PAUSE button 9 The question appears Press the number button 3 that corresponds with the number of seconds time delay that you want to build in e g ...

Страница 60: ...o is stored or Whilst the macro is being carried out is displayed X 1 2 3 along with the transmitting symbol If there is no macro stored under the selected number button 3 then the notification appears Deleting macros Hold down the setup button 17 for about 3 seconds until is shown Press the setup button 17 four more times to bring up the menu Press OK 12 to bring up mode Confirm with OK 12 ...

Страница 61: ...fication appears Press the number button 3 under which the macro that you wish to delete is stored The prompt appears Confirm by pressing OK 12 The message and the confirmation will appear shortly after each other The remote control will then revert back to normal use ...

Страница 62: ...F button 19 twice and on the second time hold the button down for about 3 seconds When you release the button will appear and the devices will switch themselves off Certain devices can be both turned on and off with the POWER ALL OFF button 19 Such devices when they are turned off will be turned on by the ALL OFF function ...

Страница 63: ...e control with a dry or damp cloth The cloth must be lint free Not using the remote control for an extended period of time If the remote control is not going to be used for an extended period of time carry out the following Remove the batteries from the remote control Store the batteries in a safe place Store the remote control in a dry and dust free place Ensure that the remote control is not exp...

Страница 64: ...des listed under the manufacturer of my device How do I determine the correct code To determine the correct code try out the codes one after the other until the majority of the functions of the device work normally You can programme the missing functions using the learn function Test more codes until the device will respond to the codes accordingly The devices will only react to certain commands f...

Страница 65: ... small change the distance between them The buttons on the original remote control are not working Check the functions of the original remote control The code of the original remote control does not work with the universal remote control for technical licence technical reasons If the problem still does not resolve itself contact your supplier or the manufacturer ...

Страница 66: ...odulated with a frequency of 20 70 kHz The modulation of the signal reduces the power consumption of the transmitter and enables the transfer regardless of ambient light Infra red diode Sends an invisible beam of infra red light at the wavelength of 880 950 nm LCD liquid crystal display Liquid crystal displays the liquid crystals are influenced by the polarisation direction of light when a particu...

Страница 67: ...ou to save a string of commands carrying out more than one function one after the other Punch Through Punch through enables you to use the volume control and mute function on a different device from the one that you are using ...

Страница 68: ...regarding disposal contact the appropriate local authority Never dispose of batteries in normal household waste Batteries can be poisonous Dispose of batteries in accordance with the relevant statutory provisions within the framework of the statutory obligation to return For further information regarding disposal contact the appropriate local authority Dispose of used batteries at a battery collec...

Страница 69: ...67 Technical Data Dimension in mm W x D x H 50 20 205 Weight g 97 g without batteries Batteries 2 x 1 5V AAA LR03 Laser Class 1 LCD Display 35 x 21 mm Infra red transmitter 8m range 500 angle ...

Страница 70: ...shown that many customer complaints can be solved with a simple telephone conversation If you should have problems with your device please contact our Service Hotline first This will save you time and worry Our Service Hotline will also tell you about the exact warranty procedure in case you actually have to send us your device Service hotline 0044 0 8708 900137 E mail info comag ag co uk ...

Страница 71: ...arantee for this COMAG Handels AG product consists of the statutory requirements at the time of purchase The warranty time of the product is three years Altering the device voids the manufacturer s warranty and guarantee ...

Страница 72: ...nformity The manufacturer declares that this product conforms to the following directives and standards EMC Directive 2004 108 EC EN 55022 EN 55024 Device type Universal remote control Göppingen 06 05 2009 COMAG Handels AG ...

Отзывы: