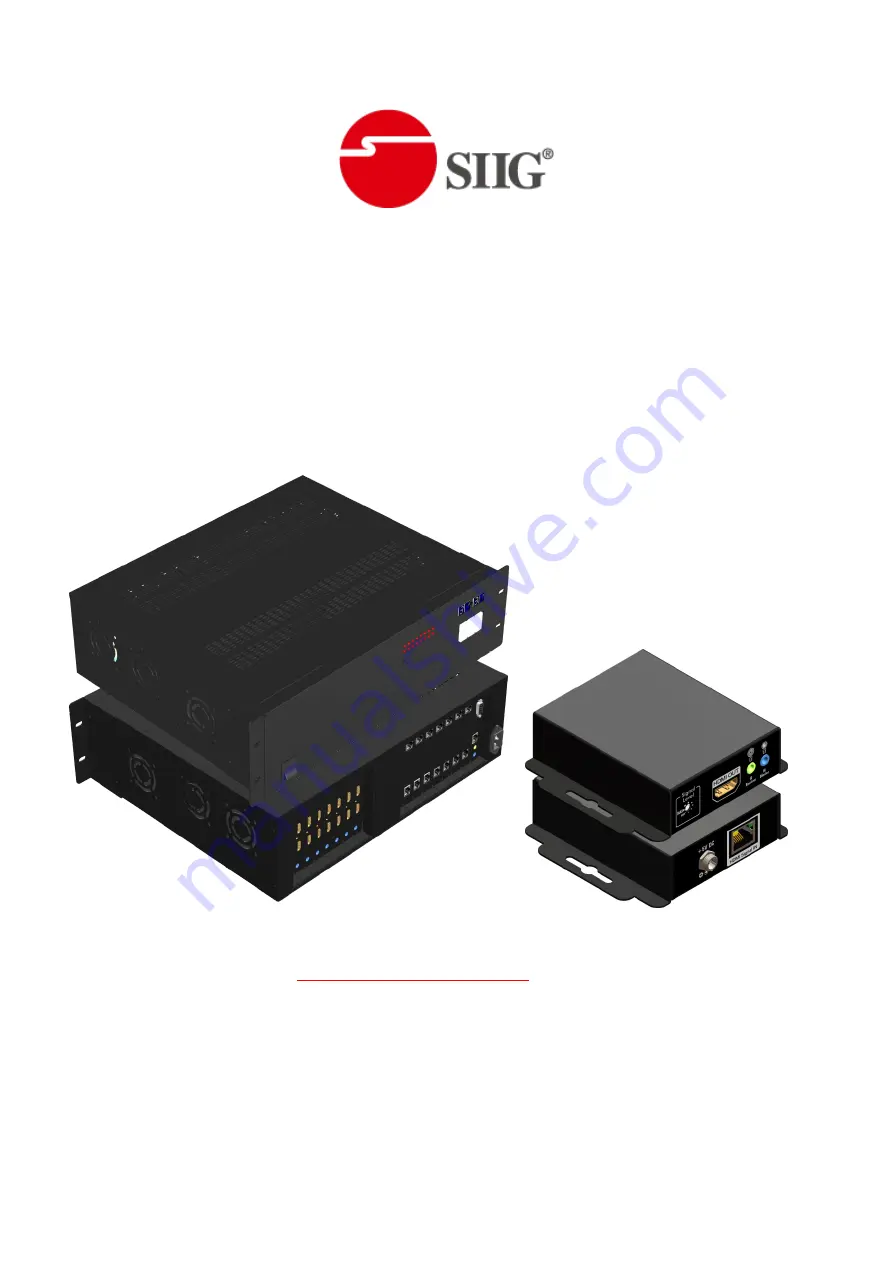
16x16 HDMI Deep Color & full 3D over single
Cat.X Matrix
To avoid EMI issue, complete STP Cat6 cable is strongly recommended!
P/N: AV-GM07J3-S1
Страница 1: ...16x16 HDMI Deep Color full 3D over single Cat X Matrix To avoid EMI issue complete STP Cat6 cable is strongly recommended P N AV GM07J3 S1...
Страница 2: ...ourself except where explained in this manual Provide proper ventilation and air circulation and do not use near water Keep objects that might damage the device and assure that the placement of this u...
Страница 3: ...same time Allows any HDMI display to view any HDMI source at any time Supports 7 1 channel digital audio Supports default HDMI EDID and learns the EDID of displays Supports full frequency IR signal f...
Страница 4: ...single 50 Input 16x HDMI 1x RS 232 1x Ethernet 1x IR socket for IR receiver 1x RJ 45 1x IR socket for IR receiver Output 16x RJ 45 17x IR socket for IR blaster 1x HDMI 1x IR socket for IR blaster HDM...
Страница 5: ...e Metal case Dimensions L x W x H Model TBA TBA Package TBA Carton TBA Weight Model TBA TBA Package TBA Fixedness 3RU rack mount with ears Wall hanging holes Wall mount with screws Power supply AC Pow...
Страница 6: ...t LED LED display for input channels 6 Output Push Button Front panel push buttons used to select the number of display channel 7 Enter Button Trigger the IN OUT mapping setting 8 Input Push Button Fr...
Страница 7: ...rom strongest 0 to weakest 7 for respective transmission length from longest possible range to short distance Please adjust the signal level from strongest to weakest and stop turning the rotary switc...
Страница 8: ...input channel from 1 to 16 System IR Receives IR commands from remote control MA 5288RX IR BLASTER IR control on individual display device IR RECEIVER IR receiver connected here can receive all IR co...
Страница 9: ...RX as receiver 1 Connect each HDMI output to HDMI displays 2 Connect the CAT X input on the MA 5288RX to the CAT X output port on the AV GM07J3 S1 3 Connect IR receiver and place the IR receiver at th...
Страница 10: ...8 CONNECTION DIAGRAM...
Страница 11: ...port please push the enter button to let the setting be effective Method B IR Remote Control Button Function ON Power on the matrix switcher OFF Standby mode PRESET Preset mapping mode SAVE Save curr...
Страница 12: ...13 Switch All output To number input Take Ex Input 3 To Output All 1 Press SWITCH button 2 Press ALL to select All Output All 3 Press To button All 4 Press number key 3 to select Input All 03 5 Press...
Страница 13: ...Take Ex Preset saved mapping from 5 1 Press PRESET button Lo Ad 2 Press number key 5 to select the storage site 00 05 3 Press TAKE button Mute Output Switch number output To Mute Take Ex Mute Output 3...
Страница 14: ...irmware Update Button 3 Ethernet Button 10 Network Button 4 COM Port Selection 11 Mapping Button 5 Connect Disconnect Status 12 Default Reset Button 6 Connect Button 13 In Out Switch Button 7 Power On...
Страница 15: ...cted the button will show the sign image to let you know 5 Ethernet Button 1 Click button to switch to Ethernet function 2 If Ethernet is connected the button will show the sign image to let you know...
Страница 16: ...lue Click this button to power off device Standby Mode Power off status Red Click this button to power on device 10 EDID Button 1 Learn EDID from Default a Select Default EDID 1 8 Default EDID b Selec...
Страница 17: ...Create EDID File a Click Create button to create EDID file b Select the EDID content c Click Save EDID on Computer to save the generated EDID as a file 4 View EDID content a Select Input HDMI output...
Страница 18: ...r 11 Firmware Update Button 1 Make sure RS 232 is connecting and the connecting status is 2 Click FIRMWARE UPDATE Button and then will be a pop up windows 3 F W Update for Control Board Step1 Click Lo...
Страница 19: ...he AV GM07J3 S1 Step4 Click Start button and the firmware will start writing 4 F W Update for Input and Output Card Step1 Click Load File to select the firmware file which you want to update Step2 Cli...
Страница 20: ...d the device IP address Step5 Select Ethernet button and then will be a pop up windows Step6 Key in the device IP address to the pop up windows and click OK Step7 Click the Connect Button to connect t...
Страница 21: ...ng a Select Mapping 1 8 b Click Recall button to recall previous mapping which are saved 3 Rename Mapping a Rename the mapping Mapping1 Mapping8 b Click Confirm button to confirm the change 14 Default...
Страница 22: ...0 15 In Out Switch Button Click the button on the checkerboard to select Input Output port User can click the input number button to let all outputs select the same input Ex All outputs select input 1...
Страница 23: ...21 16 Mute Output Button Click the circle button to turn off output s video and audio Ex Mute Output 2...
Страница 24: ...22 Method D Web Interface Control 1 Set up PT MA HD1616 C IP address Please refer to Network setting section 2 Key in the IP address on the web page...
Страница 25: ...EDID of the lowest capable HDMI display among others to make sure all displays are capable to play the HDMI signals normally There are THREE methods to do EDID Learning as below 1 Front Panel Push in...
Страница 26: ...est capability among the ones you would use for this input source For example if user would like to play the Input 2 upon output 2 output 3 and output 4 and only output 3 cannot support 1080p support...
Страница 27: ...id UTP CAT5e cable shows longer transmission range than stranded STP CAT6 cable For long extension users solid LAN cables are the only viable choice 4 EIA TIA 568 B termination T568B for LAN cables is...
Страница 28: ...ss or damage in transit Under no circumstances will a unit be accepted without a return authorization number The warranty is in lieu of all other warranties expressed or implied including without limi...