background image

Getting to know your appliance       

en

17

Display panel

Buttons in the display panel

For a detailed description of all buttons, 

see 

~

 Page 21

 onwards.

Display panel

(

Select the 

degree of dryness

.

0

Select the 

drying time

.

8

Select the 

Ready in time

.

@

Select 

Anti-Crease

.

H

Select 

Low-Heat Drying

.

P

Switch the 

signal

 on or off.

X

Select 

Start/Pause

.

   # +

;

3

Ý

"Anti-Crease" selected.

C


Ô

Fine adjustment of the dryness 

level.

û

Time programme selected.

5

"Ready in" time selected.

w

Childproof lock selected.

0

Spin speed selected.

μ

Low-Heat Drying selected.

ü

Audible signal active.

Ü

Start or Pause selected.

3 h

Programme delay in hours 

when "Ready in" time is 

selected.

1:27

Expected programme duration 

in hours and minutes.

e


Ø


»

Ý


“Ÿš

 -

 ˜ 

-

Programme progress: Dry; 

Iron Dry; Cupboard Dry; Anti-

Crease; End and Pause.

Ì

Empties the condensate 

container; 

~

 Page 25

.

¥

Cleans the fluff filters; 

~

 Page 24

.

Содержание WT46G490GB

Страница 1: ...Register your product online ens home com welcome siemens home com welcome en QVWDOODWLRQ DQG RSHUDWLQJ LQVWUXFWLRQV Tumble dryer WT46G490GB ...

Страница 2: ...If the operating and installation instructions describe different models any differences will be pointed out at the relevant points in the text Read these operating and installation instructions before operating the tumble dryer Display rules Warning This combination of symbol and signal word indicates a possibly dangerous situation Not heeding the warning can cause death or injuries Caution This ...

Страница 3: ...ing washing according to 18 Programmes and buttons 19 Programmes 19 Buttons 21 1 Operating the appliance 22 Loading laundry and switching on the dryer 22 Setting a programme 22 Starting the programme 22 Programme sequence 23 Changing the programme or adding laundry 23 Cancelling the programme 23 Programme end 23 Removing laundry and switching off the dryer 23 Clean the fluff filter 24 Emptying the...

Страница 4: ...r service Read and follow the operating and installation instructions and all other information provided with this appliance Retain the documents for subsequent use or for subsequent owners Safety instructions Safetyinstructions The following safety information and warnings are provided to protect you from injury and to prevent material damage to your surroundings It is nevertheless important to t...

Страница 5: ... Warning Risk of suffocation If allowed to play with the packaging plastic film or packing components children may become caught in these or pull them over their heads and suffocate Keep packaging plastic film and packing components away from children Warning Risk of poisoning Detergents and care products may result in poisoning if consumed If accidentally swallowed seek medical advice Keep deterg...

Страница 6: ...ations Warning Risk of electric shock fire material damage damage to the appliance If the appliance s mains cable is altered or damaged this may result in electric shock short circuiting or fire due to overheating The mains cable must not be kinked crushed or altered and must not come into contact with any heat sources Warning Risk of fire material damage damage to the appliance The use of extensi...

Страница 7: ...e Warning Risk of injury The appliance is very heavy Lifting it may result in injury Do not lift the appliance on your own Riskofinjury The appliance has sharp edges on which you could cut your hands Do not take hold of the appliance by its sharp edges Wear protective gloves to lift it Riskofinjury If the hoses and mains cables are not correctly routed they may constitute a tripping hazard which m...

Страница 8: ...erminated before the drying cycle has finished this prevents the laundry from cooling down sufficiently and may cause the laundry to ignite or may result in material damage or damage to the appliance During the last part of the drying cycle the laundry in the drum is not heated cooling cycle This is to ensure that it remains at a temperature at which it will not be damaged Do not switch off the ap...

Страница 9: ...ndry in the appliance exceeds its maximum load capacity it may not be able to operate properly or this may result in material damage or damage to the appliance Do not exceed the maximum load capacity of dry laundry Make sure you comply with the maximum load capacities specified for each of the programs Page 19 Materialdamage damagetotheappliance If you operate the appliance without a fluff filter ...

Страница 10: ...se note Switch off the appliance Disconnect the appliance from the power supply pull out the plug Never take hold of the mains plug with wet hands When removing the mains plug from the socket always take hold of the plug itself and never the mains cable otherwise this may damage the mains cable Do not make any technical modifications to the appliance or its features Repairs and any other work on t...

Страница 11: ...nated according to European directive 2012 19 EC which governs waste electrical and electronic equipment WEEE The directive provides a framework for the collection and recycling of old appliances which is valid across the EU Energy saving tips Spin the laundry before drying The drier the laundry the shorter the drying time will be thus consuming less energy Load the dryer with the maximum load Not...

Страница 12: ...lf by trying to lift it Do not lift the dryer on your own You could cut your hands on the sharp edges of the dryer Do not hold the dryer by the sharp edges Protruding parts on the dryer may break off when it is lifted or pushed Do not move the dryer by holding on to protruding parts Caution Risk of material damage to the dryer or fabrics Check the dryer for damage caused during transportation Neve...

Страница 13: ...ding raise your dryer with a platform Transport laundry with the clothes basket integrated into the platform drawer Order number WZ20500 Basket for woollens Dry individual woollen items sports shoes and soft toys in the basket for woollens Order number WZ20600 Transport and frost protection To empty the condensate container 1 Use the programme selector to select any programme 2 Press the Start but...

Страница 14: ...ntsinbrief 1 Load the laundry and close the door Switch on the dryer Select a programme and if necessary adjust the programme default settings 2 Select the start button Ü Dry Unload the laundry 3 Switch off the dryer Empty the condensate container Clean the fluff filter ...

Страница 15: ...iance en 15 Getting to know your appliance Gettingtoknowyourappliance Dryer Condensate container 0 Control and display panel 8 Drum interior light depending on the model Dryer door H Air inlet P Fluff filter X Heat exchanger 3 ...

Страница 16: ... sensitive and only need to be touched briefly Use the programme selector to switch the dryer on and off and to select the programme 0 Programmes Page 19 8 Start button for starting or interrupting the programme Page 21 Buttons Page 21 H Display panel with buttons Page 17 ...

Страница 17: ...tart Pause 3 Ý Anti Crease selected C Ô Fine adjustment of the dryness level û Time programme selected 5 Ready in time selected w Childproof lock selected 0 Spin speed selected μ Low Heat Drying selected ü Audible signal active Ü Start or Pause selected 3 h Programme delay in hours when Ready in time is selected 1 27 Expected programme duration in hours and minutes e Ø Ý Ÿš Programme progress Dry ...

Страница 18: ...articles which may be deposited on the moisture sensor This may impair the sensor function and in consequence the drying result Notes When washing laundry to be tumble dried use the correct amount of detergent and care products as specified in the manufacturer s instructions Clean the moisture sensor regularly Page 28 Sorting washing according to c Suitable for tumble drying a Dry at normal temper...

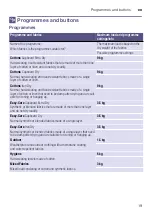
Страница 19: ... Dry Normal hard wearing and heat resistant fabrics made of a single layer of cotton or linen that need to be damp after drying and are suit able for ironing or hanging up 9 kg Easy Care Cupboard Extra Dry Synthetic or blended fabrics that are made of more than one layer and do not dry readily 3 5 kg Easy Care Cupboard Dry Normal synthetic or blended fabrics made of a single layer 3 5 kg Easy Care...

Страница 20: ... adjust the programme length using the button for the drying time Cold û All types of fabric For freshening up or airing items of laundry that have not been worn for long 3 kg You can adjust the programme length using the button for the drying time Shirts 15 For optimum drying results dry a maximum of 5 shirts at one time After drying iron the laundry or hang it up and leave for a period of time R...

Страница 21: ...time programmes Between 20 minutes and 3 hours in 10 minute increments Finish In 5 The programme will end in 1 24 hrs Set the Ready in time in increments of one hour to delay the start of the programme The required number of hours after the programme ends is displayed in the display panel Less Ironing Ý The drum moves the laundry at regular intervals for 60 or 120 minutes after drying in any progr...

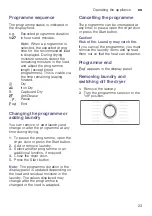
Страница 22: ...ge 21 1 Select the required programme detailed information on the programmes can be found from Page 19 onwards 2 Use the programme selector to set the required programme The default programme settings for the selected programme appear in the display panel Note Default programme settings are standard settings that are already defined when a programme is selected After selecting a programme you can ...

Страница 23: ...apted Cancelling the programme The programme can be interrupted at any time to pause open the dryer door or press the Start button Caution Risk of fire Laundry may catch fire If you cancel the programme you must remove the laundry items and spread them out so that the heat can disperse Programme end Ÿš appears in the display panel Removing laundry and switching off the dryer 1 Remove the laundry 2...

Страница 24: ... the fluff filter after each drying cycle 1 Open the dryer door and remove all fluff from the door 2 Remove the fluff filter 3 Remove the fluff from the recess in the fluff filter Note Ensure that no fluff falls into the open shaft 4 Open the fluff filter and remove all the fluff 5 Rinse away the fluff under running water or clean the fluff filter in the dishwasher 6 Dry the fluff filter close it ...

Страница 25: ...ontainer being full 1 Pull out the condensate container horizontally 2 Pour out the condensation water Caution Dirty condensation water may be harmful to your health and cause material damage Condensation water is not suitable for drinking and may be contaminated with fluff Do not drink the condensation water or reuse it 3 Push in the condensate container until you feel it lock back into place in ...

Страница 26: ... programme selector clockwise to position 2 2 The spin speed is shown in the display 3 Press the Ready in time button or the drying time button to change the spin speed 4 Turn the programme selector clockwise to position 3 5 The volume of the audible signal at the end of the programme is shown in the display 0 off 1 quiet 2 medium 3 loud 4 very loud 6 Press the Ready in time button or the drying t...

Страница 27: ...e the dryer more than twice a week If there is debris in the heat exchanger this will increase the amount of time required for drying and will compromise the drying results 1 Allow the dryer to cool down and place an absorbent cloth beneath the maintenance flap Note Residual water may leak out 2 Open the maintenance flap fully 3 Turn both locking levers towards each other 4 Remove the top cap from...

Страница 28: ...quipped with a stainless steel moisture sensor The moisture sensor measures how damp the laundry is After long periods of usage the moisture sensor may become covered by a fine layer of limescale or residues of detergents and care products Such residues must be removed regularly as the sensor function and in consequence the drying result may be impaired Open the door and clean the moisture sensor ...

Страница 29: ...aking out Not a fault the dryer may be positioned on an incline Level the dryer Change in the pro gramme duration dis played during drying Not a fault The moisture sensors detect the remaining moisture in the load and adjust the programme length except timed programmes Laundry is not dried cor rectly or is still too damp After the end of the programme warm laundry feels damper than it actually is ...

Страница 30: ... freely accessible this may increase the drying time Make sure that the air inlet remains unobstructed If the ambient temperature is higher than 35 C this may extend the drying time Insufficient air circulation in the room may increase the drying time Ventilate the room Humidity in the room increases Not a fault Make sure the room is sufficiently ventilated Power cut The drying programme is interr...

Страница 31: ...act information for your nearest after sales service can be found here or in the enclosed after sales service directory Please provide after sales service with the dryer s product number E no and production number FD You can find this information on the inside of the dryer door or on the rear of the dryer Trust the expertise of the manufacturer Contact us You can therefore be sure that the repair ...

Страница 32: ...1 kWh 2 12 kWh 800 rpm 147 min 76 min 4 50 kWh 2 38 kWh Easy Care 3 5 kg 3 5 kg Cupboard Dry 800 rpm 46 min 1 42 kWh 600 rpm 56 min 1 74 kWh For testing in accordance with applicable standard EN61121 the dryer shall be used with external drain set Programme setting for testing in accordance with the applicable EN 61121 standard The values may differ from those specified depending on the type of fa...

Страница 33: ...h Weight Approx 45 kg Maximum load 9 kg Condensate container 4 6 l Connected voltage 220 240 V Connected load Max 2600 W Fuse 13 A Drum interior light Ambient temperature 5 35 C Power consumption when switched off 0 10 W Power consumption when ready for use left on mode 0 75 W Depending on the model ...

Страница 34: ...6 ...

Страница 35: ...6 ...

Страница 36: ... E 6 DXVJHUlWH PE XQGHU 7UDGHPDUN LFHQVH RI 6LHPHQV Repair order and advice in the event of faults You can find the contact information for all countries in the attached after sales service directory GB 0344 892 8999 Calls charged at local or mobile rate IE 01450 2655 0 03 per minute at peak Off peak 0 0088 per minute ...

Отзывы: