background image

06.03

10.4 Memory configuration

10-297

 Siemens AG, 2003. All rights reserved

SINUMERIK 840Di Manual (HBI) – 06.03 Edition

10.4.1

DRAM memory

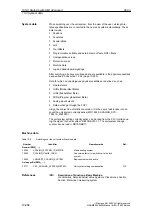
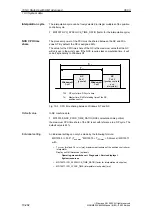
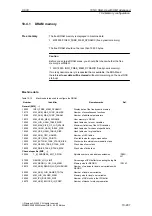
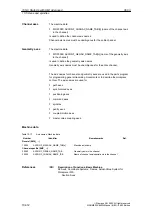
The free DRAM memory is displayed in machine data

S

MD18050: INFO_FREE_MEM_DYNAMIC (free dynamic memory).

The free DRAM should not be less than 15,000 bytes.

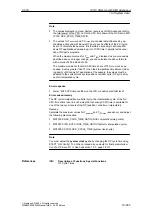
Caution

Before you enlarge DRAM areas, you should first check whether the free
memory is sufficient:

S

MD18050: INFO_FREE_MEM_DYNAMIC (free dynamic memory).

If more dynamic memory is requested than is available, the SRAM and
therefore all user data will be cleared without prior warning on the next NCK
start-up!

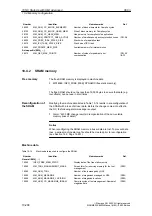
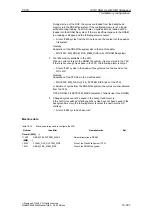
Table 10-13

Machine data required to configure the DRAM

Number

Identifier

Name/remarks

Ref.

General ($MN_ ...)

18050

INFO_FREE_MEM_DYNAMIC

Display data of the free dynamic memory

18170

MM_NUM_MAX_FUNC_NAMES

Number of miscellaneous functions

18180

MM_NUM_MAX_FUNC_PARAM

Number of additional parameters

18210

MM_USER_MEM_DYNAMIC

User memory in DRAM

18240

MM_LUD_HASH_TABLE_SIZE

Hash table size for user variables

18242

MM_MAX_SIZE_OF_LUD_VALUE

Maximum field size of the LUD variables

18250

MM_CHAN_HASH_TABLE_SIZE

Hash table size for channel-specific data

18260

MM_NCK_HASH_TABLE_SIZE

Hash table size for global data

18340

MM_NUM_CEC_NAMES

Number of LEC tables

18342

MM_CEC_MAX_POINTS

Max. table size for sag compensation

18500

MM_EXTCOM_TASK_STACK_SIZE

Stack size for external communication task

18510

MM_SERVO_TASK_STACK_SIZE

Stack size of servo task

18520

MM_DRIVE_TASK_STACK_SIZE

Stack size of drive task

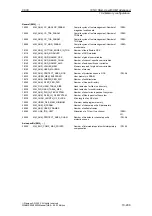
Channel-specific ($MC_ ...)

20096

T_M_ADDRESS_EXIT_SPINO

Spindle number as an address extension

/FBW/,
W1

27900

REORG_LOG_LIMIT

Percentage of IPO buffer for enabling the log file

28000

MM_REORG_LOG_FILE_MEM

Memory size for REORG

/FB/, K1

28010

MM_NUM_REORG_LUD_MODULES

Number of modules for local user variables with
REORG

28020

MM_NUM_LUD_NAMES_TOTAL

Number of local user variables

28040

MM_LUD_VALUES_MEM

Memory size for local user variables

28060

MM_IPO_BUFFER_SIZE

Number of NC blocks in the IPO buffer

28070

MM_NUM_BLOCKS_IN_PREP

Number of blocks for block preparation

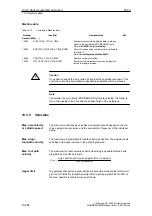
Free memory

Machine data

10 NC Start-Up with HMI Advanced

Содержание SINUMERIK 840Di

Страница 1: ...Manual 06 2003 Edition SINUMERIK 840Di ...

Страница 2: ......

Страница 3: ...s 4 MPI Communication 5 Turning On and Ramp Up 6 PROFIBUS DP Communication 7 PLC Start Up 8 Drive Start Up Preconditions 9 NC Start Up with HMI Advanced 10 Alarm and Message Texts 11 Dry Run of Axis and Spindle 12 Drive Optimization using HMI Advanced 13 User Data Backup Series Machine Start Up 14 SW Installation Update and Data Backup 15 840Di Specific Data and Functions 16 Abbreviations A Refere...

Страница 4: ...ay constitute copyright violation Further information is available on the Internet under http www ad siemens de sinumerik This publication was produced with Interleaf V7 The reproduction transmission or use of this document or its contents is not permitted without express written authority Offenders will be liable for damages All rights including rights created by patent grant or registration of a...

Страница 5: ... the SINUMERIK 840Di control S Configuring engineers S Electricians and start up specialists S Service and operating personnel This manual provides detailed information on the specific hardware and start up installation of a SINUMERIK 840Di system This manual provides information about the control system design and the interfaces of the individual components Furthermore the procedure for starting ...

Страница 6: ...alified person is one who is familiar with the installation mounting start up and operation of the equipment and the hazards involved S Training and education i e authority to switch on and off to earth and tolabel circuits and devices according to safety technology standards S Training and education in maintenance and use of adequate safety equip ment according to safety technology standards S Fi...

Страница 7: ... mage Caution Used without safety alert symbol indicates a potentially hazardous situation which if not avoided may result in property damage Notice Used without the safety alert symbol indicates a potential situation which if not avoided may result in an undesirable result or state Explanation of symbols Important Important indicates an important or especially relevant item of information Notice ...

Страница 8: ...nts Suitable electric tools must be used Warning S Repairs to equipment supplied by Siemens must always be carried out by SIEMENS after sales service personnel or by repair centers authorized by SIEMENS Parts or components must always be replaced by parts or components specified in the spare parts list S Always disconnect the power supply before you open the unit S EMERGENCY STOP devices in compli...

Страница 9: ...table with antistatic surface conductive antistatic foam or antistatic packaging S Do not bring ESD sensitive modules into the vicinity of visual display units monitors or TV sets minimum distance to the screen 10 cm S Do not bring ESD sensitive modules into contact with chargeable and highly insulating materials such as plastic insulating table tops or clothing made of synthetic materials S Measu...

Страница 10: ...06 03 x Siemens AG 2003 All rights reserved SINUMERIK 840Di Manual HBI 06 03 Edition SINUMERIK 840Di Manual Preface Notes ...

Страница 11: ... command Window 1 39 2 Hardware Descriptions 2 43 2 1 Overview of hardware components 2 43 2 2 MCI board 2 46 2 2 1 Module 2 46 2 2 2 Interface description 2 48 2 2 3 Changing the battery 2 50 2 2 4 Module replacement 2 54 2 2 5 Technical Data 2 55 2 3 MCI board extension 2 56 2 3 1 Module 2 56 2 3 2 Installation instructions 2 57 2 3 3 Interface description 2 59 2 3 4 Technical Data 2 61 2 4 MCI ...

Страница 12: ... 2 102 2 12 5 Dimension drawing 2 103 2 12 6 Technical data 2 104 2 13 ADI4 analog drive interface for 4 axes SW 09 01 and higher 2 105 2 13 1 Module 2 105 2 13 2 Interface description 2 107 2 13 3 Cabinet mounting 2 119 2 13 4 Power supply 2 119 2 13 5 Grounding 2 121 2 13 6 Connection overview 2 122 2 13 7 Dimension drawing 2 123 2 13 8 Technical data 2 124 3 Design 3 125 3 1 System overview 3 1...

Страница 13: ...during running operation 5 167 5 8 External operator panel PCU with HMI Advanced 5 168 5 8 1 General settings 5 168 5 8 2 Language default setting 5 169 6 Turning On and Ramp Up 6 173 6 1 Preparing for ramp up 6 173 6 1 1 Checklist 6 173 6 1 2 Recommended order when commissioning 6 174 6 2 First ramp up 6 175 6 2 1 Basic ramp up of the system software SW 2 2 and higher 6 175 6 2 2 Basic start up o...

Страница 14: ... components 6 201 6 8 License management SW 2 1 and higher 6 201 7 PROFIBUS DP Communication 7 203 7 1 General 7 203 7 1 1 Message frame structure for cyclic DP communication 7 204 7 1 2 Description of a DP cycle 7 205 7 1 3 SINUMERIK 840Di with PROFIBUS DP 7 206 7 2 Network rules 7 210 7 3 SIMATIC S7 project 7 211 7 3 1 Creating an S7 Project 7 211 7 3 2 HW Config 7 212 7 3 3 840Di Rack 7 212 7 3...

Страница 15: ... 1 Resolutions 10 281 10 3 2 Normalization of phys quantities of Machine and Setting data 10 283 10 3 3 Changing scaling machine data 10 285 10 3 4 Loading default machine data 10 286 10 3 5 Switching over the measuring system 10 287 10 3 6 Traversing ranges 10 289 10 3 7 Positioning accuracy 10 289 10 3 8 Cycle times 10 290 10 3 9 Velocities 10 294 10 4 Memory configuration 10 296 10 4 1 DRAM mem...

Страница 16: ...n 10 381 10 6 4 Digital I O bytes and system variables 10 382 10 6 5 Time behavior 10 383 10 6 6 Configuration example 10 384 10 7 Loadable compile cycles SW 2 2 and higher 10 389 10 7 1 Loading compile cycles 10 390 10 7 2 Boundary conditions 10 391 10 7 3 Activating and licensing the technological functions 10 391 10 7 4 Data descriptions MD 10 392 10 8 PROFIBUS DP 10 393 10 8 1 Setting the para...

Страница 17: ...dvanced 14 454 15 SW Installation Update and Data Backup 15 455 15 1 General requirements 15 455 15 1 1 PCU basic software 15 455 15 1 2 Partitioning of the hard disk 15 456 15 1 3 Boot manager 15 457 15 1 4 Setting determining the network parameters of an external computer 15 458 15 2 Software installation update 15 460 15 2 1 Software installation updating SINUMERIK 840Di system software 15 460 ...

Страница 18: ...ODRIVE drives 16 504 16 2 4 Boundary conditions 16 508 16 2 5 Data descriptions MD system variable 16 509 16 2 6 Alarms 16 510 16 3 Travel to fixed stop with high resolution torque reduction SW 2 2 and higher 16 511 16 3 1 Description of Functions 16 511 16 3 2 Requirements 16 511 16 3 3 Setting parameters for SIMODRIVE drives 16 512 16 3 4 Setting parameters for the SINUMERIK 840Di NC 16 512 16 3...

Страница 19: ...on solutions and is gen erally especially designed for applications S where decentralized automation solutions are required in the fields of PLC I Os and drives and or S a complete PC integrated control system is preferred since this solution better fits into the intended or existing automation environment Networking e g TCP IP Industrial PC PCU MCI board extension option MCI board SIEMENS A D Ope...

Страница 20: ...nents available in the basic version Max Maximum possible number of components with additional options 1 SW 2 1 and higher 4 SW 2 2 and higher 6 In addition to the system software packages the SINUMERIK 840Di can be adapted to requirements using various Performance options S Option Advanced Processing 1 S Option Advanced Processing 2 The following minimum IPO cycle times can be set with various sy...

Страница 21: ...red ISA PCI length max 175mm occupied with option MCI board extension and MCI board extension slot variant PCU 50 1x PCI length max 265mm occupied by the MCI board PCU 70 3x PCI length max 265mm one occupied by the MCI board The MCI board is a 2 3 long PCI plug in card 265mm with integrated SIMATIC S7 compatible PLC315 2DP as a routing capable DP master In addition it has interfaces for PROFIBUS D...

Страница 22: ...drives SIMODRIVE 611 universal with option module MotionControl with PROFIBUS DP SIMODRIVE 611 universal E with option module MotionControl with PROFIBUS DP SIMODRIVE POSMO CD CA SIMODRIVE POSMO SI In addition to traversing axes with interpolation it is also possible to have the drives positioned at PROFIBUS automatically and independently of other drives operating mode Positioning To this aim Sie...

Страница 23: ...s as they occur in conjunction with ma chining centers handling and mounting up to machine tools and machine tool related applications The NCK Numerik Control Kernel is part of the NC system software that real izes the real time capability of the SINUMERIK 840Di The NCK is characterized by the following features The NCK is automatically started when Windows NT powers up The NCK cyclically runs in ...

Страница 24: ...user interfaces An operator interface configured in this way can only be run if the ProTool ProRuntime System is installed S SINUMERIK HMI Programming Package The HMI Programming Package can be used to integrate OEM high level language applications using standardized interfaces COM OPC The OEM provides maximum flexibility for creating operator interfaces using standard development tools such as Vi...

Страница 25: ... standard screen resolution setting depends on the optimized value that was set for the operator panel This value was defined for technical reasons and should be adhered to Screen resolutions greater than 1024 768 pixels are not supported S Color depth The default color depth setting is 256 colors Higher values can in certain circumstances increase the amount of processor time used by Windows NT a...

Страница 26: ...d are subject to a certification proce dure with Siemens as the system manufacturer This is to certify and document the compliance with the real time capability of the whole configuration in impor tant operating modes In the case of any modifications to or expansions of PC components hardware or software no binding statements can be made regarding compliance with the product features if any amendm...

Страница 27: ...nfiguration settable in the System Properties tab Start shutdown Stop Blue Screen default Automatic restart reboot Notice The interface signal PC shutdown must be reset in the organization block OB100 cold restart of the PLC A loss of voltage lasting more than five msecs is detected by the POWER FAIL functionality of the SINUMERIK 840Di as a fault scenario and the following ac tions are initiated ...

Страница 28: ...hold values 1 Housing temperature 2 CPU module temperature 3 CPU temperature Error response S Alarm 2110 NCK temperature alarm S Logbook entry Alarm Critical temperature values Case Temp C CPU module Temp C CPU Temp C When a temperature alarm is issued the temperature measured for the fol lowing components is displayed in the logbook entry case CPU module and CPU Error causes remedy One of the thr...

Страница 29: ...sured if the power supply of the PCU is at least 24V References BH Operator Components Manual Chapter PCU 50 2 In the remaining time left by the internal power backup Windows NT can no longer be ended correctly This implies the risk that the Windows NT instal lation can be damaged so that the SINUMERIK 840Di can no longer be run It is therefore urgently recommended to use an uninterruptible power ...

Страница 30: ...he UPS serial inter face of the PCU COMx Windows NT Configuration of the UPS functionality is per formed using the Windows NT standard func tion UPS Windows NT task bar Start Settings Control panel UPS Advantage Also works if the PLC application program is not active Disadvantage Does not work in the event of serious excep tions from Windows NT BlueScreen 2 Message terminals via free wiring S7 I O...

Страница 31: ... HBI 06 03 Edition SITOP POWER DC UPS module 15 with SITOP POWER ACCU MODULE SIEMENS SITOP POWER Standard 24V 10A SINUMERIK 840Di PROFIBUS DP ET 200 I Os 2 Free wiring 1 Serial connection RS232 Power infeed 110 220VAC 60 50Hz 3 Free wiring Fig 1 2 Connection options UPS 1 General on the SINUMERIK 840Di ...

Страница 32: ... n n n n n Plus Standard 840Di 6FC5 258 jAX30 jAjj n n n n Plus Export 840DiE 6FC5 258 jAY30 jAjj n n n n j 6FC5 258 0 0AF0 current software version on the hard disk 6FC5 258 X YAF0 specific software version on the hard disk 6FC5 258 0 0AG2 software maintenance update service on CD ROM 6FC5 258 X YAG3 update when order placed specific software version on CD ROM specific software version e g 2 1 X ...

Страница 33: ...611UToolbox dpc31 version v1sl ufw SIMODRIVE POSMO SI CD CA drive firmware firmware file F SysPosmo version posmo ufw The SIMATIC S7 AddOn software contains sample programs and sample ap plications S SIMATIC S7 AddOn software PLC Toolbox Contents Basic PLC program NC variable selector PLC sample programs installation software F 840DiTools plcToolbox version Setup exe DriveOM and SlaveOM for SINUME...

Страница 34: ...Os ZIP file F 840DiTools support 840dibsp 840dibsp zip Note The components supplied as SIMATIC S7 add on software Basic PLC program DriveOM SlaveOM must be installed on the computer PG PC on which the S7 software e g SI MATIC Manager S7 is installed for creating the S7 project for the SINUMERIK 840Di Note Before installing the software please read the information txt rtf wri con tained in the dire...

Страница 35: ...er of the sections of the present Manual To start up the SINUMERIK 840Di the following software is needed which is part of a SINUMERIK 840Di S To start up the SINUMERIK 840Di NC 840Di start up SinuCom NC S To start up PLC MPI and PROFIBUS DP communication DriveOM SlaveOM Basic PLC program S To start up SIMODRIVE 611 universal drives SinuCom U To start up the SINUMERIK 840Di the following software ...

Страница 36: ...15 Page 15 455 The following documentation is required for start up S BH Operator Components Manual SINUMERIK Operator Panels SINUMERIK Industrial PCs Machine Control Panels Handheld Operator and Programming Units Depending on the NC and PLC functions used the relevant Descriptions of Functions S FB Description of Functions Basic Machine S FB Description of Functions Extended Functions S FB Descri...

Страница 37: ...oes not require an export approval This does not pertain to an export approval that may result from the intended purpose of application and this can additionally result The configuration of the control system is determined by the system software that is offered in two versions standard and export i e the duty to obtain an approval for the system software for the relevant information see delivery n...

Страница 38: ...0Di is intended as a first introduction to the SINUMERIK 840Di function ality The user interface comprises the following functions S Display of main screens S Display of alarms and messages S Management of parts programs S ASCII editor S NC PLC and PROFIBUS diagnoses S Log Book The menu bar comprises the following menu commands S File S Edit S Window S Display The functions that can be called usin...

Страница 39: ...d Override Switchover of the position display between MCS WCS Current block display Display of Parts programs and up to 3 blocks Program control Selection of Machine function SBL1 SBL2 after each block Program test G functions H functions Display of Current G functions Current H functions Program pointer Display of Program name of the selected parts pro gram Number of passes P Block number Program...

Страница 40: ...click with the left mouse button on the file Editor Editing files Start the editor with Menu command File Open Double click with the left mouse button on the file Menu command File Open Close Cut Exit Menu command Edit Copy Insert Load Unload Select Diagnostics PROFIBUS Bus Display of bus configuration Baud rate Cycle time Synchr portion TDX Display of status Configuration Bus status Slaves Displa...

Страница 41: ...ion Menu command Functionality NC PLC S NC Display of NC status NC Reset Clear NC memory S PLC Display of PLC status RUN P RUN STOP MRES S Latency display Current value Maximum value Number of violations Oscilloscope Log Book Display of SINUMERIK 840Di system mes sages J 1 General on the SINUMERIK 840Di ...

Страница 42: ...06 03 1 5 840Di start up 1 42 Siemens AG 2003 All rights reserved SINUMERIK 840Di Manual HBI 06 03 Edition 1 General on the SINUMERIK 840Di Notes ...

Страница 43: ...n 1 2GHz 256MB RAM and MCI board 24V power supply Order No 6FC5 220 0AA22 0AA0 S SINUMERIK 840Di PCU 70 with Pentium III 500MHz 128MB RAM and MCI board 24V power supply Order No 6FC5 220 0AA02 1AA0 The following hardware components are available as spare parts S SINUMERIK PCU 50 Pentium II 333MHz 128MB RAM and Windows NT 4 0 US 24V power supply Spare part Order No 6FC5 210 0DF01 0AA0 S SINUMERIK P...

Страница 44: ...A00 0AA1 S SINUMERIK 840Di MCI Board Extension External Variation Order number 6FC5 222 0AA01 0AA0 S SINUMERIK operator panel fronts OP 010 Order number 6FC5 203 0AF00 0AA0 OP 010C Order number 6FC5 203 0AF01 0AA0 OP 010S Order number 6FC5 203 0AF04 0AA0 OP 012 Order number 6FC5 203 0AF02 0AA0 OP 015 Order number 6FC5 203 0AF03 0AA0 S Floppy Disk Drive 3 5 incl 0 5m interconnecting cable Order num...

Страница 45: ...er number 6FC5 611 0CA01 0AA0 Interface modules S ADI4 Analog Drive Interface for 4 Axes Order number 6FC5 211 0BA01 0AA1 S SIMODRIVE 611 universal with option module MotionControl with PROFIBUS DP S SIMODRIVE 611 universal E with option module MotionControl with PROFIBUS DP S SIMODRIVE POSMO CD CA S SIMODRIVE POSMO SI S SIMODRIVE POSMO A For detailed ordering information on various drives see Ref...

Страница 46: ...us connector for PROFIBUS DP Bus connector for MPI locking screws Internal thread UNC 4 40 Fig 2 1 MCI board with bus connector Designation Order No MLFB MCI board as a spare part 6FC5 222 0AA00 1AA0 Caution Some parts of the MCI board are always alive due to the backup battery To avoid short circuits do not place the MCI board on electrically conductive mate rials Order No MCI board 2 Hardware De...

Страница 47: ...ocket 6ES7 972 0BA40 0XA0 35 cable outlet with PG connection socket 6ES7 972 0BB40 0XA0 90 cable outlet without PG connection socket 6ES7 972 0BA11 0XA0 90 cable outlet with PG connection socket 6ES7 972 0BB11 0XA0 Designation Order No MLFB Backup battery 6FC5 247 0AA18 0AA0 Notice For MPI connection on the MCI board you must use a connector with straight cable outlet 180 Order No bus connector Or...

Страница 48: ...BATT VI Minus pole of the battery 2 BATT VI Plus pole of the battery 1 VI Voltage Input Interface description PROFIBUS DP interface X101 S Connection 9 pin SUB D socket connector S Pin assignment Table 2 3 Pin assignment PROFIBUS DP interface X101 Pin Designation Type 1 Function 1 Not assigned 2 Not assigned 3 RS DP B RS 485 differential signals 4 RTS O Request to Send 5 GNDext VO External ground ...

Страница 49: ... MPI B RS 485 differential signals 4 RTS O Request to Send 5 GNDext VO External ground 2 6 P5ext VO Ext 5V power supply 2 7 Not assigned 8 XRS MPI B RS 485 differential signals 9 Not assigned 1 VO Voltage Output O Output B Bidirectional 2 Pins 5 and 6 are only allowed to be used to supply power to the bus terminators S Connection cable see Subsection 3 3 1 Page 3 131 Notice The MPI and PROFIBUS DP...

Страница 50: ...lectrically Caution Improper handling of backup batteries results in the hazard of inflammation burning or explosion The 3V lithium battery to back up the SRAMs and the clock module is monitored in stages Battery voltage Message 2 7 2 9V Alarm 2100 NCK battery warning threshold reached 2 4 2 6V Alarm 2101 NCK battery alarm Alarm 2102 NCK battery alarm The alarm 2101 NCK battery alarm is output if ...

Страница 51: ...he prescribed maintenance intervals as well as the in structions for repair and replacement Notice The module contains electrostatically sensitive devices Electrostatically discharge your own body before touching the module To do so touch an earthed conductive object e g blank cubicle parts socket protec tion contact immediately before starting work on the module In order to change the battery pro...

Страница 52: ...e interconnecting cable to the MCI board extension module interface X2 6 Remove the fastening screw of the module holding down device Fig 2 3 and remove the module holding down device Module holding down device Fastening screws for the module holding down device Plastic holder Guide rail Fig 2 3 Mounting of the module 7 Remove the fastening screw of the cover plate of the module 8 Remove the modul...

Страница 53: ...e 10 Remove the cable connection X3 battery connector from the module 11 Remove the used battery and dispose of it acc to the relevant standards 12 Install the new battery and plug the battery connector onto the connection contacts without applying force X3 Marking of the battery connector Fig 2 5 Battery connector 2 Hardware Descriptions ...

Страница 54: ...iate slot on the mother board and fasten it using the fastening screw on the cover plate 15 Mount the module holding down device 16 Close the cover plate of the housing of your PC and fasten it using the two housing screws 17 Connect your PC to mains again and start it 2 2 4 Module replacement For module replacement a module is installed and removed in an analogous way to changing the battery see ...

Страница 55: ...ard in PCU 50 5 55 C 20 60 C Tested to DIN IEC 68 2 1 DIN IEC 68 2 2 DIN EN 60068 2 2 DIN IEC 68 2 14 Limit values of rel humidity 5 80 5 95 Tested to DIN IEC 68 2 30 per min per hour Temperature change max 1K max 10K Condensation not admissible Quality assurance acc to ISO 9001 Vibrational load during operation Class 3M4 Frequency range 10 58Hz 58 200Hz Const excursion acceleration 0 075mm 1g Tes...

Страница 56: ... non isolated X4 MCI board extension X121 Cable distributor PCI bus mechanical locking screws Internal thread UNC 4 40 Fig 2 6 MCI board extension Designation Order No MLFB MCI board extension option 6FC5 222 0AA00 0AA0 Caution Never plug or remove the cable distributor at the X121 interface of the mod ule under voltage Before you plug or remove the cable connector switch off the PCU shut down Win...

Страница 57: ...cordingly qualified personnel Before starting any maintenance and service work disconnect the device from mains Use only spare parts approved by the manufacturer Strictly observe the prescribed maintenance intervals as well as the in structions for repair and replacement Notice The module contains electrostatically sensitive devices Electrostatically discharge your own body before touching the mod...

Страница 58: ...module holding down device Plastic holder Guide rail Fig 2 8 Fixing the MCI board 5 Remove the blanking plate of the free PCI slot 6 Insert the module carefully but firmly into the PCI slot and tighten the con nector plate of the module 7 Plug the connector of the connecting cable into the MCI board Make sure that the latches of the connectors have securely engaged on both modules MCI board Interf...

Страница 59: ...outputs isolated Two measuring inputs isolated Two handwheels non isolated Table 2 6 Pin assignment of connector X121 Pin Signal designation Signal type Pin Signal designation Signal type 1 M24EXT VI 20 P24EXT VI 2 M24EXT VI 21 P24EXT VI 3 OUTPUT 1 O 22 OUTPUT 3 O 4 OUTPUT 0 O 23 OUTPUT 2 O 5 INPUT 3 I 24 MEXT VI 6 INPUT 2 I 25 MEXT VI 7 INPUT 1 I 26 MEXT VI 8 INPUT 0 I 27 MEXT VI 9 MEPUS 0 I 28 M...

Страница 60: ...Sensor probe input signal 24V MEPUC 0 1 1st 2nd Sensor probe input reference 0V INPUT 0 3 1st to 4th Binary NC input GNDEXT External ground reference ground for binary NC inputs OUTPUT 0 3 1st to 4th Binary NC output M24EXT External 24V supply for binary NC outputs P24EXT External 24V supply for binary NC outputs Signal type O Output VO Voltage Output I Input VI Voltage Input Notice The maximum cu...

Страница 61: ...issipation Open circuit cooling Operation Storage transportation Temperature limit values 5 55 C 40 70 C Tested to DIN IEC 68 2 1 DIN IEC 68 2 2 DIN EN 60068 2 2 DIN IEC 68 2 14 Limit values of rel humidity 5 80 5 95 Tested to DIN IEC 68 2 30 per min per hour Temperature change max 1K max 10K Condensation not admissible Quality assurance acc to ISO 9001 Vibrational load during operation Class 3M4 ...

Страница 62: ...ial hand wheels or TTL handwheels 2 4 1 Module X4 MCI board extension X121 Cable distributor PCI bus mechanical locking screws Internal thread UNC 4 40 Switch S1 Fig 2 9 MCI board extension slot variation Designation Order No MLFB MCI board extension slot variation option 6FC5 222 0AA00 0AA1 Caution Never plug or remove the cable distributor at the X121 interface of the mod ule under voltage Befor...

Страница 63: ... operated on the module Differential handwheels Switch S1 closed as delivered state TTL handwheel Switch S1 open Differential or TTL handwheels can only be operated alternately Switch S1 Switch position open Fig 2 10 Switch S1 switch position open TTL handwheels Notice You select between differential and TTL handwheels on the module using switch S1 before installing the module Switch S1 2 Hardware...

Страница 64: ...be serviced by accordingly qualified personnel Before starting any maintenance and service work disconnect the device from mains Use only spare parts approved by the manufacturer Strictly observe the prescribed maintenance intervals as well as the in structions for repair and replacement Notice The module contains electrostatically sensitive devices Electrostatically discharge your own body before...

Страница 65: ...ng screws for the module holding down device Plastic holder Guide rail Fig 2 12 Fixing the MCI board 5 Remove the blanking plate of the free PCI slot 6 Insert the module carefully but firmly into the PCI slot and tighten the con nector plate of the module 7 Plug the connector of the connecting cable into the MCI board Make sure that the latches of the connectors have securely engaged on both modul...

Страница 66: ... 3 I 4th 24V input 6 DIN_CON 2 I 3rd 24V input 7 DIN_CON 1 I 2nd 24V input 8 DIN_CON 0 I 1st 24V input 9 MEPU0_S I 1st Sensor probe input signal 24V 10 MEPU0_C I 1st Sensor probe input reference 0V 11 MPG1_XA I input 2nd handwheel track A 12 P5 VO Optional 5V handwheel power supply 13 P5 VO Optional 5V handwheel power supply 14 MPG1_XB I input 2nd Input handwheel track B 15 MPG0_XA I input 1st Inp...

Страница 67: ...1st Input handwheel track A 35 M VO Hand wheel PS ground TTL handwh ground 36 M VO Hand wheel PS ground TTL handwh ground 37 MPG0_B I input 1st Input handwheel track B 1 VI VO Voltage Input Voltage Output VI Voltage Input VO Voltage Input I Input O Output Ext power supply 24V stabilized 24V 0V Optocoupler MCI board extension X121 Pin number 5 8 M 24 27 Power supply of the digital inputs Optocouple...

Страница 68: ...lectronics S In the case of differential handwheels the following signals are used MPGx_A MPGx_B MPGx_XA MPGx_XB S In the case of TTL handwheels the following signals are used MPGx_A MPGx_B M Notice The optional power supply of the handwheels P5 is electronically protected with 2A The maximum continuous load is 1A Per handwheel 500mA Please note the following points about sensor probes The sensor ...

Страница 69: ...mental conditions Heat dissipation Open circuit cooling Operation Storage transportation Temperature limit values 5 55 C 40 70 C Tested to DIN IEC 68 2 1 DIN IEC 68 2 2 DIN EN 60068 2 2 DIN IEC 68 2 14 Limit values of rel humidity 5 80 5 95 Tested to DIN IEC 68 2 30 per min per hour Temperature change Max 1K Max 10K Condensation not admissible Quality assurance acc to ISO 9001 Vibrational load dur...

Страница 70: ...ls To free the PCI slot of the PCU in this MCI board extension variation mechani cal fixture is implemented in a modified housing cover of the PCU 2 5 1 Module X121 Cable distributor X4 MCI board extension Switch S1 Fig 2 13 Module with a modified housing cover Designation Order No MLFB MCI board extension external variation option 6FC5 222 0AA01 0AA0 Caution Never plug or remove the cable distrib...

Страница 71: ...be operated on the module Differential handwheels Switch S1 closed as delivered state TTL handwheel Switch S1 open Differential or TTL handwheels can only be operated alternately Switch S1 Switch position open Fig 2 14 Switch S1 switch position open TTL handwheels Notice You select between differential and TTL handwheels on the module using switch S1 before installing the module Switch S1 2 Hardwa...

Страница 72: ...ury or substantial material damage When servicing these devices you should therefore observe all notices pro vided in this Section and attached to the product itself This device may only be serviced by accordingly qualified personnel Before starting any maintenance and service work disconnect the device from mains Use only spare parts approved by the manufacturer Strictly observe the prescribed ma...

Страница 73: ...CI board extension module Remove interconnecting cable to the internal MCI board extension mod ule interface X2 Remove the fastening screw of the module holding down device and remove the module holding down device Unscrew the fixing screw of the end plate of the internal MCI board ex tension module and remove the module observing ESD precautions Mount the module holding down device again 5 Insert...

Страница 74: ...h MCI board extension external variation 6 Make sure that the latches of the connectors have securely engaged on both modules MCI board Interface X2 MCI board extension Interface X4 7 Close the housing completely and fix it again with the two housing screws 8 Connect your PC to mains again and start it Fig 2 17 PCU 50 with MCI board extension external variation 2 Hardware Descriptions ...

Страница 75: ... extension external variation 2 5 4 Interface description The interfaces of the MCI board extension external variation are identical with those of the MCI board extension slot variation See Subsection 2 4 3 page 2 66 2 5 5 Technical data The technical data of the MCI board extension external variation are identical with those of the MCI board extension slot variation See Subsection 2 4 4 page 2 69...

Страница 76: ...own in Table 2 12 page 2 78 To supply the digital outputs an external 24V supply is possible at the cable distributor Cable 6FX2002 4AA21 0jjj Cable 6FX2002 4AA41 0jjj 90 Fig 2 19 Cable distributor Plug the appropriate single cable into the opened cable distributor and connect it to the associated connector X1 to X10 When doing so place the cable into the appropriate cable entry Make sure that the...

Страница 77: ...e PCU using the contact springs of the cable distributor on the front panel of the PCU open closed X1 X2 X4 X5 X6 X7 X8 X9 X10 X3 X11 Cable guides Terminal clamp Contact areas Connectors X1 X10 S3 S4 S5 S1 S2 Sub D socket connector S6 S1 to S6 Fig 2 20 Position of the interfaces of the cable distributor The DIP FIX switches in the interior of the cable distributor must be set as follows Table 2 11...

Страница 78: ... X9 6 Supply for 4 binary outputs X10 7 bottom 1 probe Notice When assembling the cable distributor make absolutely sure that the supplied washer is installed correctly and the coding pins are installed The cable distributor is fastened using the two supplied adapter plates at the X121 cable distributor interface of the MCI board extension module using screws Cable distributor Top view Cable distr...

Страница 79: ...jj RD OG BN BK Shield 4 binary outputs 2nd output 4th output 1st output 3rd output 5 24 6 25 7 26 8 27 INPUT 3 GNDEXT INPUT 2 GNDEXT INPUT 1 GNDEXT INPUT 0 GNDEXT X7 2 X7 1 X7 4 X7 3 X6 2 X6 1 X6 4 X6 3 4 21 0jjj RD OG BN BK GN YE VT BU Shield 4 binary inputs 4th input ground 3rd input ground 2nd input ground 1st input ground 28 29 MEPUS 1 MEPUC 1 X5 2 X5 1 X5 4 X5 3 3 41 0jjj RD OG BN BK Shield 2...

Страница 80: ... 2nd Measuring pulse signal MEPUC 0 1 1 2nd Measuring pulse Common reference ground INPUT 0 3 1 to 4th Binary NC input MEXT External ground reference ground for binary NC inputs OUTPUT 0 3 1 to 4th Binary NC output M24EXT External 24V supply for binary NC outputs P24EXT External 24V supply for binary NC outputs Notice The maximum current carrying capacity of the handwheel interface is 1A for both ...

Страница 81: ...CI board PCU 50 333MHz 128MB 6FC5 210 0DF01 0AA0 PCU 50 500MHz 128MB 6FC5 210 0DF05 0AA0 PCU 50 566MHz 128MB 6FC5 210 0DF20 0AA0 PCU 50 1 2GHz 256MB 6FC5 210 0DF22 0AA0 Together with the MCI board the SINUMERIK industrial PC PCU 50 serves as the basis for the SINUMERIK 840Di control system The key features of the PCU 50 are as follows S Processor versions Pentium II 333MHz 128MB SDRAM Pentium III ...

Страница 82: ...10 100 Mbaud Interfaces to the operator panel LVDS interface for SINUMERIK OP USB interface for SINUMERIK OP internal USB interfaces with Pentium II III 366 500MHz 1 x USB interface with Celeron 566MHz 1 2GHz 2 x USB interfaces S Expansion slots 1 PCI expansion slot length max 265mm occupied by the MCI board 1 x shared ISA PCI expansion slot length max 175mm occupied with option MCI board extensio...

Страница 83: ...h out MCI board PCU 70 500MHz 128MB 6FC5210 0DF04 0AA0 The PCU 70 is essentially a PCU 50 with two extra expansion slots PCI It has the following features S Processor min Pentium III 500MHz S User memory RAM max 512MB S Hard disk min 10 4GB swappable S Windows NT 4 0 operating system US version S Robust design continuous operation high noise immunity S Dimensions W x H x D 297x267x122mm S Easy to ...

Страница 84: ...ion slots length max 265mm 1 expansion slot occu pied by the MCI board 1 x shared ISA PCI expansion slot length max 175mm occupied with option MCI board extension and MCI board extension slot variant The following options are offered S External floppy disk drive S Memory extension up to max 512MB The complete documentation on the PCU 70 is to be found in References BH Operator Components Manual Co...

Страница 85: ...010S OP 012 OP 015 In the following section the OP 012 operator front is described as an example in detail 2 8 1 Operator panel front OP 012 Alpha key group Numerical key group Cursor key group Control key group USB front interface Mouse Area switchover ETC key Soft keys Machine area Recall Soft keys and direct keys Soft keys and direct keys Fig 2 24 View of OP 012 operator panel front Designation...

Страница 86: ...ey and direct key functions Direct keys connectable using PP031 MC or directly to the I Os S Shift key for switchover to the second key level not for switching over the letters since uppercase letters only S Integrated mouse S Status LEDs for power supply and overtemperature S Front USB interface S Degree of protection IP65 S Can be combined with the component PCU 50 S External floppy disk drive c...

Страница 87: ...loppy disk drive serves to archive data and programs on 3 5 diskettes It can be installed e g in the front panel of the control cubicle S Input voltage 24VDC S Power consumption max 5W S Degree of protection to DIN EN 60529 IP 54 front IEC 60529 IP 00 rear S Humidity classification acc to Term 3K5 condensation and DIN EN 60721 3 3 formation of ice excluded Lowest air temperature 0 C For a complete...

Страница 88: ...1 334 1SH01 The SITOP POWER Standard 24V 10A power supply mode provides the follow ing features S Input voltage nominal value 120 230VAC S Input voltage range 93 132V 187 264V S Mains buffering 20msecs S Mains frequency nominal value 50 60Hz S Mains frequency range 47 63Hz S Input current nominal value 3 5 1 7A S Inrush current 25 C 55A S Output voltage nominal value 24VDC S Output voltage toleran...

Страница 89: ...ion S Output current nominal value 10A S Electron short circuit protection with automatic restart S Galvanic isolation SELV acc to EN 60950 S Class of protection IEC 536 VDE 1006 T1 class I S Degree of protection VDE 0470 IEC 529 IP 20 S Radio interference level EN 55011 class A 2 Hardware Descriptions ...

Страница 90: ...PS Module 15 provides the following features S Compact design S Input voltage 24VDC S Nominal output power 240W S High efficiency approx 96 S Class of protection IEC 536 VDE 1006 T1 Class III S Degree of protection VDE 0470 IEC 529 IP 20 S Absolutely uninterruptible mains buffering S Immediate electronic connection of the accumulator once the load voltage or the voltage present between the connect...

Страница 91: ... recharged with a constant current of 0 7A U I characteristic with 27V end of charge voltage S Exhaustive discharge protection S ON OFF control circuit S Signaling S LED green LED yellow and floating changer for mains battery operation S LED red and floating changer for readiness for backup existing LED OFF alarm LED ON S RS 232 interface serial interface for the additional output of all signals t...

Страница 92: ...35 6MD11 The SITOP POWER LEAD ACID MODULE 24VDC 10A 3 2AH provides the following features S It has two maintenance free closed lead acid batteries from the same lot which are installed in a holder and connected in series S Complete with battery retainer and terminals S Low self discharge rate of approx 3 per month at 20 C S Short circuit protection battery fuse 15A 32V S Class of protection IEC 53...

Страница 93: ...2 48 6FC5 611 0CA01 0AA0 The I O module PP72 48 is a simple and low cost module without a separate housing for connecting digital input outputs as part of an automation system based on PROFIBUS DP The module has the following important features S PROFIBUS DP connection max 12 Mbaud specified by PROFIDrive profile drive technology version 3 Draft V1 4 2 01 September 00 S 72 digital inputs and 48 di...

Страница 94: ...puts 3 X333 Ribbon cable connector Interface description of the external power supply X1 S Screw terminal block MSTBVA 2 5 3 G 5 08 Phoenix S Pin assignment Table 2 16 Pin assignment Ext power supply X1 Pin Designation Type 1 Function 1 P24 VI External power supply of the module 24V 2 M24 VI Reference for external power supply 3 PE VI Protective conductor of the external power sup ply 1 VI Voltage...

Страница 95: ... connector 6ES7972 0BB40 0XA0 cable outlet 350 with PG socket connector 6ES7972 0BA11 0XA0 cable outlet 900 without PG socket connector 6ES7972 0BB11 0XA0 cable outlet 900 with PG socket connector S Cables 6XV1830 0EH10 by the meter non trailable 6XV1830 3BH10 by the meter trailable S Further technical data Maximum possible data transmission rate 12 Mbit sec The PROFIBUS address of the ADI4 can be...

Страница 96: ... Output 0 1 O 8 Input 0 5 I 33 Output 0 2 O 9 Input 0 6 I 34 Output 0 3 O 10 Input 0 7 I 35 Output 0 4 O 11 Input 1 0 I 36 Output 0 5 O 12 Input 1 1 I 37 Output 0 6 O 13 Input 1 2 I 38 Output 0 7 O 14 Input 1 3 I 39 Output 1 0 O 15 Input 1 4 I 40 Output 1 1 O 16 Input 1 5 I 41 Output 1 2 O 17 Input 1 6 I 42 Output 1 3 O 18 Input 1 7 I 43 Output 1 4 O 19 Input 2 0 I 44 Output 1 5 O 20 Input 2 1 I 4...

Страница 97: ...l inputs 1 If you are using the internal power supply P24OUT 2 If you are using an external power supply P24OUText S Internal power supply P24OUT The internal power supply for the digital inputs X111 X222 X333 Pin 2 is derived from the general power supply of module X1 pin 2 P24 Specifica tion See Subsection 2 12 3 page 2 101 Caution A max current of Iout 0 5A on X111 X222 X333 Pin 2 must not be e...

Страница 98: ...al max nominal Voltage at high level Vhi 15V 1 30V 24V Input current IIN at VUhi 2mA 15mA Voltage at low level Vlo 30V 5V 0V Signal delay time TPHL 2 0 5msec 3msec S Power supply of the digital inputs 1 typical output voltage VCC IOUT RON VCC Current operating voltage P24OUT at X111 X222 X333 Pin 2 Max output current IOUT 500mA per pin Max short circuit current 4A max 100msec VCC 24V Internal resi...

Страница 99: ... outputs S Connecting cable The required connecting cables ribbon cables must be provided by the user S Supply voltage To power the digital outputs an external 24VDC power supply source must be connected to DOCOMx X111 X222 X333 Pins 47 48 49 50 The reference ground of the external power supply source must be con nected to X111 X222 X333 Pin 1 GND For further data see Subsection 2 12 3 page 2 101 ...

Страница 100: ...z Lamp 11Hz S Power supply of the digital outputs 1 typical output voltage VCC IOUT RON VCC Current operating voltage Max output current IOUT 250mA for a simultaneity factor of 100 500mA for a simultaneity factor of 50 Max short circuit current 4A max 100msec VCC 24V Internal resistance RON 0 4W S 2 Moreover the PROFIBUS communication time and the application cycle time must be taken into account ...

Страница 101: ...333 pins 47 48 49 50 DOCOMx If the internal power supply from X111 X222 X333 Pin 2 P24OUT is not used to power the digital inputs it can be replaced by an external power supply source 24VDC as an option The reference ground of the power supply source must be connected with X111 X222 X333 Pin 1 GND X111 X222 X333 Pin 2 P24OUT then remains open The external power supply voltages must be generated as...

Страница 102: ...in recovery time 50secs max events per h 10 Voltage failure for min power supply voltage max duration 1 50msecs min recovery time 1s max events per h 10 Power consumption max approx 40W On the module side the power supplies must be protected against S Polarity reversal S Short circuit elec current limitation of the outputs S Overload fuse protection 2 12 4 Grounding The installation of the module ...

Страница 103: ...PP72 48 2 103 Siemens AG 2003 All rights reserved SINUMERIK 840Di Manual HBI 06 03 Edition 2 12 5 Dimension drawing 10 170 10 5 306 325 194 35 6 5 10 35 Fig 2 32 Dimension drawing I O Module PP72 48 2 Hardware Descriptions ...

Страница 104: ...er consumption At nominal load 11W Mechanical data Dimensions WxHxD mm 194x325x35 Weight approx 0 3kg without mounting plate approx 1 2kg with mounting plate Climatic environmental conditions Heat dissipation Open circuit cooling Operation Storage transportation Temperature limit values 0 50 C 20 55 C 40 70 C Limit values of rel humidity 5 95 not condensing 5 95 not condensing Condensation not adm...

Страница 105: ...DIL switch for setting the PROFIBUS address PROFIBUS connection External power supply 24VDC Analog setpoint outputs 10V DC axis 1 4 X6 2 Connection for digital input signals X6 1 Connection for digital output signals H1 H2 PW TMP EXCH RDY Connection for protective ground screw M6 Diagnostic LEDs Encoder connection for axis 3 Encoder connection for axis 2 Encoder connection for axis 4 1 8 OFF ON eq...

Страница 106: ...rvo interfaces each with one Input TTL SSI encoder for incremental and absolute measuring systems Output 10V analog S General and drive specific digital input output signals S On board status display by means of four diagnostic LEDs To power the module and the digital outputs an external power supply source 24VDC is required Notice Please observe the following framework conditions for operating th...

Страница 107: ...for axis 4 X5 2 Socket connector Digital outputs X6 1 Connector Digital inputs X6 2 Connector Module status H1 H2 LEDs Interface description of the external power supply X1 S Connector Three way connector MSTB 2 5 3 ST 5 08 Phoenix S Pin assignment Table 2 25 Pin assignment Ext power supply X1 Pin Designation Type 1 Function 1 P24EXT1 VI External power supply of the module 24V 2 M24EXT1 VI Referen...

Страница 108: ...A0 350 angle for cable outlet without PG connec tion socket 6ES7 972 0BB41 0XA0 350 angle for cable outlet with PG connection socket 6ES7 972 0BA12 0XA0 900 angle for cable outlet without PG connec tion socket 6ES7 972 0BB12 0XA0 900 angle for cable outlet with PG connection socket S Cables 6XV1 830 0EH10 by the meter non trailable 6XV1 830 3EH10 by the meter trailable S Further technical data Max...

Страница 109: ...ive enable axis 2 relay contact 1 16 RF3_1 K 2 Drive enable axis 3 relay contact 1 17 RF4_1 K 2 Drive enable axis 4 relay contact 1 18 33 34 BS1 VO Reference for setpoint axis 1 35 SW2 VO Setpoint axis 2 10V 36 BS3 VO Reference for setpoint axis 3 37 SW4 VO Setpoint axis 4 10V 38 46 47 RF1_2 K 2 Drive enable axis 1 relay contact 2 48 RF2_2 K 2 Drive enable axis 2 relay contact 2 49 RF3_2 K 2 Drive...

Страница 110: ... supply 10 Rx_S I Zero mark signal 11 XRx_S I Zero mark signal negated 12 XBx_S I Encoder signal track B negated 13 Bx_S I Encoder signal track B 14 XAx_S I Encoder signal track A negated DATAx_N I SSI data inverted 15 Ax_S I Encoder signal track A DATAx I SSI data 1 X Number of the encoder interface with X4 1 1 X4 2 2 X5 1 3 X5 2 4 2 VO Voltage Output I Signal Input O Signal Output S Preassembled...

Страница 111: ...y Max cable length incremental TTL 5V 1MHz 10m 500kHz 35m 24V 500kHz 150m absolute SSI 24V 1 5 Mbps 10m 187 5 Kbps 250m Note If cable lengths longer than 25m or 35m are required with incremental encod ers you can use encoder types with a supply voltage of 24VDC instead Caution To ensure error free transmission of encoder data do not exceed the max cable lengths shown in the table S Specification o...

Страница 112: ...rack A to B 90_ 30_ Power consumption max 300mA Absolute encoder SSI Transmission procedure Synchronous serial interface SSI with 5V Differential signal transmission RS 422 standard Output signal Data as a true and negated signal Input signal Shift cycles as a true and negated signal Resolution max 25 bits Max transmission frequency 1 Mbps Power consumption max 300mA Notice Only SSI Multiturn enco...

Страница 113: ...h Digital output signal or axis specific direction signal axis 1 3 7 DIR2 DO 6 Digital output signal or axis specific direction signal axis 2 3 8 DIR3 DO 7 Digital output signal or axis specific direction signal axis 3 3 9 DIR4 DO 8 Digital output signal or axis specific direction signal axis 4 3 10 RDY1 K 2 Ready signal Ready relay contact 1 11 RDY2 K 2 Ready signal Ready relay contact 2 12 MEXT2...

Страница 114: ...ts 1 typical output voltage VCC IOUT RON 0 65V VCC Current operating voltage P24EXT2 Max output current IOUT 500mA Max short circuit current 4A max 100msec VCC 24V Internal resistance RON 0 4W S 2 The PROFIBUS communication time and the application cycle time must also be taken into account S Incorrect polarization causes neither high level nor destruction of the outputs S General electrical prope...

Страница 115: ...nnecting cables must be provided by the user Power supply voltage X6 1 pins 1 and 12 P24EXT2 Wire conductor cross section 1 5mm2 AWG16 Digital outputs X6 1 pins 2 9 Wire conductor cross section 0 5 1 5mm2 AWG20 AWG16 NC Ready X6 2 pins 10 and 11 Wire conductor cross section 1 5 3 5mm2 AWG16 AWG12 Notice The lengths of the digital signal lines must not exceed 30m 2 Hardware Descriptions ...

Страница 116: ...2 4 BERO3 DI Input signal BERO3 5 BERO4 DI Input signal BERO4 6 MEPU1 DI Measuring signal 1st sensor probe 7 MEPU2 DI Measuring signal 2nd sensor probe 8 DRV1_RDY DI Ready signal Drive Ready axis 1 9 DRV2_RDY DI Ready signal Drive Ready axis 2 10 DRV3_RDY DI Ready signal Drive Ready axis 3 11 DRV4_RDY DI Ready signal Drive Ready axis 4 12 MOUT VI Reference of the power supply 1 VI Voltage Input DI...

Страница 117: ...max output current IOUT 1A Internal resistor RON 0 4W S The power supply P24OUT is short circuit proof S External power supply P24OUText If an external power supply Is used for the digital inputs its reference ground must be connected to X6 2 pin 12 GND X6 2 pin 1 P24OUT then remains open S Electrical specification of the digital inputs Table 2 35 Electrical specification of the digital inputs Dig...

Страница 118: ...G20 AWG16 S General electrical properties Galvanic isolation using optocouplers Active current limitation of the inputs Protection from negative input voltage The module status is displayed on 4 diagnostic LEDs on the front of the module Table 2 36 Diagnostic LEDs H1 H2 Designation Color Description H1 POWER green Supply voltage OVTEMP red Overtemperature display H2 EXCHANGE green Cyclic data exch...

Страница 119: ...erference antenna effect The vicinity of sources of interference contactors transformators etc must be avoided placing a shield plate between the cable and the source of interference if necessary Cable extension through terminals etc must be avoided To protect interference from external sources signal cables must be shielded Warning The ADI4 is designed for operation in an enclosed cabinet Operati...

Страница 120: ...al 0 5A 0 1A max 1A 8A 1A Power consumption typical 12W 3 02W max 30 2W 241 6W 30 2W 1 P24EXT1 Supply voltage of the ADI4 module P24EXT2 Supply voltage for the digital outputs P24OUText Optional supply voltage for the digital inputs Caution The external power supply voltages must be generated as functional extra low voltages with safe electrical isolation DIN EN 60204 1 Section 6 4 PELV On the mod...

Страница 121: ... MEXT1 or X6 1 pin 12 MEXT2 it is necessary to establish a link with a central grounding point of the system If a large area permanent metallic connection with the central ground point through the rear panel is not possible the module must be connected to the grounding rail by means of a line cross section 10mm2 Caution A protective conductor must be connected The housing front has an M6 screw bot...

Страница 122: ...L 5V or 24V 6FX2001 2 Connector MSTB 2 5 3 ST 5 08 Phoenix Cable Wire 1 0 to 2 5mm2 6FX8 002 2CE02 1jj0 v 35m Pulse encoder ROD320 in the 1FT5 motor 6FX8 002 2CC11 1jj0 1 Absolute value encoder with SSI 6FX2001 5 Connector 6ES7 972 0BA41 0XA0 6ES7 972 0BB41 0XA0 6ES7 972 0BA12 0XA0 6ES7 972 0BB12 0XA0 Cable 6XV1 830 0EH10 6XV1 830 3EH10 SIMODRIVE 611 analog 4 setpoints 6FX2 002 3AD01 1jj0 v35m SIN...

Страница 123: ... 2003 All rights reserved SINUMERIK 840Di Manual HBI 06 03 Edition 2 13 7 Dimension drawing 48 5 374 23 25 3 2 360 6 5 6 5 Ğ13 163 6 80 1 80 1 Max tightening torque for all screws 0 8Nm 1 Necessary clearance for adequate ventilation Fig 2 35 Dimension drawing ADI4 2 Hardware Descriptions ...

Страница 124: ...EC 529 Certifications CE CSA CE Power consumption Nominal load 12W Max 30 2W Mechanical data Dimensions WxHxD mm 154 4x325x48 5 Weight approx 1 5kg Climatic environmental conditions Heat dissipation Open circuit cooling Operation Storage transportation Temperature limit values 0 55 C 20 55 C 40 70 C Limit values of rel humidity 5 95 not condensing 5 95 not condensing per min per hour Condensation ...

Страница 125: ...Machine control panel Decentr I O system SIMATIC ET 200 MPI bus PROFIBUS DP with MotionControl SIMODRIVE 611 universal option module MotionControl with PROFIBUS DP Mini HHU PC PG e g PG740 Handheld Terminal HT 6 Distributor box or SIMODRIVE POSMO A SIMODRIVE POSMO SI SIMODRIVE POSMO CD CA ADI4 I O Module PP72 48 OP 012 OP 015 OP 010S OP 010C OP 010 Fig 3 1 SINUMERIK 840Di system overview PROFIBUS ...

Страница 126: ...tor panel front OP 012 Industrial PC PCU 50 PS 2 keyboard Diskette drive 3 5 CD ROM drive PS 2 mouse SIEMENS SITOP DC UPS Module 15 with SITOP POWER lead acid module PC programming device e g PG740 VGA monitor SIEMENS SITOP POWER Standard 24V 10A Optional Fig 3 2 System overview PCU components as a diagram 3 Design ...

Страница 127: ... NC Z Accessories and Equipment 3 2 1 MCI board and PROFIBUS DP MCI board SIMATIC DP ET200 SIMODRIVE 611 universal option module MotionControl with PROFIBUS DP X101 X2 X111 X2 X5 X2 I O Module PP72 48 X2 ADI4 X2 SIMODRIVE POSMO A SIMODRIVE POSMO SI PROFIBUS DP connection conditions References POS1 SIMODRIVE POSMO A User Manual POS3 SIMODRIVE POSMO SI CD CA User Manual SIMODRIVE POSMO CD CA Fig 3 3...

Страница 128: ...rd Machine control panel rear view X111 X20 Distributor box Handheld unit type B MPI ÄÄ PC PG e g PG740 X4 X5 X101 X2 X5 or X4 X5 Handheld Terminal HT 6 Fig 3 4 SINUMERIK 840Di MCI board and MPI bus components 3 2 3 MCI board extension MCI board extension 2x probes 2x handwheels 4x digital inputs 4x digital output X121 X4 Cable distributor Fig 3 5 SINUMERIK 840Di MCI board extension 3 Design ...

Страница 129: ... 50 left housing side PC programming device e g PG740 SIEMENS SITOP DC UPS module 10 with SITOP POWER lead acid module Ethernet MPI L2 DP VGA COM1 LPT1 PS 2 keyboard PS 2 mouse Power supply for 24 VDC COM2 PS2 keyboard QWERTY Ext CD ROM drive PS2 mouse MCI board extension option X101 X111 X121 MCI board SITOP POWER 10 SIEMENS VGA Monitor 1 1 Only mouse and keyboard can be connected through the USB...

Страница 130: ... COM2 USB 24V power supply X101 X111 X121 1 2 Expansion slots 1 Slot 1 Master slave Note The MCI board must only be run in slot 1 2 Slot 2 master slave MCI board extension option Slot 4 slave Slot 3 slave Connections Assignment as with PCU 50 PC card slot Fig 3 8 SINUMERIK 840Di PCU 70 right housing side Note The connections of the PCU 70 correspond to those of the PCU 50 3 Design ...

Страница 131: ...X2002 4AA21 1jj0 v25m for handwheel signals Cables 6FX2002 4AA21 1jj0 v25m X4 X121 1 Cables 6FX2002 4AA21 1jj0 v25m for handwheel signals HHU type B MPI Mini HHU 1 Machine control panel 1 MCI board X111 MPI X101 PROFIBUS DP X2 4 4 1 1 2 3 SIMATIC DP ET200 e g ET200M PROFIBUS DP drive e g SIMODRIVE 611 universal or SIMODRIVE POSMO 1 I O module PP72 48 Programming device e g PG740 1 Distributor for ...

Страница 132: ...A0 cable outlet 350 with socket connector for pro gramming device 6ES7972 0BB11 0XA0 cable outlet 900 with socket connector for pro gramming device Cable 6XV1830 0EH10 yard ware non trailable 6XV1830 3BH10 yard ware trailable 4 The cable is included in the scope of supply of the HHU or the mini HHU 5 For an overview of the standard PC interfaces see Fig 3 6 page 3 129 and Fig 3 7 page 3 129 Refere...

Страница 133: ...ew of the ADI4 please refer to Sub section 2 13 6 page 2 122 Note The length codes for preassembled cables 6FXj002 can be found in References BU SINUMERIK 840D 840Di 810D FM NC Ordering information Catalog NC 60 2000 2001 For supplementary conditions if any applicable to the individual accessories please refer to References Z SINUMERIK SIROTEC SIMODRIVE Accessories and Equipment for Special Purpos...

Страница 134: ...06 03 3 3 Connection overview 3 134 Siemens AG 2003 All rights reserved SINUMERIK 840Di Manual HBI 06 03 Edition 3 Design Notes ...

Страница 135: ...unity of the whole system control system power section machine observe the following EMC measures S Observe maximum clearance between signal and load cables S Use only the cables offered by SIEMENS as the signal lines from and to the NC or PLC S Make sure that the signal lines have a sufficient clearance from strong magnetic fields e g motors and transformers S Pulse loaded high current high volta...

Страница 136: ... surfaces table with antistatic surface conductive antistatic foam or antistatic packaging Notice An exception are modules with their own power supplies e g battery These may not be placed on conductive surfaces as this might result in short circuits and thus destroy the component on the module S Do not bring ESD sensitive modules into the vicinity of visual display units monitors or TV sets minim...

Страница 137: ... nodes whose data transfer rate is set manually DIP switches set to 1 5 Mbaud S Are there any loosen cable connections S Are all bus segments terminated correctly With the MPI bus operating at 1 5 Mbaud bus segments not terminated cor rectly will certainly result in disturbances of communication Notice In some components e g HHU and HT 6 the terminating resistor is installed fixed 5 2 Network rule...

Страница 138: ... all 4 Each MPI node must be connected first to the bus and then be enabled When disconnecting the node first disable the node Then you can discon nect the node from the bus 5 A maximum of 2 of the following components can be connected per bus segment Machine control panel MCP Handheld unit HHU Handheld Terminal 6 HT 6 6 Do not enable the bus terminating resistors at the distributor boxes of an HH...

Страница 139: ...e further components connected on the MPI bus S Machine control panel MCP or interface customer operator panel S Handheld terminal HT 6 S SIMATIC programming device PG 740 with standard assignment of the MPI addresses NC PLC MCP interface customer operator panel 3 6 Address at MPI bus SINUMERIK 840Di PCU with MCI board PG 740 0 2 840Di start up HMI Advanced 1 MPI bus X HT 6 14 Fig 5 2 Default addr...

Страница 140: ...at form in order to match the basic PLC or PLC user program to the requirements of the appropriate automation system with regard to the operation of an MCP and to load it then into the PLC Note A programming device is not required if the SIMATIC Manager STEP7 is installed on the SINUMERIK 840Di How to install additional software is described in Chapter 15 page 15 455 In order to start up an MCP th...

Страница 141: ...perator Components Manual Description of MCP interfaces electrical connection etc Z Catalog NC Z Components required for connection Cables connectors etc To start up the MCP the automation system must be electrically and mechani cally connected completely with respect to NCK PLC and MCP The drives must be secured against accidental moving 5 4 2 Parameterization of the MCP The MCP s electrical conn...

Страница 142: ...ion number V Number of lighting LEDs in the left LED group Number of lighting LEDs in the middle LED group Number of lighting LEDs in the right LED group Version number V4 1 5 is displayed in the example Fig 5 5 X X Z Z C C 1 100 10 10000 1000 Y Y Left key LED group Middle key LED group Right key LED group Enable software version display both keys simultaneously LED ON LED OFF Fig 5 5 MCP software...

Страница 143: ...e monitoring ON ON ON ON ON ON ON ON OFF OFF OFF OFF OFF OFF OFF OFF ON ON ON ON OFF OFF OFF OFF ON ON ON ON OFF OFF OFF OFF ON ON OFF OFF ON ON OFF OFF ON ON OFF OFF ON ON OFF OFF ON OFF ON OFF ON OFF ON OFF ON OFF ON OFF ON OFF ON OFF MPI address 15 14 13 12 11 10 9 8 7 6 default setting 5 4 3 2 1 0 ON Type interface to customer operator panel OFF Type MCP ON OFF ON OFF ON ON OFF OFF Default set...

Страница 144: ...MCP HHU FC 6 ASUB con axes spindles Read write var PI services FB 2 3 4 TM TM_Trans TM_Dir FC 7 8 22 ÎÎÎ ÎÎÎ Restart FC 2 FC 9 15 16 18 Error and operational messages FC 10 HHU Display control FC 13 User program FB 1 Start e g MCP parameters FC 19 25 26 MCP MCP_IFM MCP_IFT HPU_MCP Star delta FC 17 Fig 5 6 Structure of PLC program The MCP communication parameters are designated in function block FB...

Страница 145: ...he send status data MCP HT 6 2 MCP2StatRec POINTER Addr of the MCP1 receive status data MCP HT 6 2 MCP2BusAdr INT MPI address MCP2Timeout S5TIME S5T 700MS should be kept MCP2Cycl S5TIME S5T 200MS should be kept The parameters listed below serve to synchronize two operator components MCP1Stop BOOL FALSE transfer of the relevant operator component MCP2Stop BOOL FALSE FALSE start TRUE stop MCP1NotSen...

Страница 146: ...ic PLC program communication with the PLC does not yet take place and all LEDs on the MCP front panel flash 2 Checking the software version Simultaneously pressing the keys Feed stop and Feed enable displays the software version using the LEDs located on the front side 3 Parameterizing function block FB 1 editing the FB 1 parameters in OB 100 using the SIMATIC Manager STEP7 The MCP will be paramet...

Страница 147: ... HBI 06 03 Edition 5 Load the modified blocks into the PLC and then restart the PLC 6 After communication with the PLC has been established the LEDs on the MCP front stop flashing The LED of the basic settings for S Mode Referencing S Spindle Stop S Feed hold light up continuously 5 MPI Communication ...

Страница 148: ...differences from an MCP start up are explained below 5 5 1 Parameterization of the MPI interface The MPI module s electrical connections and connections for MPI communica tion are made using the interfaces on the rear side of the module X231 LEDs1 4 X20 X10 X221 X211 H3 H1 H4 H2 S3 Power supply interface S3 DIP switch 3 2 1 SHIELD M24 P24 I O interfaces MPI interface Connection for equipotential b...

Страница 149: ... using switch S3 on the rear side of the MPI module S Data transfer rate S Transmission time and receive monitoring S MPI address S Operator component type Table 5 2 Meaning of S3 switch 1 2 3 4 5 6 7 8 Meaning ON OFF Data transfer rate 1 5 Mbaud Data transfer rate 187 5 kbaud ON OFF OFF OFF ON OFF 200msecs cycle transmit pattern 2400msecs receive monitoring 100msecs cycle transmit pattern 1200mse...

Страница 150: ...ual HBI 06 03 Edition Table 5 2 Meaning of S3 switch 1 Meaning 8 7 6 5 4 3 2 ON OFF ON OFF ON ON OFF ON Default setting ON OFF ON OFF ON ON OFF ON Default setting for 840Di Data transfer rate 1 5 Mbaud Cyclical transmit pattern 100msecs MPI address 6 Type MPI module 5 MPI Communication ...

Страница 151: ...HHU Distributor box The distributor box incorporates the MPI module interface the HHU interface as well as a terminal block for connecting EMERGENCY STOP enable keys handwheel and 24V power supply HHU connection cable The HHU is connected to the distributor box using the HHU cable MPI bus cable Under no circumstances may the MPI connector for connecting the HHU con tain an integrated bus terminati...

Страница 152: ...ed on the SINUMERIK 840Di installation CD Start se tup exe Products Basic PLC Program HHU related blocks of the basic PLC program are FB1 HHU parameter and FC13 display control SIMATIC Manager STEP7 SIMATIC Manager S7 is used for adapting the basic PLC and user programs e g call of FC 13 The following manuals are required to start up the HHU BH Operator Components Manual Description of HHU interfa...

Страница 153: ...the HHU can not be connected at the bus end it is generally recommended to use a PROFI BUS repeater for connecting the HHUs ON OFF OFF OFF ON ON ON SINUMERIK 840Di HHU Distributor box MPI Closed terminating resistor Open terminating resistor ON MCP Repeater RS 485 HHU Fig 5 9 Connecting using a repeater Note If a HHU is connected to the bus ends no repeater is required For a detailed description o...

Страница 154: ...ameters disconnect the HHU from mains After loos ening the fastening screws you can remove the HHU front plate 1 2 3 4 1 2 3 4 ON OFF S1 S2 ON OFF S1 S2 Reserved 1 5 Mbaud Default MPI address 15D IDLE time 100msecs Fig 5 10 Settings required on the HHU for SINUMERIK 840Di The data transfer default setting must be changed from 187 5 kbaud to 1 5 Mbaud To do so set switch 3 of DIP switch S1 to ON No...

Страница 155: ... 0 After the HHU has been electrically connected the message Waiting for PLC the software version and the MPI address are displayed on the screen until no communication between HHU and PLC takes place SIEMENS Waiting for PLC V04 01 01 F Software Version Version 4 1 1 MPI Address FH 15D Fig 5 11 Software version and MPI address 5 6 4 MPI parameterization of the PLC The PLC program has a modular str...

Страница 156: ...FC 9 15 16 18 Error and operational messages FC 10 HHU Display control FC 13 FC 19 25 26 MCP MCP_IFM MCP_IFT HPU_MCP Star delta FC 17 Fig 5 12 Structure of PLC program The MPI parameters are set on the PLC side in function block FB 1 Since the data transfer rate of the MPI bus with SINUMERIK 840Di is 1 5 Mbaud the pa rameters have to be set as follows HHU INT 2 the HHU is operated on an MPI bus HH...

Страница 157: ...he advantage that no further programming is required with respect to this communication Communication using global data is arranged by so called GD circles A GD circle is unambiguously marked by its GD circle number The GD circle parameters of a node here HHU must be set for SEND and RECEIVE separately S GD circle number S GBZ number S Object number The GD circle parameters of the HHU are assigned...

Страница 158: ... circle parameter has been reached the set values will be automatically saved in the HHU flash EPROM Activate display press simultaneously Current value 1 Current value 1 Display next parameter Fig 5 13 Displaying and modifying GD circle parameters 5 6 6 GD circle parameterization of the PLC The GD circle parameters on the side of the PLC are set side in function block FB 1 For editing FB1 it has ...

Страница 159: ...late attached to the HHU s rear 2 Open the HHU to check and set as necessary the DIP switches S1 and S2 in the HHU Data transfer rate 1 5 Mbaud IDLE time 100msecs MPI address 15D 3 The terminating resistor in the MPI bus connector on the distributor box for connecting the HHU must be disabled The HHU has an integrated MPI bus terminator 4 Make the electrical connections on the distribution box and...

Страница 160: ...S BHGRecGDNo 2 acc to the GD circle parameters BHGRecGBZNo 2 of the HHU for sending BHGRecObjNo 1 BHGSendGDNo 2 acc to the GD circle parameters HHUSendGBZNo 1 of the HHU for receiving BHGSendObjNo 1 Notice BIT7 in the 1st output byte parameter HHUOut in the example A 8 7 must be set to fixed value 1 7 Load the modified function block into the PLC and then restart the PLC 8 After communication with...

Страница 161: ...he HT 6 Distributor box The distributor box incorporates the MPI module interface the HT 6 interface as well as a terminal block for connecting EMERGENCY STOP enable keys handwheel and 24V power supply For the distributor box see Section 3 3 page 3 131 HT 6 connection cable The HT 6 is connected to the distributor box using the HT 6 cable For the HT 6 connection cable see Section 3 3 page 3 131 MP...

Страница 162: ...following software components are required to start up the HT 6 Basic PLC program The basic PLC program is included on the SINUMERIK 840Di installation CD HT 6 relevant modules of the basic PLC program are FB 1 HT 6 PLC commu nication and FC 26 NC PLC communication For the archiving location of the basic PLC program please refer to Section 1 2 page 1 32 For the use of the basic PLC program please ...

Страница 163: ...s with respect to the MPI cables and the EMERGENCY STOP jumper For a detailed description please refer to the relevant references For a detailed description of the electrical and mechanical design of the distribu tor box as well as for the electrical and data interfaces of the HT 6 please refer to References BH Operator Components Manual Section Handheld Terminal HT 6 The HT 6 detects the data tra...

Страница 164: ...am in the OBs 1 40 and 100 as shown in Fig 5 16 ÎÎÎÎÎ ÎÎÎÎÎ Process alarm GP_PRAL User program OB 40 OB 100 G group distributor FC 3 ÎÎÎ Restart User program FB 1 Start e g HHU parameters ÎÎÎ ÎÎÎ Cyclic ÎÎÎÎ processing GP OB 1 NCK Mode grp Channel Axis Spindle TOOLMAN User program OB 1 FC 14 MCP HHU FC 6 ASUB con axes spindles Read write var PI services FB 2 3 4 TM TM_Trans TM_Dir FC 7 8 22 FC 2 F...

Страница 165: ...ers are only needed if in addition to the 1st MCP HT 6 a HT 6 is additionally used MCP2In POINTER address of the MCP HT 6 2 input signals MCP2Out POINTER address of the MCP HT 6 2 output signals MCP2StatSend POINTER Addr of the send status data MCP HT 6 2 MCP2StatRec POINTER Addr of the MCP1 receive status data MCP HT 6 2 MCP2BusAdr INT MPI address MCP2Timeout S5TIME S5T 700MS should be kept MCP2C...

Страница 166: ...l connections on the distribution box and HT 6 The terminating resistor in the MPI bus connector on the distributor box for connecting the HHU must be disabled The HT 6 has an integrated MPI bus terminating resistor Once power is present on the HT 6 the start screen for communication with the HT 6 system software is displayed for some seconds Use key 6 be neath the key labeling PARAM to get to the...

Страница 167: ...c part of the PLC program see Fig 5 16 4 Load the modified blocks into the PLC and then restart the PLC 5 After communication with the PLC has been established the message Waiting for PLC will disappear from the HT 6 main screen The MMC user interface is displayed 5 7 5 Connecting and disconnecting an HT 6 during running operation To be able to connect an HT 6 to or disconnect from an automation s...

Страница 168: ... e g LCD monochrome LCD color is entered in this machine data for MMC 100 MD 9003 FIRST_LANGUAGE foreground language for MMC 100 S HMI Advanced HMI Advanced is always supplied with several languages default language is English MD 9004 DISPLAY_RESOLUTION The display resolution for position values on the screen is entered in this ma chine data The maximum number of digits on the screen is 10 before ...

Страница 169: ...een two languages The switchover takes effect immediately This key can only be used to switch between two predefined languages Different languages are selected in the Start up MMC Languages display pro vided that languages are loaded This screen displays a list from which the user can choose the desired lan guage s The user selects the desired language and acknowledges his her selection with OK Th...

Страница 170: ...le MMC INI must be altered as shown below Excerpt from mmc ini LANGUAGE Language GR LanguageFont Europe Language2 UK LanguageFont2 Europe Notice When editing file MMC INI take care to ensure that you change only the high lighted bold print texts Make sure that your entries are spelled correctly Two languages can be configured from the languages listed below GR German standard SP Spanish FR French ...

Страница 171: ...ese taiwan espanol francais english italiano AddOnProd c cstar20 cstar20 exe To be able to operate the control with pictographic languages the appropriate AddOn product must be installed for each selectable language Languages based on different AddOn products cannot be configured at the same time Notice When you change the LanguageList FontList LBList and AddOnProd lines make sure that you only ma...

Страница 172: ...06 03 5 8 External operator panel PCU with HMI Advanced 5 172 Siemens AG 2003 All rights reserved SINUMERIK 840Di Manual HBI 06 03 Edition 5 MPI Communication Notes ...

Страница 173: ...load capacity of the central power supply is taken into account With regard to the SIMODRIVE 611 universal inverter systems some additional points must be observed For more detailed information please refer to the fol lowing references References FBU Description of Functions SIMODRIVE 611 universal All components are dimensioned for defined mechanical climatic and electrical environmental conditio...

Страница 174: ... page 6 175 4 Create the PLC default program basic PLC program PLC user program and configuration supplied for the PLC or your own SIMATIC S7 project and load it into the PLC Chapter 7 page 7 203 5 Prepare the SIMODRIVE 611 universal drives for communication on PROFI BUS DP Chapter 9 page 9 263 6 Carry out ramp up of the NC channels axes and spindles etc Section 10 5 page 10 308 7 Setting up the a...

Страница 175: ...MERIK applications The software applications included in the delivery are ready for installation and are located on the hard disk under D Setup Apps Application1 Application n C FAT16 Name DOS Contents DOS 6 2 Tools D FAT16 Name Install Contents Images Setups Updates E NTFS Name WinNT Contents WinNT 4 0 F NTFS Name 840Di system Contents empty Primary partition Primary partition Primary partition E...

Страница 176: ... NEXT REBOOT None of the listed applications are installed and you go to the NT Desktop The installation menu is displayed again the next time the PCU is booted S CANCEL installing None of the listed applications are installed Notice It is not possible to repeat the installation process at a later time Notice The installation menu is not displayed the next time the PCU is booted It is not possible...

Страница 177: ...rt up is to be found at C The disk image with the SINUMERIK 840Di system software and Win dows NT are to be found at D Images The drives E and F are empty C FAT16 Name DOS Contents Ramp up tools D FAT16 Name TMP Contents Images Install Updates E NTFS Name WinNT Contents empty F NTFS Name 840Di system Contents empty Primary partition Primary partition Primary partition Extended partition with logic...

Страница 178: ...enu Please select 3 DOS Shell 5 SINUMERIK System Check 6 Reboot System warm restart 7 Backup Restore 8 Start PC Link 9 Exit Your Choice 3 5 6 7 8 9 Service menu version The menu item 5 SINUMERIK System Check will grant you access to a follow ing menu to choose the error checks Logic check of the directory file system Physical check of the hard disk Using the menu item 7 Backup Restore to S Backup ...

Страница 179: ...only the supplied PLC series machine start up must be loaded into the PLC for basic start up To do so proceed as follows 1 Start the SinuCom NC start up tool from the Windows NT taskbar Start Programs SinuCom NC SinuCom NC 2 Use SinuCom NC to load the supplied series machine start up file PLC_BSP ARC into the PLC Menu command File SeriesStart up archive ReadIn Dialog Read in archive Optional field...

Страница 180: ...operating area Start up MMC Operator panel Bus node S SIMATIC Manager STEP7 The active nodes at the MPI bus are displayed using the SIMATIC Manager STEP7 by menu command Target system Display accessible nodes The MPI default addresses of the individual components are PLC 2 NC 3 Machine control panel 6 If the machine control panel is displayed as an MPI node with address 6 it has been detected corr...

Страница 181: ... 6 5 page 6 193 6 3 2 SRAM handling The user data of the NC machine data setting data user variables parts pro grams cycles etc as well as the retentive data of the PLC are battery backed in the static memory area SRAM of the MCI board With each NCK power ON RESET warm restart or shutting down Windows NT correctly the contents of the SRAM is saved to the hard disk of the PCU as an SRAM image In th...

Страница 182: ...I board Known The serial no of the MCI board complies with the serial number last stored on the PCU Unknown The serial no of the MCI board does not comply with the serial number last stored on the PCU Unknown Provided that the SRAM of the MCI board is OK the system does not request SW update which SRAM MCI or IMAGE is to be used when it runs up for the first time after performing a SW update The S...

Страница 183: ...re changing the backup battery an inversion of the SRAM memory cells during the battery change cannot reli ably be detected The SINUMERIK 840Di must then be restarted 6 3 4 Ramp up after replacement of the MCI board After the MCI board has been changed the further procedure depends on the past history The following cases are distinguished 1 An up to date SRAM image exists 2 An up to date SRAM imag...

Страница 184: ...operation of the SINUMERIK 840Di Windows NT has possibly been shut down correctly but no SRAM image could be created After the MCI board has been changed it will be identified as unknown using the serial number Since no up to date SRAM image exists the SRAM backup is written back into the SRAM of the MCI board The SINUMERIK 840Di is thus ready again immediately The user data or the operating state...

Страница 185: ...the 840Di software If an MCI board used in a new PCU once is further used or if the 840Di software is reinstalled on a SINUMERIK 840Di that is already started up then the bat tery backed user data in the SRAM of the MCI board are kept To achieve this it is essential that the current NC and PLC software version of the SINUMERIK 840Di complies with the software version with which the bat tery backed...

Страница 186: ... harddisk If you want to use the user data from MCI card press Yes If you want to use the user data from the hard disk press No Yes No 6 3 7 Ramp up after importing a backup copy If a backup copy ghost image of a SINUMERIK 840Di already started up is loaded into the PCU again the battery backed user data in the SRAM of the MCI board will be used further The SINUMERIK 840Di is thus ready again imme...

Страница 187: ...tely See Subsection 10 10 2 page 10 399 When the shutdown signal is present the NC and PLC are terminated first and Win dows NT then shut down correctly If ramp up takes place while the shutdown signal is present Windows NT is shutdown again straight away As of 2nd ramp up with shutdown signal present produces the following system behavior Windows NT is not shut down correctly again NC and PLC are...

Страница 188: ...r network operation please contact the appropriate network administration In order to set the computer name of the PCU open the control panel using the Windows NT task bar Start Settings Control Panel In the control panel open Network and type the name of the new computer Dialog Network Register Identification Computer Name COMPUTER NAME OK In order to establish a network connection using the TCP ...

Страница 189: ...ted immediately Note This function can be also be run from the service menu Chapter 15 page 15 455 6 4 3 Setting the SINUMERIK HMI environment The SINUMERIK desktop provides the functions S Original SINUMERIK HMI Environ S Current SINUMERIK HMI Environ as script files for setting the required HMI system environment Before starting SINUMERIK HMI the HMI spec system environment is put in the as deli...

Страница 190: ...The following settings are required to operate a mouse S Alter file boot ini Open the following file with a Windows NT standard editor e g Start Programs Accessories Notepad C boot ini Remove section operating systems option NoSerialMice Save and close the changed file S Adjust the system setting to serial mouse Select the serial mouse used in the Mouse Properties dialog box from the Control Panel...

Страница 191: ...y dmp Version information about S System components of the service menu S Windows NT are contained in the file S C BaseVers txt Versions information about S HMI system software packages S Windows NT are obtained using the Windows program S HMI Explorer It is also in some cases possible to run and uninstall HMI applications 6 4 7 OEM configuration OEM configuration provides the possibility of runni...

Страница 192: ...re started in the order in which they have been placed in the subdirectory chronologically In addition to executable programs you can also place data files in the subdi rectories They will be opened in the application with which their file type is as sociated S File type txt Notepad S File type htm Internet Explorer 6 4 8 Replacing the SINUMERIK background image During ramp up of the PCU a SINUMER...

Страница 193: ...itional tools and enabling options S DOS Shell The DOS command interpreter is started S Start Windows NT WinNT is started S SINUMERIK System Check Consistency test and if necessary recovery SCANDISK of the file system S Backup Restore Hard disk backup restore with Norton Ghostt S Start PC Link Installation of PC link software Interlink Interserve using CD ROM S Reboot Restart of the system S 840Di...

Страница 194: ...ice 1 2 3 4 5 7 8 9 P Under menu item Two SINUMERIK Tools and Options you can execute the following actions S Authorizing SIMATIC STEP7 Authorizing SIMATIC STEP7 The following requirement must be fulfilled S The SIMATIC STEP7 software has already been installed on the PCU Select SINUMERIK Tools and Options with key 2 Following menu PLEASE SELECT 1 Activate Step7 for PCU 9 Return to Main Menu Your ...

Страница 195: ...seVers txt 6 5 4 Start Windows NT Service Mode PLEASE SELECT 1 Install Update SINUMERIK System 2 SINUMERIK Tools and Options 3 DOS Shell 4 Start Windows NT Service Mode 5 SINUMERIK System Check 7 Backup Restore 8 Start PC Link 9 Reboot warm restart P 840Di Services Your Choice 1 2 3 4 5 7 8 9 P Under menu item 4 Start Windows NT Service Mode you can perform the following actions S Standard Windows...

Страница 196: ...is started Note S The SINUMERIK desktop can also be started if you press key 3 while SI NUMERIK background image is being displayed during ramp up of the PCU time range 3 sec S The HMI environment can also be set on the SINUMERIK desktop by start ing the functions Original SINUMERIK HMI Environ Current SINUMERIK HMI Environ 6 5 5 SINUMERIK System Check PLEASE SELECT 1 Install Update SINUMERIK Syst...

Страница 197: ...up Restore 8 Start PC Link 9 Reboot warm restart P 840Di Services Your Choice 1 2 3 4 5 7 8 9 P You will find a detailed description of the backup restore functions data backup in Section 15 3 page15 471 6 5 7 840Di services PLEASE SELECT 1 Install Update SINUMERIK System 2 SINUMERIK Tools and Options 3 DOS Shell 4 Start Windows NT Service Mode 5 SINUMERIK System Check 7 Backup Restore 8 Start PC ...

Страница 198: ...turn to Main Menu Your Choice 1 2 3 4 9 After you have selected the function the system is rebooted While the PCU is started up the following message box is displayed indicating execution of an 840Di Service SINUMERIK 840Di NCK PLC Alarm System order executed The message box must be acknowledged with OK The selected function is executed after ramp up of the corresponding SINUM ERIK 840Di component...

Страница 199: ...mputer 3 I want to be able to give others access to my files 4 The computer name of the external computer is known 5 Access to the drive folder of the external computer you want to access must be shared by the PCU and the sharing name must be known In order to check whether the network protocol NetBEUI is installed open con trol panel using the Windows 9x task bar Start Settings Control Panel on t...

Страница 200: ... of a drive directory If the tab Access control is not displayed the computer is or was part of a Domain network and the system administration has switched off the tab display for safety reasons In order to be able to make the settings required for the point to point connec tion the tab must be unhidden This can be done using the program pole dit exe Poledit exe is to be found on the Win9x CD unde...

Страница 201: ...then cyclically display a reminder alarm that a license has not yet been registered for the option Option selection up to entering the license key is performed as follows 1 Select the required options order and obtain the corresponding license packages and or single user licences Order catalog NC 60 2002 2 Activate the options SinuCom NC at the SINUMERIK 840Di in question 3 Obtain the license key ...

Страница 202: ... with button Get a new License Key Fig 6 4 The follow further instructions in the following dia log boxes SinuCom NC Online SinuCom_NC_Project MD block1 Current License Key is not sufficient Get a new License Key Functions Options AX1 X1 AX4 A1 AX3 Z1 AX2 Y1 Channel Mode gro Axis configuration PROFIBUS assign Options MD block1 Option Show all Show not licensed only MD block1 System software 6FC525...

Страница 203: ... SIMATIC S7 etc S DP master class 2 DPMC2 These are devices for configuring starting up operating and watching during running bus operation Examples Programming devices operator control and monitoring de vices 2 Slaves passive nodes These devices may only receive messages acknowledge them and transfer message to the master on its request Examples Drives I O modules Communication between SINUMERIK ...

Страница 204: ...e 611U is operated as a double axis module Protocol frame header Fig 7 1 Message frame structure for cyclic data transmission The useful data for cyclic operation are termed parameter process data objects PPO The are subdivided into two areas within the message frame S Parameter area PIV parameter identifier value This part of the message frame is for reading and or writing parameters and for read...

Страница 205: ...rred from DP master to the DP slaves drives At the time TO the speed setpoints are accepted by all servo drive controls as the new default Dx Dx Dx GC RGT DPV1 Dx Dx Dx Speed controller cycle Drives DP slave 1 to 3 NC Master or position controller TI TM TO TMAPC TDP RGT GC TDX R PROFIBUS DP communication 1 2 TDX R R R R R R R R R R R R R R R R DPV1 T O TI Fig 7 2 Example Optimized DP cycle with 3 ...

Страница 206: ...e stations TOKEN Token passing is either performed from the station to itself or to other masters RES The reserve is used as an active pause for the station to send the token to itself until the equidistant cycle is terminated 1 The actual values for the current DP cycle position controller cycle are transferred from the DP slave drives to the NC position controller 2 The setpoints calculated by t...

Страница 207: ...nsfer the S7 project into the PLC of the SINUMERIK 840Di no additional MPI cable is therefore needed For creating the S7 project for the SINUMERIK 840Di a SIMATIC Manager STEP7 is required S SIMATIC Manager STEP7 Version 5 1 and higher Service Pack 3 Notice The SIMATIC Manager STEP7 is not included in the scope of supply of the SINUMERIK 840Di The 840Di Rack is a SIMATIC 300 station preconfigured ...

Страница 208: ...nager for SINUMERIK 840Di allows dialog based configuration of the following drives in conjunction with a SINUMERIK 840Di SIMODRIVE 611 universal or universal E SIMODRIVE POSMO CD CA SIMODRIVE POSMO SI SIMODRIVE POSMO A ADI4 Analog Drive Interface for Four Axes Notice If the SlaveOM is used in conjunction with other PLC CPUs a consistency er ror is signaled when compiling the configuration and no ...

Страница 209: ...CII format STEP7 requires one DMF file each for each DP slave so that the DP slave can be selected from the hardware catalog If a DP slave is not displayed in the hardware catalog its specific DMF file must be installed in HW Config using the menu command Tools Install new DMF file After the DMF file has been installed the DP slave is available in the hardware catalog of HW Config for being insert...

Страница 210: ...rminating resistor must be connected to a powered device 3 No tap lines may be routed along PROFIBUS DP 4 Each PROFIBUS node must first be connected and then enabled When disconnecting a node first disable the connection then remove the connector 5 The cable length of a PROFIBUS DP bus segment may be max 100m Field device SIMATIC ET200 Drive SIMODRIVE 611 universal Terminating resistor in the conn...

Страница 211: ... within the framework of this S7 project S Hardware configuration S PROFIBUS addresses DP master and DP slaves S Equidistant PROFIBUS DP cycle S Equidistant time A new S7 project is created in the SIMATIC Manager using the menu command File New Project Type a name you want to assign the project and click OK to confirm the dialog The Project window will appear where the structure of the S7 project ...

Страница 212: ...s used in the automation system 2 Select the appropriate module from the hardware catalog and compare the order number MLFB with the MLFB number of the module displayed in the hardware catalog Both MLFB numbers must be the same 7 3 3 840Di Rack 840Di Rack contains the already partially preset modules S SINUMERIK 840Di PLC standard designation PLC315 2DP M S 2AF03 S PROFIBUS DP Master standard desi...

Страница 213: ...e depends on 1 The cyclic communication load by the drives and field devices on PROFI BUS DP 2 The capacity utilization of the cyclic position controller level of the NC by the number of position controlled machine axes and the active functions Dialog Properties PROFIBUS Interface DP Master Tab Parameters Address 2 Subnetwork Button New Dialog Properties New PROFIBUS Subnetwork Tab General S7 subn...

Страница 214: ...etworked To do so open the Properties dialog box by double clicking on the PLC in 840Di Rack The following settings are made in the dialog box S Interface type S Address S Data transfer rate Dialog Properties of PLC315 2DP M S 2AF03 Tab General Group Interface Button Properties Dialog Properties MPI Interface PLC315 2DP M S 2AF03 Tab Parameters Address 2 see Note Subnetwork MPI Button Properties D...

Страница 215: ...uble clicking on the NC in 840Di Rack Dialog Properties S7 FM NCU Tab General Group Backplane connection MPI address 3 see Note Tab Addresses Group Inputs Start 256 Length 2 Group Outputs Start 256 Length 2 OK Notice The MPI address of NC and PLC are tightly connected one to another MPI addr of NC MPI addr of PLC 1 Notice The input output address of the NC must be set to 256 In the case of values ...

Страница 216: ... SIMATIC S7 I Os you require into the con figuration before parameterization of the DP drives e g DP slave 611U or ADI4 Note To check whether a module selected from the hardware catalog complies with the module in the automation system the following procedure is recom mended 1 Put down the MLFB numbers of all modules used in the automation system 2 Select the appropriate module from the hardware c...

Страница 217: ...is to be found at S Profile Standard PROFIBUS DP further field units IO PP input output module Click with the left mouse button on the DP slave PP72 48 in the hardware cata log see Note and drag it onto the DP master system in the station window holding down the left mouse button Note As DP slave PP72 48 the directory symbol with the designation PP input output module and not the module symbol ben...

Страница 218: ...t is displayed The following PROFIBUS parameters must either be set or verified PROFIBUS address Data transfer rate Profile Notice The PROFIBUS address of DP slave PP72 48 set in the S7 project must match with the PROFIBUS address set on the module using switch S1 see Section 2 12 page 2 93 No automatic adjustment takes place The following data must be identical 1 SIMATIC S7 configuration of DP sl...

Страница 219: ...plementary conditions S I O address range of the NC S Selective access to the input outputs by the PLC For compatibility reasons and for future system expansions the I O addresses 256 271 should not be assigned In the case of I O addresses 256 the PLC cannot access the individual input outputs The input output data must first be copied to internal flags of the PLC To this aim use the system functi...

Страница 220: ...nfiguration open the hardware catalog via the menu command View Catalog The DP slave ADI4 is to be found at S Profile Default PROFIBUS DP SINUMERIK ADI4 Select DP slave ADI4 by clicking with the left mouse button on it and drag it to the DP master system in the Station window while holding down the mouse but ton The DP master system is displayed in the station window with the following symbol When...

Страница 221: ...PROFIBUS parameters On insertion of a DP slave ADI4 into the configuration the dialog Properties PROFIBUS Interface ADI4 opens SlaveOM has set the PROFIBUS address to the next free PROFIBUS address Any PROFIBUS address is possible but it must match the address set on the ADI4 using DIP switch S2 Notice The PROFIBUS address of DP slave ADI4 which is set on the SlaveOM must match with the PROFIBUS a...

Страница 222: ...a 16 bits Low High STD 3 Axis1 Axis4 Axis3 Axis2 STD 3 STD 3 STD 3 I word I O Standard message frame 3 Speed setpoint interface 32 bits with 1 encoder STW1 PDA1 Setpoint master slave G1_STW STW2 NSOLL_B PDA5 PDA4 PDA3 PDA2 ZSW1 PDA1 Actual value slave master G1_ZSW ZSW2 NIST_B PDA5 PDA4 PDA3 PDA2 G1_XIST1 PDA7 PDA6 G1_XIST2 PDA8 PDA9 Low High O word dig output data 16 bits 1 15 Dig output 1 4 X6 1...

Страница 223: ...atically when inserting a DP slave ADI4 into a configuration The standard default of the NC machine data S MD13050 DRIVE LOGIC_ADDRESS n logical drive address is described in Subsection 10 5 1 page 10 308 Dialog DP Slave Properties Tab Configuration PROFIBUS partner I O addr I O address OK Notice S The I O addresses for set and actual values of an axis must be the same I O address actual value I O...

Страница 224: ...ed as synonyms in various documents Function parameters In dialog box DP slave properties Encoder tab the function parameters are entered see Fig 7 4 with sample values for the individual parameters 1st Axis 2nd Axis Shutdown ramp ms Shutdown delay s Unipolar spindle Encoder 1 Encoder 2 Encoder type Encoder type TTL DP slave properties Configuration General TTL OK 3rd Axis 4th Axis Tolerable sign ...

Страница 225: ... set in den NC machine data see Subsection 10 5 5 page 10 317ff Encoder parameters S Parity Select this radio button if the encoder data are to be transmitted from the encoder to the ADI4 with a parity bit S Resolution Number of encoder lines encoder lines revolution S MsgLength Number of useful data bits transmitted by the encoder S Encoding The following encoder codes are supported Binary Gray S...

Страница 226: ...Sensor 2 falling edge 2 Reference mark search or In process measure Func tions Tip S Bit x 1 Function requested Bit x 0 Function not requested S If more than one function is activated then The values for all functions can only be read when each activated function has been terminated and this has been confirmed with the corresponding status bit 3 measure ment been terminated and this has been confi...

Страница 227: ...I4 all drives of ADI4 are decelerated to setpoint 0 If you set the parameter to 0 the drives coast to standstill S Unit msec t msec Max setpoint Parameter value Shutdown ramp 0 current setpoint Fig 7 5 Parameter Shutdown ramp In the Shutdown delay time parameter you can set a time delay after which all drives of ADI4 are decelerated to setpoint 0 if a temperature alarm occurs After the Shutdown de...

Страница 228: ...selection of the signal source conformant with SIMODRIVE 611 universal for referencing the axis In 611U conformant mode the signal source for referencing the axes zero mark or BERO is no longer set in the standard message frame encoder control word G1_STW page 7 226 but with the digital output word S Digital output word bits 8 11 see O word page 7 222 Referencing the axis Bit 8 0 axis 1 with zero ...

Страница 229: ... DP cycle msec 2 000 2 000 2 000 0 125 0 125 0 125 8 2 16 1 1 000 0 250 DP slave properties Factor Factor Factor Basic time msec Basic time msec Basic time msec x x x x TI TDX TDP TO Fig 7 6 Dialog DP slave properties cutout 1 Equidistant DP cycle TDP TDP 2 n 125msec where n w 4 minimum TDP 1 msec 2 Setpoint acceptance To TDX 125msec v TO t TDP where TDX TDX rounded up to an integral multiple of 1...

Страница 230: ...Ti and setpoint acceptance To that deviates from one of the above mentioned boundary conditions S DP slave ADI4 with MLFB 0AA0 A parameterization that deviates from one of the above mentioned bound ary conditions is ignored by this DP slave ADI4 since the parameters are set permantenly internally The DP slave ADI4 starts communication with the DP master using the values that deviate from he parame...

Страница 231: ...and View Catalog The DP slave 611U is to be found at S Profile Default PROFIBUS DP SIMODRIVE SIMODRIVE 611 universal PROFI BUS DP MC Select DP slave 611U by clicking with the left mouse button on it and drag it to the DP master system in the Station window while holding down the mouse but ton The DP master system is displayed in the station window with the following symbol When you release the lef...

Страница 232: ...ng the matching function of SlaveOM Inserting a DP slave 611U into the configuration will open the dialog for parame terizing the PROFIBUS DP properties SlaveOM sets the PROFIBUS address to the next free PROFIBUS address automatically The PROFIBUS address can generally be freely selected It must however match the PROFIBUS address set in the drive e g with SimoCom U parame ter P0918 Notice The PROF...

Страница 233: ...A 6 10 nset interface with encoder 1 2 axes Message frame type 102 PDA 6 10 nset interface with encoder 1 1 axis Message frame type 103 104 PDA 7 15 nset interface with encoders 1 and 2 103 or encoders 1 and 3 104 2 axes Massage frame type 104 PDA 7 15 nset interface with encoders 1 and 3 1 axis Message frame type 105 PDA 10 10 nset interface with DSC and encoder 2 axes Message frame type 105 PDA ...

Страница 234: ...Section Communication on PROFIBUS DP A communication between NC and the individual axes of the DP slaves 611U in the SINUMERIK 840Di can only take place if the I O addresses for setpoint and actual value of an axis are the same This prerequisite is taken into account by SlaveOM automatically when inserting a DP slave 611U into a configuration Notice S The I O addresses for set and actual values of...

Страница 235: ...default setting for the machine data is described in Subsection 10 5 1 page 10 308 Dialog DP Slave Properties Tab Configuration Table entry PROFIBUS partner I O addr I O address OK After you have confirmed this dialog using the button OK the dialog DP slave properties closed Step 1 of parameterization of DP slave 611U is then complete The default setting with regard to the consistency of the I O d...

Страница 236: ...611U NC I O address message frame type MD13050 DRIVE_LOGIC_ADDRESS n 1 machine axis 272 2 machine axis 292 Check MD 13060 DRIVE_TELE GRAM_TYP n 1 machine axis 102 2 machine axis 102 DP master PROFIBUS address slot and I O address message frame type PROFIBUS address 10 Axis 1 Slot 5 6 I O addr 272 Axis 2 Slot 9 10 I O addr 292 Message frame type 102 DP save 611U PROFIBUS address message frame type ...

Страница 237: ... generated from the configuration DP master equidistantly transfers the data to from the DP slaves cyclically using the following information PROFIBUS addr 10 Setpoint Slot 5 I O address 272 Actual value Slot 6 I O address 272 Setpoint Slot 9 I O address 292 Actual value Slot 10 I O address 292 Message frame type 102 For a 2 axis closed loop control module of a SIMODRIVE 611 universal the followin...

Страница 238: ...TDP S Master application cycle TMAPC S Actual value sensing TI S Setpoint acceptance TO An overview of the various times of a DP cycle is shown in Fig 7 2 page 7 205 Note The procedure of final parameterization of equidistant DP communication is exemplified by one DP slave 611U For other equidistant DP slaves e g SIMO DRIVE POSMO SI CD CA ADI4 etc proceed analogously Notice If a project you want t...

Страница 239: ...al Equidistant bus cycle activated Network settings in msec Synchronize drive to equidistant DP cycle Clock synchronization Configuration Cyclic portion of equidistant master Setpoint acceptance msec Actual value sensing msec Basic time msec Master application cycle msec 4 000 Equidistant DP cycle 0 367 DP cycle msec 1 000 1 000 1 000 0 125 0 125 0 125 4 1 8 1 0 500 0 125 Help Cancel OK Adjust DP ...

Страница 240: ...le equidistant bus cycle 2nd Optional field Enable equidistant bus cycle When calculating the cyclic portion of the PROFIBUS communication the time for the equidistant DP cycle is automatically changed to the time required as the minimum This change must be undone by reentering the time intended for the equidistant DP cycle Group Equidistant time in msec Equidistant DP cycle Equidistant time OK OK...

Страница 241: ...cycle 1 258 DP cycle msec 2 000 2 000 2 000 0 125 0 125 0 125 12 1 16 1 1 500 0 125 Help Cancel OK Adjust DP slave properties Factor Factor Factor Basic time msec Basic time msec Basic time msec x x x x Fig 7 11 Dialog DP slave properties The DP cycle time of the DP slave 611U must be set to the cycle time of the DP master displayed under equidistant DP cycle Notice For DP cycle time TDP the follo...

Страница 242: ...olate Notice The following condition must be observed for the time of actual value sensing TI DP cycle actual value acquisition basic time Tab Clock synchronization Actual value sensing msec Factor Factor The parameter Setpoint Acceptance To defines the time when the speed set point of the NC position controller is accepted by a DP slave 611U It is recommended to use the same value for the time of...

Страница 243: ...ith OK Tab Clock synchronization Button Adjust OK Notice If there are different types of equidistant DP slaves in a S7 project e g different SIMODRIVE drives ADI4 etc the following parameters S Equidistant DP cycle TDP S Master application cycle TMAPC S Actual value sensing TI S Setpoint acceptance TO must be set for each type of DP slave as described above and adjustment must be performed By adju...

Страница 244: ...Check Consistency If HW Config finds any inconsistencies within the configuration an error dialog box appears which displays the appropriate error messages and possible rem edies The menu command Station Save and Compile saves the current configura tion in S7 as an object Station and is then compiled The compilation includes a consistency check of the parameterized settings If no inconsistencies a...

Страница 245: ... must be ful filled S The MPI drivers are installed S Current interface parameterization SINUMERIK MCI board MPI S Data transfer rate 1 5 Mbps Parameterization of the MPI interface is carried out with the SIMATIC Manager using menu command Tools Set PG PC Interface Dialog Setting the PG PC Interface Register Access Path Interface parameter set used with ext PG PC CP5611 MPI or with local PC SINUME...

Страница 246: ...UN LED lights in green The configuration is loaded in HW Config using the menu command Target system Load into module For loading a configuration the PLC must be in the STOP state If HW Config detects on loading that the PLC is still in the RUN state a dialog box will appear where you can set the PLC to the STOP state From the dialog box Choose Target Module choose the module into which you want t...

Страница 247: ...06 03 7 3 SIMATIC S7 project 7 247 Siemens AG 2003 All rights reserved SINUMERIK 840Di Manual HBI 06 03 Edition Dialog NC PLC Diagnosis Group NC Button NC Reset J 7 PROFIBUS DP Communication ...

Страница 248: ...06 03 7 3 SIMATIC S7 project 7 248 Siemens AG 2003 All rights reserved SINUMERIK 840Di Manual HBI 06 03 Edition 7 PROFIBUS DP Communication Notes ...

Страница 249: ...C in cyclic mode 3 PLC is in the RUN condition 4 The PLC program to be loaded is available either as an S7 project or as a series machine start up file 8 1 1 Commissioning When commissioning the PLC first a general reset of the PLC has to be carried out after the SINUMERIK 840Di has been turned on and booted In order to obtain a defined initial state of the whole system NC and PLC it is recommende...

Страница 250: ...e reset by the general PLC reset MPI address of the PLC 2 MPI data transfer rate 1 5 Mbit s 2 Delete NC data NC group Button General NCK reset 3 Trigger NC reset In order to start cyclic operation or NC PLC communication NC reset but ton NCK Reset must be initiated The subsequent power up of the SINUMERIK 840Di is successfully completed if the following display appears in the dialog S NC status NC...

Страница 251: ... The user memory provided for basic PLC and user programs of the PLC inte grated on the MCI board AS315 2 DP amounts to 64KB by default Optionally a user memory of up to 288KB is possible 8 2 1 Performance data of the PLC315 2DP The PLC315 2DP complies with the following performance data regarding the max number of blocks and their max length Table 8 1 Block performance data of the PLC315 2DP Bloc...

Страница 252: ...e S7 project 3 Open the station in the example project SIMATIC 300 4 Open the module in the example project PLC315 2DP M S 2AF03 5 Open the folder S7 Program Blocks 6 Open the installed library gp8x0 language version e g gp8x0d53 SIMATIC Manager Menu command File Open File Dialog Open Optional field Select libraries Library gp8x0d52 select OK 7 The library is displayed in a new window To copy the ...

Страница 253: ...ogram Process alarm Cyclic processing Start GP_PRAL GP OB 1 NCK Mode grp Channel Axis Spindle TOOLMAN not FMNC User program User program User program OB 40 OB 1 OB 100 G group distributor FB 1 FC 14 FC 3 MCP HHU FC 6 ASUB con axes spindles FC 19 25 Read write var PI services FB 2 3 4 MCP MCP_IFM MCP_IFT TM TM_Trans TM_Dir FC 7 8 22 Restart FC 2 FC 9 15 16 18 Error and operational messages FC 10 St...

Страница 254: ...MATIC Manager STEP7 S Select the appropriate block e g OB 100 in the folder Blocks of the corre sponding Module S Use the menu command Edit Open Object to open the block or double click with the left mouse button on the block S Edit the block using the LAD STL CSF editor Switch over the block display using the menu command View LAD or STL or CSF Processing modules 8 PLC Start Up ...

Страница 255: ...sts e g CP5611 S The MPI drivers are installed S Current interface parameterization CP5611 MPI S Data transfer rate 1 5 Mbps S The MPI interface of the PG PC is linked with the MPI interface of the MPI board X111 using an MPI cable If the configuration is transferred from the SINUMERIK 840Di the following re quirements must be fulfilled S The MPI drivers are installed S Current interface parameter...

Страница 256: ...ed operating status Dialog Operating Status Button STOP OK To load the entire PLC program choose the folder Blocks of the corresponding module from the SIMATIC Manager using the left mouse button Use the menu command Target System Load to load the PLC program into the corresponding module If the folder Blocks of the appropriate module contains system data blocks you will be asked at the end of the...

Страница 257: ...ation of NC and PLC NC reset must be initiated e g using 840Di start up S 840Di start up Dialog NC PLC Diagnosis Group NC Button NC Reset 8 3 2 Series machine start up file The creation and loading of a series machine start up file within the framework of data backup can be carried out using SinuCom NC part of the SINUMERIK 840Di installation or HMI Advanced option For detailed information on data...

Страница 258: ...n the module The start up mode of the PLC with SINUMERIK 840Di is fixed to COLD RE START This setting cannot be modified In the case of COLD RESTART OB 100 is passed prior to the cyclic processing OB 1 Then the cyclic operation starts with calling OB 1 The following data are kept in the case of COLD RESTART S All data blocks and their contents S Retentive timers counters and flags The ranges of th...

Страница 259: ...out such that with regard to time the basic PLC user program is executed prior to the PLC user program Communication of the PLC with the NC is carried out using the NC PLC inter face The interface is divided into the following areas S Mode groups S Channels S Axes spindles S General NC data Data exchange through the NC PLC interface is carried out in the basic PLC program at the beginning of OB 1 ...

Страница 260: ...r program or the CPU module fixed values in the STOP operating status Enable PO and activate control values S Assign individual variables of the PLC user program or the CPU module fixed values which cannot be overwritten by the PLC user program Force variables You can specify or display values of the following variable types S Inputs outputs flags timers and counters S Contents of data blocks S I ...

Страница 261: ... n IBn Input double word n DBn DBXm x Data block n byte m bit x DBn DBBm Data block n byte m DBn DBWm Data block n word m DBn DBDm Data block n double word m On Output n Fn Flag n Tn Timer n Cn Counter n Table 8 3 Input field Format Syntax Meaning H Hexadecimal D Decimal B Binary F Floating point only in conjunction with double word After the variable to be displayed has been input in the field Op...

Страница 262: ...NUMERIK 840Di Manual HBI 06 03 Edition As long as the Control mode is active the entered values are not imported Only when you quit the mode using the soft key Accept the entered values are written to the variables and processed in the PLC program J Controlling End 8 PLC Start Up ...

Страница 263: ...l able for the drive in the form of the parameter file A series machine start up must only be carried out if no matching parameter record is available for the drive in the form of the parameter file The parameter file is then loaded into the drive to be started up using SimoCom U in online mode for online mode see Subsection 9 1 2 page 9 265 The possible ways of starting up a drive are S Using a d...

Страница 264: ...I board SimoCom U is connected to all drives using a PROFIBUS cable Within the framework of SINUMERIK 840Di the procedure described above Point 3 is recommended The advantages of this procedure are S SimoCom U is always available for start up diagnosis controller optimization software upgrade of drive firmware software upgrade of option module firmware S no additional PG PC required S no additiona...

Страница 265: ... see Subsection 9 1 4 page 9 267 S The SINUMERIK 840Di PLC must be networked using MPI For networking the PLC see Subsection 7 3 2 page 7 212 S The configuration must be loaded into the PLC For creating an S7 project see Section 7 3 page 7 211 For loading the PLC see Subsection 7 3 8 page 7 238 S The MPI interface must be set on the SINUMERIK MCI Card MPI For setting the MPI interface see Subsecti...

Страница 266: ...dress Press the P again to quit the input mode 2 Saving the PROFIBUS node address in the FEPROM Press the or key The parameter P0652 acceptance into FEPROM is displayed Press the P again to call the input mode Use the key to change the value to 1 start writing and wait until the write process is acknowledged with 0 on the display 3 Carrying out POWER ON Reset Push the POWER ON RESET button on the ...

Страница 267: ...Ï ÏÏ Ï Ï Ï Ï Ï Ï 1 2 3 4 5 6 7 8 20 1 21 2 22 4 23 8 24 16 25 32 26 64 reserved ÏÏ ÏÏ ON 1 2 3 4 ON Terminating resistor active Example PROFIBUS address 37 ON 1 2 3 4 1 2 3 4 5 6 7 8 ON OFF 0 ON 1 Switch position Note S The valid settable address are 3 to 126 S The set address is read by POSMO SI CD CA and displayed using P0918 PROFIBUS node address 1 2 3 4 1 2 3 4 5 6 7 8 1 4 32 37 Fig 9 2 Settin...

Страница 268: ...s SimoComU SimoComU 2 In SimoCom U open the interface dialog using the menu command Tools Communication Dialog Interface Option field Route through S7 CPU Button Set PG PC Interface Dialog Setting the PG PC Interface Register Access Path Access point of application S7ONLINE STEP7 SINUMERIK MCI board MPI Interface parameter set used SINUMERIK MCI board MPI If SINUMERIK MCI board MPI cannot be selec...

Страница 269: ...otice With SINUMERIK 840Di the routing of the MPI interface to the PROFIBUS DP is provided the PLC Therefore the MPI address of the PLC must be specified as the MPI No With SINUMERIK 840Di the PLC always has the MPI address 2 Enter the 8 digit PROFIBUS S7 subnetwork ID of DP master S7 project in the 12 digit input screen form of the SimoCom U dialog as follows Example S7 project 8 digit S7 subnetw...

Страница 270: ...US Button Properties Dialog Properties PROFIBUS Tab General S7 subnetwork ID 0010 0005 example Cancel Cancel Cancel The online operation with the drives connected to PROFIBUS can now be started 9 1 7 Starting online operation After parameterization of the MPI interface and entry of the routing information SimoCom U can enter online operation with the SIMODRIVE drives To start the search for any dr...

Страница 271: ...ation path readme txt SimoCom U provides the following functions Make an online connection to the drives Upgrade the firmware Optimize the control parameters Traverse the axes Diagnose the drive status After installation the documentation for SimoCom U is available electronically Use the menu command Help in SimoCom U to call information on the topics Short introduction How to Use WINDOWS Help Hel...

Страница 272: ...06 03 9 2 Installing SimoCom U 9 272 Siemens AG 2003 All rights reserved SINUMERIK 840Di Manual HBI 06 03 Edition 9 Drive Start Up Preconditions Notes ...

Страница 273: ...Machine data MD S Setting data SD 10 2 Machine and setting data Machine data are system variables used to adapt the NC to the machine The identifier of a machine data is subject to the scheme M k _IdentifierString The letters characters have the following meaning S System variable S M Machine data S k Component k identifies the components of the NC parameterizing the appropriate machine data S N N...

Страница 274: ... data S N NC S C Channel S A Axis In contrast to machine data changes of setting data always come immediately into effect The machine data are divided into the following areas Table 10 1 Overview of machine data Area Designation from 1000 to 1799 Machine data for drives MD_ from 9000 to 9999 Machine data for operator panel MM_ from 10000 to 18999 NC specific machine data MN_ from 19000 to 19999 Re...

Страница 275: ... and setting data is to be found in References LIS Lists Machine and setting data Note To search for information regarding machine and setting data it is recom mended to use the search functions in the electronic documentation SINUMERIK DOConCD 10 2 1 Display and input To display and input machine data appropriate screen forms are provided The screen forms are found on the HMI Advanced user interf...

Страница 276: ...e bit editor and accept the value set S With the soft key Abort you can quit the bit editor and discard the value set The previous setting is then valid again 10 2 2 Protection levels The access to programs data and functions is protected user oriented using eight hierarchical protection levels These are divided into see Table 10 3 S Four password levels for SIEMENS machine manufacturers and final...

Страница 277: ...er Example switch Trained operator Only program selection input of tool wear pos 1 who will not program and zero offsets 7 Key Final user Example switch Semiskilled operator No inputs no program selection pos 0 only possible if the machine control panel can be operated Descending access rights For the four possible password levels with their access permissions the pass words can be entered in the ...

Страница 278: ...ange additive tool offsets 9205 USER_CLASS_WRITE_TOA_EC Protection level Change tool setup offsets 9206 USER_CLASS_WRITE_TOA_SUPVIS Protection level Change tool monitoring limit values 9207 USER_CLASS_WRITE_TOA_ASSDNO Change assigned D No of a tool edge 9208 USER_CLASS_WRITE_MAG_WGROUP Change wear group magazine location mag 9209 USER_CLASS_WRITE_TOA_ADAPT Protection level Tool adapter data 9210 U...

Страница 279: ...ion MMC machine data for protection levels Single data The protection level of individual machine and or setting data can be modified in the file SGUD DEF Example The axial machine data item CTRLOUT_SEGMENT_NR requires protection level 3 for reading and protection level 2 for writing Syntax REDEF machine data string APR n APW m APR n Defining the protection level for reading Read the data APW m De...

Страница 280: ...ences LIS Lists A display group contains machine data within a machine data area which be long to the same topic By selecting deselecting the display groups the number of displayed machine data of the current machine data area increases or decreases If the Expert mode display filter is disabled only the machine data of a machine data range are displayed which are required for the basic functionali...

Страница 281: ...ns indicated in the Pro gramming guide The computational resolution defines the maximum number of effective decimal places for all data the physical unit of which is referred to a length or an angle e g position values velocities tool offsets zero offsets etc The desired computational resolution is defined using the machine data S Check MD 10200 INT_INCR_PER_MM computational resolution for linear ...

Страница 282: ...ed and traversed within the range of values 0 1 1 000mm To position exactly to 0 1mm the computational resolution must be set to 104 incr mm Check MD 10200 INT_INCR_PER_MM 10 000 incr mm Example of related parts program N20 G0 X 1 0000 Y 1 0000 Axes move to position X 1 0000mm Y 1 0000mm N25 G0 X 5 0002 Y 2 0003 Axes move to position X 5 0002mm Y 2 0003mm Table 10 5 Resolutions Machine data Number...

Страница 283: ...celeration 1 m sec2 1 inch sec2 1 mm sec2 Angular acceleration 1 rev sec2 1 rev sec2 1 degree sec2 Linear jerk 1 m sec3 1 inch sec3 1 mm sec3 Angular jerk 1 rev sec3 1 rev sec3 1 degree sec3 Time 1 sec 1 sec 1 sec Position controller loop gain 1 sec 1 1 sec 1 1 sec 1 Rotational feedrate 1 mm rev 1 inch rev 1 mm degree Compensation value of linear position 1 mm 1 inch 1 mm Compensation value of ang...

Страница 284: ...value of linear position 11 11 Compensation value of angle position 12 12 Example 1 The machine data input output of linear velocities is to be carried out in m min instead of mm min default The internal unit is mm sec Via MD 10220 SCALING_USER_DEF_MASK Bit2 1 is used to enter the scaling factor for linear velocities as a user defined value The scaling factor is calculated using the following form...

Страница 285: ...h sys tem 10260 CONVERT_SCALING_SYSTEM Basic system switch active 10270 POS_TAB_SCALING_SYSTEM Unit system of position tables T1 10290 CC_TDA_PARAM_UNIT Physical units of tool data for CC 10292 CC_TDA_PARAM_UNIT Physical units of cutting edge data for CC 10 3 3 Changing scaling machine data The scaling of machine data having physical units is defined by the following machine data S MD 10220 SCALIN...

Страница 286: ... MAX_AX_VELO A1 2 778 rev min Note If a scaling machine data item is altered then the control outputs alarm 4070 Scaling data changed The following procedure is recommended when modifying scaling machine data manually 1 Set all scaling machine data 2 Carry out NCK reset 3 Set all dependent machine data after the NC has powered up 10 3 4 Loading default machine data The default machine data can be ...

Страница 287: ...INE The switch will only be accepted if S MD10260 CONVERT_SCALING_SYSTEM 1 S Bit 0 of MD20110 RESET_MODE_MASK is set in each channel S all channels are reset S the axes are not traversed with JOG DRF or the PLC S constant grinding wheel peripheral speed GWPS is not active For the duration of the switching actions such as parts program start or mode change are blocked If the switch cannot be carrie...

Страница 288: ... S Analog input outputs S Data exchange through the FC21 will not be subject to automatic conversion It is the user s task to take into ac count the unit system currently active MD 10240 SCALING_SYS TEM_IS_METRIC The unit system setting currently active can be read from the PLC interface us ing the signal Inch unit system DB10 DBX107 7 The unit system change counter can be read in DB10 DBB71 Table...

Страница 289: ...n parameters I J K 999 999 999 mm degrees 399 999 999 Inch degrees 10 3 7 Positioning accuracy The positioning accuracy depends on S the computational accuracy internal increments mm or degrees S the actual value resolution encoder increments mm or degrees The rougher resolution of both determines the positioning accuracy of the NC The input resolution the position control and interpolation clock ...

Страница 290: ...e sys tem clock cycle This setting cannot be modified The position controller cycle offset TM must be set such that the following con ditions are fulfilled within a PROFIBUS DP system clock cycle The cyclic communication with the DP slaves drives must be com pleted before the position controller is started Condition TM TDX The position controller must be completed before the DP cycle system clock ...

Страница 291: ...et TM TDP 3 Tpos max TDP The DP cycle time is equivalent to position controller cycle of the SINUMERIK 840Di Tpos max Display using HMI Advanced Option Operating area switchover Diagnosis Service displays System resources Error response S Alarm 380005 PROFIBUS DP Bus access conflict type t counter z Error causes remedy S t 1 The position controller cycle offset has been chosen too small The cyclic...

Страница 292: ...controller and interpolator TDP DP cycle time DP cycle time TM Master time Shift of starting time of the NC position control Fig 10 3 CPU time sharing between Windows NT and NC In NC machine data S MD10185 NCK_PCOS_TIME_RATIO NCK computation time portion the maximum CPU time share of the NC is set with reference to a DP cycle The default value is 65 An individual setting can only be made by the fo...

Страница 293: ... slow ing down of Windows NT applications If necessary the values must be adapted to the system clock cycle position controller cycle DP cycle time and or interpolation cycle Error response S Alarm 4240 CPU time overflow on the IPO or position controller level Error causes remedy The DP cycle time position controller cycle the interpolation cycle or the NC CPU time share is set in such a way that ...

Страница 294: ...t up process Note The smaller the cycle times PROFIBUS DP cycle are selected the higher is the control quality of the drive and the surface finish of the workpiece 10 3 9 Velocities The maximum possible axis velocities and spindle speeds depend on the ma chine design drive dynamics and the encoder limit frequency of the individual drives The maximum programmable tool path velocity results from the...

Страница 295: ...gram blocks The function Online compressor can help to avoid such sudden velocity dips References PGA Programming Guide Advanced Section Compressor COMPON COMPCURVE The minimum tool path or axis velocity at which traversing is possible results from Vmin 10 3 Computational resolution Incr mm or degrees IPO cycle secs for the computational resolution see Subsection 10 3 1 page 10 281 If Vmin is not ...

Страница 296: ... disk of the PCU The memory areas of the user data are preset to expedient values during gen eral reset of the NC The size of the individual areas can be set for optimized utilization of the user memory e g for S Parts programs S Tool management S Tool offset S User variables S R parameters S Compensation S Protection zones S Frames see Subsection 10 4 2 Page 10 298 Memory allocation must take pla...

Страница 297: ...E_SIZE Hash table size for user variables 18242 MM_MAX_SIZE_OF_LUD_V ALUE Maximum field size of the LUD variables 18250 MM_CHAN_HASH_TABLE_SIZE Hash table size for channel specific data 18260 MM_NCK_HASH_TABLE_SIZE Hash table size for global data 18340 MM_NUM_CEC_NAMES Number of LEC tables 18342 MM_CEC_MAX_POINTS Max table size for sag compensation 18500 MM_EXTCOM_TASK_STACK_SIZE Stack size for ex...

Страница 298: ...ffsets can be read in at all times Modifying the machine data listed in Table 10 14 results in a reconfiguration of the SRAM with a loss of all user data Before the change comes into effect in the NC the following alarm message is output S Alarm 4400 MD change results in reorganization of the non volatile memory loss of data Notice When reconfiguring the SRAM memory all user data are lost To preve...

Страница 299: ...SER_MACROS Number of macros 18190 MM_NUM_PROTECT_AREA_NCK Number of protection zones in NCK FB A3 18230 MM_USER_MEM_BUFFERED User memory in SRAM 18270 MM_NUM_SUBDIR_PER_DIR Number of subdirectories 18280 MM_NUM_FILES_PER_DIR Number of files per directory 18290 MM_FILE_HASH_T ABLE_SIZE Hash table size for files in a directory 18300 MM_DIR_HASH_TABLE_SIZE Hash table size for subdirectories 18310 MM_...

Страница 300: ...e of last proper shutdown Notice On loss of voltage or on deactivation of the PCU without proper shutdown of Windows NT beforehand all user data stored in the virtual SRAM will be lost A UPS system see Subsection 1 1 8 Page 1 29 is therefore absolutely neces sary in conjunction with the virtual SRAM The Windows NT system settings stated below can generally prevent loss of data in the event of a se...

Страница 301: ...inistrative alert D Memory dmp OK Cancel Automatically reboot System Properties Write debugging information to Overwrite any existing file Fig 10 4 Dialog Windows NT system settings The following settings must be made Option Write debugging information to selected Drive and file specified The file should preferably reside on drive D to prevent it being stored in a ghost image and the file name mus...

Страница 302: ...inimum Allowed 2 MB Recommended 75 MB Currently Allocated 135 MB Current Registry Size 10 MB Maximum Registry Size MB 13 Set Help Cancel Paging File Size for Selected Drives C DOS D TMP E WinNT 135 200 F 840DSystem Fig 10 5 Dialog Windows NT system settings The following setting must be made The size of the Paging Files set Paging File Size MB on the Win dows NT drive E WinNT must correspond at le...

Страница 303: ...in dows NT Blue Screen then occurs In the start up of the SINUMERIK 840Di that follows the last valid version on the user data are loaded to the virtual SRAM and the follwoing alarm issued also refer to Loss of data Page 10 304 S Alarm 4065 non volatile memory restored from hard disk data loss possible If a serious exception Blue Screen occurs an appropriate message box ap pears SINUIMERIK 840Di N...

Страница 304: ...Restoring NCK user data after BlueScreen this may take a while Notice The control must not be switched off terminated until start up of the SINUM ERIK 840Di is complete Otherwise all user data will be lost requiring re com missioning of the SINUMERIK 840Di NCK and PLC If the memory area of the virtual SRAM could not be written to the hard disk of the PCU e g because the control was switched off wi...

Страница 305: ...from this retentive background memory every time the NCK is booted On the SINUMERIK 840Di the hard disk of the PCU is used as the background memory To ensure data consistency not only the entire SRAM but also the retentive background memory of the DRAM file system is cleared with the function Clear NC data for example before restart up of the NCK The maximum size of the DRAM file system in Kbytes ...

Страница 306: ...l cycle areas are saved in the retentive background memory per default On loading a series machine start up file or one of the individual cycles to the NCK the cycles are first written to the retentive background memory and then load to the DRAM file system when the function is selected Cycles relocated into the DRAM file system can be changed edited The changes take effect immediately Retentive s...

Страница 307: ...e FFS If there is not enough free space in the FFS the following alarm is output Alarm 6691 cycles in the passive file system cannot be saved on the NC card Remedy Adaptation of the FFS size in the machine data MD18332 MM_FLASH_FILE_SYSTEM_SIZE size of the FFS or deletion of cycles from the DRAM file system the cycles are also deleted from the FFS 11290 DRAM_FILESYSTEM_MASK selection of directorie...

Страница 308: ...to a channel is designated as channel axes In this context the geometry and special axes constitute the program techno logical part of the machining process i e they are used for programming in the parts program The machine axes constitute the physical part of the machining process i e they carry out the programmed traversing movements on the machine The geometry axes constitute the rectangular Ca...

Страница 309: ...110 CTRLOUT_MODULE_NR 0 MD30220 ENC_MODULE_NR 0 Machine axes of the NC List of all drives of the NC MD13050 DRIVE_LOGIC_ADDRESS n 1 4 3 2 2 3 1 2 0 1 4 5 3 4 2 3 1 2 0 1 0 5 0 4 0 3 0 2 0 1 Special axes 0 8 0 7 0 6 4 I O address of drive 3 I O address of drive 2 I O address of drive 1 I O address of drive 0 I O address of drive 7 I O address of drive 6 I O address of drive 5 I O address of drive M...

Страница 310: ...ibed under Point 1 MD13050 DRIVE_LOGIC_ADDRESS n 3 The machine data MD 20070 AXCONF_MACHAX_USED n machine axis number valid in channel defines explicitly which channel axis and which machine axis is used and de fines implicitly how many channel axes exist in the channel The machine axis number m to be entered in the machine data with m 1 2 3 is referred to the appropriate machine axis m 4 The mach...

Страница 311: ...for Workpiece IWS Section Axes 10 5 2 Axis names Each machine channel and geometry axis can must be assigned an individual name unambiguously identifying it in its name range The machine data MD10000 AXCONF_MACHAX_NAME_TAB n machine axis name is used to define the machine axis names Machine axis names must be unambiguous for the entire NC The names and the corresponding index defined in the machin...

Страница 312: ...in the parts program for programming general traversing movements or to describe the workpiece contour The axis names are used for path axes synchronized axes positioning axes command axes spindles gantry axes coupled motion axes master value coupling axes Table 10 17 Axis names Machine data Number Identifier Name remarks Ref General MN_ 10000 AXCONF_MACHAX_NAME_T AB n Machine axis name Channel sp...

Страница 313: ... Notice Any changes in the I O addresses must be carried out consistently DP slave 611U SIMATIC S7 project HW Config I O address for set point and actual value NC MD13050 DRIVE_LOGIC_ADDRESS n No automatic adjustment takes place The message frame type describes the data volume and the data structure of the message frames exchanged between NC and drive on PROFIBUS DP dur ing the cyclic communicatio...

Страница 314: ...e in the machine data MD13050 DRIVE_LOGIC_ADDRESS n MD13060 DRIVE_TELEGRAM_TYPE n must be identical in both machine data With an ADI4 module you can operate up to 4 drives with analog setpoint inter face on an isochronous PROFIBUS In addition to performing the above mentioned drive configuration for these drives you also need to deactivate all the SIMODRIVE 611U specific DP func tions that are act...

Страница 315: ... and at least one actual value channel must be parameterized A second actual value channel can be set up as an option Notice The motor measuring system is always used for the speed control function Motor and motor measuring system must therefore always be connected to the same drive module In the two axis specific machine data MD 30110 CTRLOUT_MODULE_NR 0 setpoint assignment logic drive number MD ...

Страница 316: ... 0 Actual value assignment Drive type 5 PROFIBUS DP 30220 ENC_MODULE_NR 0 Actual value assignment Logic drive number for position measuring system 1 30220 ENC_MODULE_NR 1 Actual value assignment Logic drive number for position measuring system 2 30230 ENC_INPUT_NR 0 Actual value assignment Position encoder 1 1 motor measuring system 2 direct measuring system 30230 ENC_INPUT_NR 1 Actual value assig...

Страница 317: ...S_DIRECT 0 LEADSCREW_PITCH n Encoder Meas gearbox nMotor Load gearbox nSpindle Ball screw DRIVE_ENC_RATIO_NUMERA DRIVE_ENC_RATIO_DENOM Encoder revs Motor revs Spindle revs Motor revs Fig 10 7 Linear axis with motor mounted rotary encoder M IS_ROT_AX 0 ÍÍÍÍÍ ÍÍÍÍÍ Table ENC_RESOL F DRIVE_ENC_RATIO_NUMERA DRIVE_ENC_RATIO_DENOM ENC_IS_DIRECT 1 LEADSCREW_PITCH ENC_IS_LINEAR_ 0 Load gearbox Meas gearbo...

Страница 318: ... ENC_IS_DIRECT 1 Fig 10 10 Rotary axis with machine mounted rotary encoder Table 10 21 Incremental measuring systems Machine data Number Identifier Name remarks Ref Axis specific MA_ 30240 ENC_TYPE n Actual value acquisition modes 1 incremental signal generator 30242 ENC_IS_INDEPENDENT n Encoder is independent 30300 IS_ROT_AX Rotary axis R2 31000 ENC_IS_LINEAR n Direct measuring system linear scal...

Страница 319: ...inear scale Table 10 22 Linear measuring system Machine data Number Identifier Name remarks Ref Axis specific MA_ 30240 ENC_TYPE n Actual value acquisition modes 1 incremental signal generator 30242 ENC_IS_INDEPENDENT n Encoder is independent 30300 IS_ROT_AX Rotary axis R2 31000 ENC_IS_LINEAR n Direct measuring system linear scale 31010 ENC_GRID_POINT_DIST n Pitch period for linear scales 31030 LE...

Страница 320: ...ace 2 048 pulses revolution 4 096 revolutions An absolute encoder can currently exclusively be used as a motor encoder in direct measuring system M IS_ROT_AX 0 ÍÍÍÍÍÍ ÍÍÍÍÍÍ Table F DRIVE_AX_RATIO_NUMERA DRIVE_AX_RATIO_DENOM LEADSCREW_PITCH n Encoder Meas gearbox nMotor Load gearbox nSpindle Ball screw DRIVE_ENC_RATIO_NUMERA DRIVE_ENC_RATIO_DENOM Encoder revs Motor revs Spindle revs Motor revs ENC...

Страница 321: ...242 ENC_IS_INDEPENDENT n Encoder is independent 30300 IS_ROT_AX Rotary axis R2 31000 ENC_IS_LINEAR n Direct measuring system linear scale 31030 LEADSCREW_PITCH Leadscrew pitch 31040 ENC_IS_DIRECT n Encoder is directly mounted on the machine 0 motor mounted encoder 31050 DRIVE_AX_RATIO_DENOM n Load gear denominator 31060 DRIVE_AX_RATIO_NUMERA n Load gear numerator 31070 DRIVE_ENC_RATIO_DENOM n Reso...

Страница 322: ...for a 2nd measuring system of a machine axis connected via ADI4 The following assumptions are made NC 2 measuring systems should be parameterized for the 1st machine axis 1st measuring system Motor measuring system of drive 2nd measuring system Direct measuring system Drive A SIMODRIVE 611U 1 axis module with connection option for a measuring system motor sensor is used as a drive ADI4 The 2nd mea...

Страница 323: ...uration Clock synchroniza tion Encoder 4 axes each with an encoder standard message frame 3 IO PDA 5 9 A Slot PROFIBUS Partner Drive 6 5 4 No PKW Setpoint Actual value PDA1 Input 2 472 9 Word Overall length PDA1 output 2 472 5 Word Overall length Type Address Type PR I O ad dress Length Unit Consis tency Fig 10 16 DP slave properties ADI4 The general and axis specific NC machine data must then be ...

Страница 324: ...MD13050 1 Also refer to Subsection 10 5 4 Page 10 315 Table 10 24 Drive configuration Machine data Number Identifier Name remarks Ref General MN_ 13050 DRIVE_LOGIC_ADDRESS n Logical I O address of drive G2 13060 DRIVE_TELEGRAM_TYPE n Drive message frame type for the drives con nected to PROFIBUS DP G2 30220 ENC_MODULE_NR 0 Actual value assignment Logic drive number for position measuring system 1 ...

Страница 325: ...trol loop performance is the same Note The speed feedforward control can be used in conjunction with DSC Before you can activate DSC mode the following preconditions must be fulfilled DSC capable drive e g SIMODRIVE 611 universal SIMODRIVE POSMO CD CA SIMODRIVE POSMO SI A DSC capable message frame type has been parameterized in the S7 proj ect for the drive see Subsection 7 3 7 page 7 233 The DSC ...

Страница 326: ...current speed and position control loop of the drives can be performed with HMI Advanced see Chapter 13 page 13 417 All drives Start up tool SimoCom U SIMODRIVE 611 universal E SIMODRIVE POSMO CD CA SIMODRIVE POSMO SI Note You will find detailed information about frequency measurement and optimiza tion of the SIMODRIVE 611 universal E POSMO CD CA and SI drives in the online help of the start up to...

Страница 327: ...es Machine data Number Identifier Name Ref General MN_ 10210 INT_INCR_PER_DEG Computational resolution for angular positions G2 Axis specific MA_ 30300 IS_ROT_AX Axis is rotary axis 30310 ROT_IS_MODULO Modulo conversion for rotary axis 30320 DISPLAY_IS_MODULO Actual value display modulo 36100 POS_LIMIT_MINUS Software limit switch minus A3 36110 POS_LIMIT_PLUS Software limit switch plus A3 Table 10...

Страница 328: ...axis velocity will apply to this axis automatically This feedrate will apply until an axis specific feedrate is programmed in the parts program for this axis Table 10 29 Positioning axes Machine data Number Identifier Name Ref Channel specific MC_ 22240 AUXFU_F_SYNC_TYPE Output time for F functions H2 Axis specific MA_ 30450 IS_CONCURRENT_POS_AX Concurring positioning axis 32060 POS_AX_VELO Feedra...

Страница 329: ...EX_AX_POS_TAB_1 n indexing position table 1 MD10920 INDEX_AX_LENGTH_POS_TAB_2 number of positions of in dexing table 2 MD10930 INDEX_AX_POS_TAB_2 n indexing position table 2 Table 10 31 Indexing axes Machine data Number Identifier Name Ref General MN_ 10260 CONVERT_SCALING_SYSTEM Basic system switch active G2 10270 POS_TAB_SCALING_SYSTEM Unit system of position tables 10900 INDEX_AX_LENGTH_POS_T A...

Страница 330: ... following applies to axes For a machine axis that is not involved in tapping or thread cutting the 1st set of parameters index 0 is active in all cases All further sets of parameters need not be taken into account For machine axes involved in tapping or thread cutting the parameter sets corresponding to the current gear stage of the spindle becomes active All sets of parameters corresponding to t...

Страница 331: ...ameter set dependent machine data Number Identifier Name Ref Axis spindle specific MA_ 31050 DRIVE_AX_RATIO_DENOM n Load gear denominator 31060 DRIVE_AX_RATIO_NUMERA n Load gear numerator 32200 POSCTRL_GAIN n Kv factor 32810 EQUIV_SPEEDCTRL_TIME n Equivalent time constant of speed control loop for feed forward control 32910 DYN_MATCH_TIME n Time constant of dynamic adaptation 35110 GEAR_STEP_MAX_V...

Страница 332: ...ion the appropriate adaptation is made in MD32100 AX_MOTION_DIR traversing direction The value 1 reverses the direction of motion If the control direction of the position measuring system is incorrect it can be adjusted with MD32110 ENC_FEEDBACK_POL sign of actual value In order to obtain high contour accuracy a high loop gain KV factor of the position controller is required However an excessively...

Страница 333: ... SCALING_USER_DEF_MASK H200 bit no 9 as a hex adecimal value When entering the servo gain factor take into account that the amplification factor of the entire position control loop is also dependent on other parameters of the controlled system These factors are MD32260 RATED_VELO MD32250 RATED_OUTVAL Tacho adjustment on the speed controller Tacho generator on drive Notice Machine axis that interpo...

Страница 334: ...ots may occur while the drive is approaching the static statuses this applies to all speed ranges The reasons for an overshoot in the control loop can be Acceleration too high current limit is reached Error in speed controller reoptimization necessary Mechanical backlash Mechanical components canted For safety reasons set the KV factor to a little less than the maximum possible value The real KV f...

Страница 335: ...he current limit before the rapid tra verse velocity or the final position is reached Slight load changes during machining must not cause the current limit to be reached Excessive current during machining causes falsification of the contour For this reason the acceleration value should be a little bit less than the maxi mum acceleration value Machine axes can have different acceleration values eve...

Страница 336: ...tart up of the NC speed setpoint matching between the NC and the drive is then performed automatically Note If automatic speed setpoint matching fails for one axis the following message is output on a traverse request for his axis Message Wait axis enable missing This axis and any axes that interpolate with it are not traversed If a value not equal to 0 is entered in machine data MD32250 RATED_OUT...

Страница 337: ...chine data MD 36210 CTRLOUT_LIMIT max speed setpoint Values greater than 100 make sense in connection with ADI4 because the DACs of the ADI4 limit the output voltage to 10V If the motor speed required for speed setpoint matching is not known directly it can be calculated as follows with reference to the required axis velocity linear axis or load speed rotary axis spindle nMotor Motor speed for lin...

Страница 338: ...ocity Desired following error mm Traversing velocity m min MD32200 POSCTRL_GAIN KV factor m min mm The actual following error is displayed in the axis specific service data HMI Advanced Operating area switchover Diagnosis Service displays Service axis spindle Table 10 35 Speed setpoint matching Machine data Number Identifier Name remarks Ref Axis specific MA_ 32250 RATED_OUTVAL Rated output voltag...

Страница 339: ...nd ing on the direction of the drift until the axis reaches zero speed Position controlled axis The drift causes a constant following error or position setpoint 0 To com pensate for the drift the compensation value is incremented decremented step by step depending on the direction of the drift until following error or position setpoint 0 is displayed HMI Advanced Operating area switchover Diagnosi...

Страница 340: ..._RAPID n revolutional feedrate in JOG mode with rapid traverse override is the velocity at which the machine axis traverses in JOG mode with the rapid traverse override key actuated and with an axial feedrate override of 100 The entered value may not exceed the max permissible axis velocity This machine data will not be used for the programmed rapid traverse G00 The value entered in machine data M...

Страница 341: ...velocity for G94 Rotary axes JOG speed SD41130 JOG_ROT_AX_SET_VELO JOG velocity for rotary axes 2 SD JOG_REV_IS_ACTIVE revolutional feedrate in JOG mode 1 JOG speed SD41120 JOG_REV_SET_VELO JOG speed with G95 The entered value may not exceed the max permissible axis velocity Notice Depending on MD30300 IS_ROT_AX n the velocities have to be entered in mm min inch min or rpm If the velocities change...

Страница 342: ...sitioning axis velocity P2 32250 RATED_OUTVAL Rated output voltage 32260 RATED_VELO n Rated motor speed Table 10 38 Velocities Setting data Number Identifier Name remarks Ref General SN_ 41100 JOG_REV_IS_ACTIVE Revolutional feedrate in JOG mode active 41110 JOG_SET_VELO JOG velocity for linear axes for G94 41120 JOG_REV_SET_VELO JOG velocity for G95 41130 JOG_ROT_AX_SET_VELO JOG speed for rotary a...

Страница 343: ...t stop fine delay time Alarm 25080 Positioning monitoring and follow up mode Position tolerance which a standing machine axis may not leave MD36030 STANDSTILL_POS_TOL standstill position tolerance Alarm 25040 Zero speed control and follow up mode Delay time after which the actual value must have reached the tolerance window Standstill position tolerance when the setpoint position is reached MD3604...

Страница 344: ...ive in the positive direction SD43410 WORKAREA_PLUS_ENABLE working area limitation active in the negative direction SD43420 WORKAREA_LIMIT_PLUS working area limitation plus SD43430 WORKAREA_LIMIT_MINUS working area limitation minus Alarm 10630 Axis reaching operating range limit Alarm 10631 Axis is at operating range limit JOG Alarm 10730 Progr end point is behind operating range limit Two softwar...

Страница 345: ...ke response IS DB31 DBX12 1 hardware limit switch plus IS DB31 DBX12 0 hardware limit switch minus MD 36600 BRAKE_MODE_CHOICE brake response at the hardware limit switches 0 brake characteristic is observed 1 rapid deceleration with setpoint 0 Alarm 21614 hardware limit switch 2nd software limit switch plus activated in PLC 1 software limit switch plus Hardware limit switch plus Mechanical travers...

Страница 346: ...ay time for speed setpoint monitoring defines how long the speed setpoint may remain within the limits before the speed setpoint monitoring responses Error response ALARM 25060 Speed setpoint limiting and stopping the machine axis using a speed setpoint ramp whose characteristic is set in MD36610 AX_EMERGENCY_STOP_TIME time of brake ramp in case of error conditions Error causes remedy A control lo...

Страница 347: ...ed on the encoder values MD 36020 AX_VELO_LIMIT threshold value for speed monitoring Error response Alarm 25030 Alarm limit of actual velocity and stopping the machine axis using a speed setpoint ramp whose characteristic is set in MD36610 AX_EMERGENCY_STOP_TIME time of brake ramp in case of error conditions Error causes remedy Check speed setpoint cable Check actual values Check direction of posi...

Страница 348: ...override acceleration max speeds When operating with feedforward control MD 32810 EQUIV_SPEEDCTRL_TIME equivalent time constant of speed control loop for feedforward control If the machines are set too inexactly MD 36400 CONTOUR_TOL must be increased Monitoring of the cut off frequency of the encoder of a machine axis MD 36300 ENC_FREQ_LIMIT encoder cut off frequency Error response Alarm 21610 Enc...

Страница 349: ...ncoders or position measuring systems of a machine axis at any time The permissible position difference between the two position measuring systems is monitored MD 36500 ENC_CHANGE_TOL maximum tolerance when switching over the actual position value Error response Alarm 25100 Measuring system cannot be switched over The requested switchover to another encoder is not carried out Error causes remedy T...

Страница 350: ...ING IS Position measuring system 1 2 active Following error STOP_LIMIT_COURSE STOP_LIMIT_FINE POSITIONING_TIME STANDSTILL_DELAY_TIME STANDSTILL_POS_TOL CLAMP_POS_TOL Braking ramp PROFIBUS DP drive Fig 10 24 Monitoring functions with SINUMERIK 840Di Notice MD 36620 SERVO_DISABLE_DELAY_TIME servo enable cutout delay must always be selected greater than MD 36610 AX_EMERGENCY_STOP_TIME time of brake r...

Страница 351: ...arted using traversing keys PLUS or MINUS depending on the parameterized refer ence point approach direction With incremental measuring systems referencing is carried out using a reference point approach divided into 3 phases 1 Traversing to the reference cam 2 Synchronizing to the encoder zero marker 3 Approach reference point The following machine data and interface signals are independent with ...

Страница 352: ...sitioning velocity Phase 2 Phase 1 Phase 3 t Fig 10 25 Referencing sequence with incremental measuring system example The following machine data and interface signals are important MD34010 REFP_VELO_SEARCH_CAM reference cam approach in the negative direction MD34020 REFP_VELO_SEARCH_CAM reference cam approach velocity MD34030 REFP_MAX_MARKER_DIST maximum distance to reference cam MD 34092 REFP_CAM...

Страница 353: ...a limits will thus also be active for the wrong positions The difference corresponds to one encoder revolution Danger for man and machine exists The following machine data and interface signals are important MD 34040 REFP_VELO_SEARCH_MARKER shutdown speed MD 34050 REFP_SEARCH_MARKER_REVERSE direction reversal to reference cam MD 34060 REFP_MAX_MARKER_DIST maximum path from cam to reference mark Pr...

Страница 354: ...int offset additive MD34100 REFP_SET_POS reference point value IS DB31 DBX2 4 2 5 2 6 2 7 Reference point values 1 4 IS DB31 DBX60 4 DBX60 5 Referenced synchronized 1 2 Properties of phase 3 Feed override the feed override switch is active Feed stop channel specific and axis specific is active The machine axis can be stopped and started again using NC Stop NC Start FB1 Description of Functions Bas...

Страница 355: ...coded reference marks The following machine data and interface signals are independent with re spect to the individual phases of reference point approach MD11300 JOG_INC_MODE_LEVELTRIGGRD INC REF in jog mode MD34000 REFP_CAM_IS_ACTIVE axis with reference cam MD34110 REFP_CYCLE_NR axis sequence with channel specific refer ence point approach MD 30240 ENC_TYPE encoder type Set MD 34200 ENC_REFP_MODE...

Страница 356: ...target point MD 34330 REFP_STOP_AT_ABS_MARKER with without target point IS DB31 DBX60 4 DBX60 5 Referenced synchronized 1 2 Properties of phase 2 The feed override the feed override switch is active The feed stop channel specific and axis specific is active The machine axis can be stopped and started again using NC Stop NC Start To determine the absolute offset between the measuring system zero po...

Страница 357: ...g of an axis with absolute encoders is carried out automatically when the NC powers up if the corresponding axis is detected adjusted The following two requirements must be fulfilled The absolute encoder is adjusted Sign MD 34210 ENC_REFP_STATE n 2 The measuring system of the machine axis which is active when the NC powers up uses the absolute encoder The acceptance of the absolute encoder is carr...

Страница 358: ...roached at slow velocity and always from the same direction to make sure that the actual value is not invalidated by the backlash in the drive system 3 Enter the approached machine position in the machine data MD34100 REFP_SET_POS n ref point value machine position This value can be a value specified from the design e g fixed stop or be determined using a measuring instrument 4 Enable adjustment i...

Страница 359: ...otor with absolute encoder or if data are lost in the NC SRAM battery voltage failure PRESET in the case of gear change between load and absolute encoder Notice The status in MD34210 ENC_REFP_STATE n status of absolute encoder is only reset by the NC automatically in the case of gear change In all the other cases the user must reset the status to 0 Encoder not ad justed by himself herself and prov...

Страница 360: ...NUS Reference point approach in minus direction 34020 REFP_VELO_SEARCH_CAM Reference point approach velocity 34030 REFP_MAX_CAM_DIST Max distance to be traversed to the reference cam 34040 REFP_VELO_SEARCH_MARKER n Reference point creep speed encoder number 34050 REFP_SEARCH_MARKER_REVERSE n Direction reversal at reference cam encoder number 34060 REFP_MAX_MARKER_DIST n Max distance to be traverse...

Страница 361: ...ance coded measurements encoder no 34320 ENC_INVERS encoder Linear measuring system inverse to the ma chine system encoder number 34330 REFP_STOP_AT_ABS_MARKER n Distance coded linear measuring system with out target point encoder number 35150 SPIND_DES_VELO_TOL Spindle speed tolerance S1 36302 ENC_FREQ_LIMIT_LOW Encoder limit frequency for re synchronization 36310 ENC_ZERO_MONITORING Zero mark mo...

Страница 362: ...lessly rotating rotary axis whose pro gramming and display is carried out modulo 360 degrees The machine axis is converted to a spindle by defining the spindle number x with x 1 2 max number of channel axes in machine data MD 35000 SPIND_ASSIGN_TO_MACHAX spindle number The spindle number must be unambiguous within the channel axes of the channel to which the spindle is assigned i e several spindle...

Страница 363: ...les using their axis names or by M70 2 If the axis is not synchronized e g position control enabled with M70 the axis has to be referenced with G74 first Only then the mechanical position will coincide with the programmed position 3 It is switched over to the current feedforward control mode marked by the machine data and commands FFWON and FFWOF The following characteristics apply to the axis mod...

Страница 364: ...in spindle revolutions G4 S a master spindle has to be defined in the corresponding channel MD20090 SPIND_DEF_MASTER_SPIND master spindle initial setting in channel In machine data MD 35000 SPIND_ASSIGN_TO_MACHAX spindle number the defined spindle number of the spindle of the channel is entered which will be the master spindle The machine data MD 35040 SPIND_ACTIVE_AFTER_RESET spindle active with ...

Страница 365: ... gear stage best Gear stage x parameter set x 1 index x In axis mode of a spindle the NC always selects the 1st parameter set index 0 independent of the current gear stage The machine data listed in the following are gear stage dependent machine data of a spindle MD35110 GEAR_STEP_MAX_VELO n nmax for gear stage change MD35120 GEAR_STEP_MIN_VELO n nmin for gear stage change MD35130 GEAR_STEP_MAX_VE...

Страница 366: ...ve is always used as the multiplication of the increments The pulse multiplication with SIMODRIVE 611 universal is 128 Examples of encoder adaptation Supposed the following conditions are provided The incremental encoder is mounted on the spindle Encoder pulses 500 pulses rev Pulse multiplication 128 Internal precision 1000 increment degree Encoder gear stage 1 1 Load gear stage 1 1 The machine da...

Страница 367: ...sion 1000 increment degree Encoder gear stage 1 1 Load gear stage 1 2 5 1 motor rev spindle rev Load gear stage 2 1 1 motor rev spindle rev Gear stage 1 MD 31020 pulse rev 360 degrees MD 31070 MD 31080 MD10210 MD 31060 MD 31050 Internal resolution 2048 128 360 1 1000 1 1 2 5 0 54932 Internal resolution int increments Encoder pulse One encoder increment corresponds to 0 54932 internal increments An...

Страница 368: ...tage 2 changeover Max speed of gear stage 1 Max speed for gear stage 1 changeover Min speed for gear stage 2 changeover Min speed of gear stage 2 Min speed for gear stage 1 changeover Min speed of gear stage 1 Min spindle speed rev min ÉÉÉ ÉÉÉ ÉÉÉ ÉÉÉ ÉÉÉ 0 gear stage 1 2 Fig 10 29 Example of speed ranges with automatic gear stage selection M40 The speeds of the spindle in conventional mode are en...

Страница 369: ...020 SPIND_DEFAULT_MODE Spindle park position 35030 SPIND_DEFAULT_ACT_MASK Activate spindle park position 35040 SPIND_ACTIVE_AFTER_RESET Spindle activated by reset 35200 GEAR_STEP_SPEEDCTRL_ACCEL n Acceleration in speed control mode 35220 ACCEL_REDUCTION_SPEED_POINT Speed limit for reduced acceleration 35230 ACCEL_REDUCTION_FACTOR Reduced acceleration 35400 SPIND_OSCILL_DES_VELO Oscillation speed 3...

Страница 370: ...terion The control brakes the spindle down to creep speed at the acceleration rate for speed operation If the creep speed has been reached INT Spindle in setpoint range the con trol branches into position control mode and the acceleration rate for position control mode and the KV factor become active The interface signal Fine exact stop is output to indicate that the programmed position has been r...

Страница 371: ...s a rule synchronizing is done to the zero mark of the connected encoder or to a BERO as zero mark substitute The machine data Set MD 34100 REFP_SET_POS reference point value defines the actual position of the spindle at the zero mark position The machine data MD34090 REFP_MOVE_DIST_CORR reference point offset is used to enter the zero mark offset The machine data MD 34200 ENC_REFP_MODE referencin...

Страница 372: ...e To synchronize the spindle it must always be rotated using a programming command e g M3 M4 SPOS The specification of a spindle speed using the direction keys of the machine control panel is not sufficient If the spindle encoder is not mounted directly on the spindle and there are speed transforming gears between the encoder and spindle e g motor mounted encoder then a BERO signal connected to th...

Страница 373: ...d is set If MD 35110 SPIND_STOPPED_AT_IPO_START feed enable for Spindle stopped is set the path feed is enabled If the spindle reaches the tolerance range specified in machine data MD35150 SPIND_DES_VELO_TOL spindle speed tolerance the interface signal IS DB31 DBX83 5 spindle in setpoint range is set If MD 35110 SPIND_STOPPED_AT_IPO_START feed enable for Spindle stopped is set the path feed is ena...

Страница 374: ...cify a spindle speed limitation in a parts program The limita tion is active in all operating modes The function LIMS LIMS spindle speed limitation G96 can be used to specify a spindle speed limit for G96 constant cutting rate This limitation is operative only when G96 is active If the encoder cut off frequency MD36300 ENC_FREQ_LIMIT encoder cut off frequency is exceeded the synchronization of the...

Страница 375: ... limiting LIMS Programmable minimum spindle speed G25 or spindle chuck Speed range of current gear stage Speed range of current gear stage limited by G25 and G26 Speed range of current gear stage with constant cutting rate G96 and G97 IS Referenced synchronized Programmable spindle speed limitation G26 0 Max velocity speed Axis spindle stopped Fig 10 32 Ranges of spindle monitoring functions speed...

Страница 376: ...f speed control loop for feedforward control K3 32910 DYN_MATCH_TIME Time constant of dynamic adaptation G2 34040 REFP_VELO_SEARCH_MARKER Reference shutdown speed R1 34060 REFP_MAX_MARKER_DIST Monitoring of zero reference mark distance R1 34080 REFP_MOVE_DIST Reference point distance target position with clearance coded system R1 34090 REFP_MOVE_DIST_CORR Reference point offset absolute offset cle...

Страница 377: ... A2 36060 STANDSTILL_VELO_TOL Threshold speed Axis spindle stopped A3 36200 AX_VELO_LIMIT Threshold value for velocity monitoring A3 Table 10 48 Spindle Setting data Number Identifier Name Ref Spindle specific SA_ 42600 JOG_FEED_PER_REF_SOURCE Revolutional feedrate control in JOG mode V1 42800 SPIND_ASSIGN_TAB Spindle number converter 42900 MIRROR_TOOL_LENGTH Mirror tool length compensation W1 429...

Страница 378: ...PLC 31 19 7 19 0 Spindle override H A V1 Axis specific Signals from axis spindle to PLC 31 60 7 Position reached with exact stop fine B1 31 60 6 Position reached with exact stop coarse B1 31 60 5 Referenced synchronized 2 R1 31 60 4 Referenced synchronized 1 R1 31 60 3 Encoder limit frequency exceeded 2 A3 31 60 2 Encoder limit frequency exceeded 1 A3 31 60 0 Axis no spindle 31 61 7 Current contro...

Страница 379: ...US DP it is possible to connect all subtypes of SIMATIC S7 I O modules of type ET200 e g ET200M as long as they support a data transmission rate of 12 Mbaud Analog I O modules SIMATIC S7 ET200 modules See above Notice The digital and analog input outputs connected on PROFIBUS DP are provided for both NC and PLC It is the sole responsibility of the user to avoid access conflicts On the side of the ...

Страница 380: ...DIG_NUM_INPUTS Number of active digital NC out put bytes 10 6 2 Assignment of the inputs outputs to the signal modules On the NC side the analog and digital inputs outputs are assigned to the re spective signal modules on the PROFIBUS DP via the appropriate I O ad dresses in the machine data Analog inputs outputs MD10362 HW_ASSIGN_ANA_FASTIN n hardware assignment of exter nal analog inputs per inp...

Страница 381: ...0 6 3 System variable A_ n The digital and analog input outputs are available in the NC parts program ASUP synchronized action etc in the form of system variables Analog input outputs A_INA n Read analog input n with n 1 8 A_OUTA n Write analog output n with n 1 8 Digital input outputs A_IN n Read digital input Bit n with n 1 4 and 9 40 A_OUT n Write digital output n with n 1 4 and 9 40 Hardware a...

Страница 382: ...dules need to be explicitly assigned to the system variables MD10366 HW_ASSIGN_DIG_FASTIN 0 1 external input byte MD10366 HW_ASSIGN_DIG_FASTIN 1 2 external input byte 00 MD10350 FASTIO_DIG_NUM_INPUTS 3 1 m where 1 1 Dig input byte of the MCI board extension module alwazs permanently 1 see text m 2 2nd and 3rd dig input byte via PROFIBUS I O modules number of input bytes used by external signal mod...

Страница 383: ...ted in Fig 10 34 page 10 383 The time properties when reading in a digital or analog input are analogously to the properties described above Dx Dx Dx GC MSG RES MSG R R DP slave Signal module NC Position controller and interpolator TM TMAPC TDP RES GC PROFIBUS DP communication 2 R Dx Dx Dx 1 TDX 3 R R R RPos RInterpol Fig 10 34 Time behavior when outputting an output signal with optimized DP cycle...

Страница 384: ...nal module on PROFIBUS DP 3 Connect the signal to the output of the module 10 6 6 Configuration example In the following configuration example the following input outputs are available to the NC ET200 24 digital inputs 16 digital outputs ADI4 8 digital inputs 16 digital outputs Note The I O addresses of the modules are assigned automatically by HW Con fig Manual adjustment is possible Each I O add...

Страница 385: ...e modules 12 Drive modules 13 Drive modules 350 367 3rd Axis 14 Drive modules 350 359 3rd Axis 15 Drive modules 16 Drive modules 17 Drive modules 312 329 4th Axis 18 Drive modules 312 321 4th Axis 19 Drive modules 20 Drive modules 21 Drive modules 330 331 I word 22 Drive modules 330 331 O word Note The structure of the PROFIBUS message frame is described in Subsection 7 3 6 page 7 220f Parameteriz...

Страница 386: ...8D MD10366 HW_ASSIGN_DIG_FASTIN 1 H05000081 129D The 4th of the 4 input bytes of the signal module slot 7 MD10366 HW_ASSIGN_DIG_FASTIN 2 H05000085 133D ADI4 The high byte of the input word slot 21 MD10366 HW_ASSIGN_DIG_FASTIN 3 H0500014B 331D The following output bytes are used by the NC ET200 The 1st output byte of the output modules slots 4 and 5 MD10368 HW_ASSIGN_DIG_FASTOUT 0 H05000080 128D MD...

Страница 387: ...2 HW_LEAD_TIME_F ASTIO Lead time of the synchronous external NC I Os 10384 HW_CLOCKED_MODULE_MASK Synchronous processing of the external NC I Os 10394 PLCIO_NUM_BYTES_IN Number of directly readable input bytes of the PLC I Os 10395 PLCIO_LOGIC_ADDRESS_IN Start address of the directly readable input bytes of the PLC I Os 10396 PLCIO_NUM_BYTES_OUT Number of directly writeable output bytes of the PLC...

Страница 388: ...etting value of digital NC outputs from PLC 10 7 133 137 141 145 Setting screen form of digital NC outputs 10 146 Disable analog NC inputs 10 147 Setting screen form of analog NC inputs 10 148 163 Setting value for analog NC inputs from PLC 10 166 Overwrite screen form of analog NC outputs 10 167 Setting screen form of analog NC outputs 10 168 Disable analog NC outputs 10 170 185 Setting value for...

Страница 389: ...arance control in position controller cycle Order No 6FC5 251 0AC05 0AA0 References FB3 Description of Functions Special Functions Section clearance control TE1 Continue Machining at the Contour Retrace Support Order No 6FC5 251 0AE72 0AA0 References FB3 Description of Functions Special Functions Section Continue Machining Retrace Support TE7 Fast Laser Switching Signal Order No 6FC5 251 0AE74 0AA...

Страница 390: ...e NT desktop 2 Use the Windows NT Explorer to copy the compile cycle file e g ccresu elf from the diskette drive or external PC PG to a directory of your choice on the PCU hard disk e g F techfunctions 3 Copy the compile cycle file with SinuCom NC from the directory used in Step 2 on the PCU hard disk to the NCK FFS SinuCom NC menu command File Load compile cycle NC flash file system Loaded compil...

Страница 391: ...he compile cycle is not enabled in conjunction with SINUMERIK 840Di 840DiE the following alarm is issued Not enabled for SINUMERIK 840Di Alarm 7200 CC identifier _ELF NO_840Di Not enabled for SINUMERIK 840DiE Alarm 7200 CC identifier _ELF NO_EMBARGO Notice If after booting the NCK alarm 7200 appears then none of the loaded compile cycles are active 10 7 3 Activating and licensing the technological...

Страница 392: ...er n 0 Activation of the technological function in the NC channels n 1 Additional functions within the technological function Default settings 0 min input limit 0 max input limit FFFF Changes valid after RESET Protection level 2 7 Unit Data type UINT16 valid from SW 2 2 Meaning Activation of the technological function in the NC channels The technological function is activated in the NC channels vi...

Страница 393: ...0 8 2 Data descriptions MD 11250 PROFIBUS_SHUTDOWN_TYPE MD number PROFIBUS shutdown handling Default settings 0 min input limit 0 max input limit 2 Changes valid after RESET Protection level 2 7 Unit Data type UINT8 valid from SW 2 2 Meaning Shut down modes of PROFIBUS DP communication 0 PROFIBUS DP communication is shut down at the DP master end without any warning 1 PROFIBUS DP is switched to CL...

Страница 394: ...tings in case of reset MD 20112 START_MODE_MASK Definition of the control default settings in case of NC start MD20150 GCODE_RESET_VALUES Reset position of the G groups MD20152 GCODE_RESET_MODE G code initial setting in case of reset are used to define the relevant default settings Table 10 53 Default settings that can be parameterized through MD State parameterizable through MD Power up power ON ...

Страница 395: ...d ROV CHAN1 AUTO Start up RUN P RUN STOP General PLC reset PLC MRES STOP SF DP BUSF FORCE BATF BATL SF RUN PLC RUN PLC RUN P PLC STOP General NCK reset NCK Reset General PLC reset PLC MRES NCK latency times Channel RESET 200 0 ms Time sec 73 0 Diagnostics Settings Acknowledge alarm 4065 NCK PLC Fig 10 37 Menu NC PLC diagnosis The NCK group combines the following functions S NCK status The output f...

Страница 396: ...oad a series start up file see Section 14 Page 14 449 S Acknowledging Alarm 4065 The Acknowledge Alarm 4065 acknowledges alarm S Alarm 4065 Battery backed memory has been restored from the backup copy disk possible data loss and triggers a NCK POWER ON reset To acknowledge the alarm per soft key it is necessary to switch to the next soft key bar per ETC Note Alarm 4065 can also be acknowledged wit...

Страница 397: ...PLC reset The actions stated above at 1 4 are performed and the parameters stated at 5 also reset S Status displays The states displayed by the LEDs proivde the following information S SF System Fault Lights up on PLC system fault e g hardware programming parameter ization computation timing battery and communication faults S BATL Battery Low Lights up if the 5 V supply voltage buffer battery fall...

Страница 398: ...ctive The NCK latency time group combines the following information S NCK latency time The foundation for the SINUMERIK 840Di Real time property is the cyclic activation of the NC system software at defined intervals Since the NC and Windows NT share the available processor resources of the PLC there can be delays latency times when calling the NCK Latency times greater than 200µsecs are Real time...

Страница 399: ...annel RESET Diagnostics Settings Settings non volatileuser memory Signal source Signal input for shutdown behavior deactivated Fig 10 38 Menu Settings On switchover to the menu the data displayed are read only To modify the data first press the soft key Modify The Settings group combines the following functions S Non volatile user memory Use the list box to select the size of the non volatile user...

Страница 400: ... deactivated without terminating Window NT correctly all user data are lost A UPS system see Subsection 1 1 8 Page 1 29 is therefore absolutely necessary in conjunction with the virtual SRAM S Signal input for Shutdown behavior Signal source Use the list box to configure the digital input used for the shutdown signal of the UPS S deactivated No input signal present S NCK inputs 0 3 The shutdown si...

Страница 401: ...tileuser memory Signal source Signal input for shutdown behavior deactivated Accept Accepting the changes can result in the loss of NC user data Ensure that these data have been stored in a series machine start up file 1 Memory setting have been changed Changes do not become effective until after a full system reboot 2 The shutdown behavior has been modified Wrong configuration results in data los...

Страница 402: ...06 03 10 10 NC PLC diagnosis 840Di SW 2 3 and higher 10 402 Siemens AG 2003 All rights reserved SINUMERIK 840Di Manual HBI 06 03 Edition 10 NC Start Up with HMI Advanced Notes ...

Страница 403: ...urrent requirements is possible Files containing the alarm and message texts are stored on the hard disk in directory installation path dh mb dir 11 1 1 Configuration file MBDDE INI The alarm and message texts to be used are set in the file installation path mmc2 mbdde ini To this aim the appropriate paths to the application specific standard and user files must be stored in the section Textfiles ...

Страница 404: ...g the existing data It is therefore ur gently recommended to store user specific alarm and message texts in sepa rate user text files 11 1 3 User text files You can replace the alarm and message texts stored in the standard text files by your own user specific text files or extend them Note To edit the text files any ASCII editor can be used When editing the text files with a different editor make...

Страница 405: ...ded USER path installation path user mbdde ini Example of adding an additional text file MYPLC_GR COM Note If the text file MYPLC_GR COM is created on an external PC and then read in through the serial interface e g with PCIN the following lines must be con tained at the beginning of the file _N_MYPLC_GR_COM Path _N_MB_DIR MYPLC_GR COM User specific file for user specific German PLC alarm texts _N...

Страница 406: ...ancel 68000 69000 Reserved 70000 79999 Compile cycle alarms 400000 499999 PLC alarms general 500000 599999 PLC alarms for channel 600000 699999 PLC alarms for axis and spindle 700000 799999 PLC alarms for user 800000 899999 PLC alarms for sequential controllers graphs The text file for cycle and compile cycle alarms has the following structure Table 11 3 Structure of text file for cycle alarm text...

Страница 407: ...f and the symbol added to indicate missing text S Parameter 1 Channel number Parameter 2 Block number The ASCII file for PLC alarm texts has the following structure Table 11 4 Structure of text file for PLC alarm texts Alarm no Display Help ID Text Text on MMC 510000 1 0 Channel K FDDIS all Channel 1 FDDIS all 600124 1 0 Feed disable axis A Feed disable axis 1 600224 1 0 600124 Feed disable axis 2...

Страница 408: ...roller no Parameter N Signal number Parameter Z Status number 11 1 5 Setting the alarm log properties In addition to the current alarms an alarm log showing the alarms occurred hith erto is displayed on the user interface in the form of a list The properties of the alarm list can be changed in the MBDDE INI file Table 11 5 Section of the file MBDDE INI Section Meaning Alarms General information on...

Страница 409: ...e Microsoft Foundation Classes S MaxNo defines the maximum size of the alarm list S ORDER defines the order in which the alarms are included in the alarm list FIRST puts more recent alarms at the head of the list LAST puts more recent alarms at the end of the list Example for the section Alarms Time format day month year hour minute second Maximum size of alarm list 50 Order New alarms are to be p...

Страница 410: ...06 03 11 1 Alarm and message texts 11 410 Siemens AG 2003 All rights reserved SINUMERIK 840Di Manual HBI 06 03 Edition 11 Alarm and Message Texts Notes ...

Страница 411: ...References FBU SIMODRIVE 611 universal Description of Functions The following signals must be made available at the PLC interface for axis or spindle IS Servo enable DB31 DBxx DBX2 1 IS Pulse enable DB31 DBxx DBX21 7 IS Position measuring system 1 or 2 DB31 DBxx DBX1 5 DBX 1 6 The following signals on the interface must not be set or else the axis spindle motion will be disabled IS Feed spindle ov...

Страница 412: ...ition References FB Description of Functions Basic Machine A2 Various Interface Signals and Functions Setting the limit switches and checking the interface signals S Hardware limit switch PLUS DB31 DBxx DBX12 1 S Hardware limit switch MINUS DB31 DBxx DBX12 0 Limit switches 12 Dry Run of Axis and Spindle ...

Страница 413: ...4 Follow up mode DBX1 3 Axis disable DBX2 2 Delete distance to go DBX2 1 Controller enable DBX4 3 Feed stop spindle stop DBX5 0 5 5 JOG INC DBX4 6 4 7 Traversing keys DBX20 1 HLGSS Drive DBX21 7 Pulse enable 611D Check machine data MD32000 32050 Velocities MD36000 36620 Monitoring functions MD32110 Sign actual value MD32250 Nominal output voltage 1 MD32260 Nominal output speed Service display Trav...

Страница 414: ...g error OK Check machine data MD32200 KV factor MD32410 Time constant for jerk limitation MD32910 Dynamic response adaptation MD31050 31060 Load gearing MD32610 Feedforward control MD of the velocity matching Check the drive parameters P880 PROFIBUS speed evaluation no yes 1 Alarm no yes 1 Interpret alarm 2 Check MD of velocity adaptation End 12 Dry Run of Axis and Spindle ...

Страница 415: ... 3 Feed stop spindle stop DBX20 1 HLGSS DBX2 2 Spindle reset when MD 35050 1 DBX21 7 Pulse enable Check machine and setting data MD32250 Nominal output voltage 1 MD32260 Nominal output speed MD 35100 35150 Spindle speed limitation MD 36200 AX_VELO_LIMIT SD 41200 JOG_SPIND_SET_VELO SD 43220 SPIND_MAX_VELO_G26 SD 43210 SPIND_MIN_VELO_G25 Service display Enable spindle controller enable NC enable on ...

Страница 416: ... MD 35300 Creep speed MD 36300 Encoder limit frequency MD34200 Spindle synchronization MD of encoder matching All gear stages tested End yes IS Spindle in setpoint range DB31 DBxx DBX83 5 no yes Check machine data and interface signals MD 35110 35140 Speeds for gear stages MD 35150 Spindle speed tolerance IS Actual gear stage DB31 DBxx DBB16 IS Select drive parameter set DB31 DBxx DBB21 IS Setpoin...

Страница 417: ...e the most important speed and position control loop quantities in the time and frequency range of a drive without any external measuring instruments The integrated FFT analysis Fast Fourier Transformation provides a powerful means to assess the control loop quality and in addition also to analyze the given mechanical properties The FFT analysis should be used whenever unsteady speed or position s...

Страница 418: ...time response of servo and drive data For example S Actual position S Setpoint position S Following error S Contour deviation The diagrams determined can be archived using file functions Thus they can be used both for documenting the machine settings and to facilitate remote diagnosis Servo trace Saving measurement results 13 Drive Optimization using HMI Advanced ...

Страница 419: ...d in inch min or rev min for translatory or rotary motions Distance Metric system Specified in mm or degrees for translatory or rotary motions Inch system Specified in inches or degrees for translatory or rotary motions Time Specified in msec Frequency Specified in Hz Note The default setting for all parameters is 0 To ensure that no erroneous traversing movements due to parts programs can be carr...

Страница 420: ...ote JOG mode must be selected when measuring functions are started The user must ensure that when the measuring functions are used the EMERGENCY STOP button is always within the reach no obstacles are in the traversing range The following events will cancel active measuring functions Hardware limit switch reached Traversing range limits exceeded EMERGENCY STOP RESET mode group channel NC stop No c...

Страница 421: ...traversing enable The interface signals are activated from the main menu of the appropriate mea suring function in the group Drive test traversing enable See Fig 10 37 page 10 395 Fig 13 1 Main menu Position control loop measurement Choose the type of traversing enable from the selection list either by using the Toggle key or by clicking with the right mouse button on the desired enable type Witho...

Страница 422: ...absolute axis position displayed in the Status group at the time of measurement The traversing range monitoring is activated from the main menu of the ap propriate measuring function in the group Traversing range See Fig 10 37 page 10 395 Choose the type of traversing range monitoring from the selection list Monitor ing either using the Toggle key or by clicking with the right mouse button on the ...

Страница 423: ...Speed control loop measurement Note You will find information about optimization of the torque current and speed control loop of the SIMODRIVE 611 universal E POSMO CD CA and SI drives in the online help of the start up tool SimoCom U Index Optimization of speed control loop This measurement function basically analyses the response to the motor mea suring system Depending on which basic measuremen...

Страница 424: ... care must be taken to prevent resonance within the speed controller limit frequency range stability limit approx 200 500Hz Fig 13 2 Example Measurement results of a reference frequency response measurement Alternatively the interference frequency response can be recorded in order to assess how well the control suppresses interference Amplitude This parameter determines the height of the test sign...

Страница 425: ... distorted Offset The measurement requires a slight speed offset of a few motor revolutions per minute The offset must be set to a higher value than the amplitude S The Offset is run up using an acceleration ramp S The acceleration value is defined for one axis check MD 32300 MAX_AX_ACCEL spindle check MD 35200 GEAR_STEP_SPEEDCTRL_ACCEL MD 35210 GEAR_STEP_POSCTRL_ACCEL S The following applies Acce...

Страница 426: ...ollowing applies Acceleration value 0 no ramp Acceleration value 0 ramp active S The actual measuring function becomes active only when the offset value is reached Settling time This value represents the delay between measured data recording test setpoint output and the injection of the offset Speed setpoint Amplitude Offset Settling time Measuring period Time Time 0 0 Position characteristic Fig ...

Страница 427: ...oint step change S Setpoint ramp 2 Set the required parameters in the measurement parameter screen 3 Display of the measurement result on the screen with the soft key Display The reference frequency response determines the transmission response of the position controller in the frequency active position measuring system The set point filters Kv value and feedforward control must be parameterized s...

Страница 428: ...The maximum value is given by the position control cycle Tposition controller Bandwidthmax Hz 1 2 Tposition controller sec Example Position controller cycle 2msec Bandwidthmax 1 2 2 10 3 250Hz Averaging The accuracy of the measurement but the measurement duration too will in crease with this value A value of 20 is normally suitable Settling time This value represents the delay between recording of...

Страница 429: ...plitude This parameter determines the height of the preset setpoint step change or ramp Measurement time This parameter determines the period of time to be recorded maximum value 2048 position controller cycles Settling time This value represents the delay between measured data recording test setpoint output and the injection of the offset Ramp duration In basic setting Setpoint ramp the position ...

Страница 430: ...d to the value specified in S MD 32000 MAX_AX_VELO maximum axis velocity This can lead to not achieving the desired step height Just as well the S MD 32000 MAX_AX_VELO maximum axis velocity S MD 32300 MAX_AX_ACCEL max axis acceleration are effective with the setpoint ramp in the range of the ramp The max axis ve locity limits the ramp rate of rise velocity limitation whereby the drive does not rea...

Страница 431: ...nt Fig 13 6 Menu Display of measurement with marker X ON When the soft keys X marker ON and Y marker ON are pressed a vertical or horizontal line with a circle is displayed on the measurement curve The corresponding values e g for damping frequency degrees etc are dis played in the appropriate diagram Use the cursor keys to move the markers slowly Cursor key fast Shift key cursor key Display of me...

Страница 432: ...re peated as often as desired until the maximum size of representation is reached Use the soft key Fullscreen to switch the display of the diagrams back to their original size Note X and Y markers can be active at a time Use the soft key Scale to change the scaling of the traces and of the marker ranges in the two graphs The scaling can be switched over between auto default setting and fixed The Y...

Страница 433: ...tions Switching over the display from double to single graphics and vice versa this function also exists in the scaling menu Fig 13 7 page 13 432 Printing graphics Printing the graphics into a file bitmap or output to a connected printer Printer selection Selecting the output of the graphics to a bitmap file or to a connected printer Soft keys Graphics 13 Drive Optimization using HMI Advanced ...

Страница 434: ...ted using the mouse or keyboard Individual functions of the trace function S Four trace buffers with up to 2 048 values each S Selection of SERVO and drive signals in position control cycle S Trace trigger signals can be set using absolute address and value masking S Different trigger conditions to start recording triggering always on Trace 1 S Pretriggering and posttriggering possible S Measuring...

Страница 435: ... switchover Start up Drives servo Servo trace Fig 13 8 Main menu Servo trace Toggle key The cursor is controlled using the arrow keys on the operator panel or with the mouse If the cursor is placed on a list box press the insert key to open the list box You page in the list using the arrow keys You accept a value using the input key Fig 13 9 Cursor control Main menu Servo trace 13 Drive Optimizati...

Страница 436: ...ording starts in advance of the triggering event by the time set With positive input values without sign recording starts the time set after the triggering event Boundary condition Trigger time measurement duration y 0 The trigger type is chosen from the drop down list Trigger The trigger always refers to trace 1 Once the triggering conditions are fulfilled traces 2 to 4 are started simultaneously...

Страница 437: ...do so proceed as follows Choose the signal type Physical address from the desired trace Press the soft key Physical address Enter the desired values in the input screen form Press the soft keys OK to complete your input Notice This function is only required in exceptional cases for example if the informa tion provided by the known signals see Signal selection list field is not adequate Before usin...

Страница 438: ...6 4 Measuring After parameterization has been completed you then enable measurement by pressing soft key Start The measurement is carried out once the set trigger condition of trace 1 is ful filled The measurement is completed after the set measurement duration is expired With the end of the measurement the graphics are prepared automatically Use the Display soft key to call the display functions ...

Страница 439: ...cal display function of the measurement results Fig 13 11 Measurement results Trace function When the soft keys X marker ON and Y marker ON are pressed a vertical or horizontal line with a circle is displayed on the measurement curve The corresponding values e g for damping frequency degrees etc are dis played in the appropriate diagram Use the cursor keys to move the markers slowly Cursor key fas...

Страница 440: ...e peated as often as desired until the maximum size of representation is reached Use the soft key Fullscreen to switch the display of the diagrams back to their original size Note X and Y markers can be active at a time Use the soft key Scale to change the scaling of the traces and of the marker ranges in the two graphs The scaling can be switched over between auto default setting and fixed The Y ...

Страница 441: ...tions Switching over the display from double to single graphics and vice versa this function also exists in the scaling menu Fig 13 12 page 13 440 Printing graphics Printing the graphics into a file bitmap or output to a connected printer Printer selection Selecting the output of the graphics to a bitmap file or to a connected printer Soft keys Graphics 13 Drive Optimization using HMI Advanced ...

Страница 442: ...ent of the specific measurement data Fig 13 13 Menu File functions In the File group you can select an existing file from the drop down list or enter one in the text field underneath In the Directory group you can select the directory where you want to save the file This can also be a directory in the Services operating area you have created by yourself or the basic directory of the data managemen...

Страница 443: ...fault direc tory you can create user specific directories New directories are created in the operating area Operating area switchover Services Manage data New subdirectories can be created below the Diag nosis directory For the description of the operating area Services please refer to References BA Operator s Guide Creating subdirectories 13 Drive Optimization using HMI Advanced ...

Страница 444: ... print the graphics Fig 13 14 Graphics soft keys Use the soft key Printer selection to open the appropriate menu Fig 13 15 page 13 445 Choose the type of file output from the selection list of the menu Select printer using either the Toggle key or by double clicking with the right mouse button on the desired file output type Bitmap file Printer Toggle key Printer selection Soft key Printer selecti...

Страница 445: ...the Toggle key or by double clicking with the right mouse button on the desired printer The graphics is to be saved in a bitmap file bmp S In the selection field for printer setting set Output to bitmap file S Press the soft key Print graphics S Enter the desired file name You can enter a new file name or choose an existing file from the drop down list Output to printer Output as a bitmap file 13 ...

Страница 446: ...File name group you can select an existing file from the drop down list or enter one in the text field underneath In the Directory group you can select the directory where you want to save the file This can also be a directory in the operating area Services Data you have created by yourself or the basic directory of the data management list entry standard directory For the description of the opera...

Страница 447: ...th HMI Advanced is not possible within the framework of SINUMERIK 840Di For a description how to carry out an automatic controller adjustment of SIMO DRIVE 611 universal drives please refer to References FBU SIMODRIVE 611 Universal Descriptions of Function Section Description of Functions Optimizing current and speed controllers J SIMODRIVE 611 universal 13 Drive Optimization using HMI Advanced ...

Страница 448: ...06 03 13 9 Automatic controller setting 13 448 Siemens AG 2003 All rights reserved SINUMERIK 840Di Manual HBI 06 03 Edition 13 Drive Optimization using HMI Advanced Notes ...

Страница 449: ...ing times are recommended to carry out data backups S After start up S After changing machine specific settings S In service cases e g after a hardware replacement software upgrade etc to resume production without longer downtimes Before activating memory configuring machine data a warning appears a data backup must be carried out A data backup can currently not yet be carried out uniformly for al...

Страница 450: ...VE 611 universal drives is carried out using the start up tool SimoCom U When doing so one parameter file each is saved per drive on the hard disk of the PCU SimoCom U is part of the SINUMERIK 840Di installation For detailed information on the data backup of SIMODRIVE 611 universal drives please refer to References FBU SIMODRIVE 611 Universal Description of Functions Section Closed loop control un...

Страница 451: ...ile by selecting the device to which you wish the file to be output Note Because of its file extension arc the series machine start up file is also called archive A series machine start up file can be created for the following components S NC with without compensation data S PLC S HMI When selecting any combinations are possible However it is recommended to save the individual components separatel...

Страница 452: ... was made OB organization blocks FB function blocks SFB system function blocks FC functions SFC system functions DB data blocks SDB system data blocks The contents of a series machine start up file created for the HMI Advanced comprise all data stored in the HMI database in the directory dh at the moment when the data backup was made The creation and output of the series machine start up file is s...

Страница 453: ... following alternative procedure to save an original image Operating sequence 1 Set the PLC to the operating status STOP 2 Archive the PLC data 3 Set the PLC to the operating status RUN An inconsistent image results if a series machine start up file with PLC data is created and the PLC is in the status RUN cyclic operation The data blocks of the PLC are saved at different times with contents that ...

Страница 454: ...r Start up NC PLC Diagnosis S Change the PLC operating state Group PLC buttons STOP and RUN S NC and PLC must then be resynchronized Group PLC buttons NC Re set 14 4 Reading in a series machine start up file with HMI Advanced Reading in a series machine start up file is divided into the following steps 1 Open the menu to read in a series machine start up file Operating area switchover Services key...

Страница 455: ...Boot Manager that is dis played when booting after turning on the PCU 15 1 1 PCU basic software The PCU basic software that is already preinstalled on the PCU hard disk when the SINUMERIK 840Di is supplied comprises S Windows NT 4 0 Service Pack 6 English version S Internet Explorer 5 English version S MS DOS SW 6 21 and higher S MPI driver SW 5 and higher S Norton Ghostt Version 6 and higher S No...

Страница 456: ... Primary partition Primary partition Primary partition Extended partition with logic drive active Fig 15 1 Partitioning of the hard disk 1st partition drive C Drive C contains MS DOS 6 2 tools e g Norton Ghostt and scripts implemented by the service menu 2nd partition drive D Drive D contains The Images directory with the images preinstalled and created by the user The Install directory into which...

Страница 457: ...nal languages S change INI files hardware configuration e g install drivers Note With power up under Windows NT the NC system software is automatically started in the background Select the hidden menu option Service menu CursorDown key and Input key to start the SINUMERIK service software In the Service menu under MS DOS you can S establish the connection to an external computer programming device...

Страница 458: ...e folder of the external computer you want to access must be shared by the PCU and the sharing name must be known To install the network protocol NetBEUI open Control Panel using the Windows 95 NT taskbar Start Settings Control Panel on the external computer Open Network in the Control Panel Dialog Network Register Protocols Button Add Dialog Select Network Protocol Network Protocol NetBEUI protoc...

Страница 459: ...e Properties dialog right mouse button Properties of the drive di rectory and define the sharing name and the access rights Dialog Properties of drive directory Tab Share access Optional field Choose Shared As Sharing name SHARED AS Button Rights Dialog Access by share access rights Button Add Dialog Add users and groups Names Choose a name from the list e g User or Everybody Button Add OK Access ...

Страница 460: ...66 3 Initialize the control by deleting NC data and performing a general PLC re set See Subsection 8 1 1 page 8 249 4 Read in the series machine start up file created in Step 1 See Section 14 4 page 14 454 15 2 2 Parallel link and external FAT16 drive The operator actions explained in the following will copy software from an exter nal computer PG PC from a FAT16 drive into the installation directo...

Страница 461: ... not yet exist of the external computer PG PC If not enough space is available on drive C or C is not a FAT16 drive you can also use another local drive e g D Note Direct installation from CD is not possible 4 On an external computer PG PC start the program intersrv exe under DOS or under Windows 95 from a DOS prompt As the parameter specify the drive on which the software to be installed is found...

Страница 462: ... to enter a password 7 Type one of the passwords of protection levels 0 2 System Manufacturer Service Following menu PLEASE SELECT MEDIUM 1 Install from Floppy Disk 2 Install via Serial Parallel Line 3 Install from Network Drive 5 REBOOT 9 Return to Main Menu Your Choice 1 2 3 5 9 8 From the following menu choose the menu item Install via Serial Parallel Line using the key 2 The software to be ins...

Страница 463: ...DOS S To transfer the software to be installed on the PCU the program interlnk exe must be installed on the external computer PG PC S The PCU is equipped with a full keyboard Notice Before you copy the software into the D Install directory make sure that suffi cient free memory space is available 1 Make sure that the program interlnk exe is installed on the ext computer PG PC Windows 95 Windows 3 ...

Страница 464: ... Services Your Choice 1 2 3 4 5 7 8 9 P 4 Select Start PC Link using the key 8 The system prompts you to enter a password 5 Type one of the passwords of protection levels 0 2 System Manufacturer Service The following menu will appear Microsoft Interlnk Server Version version This Computer Other Computer Server Client C size D size LPT1 Transfer Port Speed Alt F4 Exit 6 Now restart the ext computer...

Страница 465: ...puter PG PC as drive G 8 Now copy the software to be installed from the ext computer into the drive D INSTALL of the PCU copy path G INSTALL 9 If the copying process is complete exit INTERSVR on the PCU key com bination Alt F4 When the control is booted for the next time under Windows NT the software setup exe contained in the installation directory D INSTALL of the PCU is installed automatically ...

Страница 466: ...dows 95 S The Ethernet cable is connected to the Ethernet interface of the external computer and the PCU Notice A point to point connection between PCU 50 and an external computer PG PC requires an Ethernet cable of the type Twisted Pair Crossed 10ba seT 100baseTX Ethernet Cable S The network parameters of the external computer are set or known Network Protocol NetBEUI Computer Name Shared As How ...

Страница 467: ...n levels 0 2 System Manufacturer Service Following menu PLEASE SELECT MEDIUM 1 Install from Floppy Disk 2 Install via Serial Parallel Line 3 Install from Network Drive 5 REBOOT 9 Return to Main Menu Your Choice 1 2 3 5 9 4 Choose Install from Network Drive using the key 3 Following menu PLEASE SELECT 1 Connect to Network Drive 2 Show Connected Network Drives 3 Disconnect from all Network Drives 4 ...

Страница 468: ...STALL 6 The default setting of the directory where the software is to be installed on the external computer Install Directory is F INSTALL If the software is in a different directory what is normally the case this set ting must be adapted accordingly PLEASE SELECT 1 Connect to Network Drive 2 Show Connected Network Drives 3 Disconnect form all Network Drives 4 Change Install Directory 5 Install fr...

Страница 469: ...tall from H PFAD 9 Return to previous Menu Your Choice 1 2 3 5 9 Connected Network Drive last H R3344 MY_INSTALL Install Directory H PATH 7 To start the data transfer choose Install from H PATH using the key 5 When the transmission is complete the PCU will reboot When the control is booted for the next time under Windows NT the software setup exe contained in the installation directory D INSTALL i...

Страница 470: ...rives using the key 2 Status Local Name Remote Name OK H R3344 MY_INST ALL Use the menu item Disconnect from all Network Drives to disconnect all links to network drives PLEASE SELECT 1 Connect to Network Drive 2 Show connected Network Drives 3 Disconnect from all Network Drives 4 Change install directory 5 Install from H PATH 9 Return to previous Menu Your Choice 1 2 3 5 9 Choose Disconnect form ...

Страница 471: ...puter and enough memory capacity is provided S In the BIOS of the PCU and of the external computer the parallel interface is set to EPP or ECP Notice Before you transfer the backup copy disk image make sure that enough free memory space is available on the ext computer PG PC After the PCU has been turned on the menu of the boot manager is displayed 1 Select the menu option Service menu hidden usin...

Страница 472: ...oice 1 2 3 9 5 Now select the menu option Configure GHOST parameters using the key 1 to set the following parameters Connection type PARALLEL Path or File name under which you wish the backup copy to be stored on the external computer Following menu PLEASE SELECT 1 Set Connection Mode PARALLEL 2 Set Connection Mode LOCAL 3 Change Backup Image Filename 4 Change Restore Image Filename 5 Change Machi...

Страница 473: ...rwise Point 8 is dis played immediately Following menu PLEASE SELECT 1 Backup WITHOUT Local Images 3 Backup WITH Local Images 9 Back to previous Menu Your Choice 1 2 3 9 If you do not wish to save the local backup copies of saved partitions avail able on the hard disk of the PCU then choose Backup WITHOUT Local Images using the key 1 Otherwise choose Backup WITH Local Images using the key 2 8 A me...

Страница 474: ...a transfer The following information is displayed in the Ghost message window The progress of the data transfer is displayed The paths are displayed The volume of data to be transferred is displayed Size of backup copy with compressing 4 8GB hard disk approx 330MB file Time for transfer approx 50min 15 SW Installation Update and Data Backup ...

Страница 475: ... enough memory capacity is provided S In the BIOS of the PCU and of the external computer the parallel interface is set to EPP or ECP After the PCU has been turned on the menu of the boot manager is displayed 1 Select the menu option Service menu hidden using the CursorDown key and then press the Input key The following menu will appear PLEASE SELECT 1 Install Update SINUMERIK System 2 SINUMERIK T...

Страница 476: ...ou wish the backup copy to be stored on the external computer Following menu PLEASE SELECT 1 Set Connection Mode PARALLEL 2 Set Connection Mode LOCAL 3 Change Backup Image Filename 4 Change Restore Image Filename 5 Change Machine Name 6 Manage Network Drives 9 Back to previous Menu Your Choice 1 2 3 4 5 6 9 S To set the connection mode Network Connection choose the menu item Set Connection Mode PA...

Страница 477: ...k partitioning do you want 1 Standard Partitioning default 2 User defined Partitioning Your Choice 1 2 Standard partitioning default The hard disk partitioning of the PCU is set to the initial state by auto matic parameterization by Norton Ghostt User defined partitioning You can adapt the sizes of the hard disk partitions on the PCU manually in Norton Ghostt A message window appears during the ch...

Страница 478: ...mport process is completed 9 With restoring the backup copy to the PCU the last valid computer name with which the PCU has been identified on the network has been overwrit ten To make sure that the PCU is assigned a valid computer name again you must type a new name of the computer The following menu will appear PLEASE SELECT 1 Input Machine Name MANUALLY 2 Input Machine Name RANDOMLY 9 Abort Your...

Страница 479: ...Walkert has updated the computer name and system ID the following menu is displayed It seems that Ghost Restore succeeded Hit any Key to reboot the System When the PCU is booted for the next time under Windows NT the partitions E and F will be checked by the diagnostic program CHKDISK in succession whereby the PCU is rebooted automatically After completion of the check the system with the restored...

Страница 480: ... cable is connected to the Ethernet interface of the external computer and the PCU Notice A point to point connection between PCU 50 and an external computer PG PC requires an Ethernet cable of the type Twisted Pair Crossed 10ba seT 100baseTX Ethernet Cable S The network parameters of the external computer are set or known Network Protocol NetBEUI Computer Name Shared As How to set or determine th...

Страница 481: ...wing menu PLEASE SELECT 1 Hard disk Backup Restore with GHOST 4 Partitions Backup Restore with GHOST 9 Back to previous Menu Your Choice 1 4 9 4 Choose the menu item Hard disk Backup Restore with Ghost using the key 1 Following menu PLEASE SELECT 1 Configure Ghost Parameters 2 Hard disk Backup to PATH Mode 3 Hard disk Backup from PATH Mode 9 Back to previous Menu Your Choice 1 2 3 9 Fig 15 2 Main ...

Страница 482: ...ves 9 Back to previous Menu Your Choice 1 2 3 9 Choose Connect to Network Drive using the key 1 Type the user name and the password you want to use for access to the external computer using the network connection Windows NT 4 0 User name and password of the local user of the PG PC Windows 95 Any user name if a password is required type the password you have specified to share access to the directo...

Страница 483: ...y in a subdirectory with reference to the shared drive directory of the external computer Type the desired file name under which you wish to store the backup copy e g SICHER01 GHO Use the key 9 to return to the Main menu for configuring the Ghost param eters Fig 15 3 page 15 482 Use the key 9 to return to the Main menu for saving restoring hard disks after you have confirmed the confirmation warni...

Страница 484: ... the connection between the PCU and the external computer is established The destination path in which the backup copy will be stored on the ex ternal computer is displayed Press Y to start the backup process The actual backup process is now carried out by Norton Ghostt The following information is displayed in the message window that opens The progress of the data transfer is displayed The paths ...

Страница 485: ... 1 2 3 9 Choose Show Connected Network Drives using the key 2 Status Local Name Remote Name OK H R3344 MY_BACKUP Use the menu item Disconnect from all Network Drives to disconnect all links to network drives PLEASE SELECT 1 Connect to Network Drive 2 Show connected Network Drives 3 Disconnect from all Network Drives 9 Back to previous Menu Your Choice 1 2 3 9 Choose Disconnect form all Network Dri...

Страница 486: ...lfilled S The operating system of the external computer is Windows NT 4 0 Windows 95 S The Ethernet cable is connected to the Ethernet interface of the external computer and the PCU Notice A point to point connection between PCU 50 and an external computer PG PC requires an Ethernet cable of the type Twisted Pair Crossed 10ba seT 100baseTX Ethernet Cable S The network parameters of the external co...

Страница 487: ...wing menu PLEASE SELECT 1 Hard disk Backup Restore with GHOST 4 Partitions Backup Restore with GHOST 9 Back to previous Menu Your Choice 1 4 9 4 Choose the menu item Hard disk Backup Restore with Ghost using the key 1 Following menu PLEASE SELECT 1 Configure Ghost Parameters 2 Hard disk Backup to PATH Mode 3 Hard disk Backup from PATH Mode 9 Back to previous Menu Your Choice 1 2 3 9 Fig 15 4 Main ...

Страница 488: ...ves 9 Back to previous Menu Your Choice 1 2 3 9 Choose Connect to Network Drive using the key 1 Type the user name and the password you want to use for access to the external computer using the network connection Windows NT 4 0 User name and password of the local user of the PG PC Windows 95 Any user name if a password is required type the password you have specified to share access to the directo...

Страница 489: ...external computer Type the desired file name under which you wish to store the backup copy e g SICHER01 GHO Use the key 9 to return to the Main menu for configuring the Ghost param eters Fig 15 5 page 15 488 Use the key 9 to return to the Main menu for saving restoring hard disks after you have confirmed the confirmation warning regarding the modified GHOST parameters Following menu PLEASE SELECT ...

Страница 490: ...ata transfer is displayed The paths are displayed The volume of data to be transferred is displayed Size of backup copy with compressing 4 8GB hard disk approx 330MB image file Time for transfer approx 15min Notice If you abort the transfer inconsistent data will be available on the PCU and the system can possibly no longer be booted To boot the PCU you will need a boot diskette Norton Ghostt clos...

Страница 491: ... computer name and system ID are made using the program Norton Ghost Walkert Note The network settings can be later modified determined under Windows NT Windows NT taskbar Start Settings Control Panel Network 9 After Norton Ghost Walkert has updated the computer name and system ID the following menu is displayed It seems that Ghost Restore succeeded Hit any Key to reboot the System When the PCU is...

Страница 492: ...u option Show Connected Network Drives using the key 2 Following menu Status Local Name Remote Name OK H R3344 MY_BACKUP All currently connected drives are displayed 15 3 6 Disconnecting connected drives From the menu displayed in the Subsection 15 3 4 under Point 5 page 15 487 select PLEASE SELECT 1 Connect to Network Drive 2 Show connected Network Drives 3 Disconnect from all Network Drives 9 Ba...

Страница 493: ...he menu item Service Menu hidden The following menu will appear PLEASE SELECT 1 Install Update SINUMERIK System 2 SINUMERIK Tools and Options 3 DOS Shell 4 Start Windows NT Service Mode 5 SINUMERIK System Check 7 Backup Restore 8 Start PC Link 9 Reboot warm restart P 840Di Services Your Choice 1 2 3 4 5 7 8 9 P 2 Choose Backup Restore using the key 7 The system prompts you to enter a password 3 Ty...

Страница 494: ...key 2 Following menu You must specify the image name max 7 characters long Image Name 6 Type the name under which you wish the partition backup to be stored max 7 characters In the example IBNZWST If more than one partition backup is possible the input option of a descrip tion is offered You can store a description text along with the image description Local Backup When you select a partition back...

Страница 495: ...r of partition backups From the menu displayed in the Subsection 15 3 7 under Point 4 page 15 493 select PLEASE SELECT 1 Configure Ghost Parameters 2 Partitions Backup Mode LOCAL 3 Partitions Restore Mode LOCAL 4 Delete Image 9 Back to previous Menu Your Choice 1 2 3 4 9 Ghost Connection Mode LOCAL Maximum Backup Images max Anzahl Actual Backup Images akt Anzahl the menu option Configure GHOST Par...

Страница 496: ...gure Ghost Parameters 2 Partitions Backup Mode LOCAL 3 Partitions Restore Mode LOCAL 4 Delete Image 9 Back to previous Menu Your Choice 1 2 3 4 9 Ghost Connection Mode LOCAL Maximum Backup Images max Anzahl Actual Backup Images akt Anzahl Choose the menu item Delete Image using key 4 Choose the partition backup you want to delete from the next following menu and confirm the warning questions with ...

Страница 497: ...will appear PLEASE SELECT 1 Install Update SINUMERIK System 2 SINUMERIK Tools and Options 3 DOS Shell 4 Start Windows NT Service Mode 5 SINUMERIK System Check 7 Backup Restore 8 Start PC Link 9 Reboot warm restart P 840Di Services Your Choice 1 2 3 4 5 7 8 9 P 2 Choose Backup Restore using the key 7 The system prompts you to enter a password 3 Type one of the passwords of protection levels 0 2 Sys...

Страница 498: ...The descriptions that have been specified for the individual partition back ups are displayed Choose the partition backup you want to restore In the example Start up intermediate version 1 using the key 2 After confirmation a warning is displayed CAUTION All data will be overwritten If you confirm again the partitions of the hard disk are restored Following menu It seems that Ghost Restore succeed...

Страница 499: ...mmunication via MPI 10 108 3 MMC ready communication via shared memory communication 10 109 4 PC OS fault 10 57 3 PC shutdown 16 1 2 Interface signals not supported DB number Byte bit Name Doc Ref erence Axis spindle specific Signals from PLC to axis spindle 31 20 0 Ramp function switch U F mode 31 20 2 Torque limit 2 Safety Integrated signals from PLC to axis spindle 31 22 0 Deselection of safe v...

Страница 500: ...SBH SG active 31 108 2 Delete status pulses 31 108 7 Axis referenced reliably 31 109 0 109 7 Cam signals of plus and minus cams SN1 1 through SN4 4 31 110 1 Safe operational stop active SBH active 31 110 3 110 4 Safe velocity active bit value 0 through bit value 1 31 110 5 n nx 31 111 1 Safe operational stop active SBH active 31 111 4 11 7 Stop A B through Stop E active 16 840Di Specific Data and ...

Страница 501: ...e frame configura tion which allows you to cyclically transfer drive data in addition to process data from the drive DP slave to the NC DP master by combining standard message frames and customized message frame configuration The drive data transferred in addition to the standard message frame process data must always be appended at the end of the standard message frame Process data Standard frame...

Страница 502: ...l process data is transferred in a general system variable as an array of 16 bit integer data words via S MD 36730 DRIVE_SIGNAL_TRACKING n 2 S System variable VA_DP_ACT_TEL n a with n index 0 2 15 a machine axis identifier Note When using the system variable VA_DP_ACT_TEL n a it is only permissible to use a constant as index n Application example for system variables in a synchronized action IDS 1...

Страница 503: ...for expanded message frame System variable VA_DP_ACT_TEL n a PDA1 PDAx 1 PDAx PDAy 0 31 15 0 15 0 15 0 15 0 Index n 0 Index n x Index n y Index n x 1 15 16 31 0 15 16 31 0 15 16 31 0 15 16 Bit 31 16 bit 15 Bit 31 16 bit 15 Bit 31 16 bit 15 Bit 31 16 bit 15 PDAx1 Fig 16 2 Mapping principle PDA on system variable VA_DP_ACT_TEL Notice The responsibility for possibly necessary format conversions or co...

Страница 504: ...example using SIMODRIVE 611 universal DP slave 611U Please adapt your procedure for the other SIMODRIVE drives We recommend proceeding in the following order to configure the components included in the expanded message frame configuration 1 Configure the DP master with SIMATIC STEP 7 2 Configure the DP slave 611U with the start up tool SimoCom U 3 SINUMERIK 840Di NC with start up tool SinuCom NC o...

Страница 505: ...rties Tab Configuration Actual value length Length standard PDA length additional PDA Setpoint I O address I O address actual value see above 2 OK Notice S The I O address for setpoint and actual values of an axis must be the same I O address actual value I O address setpoint S The axis I O address set via the SlaveOM must match the I O address set in the NC No automatic adjustment takes place The...

Страница 506: ...ivate the customizable message frame configuration replace the mes sage frame type of the selected standard message frame in the menu PRO FIBUS Parameter Settings menu command Start up Parameterization Views PROFIBUS Parameter Settings with 0 File Edit Start up Operation Diagnostics Tools Help SimoCom U 12A drive Online to drive 12A data are modified directly in the drive Configurati Analog in Mec...

Страница 507: ...osition actual value 2 G1_XACT2 10 Encoder 1 position actual value 2 G1_XACT2 14 No signal NIL 15 No signal NIL 16 No signal NIL Currently selected block CurrBlo Digital inputs DIG_IN Load Load Analog input T 56 x 14 ADC Analog input T 24 x 20 ADC Speed actual value A NACT_A 11 12 13 Fig 16 4 Configuring the additional drive actual values Before configuring the expanded message frames you first ne...

Страница 508: ... PDA actual value assignment If the number of process data expected from the NC set in the message frame telegram type pa rameter in the NC machine data S MD 13060 DRIVE_TELEGRAM_TYPE n drive message frame type is greater than the number of process data configured with STEP7 HW Config for the DP slave drive S DP Slave Properties Configuration Setpoint Length S DP Slave Properties Configuration Act...

Страница 509: ... of danger to person or machine 16 2 5 Data descriptions MD system variable 13070 DRIVE_FUNCTION_MASK MD number Bit coded screen for selecting the functional scope expected by the NCK with PROFIBUS drives Default settings 0 min input limit 0 max input limit FFFF FFFF Changes effective after power ON Protection level 2 7 Unit Data type DWORD valid from SW 2 1 Meaning Meaning of set bits Bit 0 Deact...

Страница 510: ...d stored in system variables Actual value System variable Load AA_LOAD Torque setpoint AA_TORQUE Active power AA_POWER Current actual value t AA_CURR 2 The entire PROFIDrive message frame is stored in a system variable Actual value System variable PROFIDrive message frame VA_DP_ACT_TEL MD irrelevant with Name VA_DP_ACT_TEL n a Meaning Word by word mapping of the PROFIBUS message frame from the DP ...

Страница 511: ... with a message frame type containing the control word TorRed torque reduction e g SIMODRIVE standard message frame 102 to 107 To simplify the start up of torque reduction the SINUMERIK 840Di NC carries out an automatic matching procedure using the torque reduction resolution parameterized in the drive The following requirements must be met The drive supports acyclic communication and it is enable...

Страница 512: ...esolution of the torque reduction is parameterized in the DP slave 611U in parameter S P0881 Torque reduction evaluation As standard in the DP slave parameter P0881 is scaled to 16384 00 1 Examples for other resolutions 1638 40 0 1 163 84 0 01 Setpoint torque Tset of the drive is therefore calculated by Tset Tmax 1 P0881 TorRed 16384 100 Tmax Maximum possible drive torque from rated motor torque a...

Страница 513: ...C format lies outside the admissible limit values the value set in the NC machine data is retained An alarm is then not issued Note You can disable automatic adjustment via S MD 13070 DRIVE_FUNCTION_MASK n bit 15 0 If one of the requirements listed above for automatically adjusting the torque reduction resolution is not met it is possible to set the parameters manually to achieve consistence if th...

Страница 514: ...erformed The following data must be consistent in terms of values and meaning 1 SINUMERIK 840Di NC machine data MD 37620 PROFIBUS_TORQUE_RED_RESOL torque reduction resolu tion on PROFIBUS LSB weighting 2 Drive With automatic adjustment Parameter P0881 torque reduction evaluation With manual adjustment The parameter corresponding in meaning to the DP slave 611U pa rameter P0881 Notice If automatic ...

Страница 515: ...ection of non cyclic DP communication 0 DPT 1 DPV1 Bit 15 Deactivation of consistency check for PROFIBUS message frame configuration CTW Control word PDA word in the PROFIDrive message frame to DP slave STW Status word PDA word in the PROFIDrive message frame from DP slave PDA Process data MD irrelevant with 37620 PROFIBUS_TORQUE_RED_RESOL MD number torque reduction resolution on PROFIBUS LSB weig...

Страница 516: ...16 3 Travel to fixed stop with high resolution torque reduction SW 2 2 and higher 16 516 Siemens AG 2003 All rights reserved SINUMERIK 840Di Manual HBI 06 03 Edition 16 840Di Specific Data and Functions Notes ...

Страница 517: ...nalog converter Data Block Data Block Byte Data Block Bit Dynamic Host Configuration Protocl Protocol for automatical assignment of IP addresses from a DHCP server to a client computer Dual Port RAM Dynamic memory not non volatile Differential Resolver Function Dry Run Probelaufvorschub Data Send Ready Message to indicate that serial data interfaces are ready Data Word Simple I O module PLC I O mo...

Страница 518: ...area Hexadecimal number Handheld unit Human Machine Interface Hardware SIMATIC S7 Tool to configure and parameterize S7 hardware within an S7 proj ect Hardware limit switch Increment Initialization Initializing Data Internal multiplication Interface signal Special punchtape code number of punched holes per character always even Jogging Setting up mode Channel 1 Transmission ratio Servo gain factor...

Страница 519: ...ol word Process data Process data part of a PPO Programming unit Parameter Identification Part of a PIV Parameter Identification Value Parameterizing part of a PPO Programmable Logic Controller Position measuring system 1 Position measuring system 2 PROFIBUS user organization Power ON Positioning Motor Actuator Positioning Motor Compact AC Positioning Motor Compact AC Complete drive unit with inte...

Страница 520: ...ogram File Static RAM non volatile Synchronous Rotary Motor Spindle pitch for error compensation Synchronous Serial Interface interface type Status word Software Software limit switch Tool Tool Change Testing Data Active Identifier for machine data Tool Offset Tool Offset Active Identifier for tool offsets Tool Radius Offset Transistor Transistor Logic interface type Data interface between NC and ...

Страница 521: ...06 03 A 521 Siemens AG 2003 All rights reserved SINUMERIK 840Di Manual HBI 06 03 Edition Zero Offset work offset Microcontroller J ZV µC A Abbreviations ...

Страница 522: ...06 03 A 522 Siemens AG 2003 All rights reserved SINUMERIK 840Di Manual HBI 06 03 Edition A Abbreviations Notes ...

Страница 523: ... E86060 K6710 A101 B2 7600 SIMATIC Products for Totally Integrated Automation and Micro Automation Catalog ST 70 Order No E86060 K4670 A111 A8 7600 MOTION CONNECT Cable Connectors System Components for SIMATIC SINUMERIK Masterdrives and SIMOTION Catalog NC Z Order No E86060 K4490 A001 B1 7600 Electronic Documentation The SINUMERIK System 11 02 Edition DOC ON CD includes all SINUMERIK 840D 840Di 81...

Страница 524: ...tor s Guide HMI Advanced Order No 6FC5298 6AF00 0BP2 SINUMERIK 840D 840Di 810D 11 02 Edition Operator s Guide HT 6 Order No 6FC5298 0AD60 0BP2 SINUMERIK 840D 840Di 810D 02 01 Edition Short Guide Operation Order No 6FC5298 6AA10 0BP0 SINUMERIK 840D 810D 08 02 Edition Operation Programming ManualTurn Order No 6FC5298 6AD00 0BP0 SINUMERIK 840D 840Di 810D 11 02 Edition Operation Programming ShopMill O...

Страница 525: ...98 6AA20 0BP3 SINUMERIK 840D 810D 04 01 Edition Short Guide ManualTurn Order No 6FC5298 5AD40 0BP0 SINUMERIK 840D 810D 04 01 Edition Short Guide ShopMill Order No 6FC5298 5AD30 0BP0 SINUMERIK 840D 810D 07 01 Edition Short Guide ShopTurn Order No 6FC5298 6AF20 0BP0 SINUMERIK 840D 840Di 810D 11 02 Edition Programming Guide Fundamentals Order No 6FC5298 6AB00 0BP2 SINUMERIK 840D 840Di 810D 11 02 Edit...

Страница 526: ...ition System Overview Order No 6FC5298 6AE40 0BP0 Manufacturer Service Documentation SINUMERIK 840D 840Di 810D 11 02 Edition SIMODRIVE 611D Lists Order No 6FC5297 6AB70 0BP3 SIMODRIVE 06 03 Edition Planning Guide General Information for Asynchronous Motors Order No 6SN1197 0AC62 0BP0 SIMODRIVE 07 03 Edition Planning Guide 1PH2 Asynchronous Motors Order No 6SN1197 0AC63 0BP0 SIMODRIVE 07 03 Edition...

Страница 527: ...nternet address http www4 ad siemens de Please enter the ID No 15257461 in the Search field top right and click on go SINUMERIK SIMOTION ADI4 Analog Drive Interface for 4 Axes 02 03 Edition Manual Order No 6FC5297 0BA01 0BP1 SIMODRIVE 05 03 Edition Planning Guide 1FK6 Three Phase AC Servomotors Order No 6SN1197 0AD05 0BP0 SIMODRIVE 01 03 Edition Planning Guide 1FK7 Three Phase AC Servomotors Order...

Страница 528: ... Motors for Main Spindle Drives Order No 6SN1197 0AC00 0BP4 SIMODRIVE 12 02 Edition Installation Guide 1FE1 051 1FE1 147 Built In Synchronous Motors Three Phase AC Motors for Main Spindle Drives Order No 610 43000 02 SIMODRIVE 06 02 Edition Planning Guide 1FN1 1FN3 Linear Motors ALL General Information about Linear Motors 1FN1 1FN1 Three Phase AC Linear Motor 1FN3 1FN3 Three Phase AC Linear Motor ...

Страница 529: ...SIZAG2 Toothed Wheel Encoder Order No 6SN1197 0AB00 0YP3 SIMODRIVE 02 03 Edition Planning Guide ECO Motor Spindle for Main Spindle Drives Order No 6SN1197 0AD04 0BP1 SIMODRIVE 12 01 Edition Planning Guide 1PH2 1PH4 1PH7 Motors AC Induction Motors for Main Spindle Drives Order No 6SN1197 0AC60 0BP0 SIMODRIVE 11 01 Edition Planning Guide Hollow Shaft Motors for 1PM4 and 1PM6 Main Spindle Drives Orde...

Страница 530: ...and Analog NCK I Os B3 Several Operator Panels and NCUs B4 Operation via PG PC F3 Remote Diagnostics H1 JOG with without Handwheel K3 Compensations K5 Mode Groups Channels Axis Replacement L1 FM NC Local Bus M1 Kinematic Transformation M5 Measurement N3 Software Cams Position Switching Signals N4 Punching and Nibbling P2 Positioning Axes P5 Oscillation R2 Rotary Axes S3 Synchronous Spindles S5 Syn...

Страница 531: ...rameterization DL1 Linear Motor MD DM1 Calculation of Motor Power Section Parameters and Controller Data DS1 Current Control Loop DÜ1 Monitors Limitations SINUMERIK 840D SIMODRIVE 611 digital 02 00 Edition Description of Functions ANA MODULE Order No 6SN1197 0AB80 0BP0 SINUMERIK 840D 07 99 Edition Description of Functions Digitizing Order No 6FC5297 4AC50 0BP0 DI1 Start up DI2 Scanning with Tactil...

Страница 532: ...on of Functions HLA Module Order No 6SN1197 0AB60 0BP3 SINUMERIK 840D 840Di 810D 06 03 Edition Motion Control Information System MCIS Description of Functions TDI Ident Connection Order No 6FC5297 1AE60 0BP0 SINUMERIK 840D 810D 08 02 Edition Description of Functions ManualTurn Order No 6FC5297 6AD50 0BP0 SINUMERIK 840D 810D 09 01 Edition Description of Functions Configuring OP 030 Operator Interfa...

Страница 533: ...o 6SN1197 0AA70 0YP4 SINUMERIK 840D 840Di 810D 10 02 Edition Description of Functions Synchronized Actions Order No 6FC5297 6AD40 0BP2 SINUMERIK 840D 810D 06 03 Edition Description of Functions ShopTurn Order No 6FC5297 6AD70 0BP2 SINUMERIK 840D 810D 01 02 Edition IT Solutions SINUMERIK Tool Data Communication SinTDC Description of Functions Order No 6FC5297 5AF30 0BP0 SINUMERIK 840D 810D 02 01 Ed...

Страница 534: ...6 03 Edition System Description Commissioning Tool SINUMERIK SinuCOM NC Order No an integral part of the online help for the start up tool SINUMERIK 840D 810D 08 01 Edition Description of Functions Configuring Package HMI Embedded Software Update Configuration Installation Order No 6FC5297 6EA10 0BP0 the document PS Configuring Syntax is supplied with the software and available as a pdf file SIMOD...

Страница 535: ... 8BA0 SIMATIC S7 300 03 97 Edition Manual STEP 7 Reference Manuals V 3 1 Order No 6ES7810 4CA02 8BR0 SIMATIC S7 300 04 02 Edition FM 353 Positioning Module for Stepper Drive Order together with configuring package SIMATIC S7 300 04 02 Edition FM 354 Positioning Module for Servo Drive Order together with configuring package SIMATIC S7 300 01 03 Edition FM 357 2 Multimodule for Servo and Stepper Dri...

Страница 536: ...e incl description of SIMODRIVE 611D start up software Order No 6FC5297 6AD20 0BP0 SINUMERIK 840D SIMODRIVE 611 digital 11 02 Edition Installation and Start Up Guide incl description of SIMODRIVE 611 digital start up software Order No 6FC5297 6AB10 0BP2 SINUMERIK 840D 840Di 810D 11 02 Edition Installation and Start Up Guide HMI MMC Order No 6FC5297 6AE20 0BP2 AE1 Updates Supplements BE1 Expanding ...

Страница 537: ...ion the EC Declaration of Conformity is no longer included as part of this manual The EC Declaration of Conformity is available in PDF format under Product ID on Siemens A D Product Information page 15257461 Internet address www ad siemens de Support Service Support Produkt Support Search 15257461 Go Support Service Support Product Support 15257461 J C ...

Страница 538: ...06 03 C 538 Siemens AG 2003 All rights reserved SINUMERIK 840Di Manual HBI 06 03 Edition C EC Declaration of Conformity Notes ...

Страница 539: ...S parameters 7 221 Setting message frame type 7 222 Adjustment 7 243 Advanced Processing 1 1 20 Advanced Processing 2 1 20 Alarm 4065 10 304 10 396 Alarm and message texts 11 403 MBDDE INI configuration file 11 403 Standard text files 11 404 User text files 11 404 Alarm numbers 11 406 Alarm text files Syntax 11 406 Assigning actual value channels 10 315 Assigning setpoint channels 10 315 Authorizi...

Страница 540: ...cles Changing 10 306 Option 10 306 Relocation 10 306 Saving 10 306 Swapping 10 306 Cyclic operation PLC 8 259 D Data backup 14 449 611u 14 450 PLC data 14 453 Time 14 449 Various components 14 449 Data Exchange Time 7 205 Data loss 10 304 Data transfer rate HHU 5 154 HT 6 5 163 MCP 5 142 MPI interface 5 149 PCU with HMI Advanced 5 168 Declaration of Conformity C 535 Default address assignment 5 13...

Страница 541: ...s Absolute measuring system 10 320 Endlessly rotating rotary axis 10 327 EQN 1325 10 320 Equidistant DP cycle 7 240 Setting 7 213 Equidistant master cyclic portion 7 240 Equidistant time 7 213 ESD measures 4 136 ET 200 2 45 Exact stop Coarse 10 343 Fine 10 343 Exact stop fine Delay time 10 343 EXCHANGE LED ADI4 2 118 LED PP72 48 2 101 Expanded message frame configuration 7 231 16 501 Expert mode 1...

Страница 542: ...ddOn software 1 33 Installing language packages 5 169 Interface description ADI4 2 107 MCI board 2 48 MCI board extension 2 59 2 66 MCI board extension backpack 2 75 PP72 48 2 94 Interface overview ADI4 2 48 2 66 2 107 Interface signal PC OS fault 1 27 PC shutdown 1 27 10 303 Interface signals 840Di specific 16 499 Not supported 16 499 Interference suppression measures 4 135 Interpolation cycle 10...

Страница 543: ...eneral 1 23 Setting the CPU time share 10 292 NCK CPU time share 10 292 NCK interface HPU 5 166 NCK interface parameter assignment MCP 5 145 NCK latency time 10 398 NCK reset 10 396 NCK status 10 395 NetBEUI 6 199 Network operation 6 188 Network rules 5 137 7 210 Node address 9 267 O OEM configuration 6 191 OEM directories 6 191 Online connection 611u 9 265 Online operation starting 9 270 OP 012 2...

Страница 544: ...ting the PROFIBUS address 7 218 Preparing for start up 6 173 PROFIBUS Modules 2 45 Node address 9 267 PROFIBUS address Setting using an operator unit 9 265 Setting using the PROFIBUS unit 9 267 SIMODRIVE POSMO SI CD CA 9 267 PROFIBUS DP 10 393 General 7 203 Interface 1 21 PROFIBUS DP communication 7 203 PROFIBUS S7 subnetwork ID 9 269 Determining 9 269 Programmable spindle speed limitations 10 374...

Страница 545: ...ectly 1 28 Sign of life monitoring 8 259 Signal distortion 10 348 SIMATIC ET 200 2 45 SIMATIC Manager STEP7 7 207 On an external PG PC 8 255 On SINUMERIK840Di 8 255 SIMATIC S7 I O devices 7 216 SIMATIC S7 project 7 211 SIMODRIVE drives 7 231 SIMODRIVE 611 universal 7 231 9 263 16 504 16 512 BERO 10 371 Max useful motor speed 10 346 Motor monitoring speed 10 346 Pulse multiplication 10 366 Speed ev...

Страница 546: ...D Socket connector 2 48 Subsequent installation Windows NT compo nents 6 201 Switching over the measuring system 10 287 System Check 6 196 System clock cycle 10 290 System data 10 281 System data blocks 7 244 System information 6 191 System integrity 1 26 System overview 3 125 System software 1 32 System software packages 1 20 T Tapping thread cutting 10 330 TCP IP 6 188 TDP 7 205 7 240 7 241 TDX ...

Страница 547: ...pply PP72 48 2 94 X10 MCP 5 141 X101 PROFIBUS DP MCI board 2 48 X111 Digital inputs output PP72 48 2 96 MPI interface MCI board 2 49 X121 Cable distributor MCI board Ext 2 59 I O MPG extension MCI board Ext 2 66 X121 Cable distributor 2 56 X121 I O MPG extension 2 62 2 70 X2 PROFIBUS DP ADI4 2 108 PROFIBUS DP PP72 48 2 95 X20 MCP 5 141 X222 Digital input outputs PP72 48 2 96 X3 Analog setpoint int...

Страница 548: ...06 03 Index 548 Siemens AG 2003 All rights reserved SINUMERIK 840Di Manual HBI 06 03 Edition Index ...

Страница 549: ...1050 Erlangen Germany Tel 49 0 180 5050 222 Hotline Fax 49 0 9131 98 2176 Documentation email motioncontrol docu erlf siemens de Telefax Should you come across any printing errors when reading this publication please notify us on this sheet Suggestions for improvement are also welcome Order No 6FC5 297 6AE60 0BP2 Edition 06 2003 for publication Suggestions and or corrections ...

Страница 550: ......
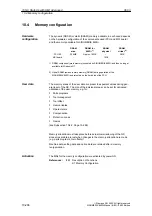
Страница 551: ...n of Functions Synchronized Actions 840D 810D SINUMERIK Operator s Guide ManualTurn Short Guide ManualTurn ShopMill Short Guide ShopMill ShopTurn Short Guide ShopTurn 840D 810D Manufacturer Service Documentation These documents are a minimum requirement Operator s Guide Short Guide HMI Embedded HMI Advanced SINUMERIK 840D 840Di 810D Configuring HW 810D 840D SINUMERIK SINUMERIK 840D 840Di 810D SINU...

Страница 552: ...mens AG 2003 Subject to change without prior notice Order No 6FC5297 6AE60 0BP2 Printed in Germany Siemens AG Automation Drives Motion Control Systems P O Box 3180 D 91050 Erlangen Germany www ad siemens de ...

Отзывы: