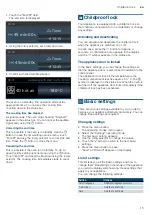
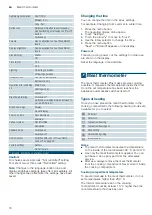
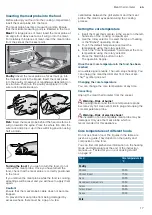
background image

en

    Time-setting options

14

O

Time-setting options

Time-sett

ing optio

ns

Your appliance has different time-setting options.

Notes

A cooking time of up to one hour can be set exactly 

to the minute. 

A cooking time over one hour can be set in five-

minute increments.

Depending on which direction you turn the rotary 

selector, the cooking time starts at a default value: 

Anti-clockwise, 10 minutes,  

Clockwise, 30 minutes.

After a time-setting option has elapsed, a signal 

sounds and "Finished" appears in the status bar.

Using the 

l

 button, you can request information 

during the operation, which then appears briefly in 

the display.

Timer

You can set the timer at any time, even if the appliance 

is switched off. It runs parallel to the other time settings 

and has a separate audible signal. In this way, you can 

tell whether it is the timer or a cooking time which has 

elapsed.  

The maximum setting you can apply is 24 hours.

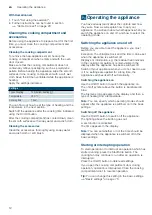
1.

Press the 

0

 button. 

The field for the timer opens.

2.

Use the rotary selector to set the timer duration. 

The timer starts after a few seconds.

The 

U

 symbol for the timer and the time counting down 

are displayed on the left in the status bar.

When the time has elapsed

An audible signal sounds. "Timer elapsed" appears in 

the display. Use the 

0

 button to cancel the audible 

signal early.

Cancelling the timer duration

Press the 

0

 button to open the time-setting options 

menu and turn the time back. Press the 

0

button to 

close the menu.

Changing the timer duration

Use the 

0

 button to open the time-setting options 

menu and change the timer time in the next few 

seconds using the rotary selector. Start the timer with 

the 

0

 button.

Cooking time

If you set the cooking time for your meal, the operation 

stops automatically once this time has elapsed. The 

oven stops heating. 

The maximum setting you can apply is 23 hours and 59 

minutes.
Prerequisite: A type of heating and a temperature have 

been set.
For example: Setting for 4D hot air, 180 °C, cooking 

time 45 minutes.

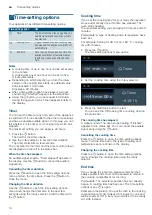
1.

Press the 

0

 button.

The time-setting options menu opens.

2.

Set the cooking time using the rotary selector.

3.

Press the Start/Stop button to start.

You can see the 

x

 cooking time counting down in 

the status bar.

The cooking time has elapsed

A signal sounds. The oven stops heating. "Finished" 

appears in the status bar. You can cancel the audible 

signal early using the 

0

 button.

Cancelling the cooking time

Press the 

0

 button to open the time-setting options 

menu. Turn the time back. The type of heating and 

temperature set are shown in the display.

Changing the cooking time

Press the 

0

 button to open the time-setting options 

menu. Change the cooking time using the rotary 

selector.

End time

If you change the end time, please remember that 

easily spoiled foods must not be allowed to remain in 

the cooking compartment for too long.
Prerequisite: The selected operation has not already 

begun. A cooking time has been set. The time-setting 

options menu 

0

 is open.

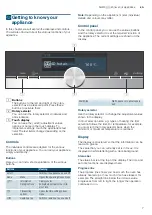
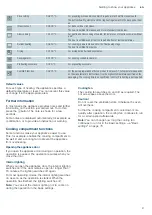
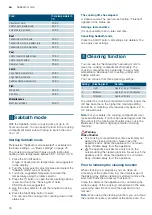
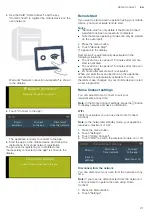
Example in the picture: You put the dish in the cooking 

compartment at 9:30. It takes 45 minutes to cook and 

will be ready at 10:15, but you would like it to be ready 

at 12:45 instead.

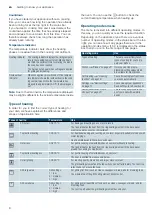
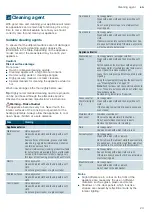
Time-setting option

Use

Q

Timer

The timer functions like an egg timer. An 

audible signal sounds once the set time 

has elapsed.

+

Cooking time

A signal sounds once a set cooking time 

has elapsed. The appliance switches off 

automatically.

*

End time

Set a cooking time and an end time. The 

appliance switches off automatically so 

that the operation ends at the desired 

time.

PLQV

ꑘ7LPHU

PLQV

ꑘ7LPHU

Содержание HB678GB.6B

Страница 1: ...5HJLVWHU RXU SURGXFW RQOLQH VLHPHQV KRPH FRP ZHOFRPH en Instruction manual Built in oven HB678GB 6B ...

Страница 2: ......

Страница 3: ...eactivating 15 The appliance door is locked 15 Q Basic settings 15 Changing settings 15 List of settings 15 Changing the time 16 Meat thermometer 16 Types of heating 16 Inserting the meat probe into the food 17 Setting the core temperature 17 Core temperatures of different foods 17 F Sabbath mode 18 Starting Sabbath mode 18 Cleaning function 18 Prior to initiating the cleaning function 18 Setting ...

Страница 4: ...iance is intended for use up to a maximum height of 2000 metres above sea level This appliance may be used by children over the age of 8 years old and by persons with reduced physical sensory or mental capabilities or by persons with a lack of experience or knowledge if they are supervised or are instructed by a person responsible for their safety how to use the appliance safely and have understoo...

Страница 5: ...us injury The cable insulation on electrical appliances may melt when touching hot parts of the appliance Never bring electrical appliance cables into contact with hot parts of the appliance Risk of electric shock Do not use any high pressure cleaners or steam cleaners which can result in an electric shock Risk of electric shock A defective appliance may cause electric shock Never switch on a defe...

Страница 6: ...uicy fruit pies do not pack the baking tray too generously Fruit juice dripping from the baking tray leaves stains that cannot be removed If possible use the deeper universal pan Extremely dirty seal If the seal is very dirty the appliance door will no longer close properly during operation The fronts of adjacent units could be damaged Always keep the seal clean Appliance door as a seat shelf or w...

Страница 7: ...e read at a glance The value that you can currently set is in focus It is displayed in white lettering with a dark background Status bar The status bar is at the top of the display The time and set time functions are displayed here Progress line The progress line shows you how much the oven has already heated up or how much time has elapsed for example The straight line below the in focus value pr...

Страница 8: ...he temperature has dropped to approximately 60 C the display goes out Operating mode Use Types of heating There are several finely tuned types of heating for you to pre pare your dishes Dishes Dishes on page 29 Here you can find prepro grammed setting values which are suitable for many dishes Self cleaning Cleaning function on page 18 The self cleaning function cleans your oven automatically Setti...

Страница 9: ...ettings Cooling fan The cooling fan switches on and off as required The hot air escapes above the door Caution Do not cover the ventilation slots Otherwise the oven will overheat So that the cooking compartment cools down more quickly after operation the cooling fan continues to run for a certain period afterwards Note You can change how long the cooling fan continues to run for in the basic setti...

Страница 10: ...The accessories can be pulled out approximately halfway until they lock in place The locking function prevents the accessories from tilting when they are pulled out The accessories must be inserted into the cooking compartment correctly for the tilt protection to work properly When inserting the wire rack ensure that lug is at the rear and is facing downwards The open side must be facing the appli...

Страница 11: ...onth and year Optional accessories Wire rack For ovenware cake tins and ovenproof dishes and for roasts and grilled food Universal pan Self cleaning For moist cakes pastries frozen meals and large roasts It can be used to catch dripping fat when you are grilling directly on the wire rack Baking tray Self cleaning For tray bakes and small baked products Wire insert For meat poultry and fish For ins...

Страница 12: ... Before you are able to set the appliance you must switch it on Exception The childproof lock and the timer can be set when the appliance is switched off Displays or information e g the residual heat indicator in the cooking compartment remain visible in the display after the appliance has been switched off Switch off your appliance when you do not need to use it If no settings are applied for a l...

Страница 13: ...of heating and the temperature are shown on the display Rapid heat up You can use the c button to heat up the cooking compartment particularly quickly The rapid heat up function is not possible for all types of heating Suitable types of heating To ensure an even cooking result do not place your food and the accessory in the cooking compartment until rapid heating is complete Applying settings Ensu...

Страница 14: ...u set the cooking time for your meal the operation stops automatically once this time has elapsed The oven stops heating The maximum setting you can apply is 23 hours and 59 minutes Prerequisite A type of heating and a temperature have been set For example Setting for 4D hot air 180 C cooking time 45 minutes 1 Press the 0 button The time setting options menu opens 2 Set the cooking time using the ...

Страница 15: ...pprox 4 seconds A confirmation note appears in the display and the symbol appears in the status bar The appliance door is locked In the basic settings you can change the settings so that the appliance door is also locked in addition to the control panel The appliance door locks if the temperature in the cooking compartment reaches approx 50 C The H symbol is displayed in the status bar When the ov...

Страница 16: ...meter supplied You can purchase it as a spare part from the after sales service After use always remove the meat thermometer from the cooking compartment Never store it inside the cooking compartment Cooking compartment temperature To prevent damage to the meat thermometer do not set temperatures higher than 250 C The interior temperature set in the cooking compartment must be at least 10 C higher...

Страница 17: ...robe The meat may expand during the cooking process Setting the core temperature 1 Insert the meat thermometer in the socket on the left hand side of the cooking compartment 2 Use the rotary selector to select the type of heating or the Dishes operating mode 3 Touch the default temperature and set the temperature using the rotary selector 4 Touch the Core temperature field and set the core tempera...

Страница 18: ...ng setting should be A cleaning cycle requires only approx 2 5 4 7 kilowatt hours Note For your safety the cooking compartment door locks automatically It cannot be opened again until the H symbol for the locking mechanism goes out in the status bar The interior lighting remains off during cleaning Warning Risk of burns The cooking compartment becomes extremely hot during the cleaning function Nev...

Страница 19: ...ely using the Start stop button or 3 select a different cleaning setting using the rotary selector 4 Press the Start stop button to start the cleaning operation The cooking compartment door locks shortly after operation starts The H symbol for the locking mechanism appears on the right hand side of the status bar next to the elapsing duration The cooking compartment door cannot be opened until the...

Страница 20: ...the menu 1 Press the Menu button 2 Touch Home Connect Assistant The appliance is ready to connect to the network automatically 3 Press the WPS button on the router Wait until Network connection successful is shown in the display 4 Touch Connect to the app The appliance is ready to connect to the app 5 Start the app on the mobile device and follow the instructions for automatic network registration...

Страница 21: ...s after the oven operation ends 24 hours after remote start is activated When you start the oven operation on the appliance remote start is automatically activated You can therefore make changes on your mobile device or start a new programme Home Connect settings You can adjust Home Connect to suit your requirements at any time Note In the Home Connect settings press the l button to display networ...

Страница 22: ...r the first time to a WLAN network which is connected to the Internet your appliance transmits the following categories of data to the Home Connect server initial registration Unique appliance identification consisting of appliance codes as well as the MAC address of the installed WiFi communication module Security certificate of the WiFi communication module to ensure a secure IT connection The c...

Страница 23: ...lean with a dish cloth and then dry with a soft cloth Do not use glass cleaner or a glass scraper Painted surfaces Hot soapy water Clean with a dish cloth and then dry with a soft cloth Control panel Hot soapy water Clean with a dish cloth and then dry with a soft cloth Do not use glass cleaner or a glass scraper Door panels Hot soapy water Clean with a dish cloth and then dry with a soft cloth Do...

Страница 24: ...rch and albumin e g egg white immediately Use the universal pan for baking very moist cakes Use suitable ovenware for roasting e g a roasting dish pRails Rails With good care and cleaning your appliance will retain its appearance and remain fully functional for a long time to come This will tell you how to remove the shelves and clean them Detaching and refitting the rails Warning Risk of burns Th...

Страница 25: ... appliance door The appliance door hinges each have a locking lever When the locking levers are closed figure the appliance door is secured in place It cannot be detached When the locking levers are open in order to detach the appliance door figure the hinges are locked They cannot snap shut Warning Risk of injury If the hinges are not locked they can snap shut with great force Ensure that the loc...

Страница 26: ...slightly 2 Press on the right and left side of the cover figure 3 Remove the cover figure Close the appliance door carefully Note Clean the stainless steel inlay in the cover with stainless steel cleaner Clean the rest of the door cover with soapy water and a soft cloth 4 Open the appliance door again slightly Put the cover back in place and press on it until it clicks audibly into place figure 5 ...

Страница 27: ...at the arrow is in the top right of the panel and that it aligns with the arrow on the metal panel 1 Insert the intermediate panel at the bottom into the retainer and push it in firmly at the top figure 2 Push both retainers downwards figure 3 Insert the front panel at the bottom into the retainers figure 4 Close the front panel until both upper hooks are opposite the opening figure 5 Press the fr...

Страница 28: ...o that the appliance does not switch off when you do not want it to e g with an extremely long preparation time The appliance heats up until the set cooking time has elapsed Cooking compartment bulbs To light the interior of your cooking compartment your appliance has one or more long life LED bulbs However if ever an LED bulb or the bulb s glass cover is defective call the after sales service The...

Страница 29: ...tion on the settings The cooking result depends on the quality of the food and the size and type of cookware For an optimal cooking result use food that is in good condition and chilled meat only For frozen food use food straight out of the freezer only For some food a temperature heating mode and cooking time is suggested The temperature and the cooking time can be changed according to your requi...

Страница 30: ... the settings will be cancelled The appliance will continue to heat and you can adjust the suggested time You must monitor the process yourself Applying settings for dishes You will be guided through the entire setting process for your chosen food Always touch the Next field 1 Press the menu button The operating modes menu will open 2 Select Dishes mode The first category will appear on the displa...

Страница 31: ...l also get tips about cookware and preparation methods Note A lot of steam can build up in the cooking compartment when cooking food Your appliance is very energy efficient and radiates very little heat to its surroundings during operation Due to the high difference in temperature between the appliance interior and the external parts of the appliance condensation may build up on the door control p...

Страница 32: ...cut greaseproof paper to size Recommended setting values The table lists the optimal heating type for various baked items The temperature and baking time depend on the amount and consistency of the dough mixture For this reason the table specifies setting ranges Try using the lower values to start with A lower temperature will result in more even browning You can use a higher setting next time if ...

Страница 33: ...opping 2 levels Universal pan baking tray 3 1 150 170 45 60 Plaited loaf savarin Baking tray 2 160 170 25 35 Swiss roll Baking tray 3 180 200 8 15 Stollen with 500 g flour Baking tray 2 150 170 45 60 Strudel sweet Universal pan 2 170 180 50 60 Strudel frozen Universal pan 3 200 220 35 45 Small baked items Small cakes Baking tray 3 160 20 30 Small cakes Baking tray 3 150 25 35 Small cakes 2 levels ...

Страница 34: ...e the universal pan Small baked items stick to one another during baking There should be a gap of approx 2 cm around each item This gives enough space for the baked items to expand well and brown on all sides The cake is too dry Set the temperature 10 C higher and shorten the baking time The cake is generally too light in col our If the shelf position and the cookware are correct then you should i...

Страница 35: ...ay be unevenly pre baked Uneven browning may remain even after baking Recommended setting values The table lists the optimal heating type for various kinds of bread and bread roll The temperature and baking time depend on the amount and consistency of the dough mixture For this reason the table specifies setting ranges Try using the lower values to start with A lower temperature will result in mor...

Страница 36: ...niversal pan Level 3 Baking tray Level 1 Baking tins dishes on the wire rack First wire rack Level 3 Second wire rack Level 1 Baking on four levels 4 wire racks with greaseproof paper First wire rack Level 5 Dish Accessories Shelf posi tion Type of heating Tempera ture in C Grill setting Cooking time in mins Bread White bread 750 g Universal pan or cake tin 2 210 220 10 15 180 190 25 35 Multigrain...

Страница 37: ...e dough mixture For this reason the table specifies setting ranges Try using the lower values to start with A lower temperature will result in more even browning You can use a higher setting next time if necessary Note Baking times cannot be reduced by using higher temperatures The food would only be cooked on the outside but would not be fully baked in the middle The setting values apply to food ...

Страница 38: ...d setting values In the table you can find the ideal heating type for various bakes and soufflés The temperature and cooking time are dependent on the quantity of food and the recipe How well cooked a bake is will depend on the size of the cookware and the depth of the bake Settings ranges are indicated for this reason Try using the lower values at first A lower temperature results in more even br...

Страница 39: ...lace the cookware onto the wire rack Very hot steam may escape when opening the lid after cooking Lift the lid at the rear so that the hot steam can escape away from you Poultry can also become crispy in a covered roasting dish To do so use a roasting dish with a glass lid and set a higher temperature Grilling Keep the appliance door closed when using the grill Never grill with the appliance door ...

Страница 40: ...ture Always cut greaseproof paper to size Tips For duck or goose pierce the skin on the underside of the wings This allows the fat to run out If using duck breast score the skin Do not turn duck breasts When you turn poultry ensure that the breast side or the skin side is underneath at first Poultry will turn out particularly crispy and brown if you baste it towards the end of the roasting time wi...

Страница 41: ...se a higher temperature and or a longer cooking time Observe the manufacturer s instructions for your roasting cookware Uncovered cookware Use a deep roasting tin dish for roasting meat Place the tin dish onto the wire rack If you do not have any suitable cookware use the universal pan Covered cookware When cooking with covered cookware the cooking compartment remains considerably cleaner Ensure t...

Страница 42: ...ults and energy savings of up to 20 per cent Types of heating used Top bottom heating 4 Circulated air grilling Grill large area Dish Accessories cookware Shelf posi tion Type of heating Tempera ture in C Grill setting Cooking time in mins Pork Joint of pork without rind e g neck 1 5 kg Cookware uncovered 2 4 180 190 110 130 Joint of pork with rind e g shoulder 2 kg Wire rack 2 4 190 200 130 140 P...

Страница 43: ... do not have any suitable cookware use the universal pan Covered cookware When cooking with covered cookware the cooking compartment remains considerably cleaner Ensure that the lid fits well and closes properly Place the cookware onto the wire rack When stewing add two to three tablespoons of liquid and a little lemon juice or vinegar into the cookware Very hot steam may escape when opening the l...

Страница 44: ...ies Ensure that you always use suitable accessories and that they are placed in the oven the right way around Wire rack Insert the wire rack with the open side facing the appliance door and the curved lip pointing downwards Always place ovenware tins and dishes on the wire rack Universal pan or baking tray Slide the universal pan or the baking tray in carefully as far as the limit stop with the be...

Страница 45: ...ed up Always keep the appliance door closed when cooking Remove unused accessories from the cooking compartment This will allow you to achieve optimum cooking results and save energy Only use original accessories supplied with your appliance These have been tailored to the cooking compartment and the operating modes of your appliance The Hot air eco heating type is used to determine the energy eff...

Страница 46: ...g Eco Dish Accessories cookware Shelf posi tion Type of heating Tempera ture in C Cooking time in mins Cakes in tins Sponge cake in a tin Ring tin cake tin 2 140 160 60 80 Sponge flan base Flan base tin 2 150 170 20 30 Sponge base 2 eggs Flan base tin 2 150 170 20 30 Sponge flan 3 eggs Springform cake tin diameter 26 cm 2 160 170 30 45 Sponge flan 6 eggs Springform cake tin diameter 28 cm 2 150 16...

Страница 47: ...the uncovered cookware onto the wire rack at level 2 You can find additional information in the tips on slow cooking attached to the settings table Your appliance features the heating type Slow cook Only start operation when the cooking compartment has fully cooled down Allow the cooking compartment to warm up for approx 15 minutes with the cookware inside Sear the meat on the hotplate at a very h...

Страница 48: ... Cookware uncovered 2 4 6 80 150 210 Sirloin 5 6 cm thick Cookware uncovered 2 6 8 80 210 270 Beef medallions rump steak 4 cm thick Cookware uncovered 2 5 7 80 30 60 Veal Joint of veal 4 5 cm thick 1 5 kg Cookware uncovered 2 8 10 80 210 240 Joint of veal 10 15 cm thick 1 5 kg Cookware uncovered 2 8 10 80 210 240 Veal fillet whole 800 g Cookware uncovered 2 5 7 80 120 150 Veal medallions 4 cm thic...

Страница 49: ...ood is preserved incorrectly the preserving jars may burst Follow the instructions for preserving Jars Use only clean and undamaged preserving jars Only use heat resistant clean and undamaged rubber rings Check clips and clamps in advance For each preserving process only use preserving jars that are the same size and contain the same food In the cooking compartment you can preserve the contents of...

Страница 50: ...ppliance more quickly than at room temperature Use the top bottom heating type Only start operation when the cooking compartment has fully cooled down Always allow yeast dough to prove twice Observe the specifications in the settings tables for the 1st and 2nd proving processes dough fermentation and final fermentation Dough fermentation Use the settings indicated in the table and heat up the appl...

Страница 51: ... whilst being kept warm Cover the dishes if necessary Test dishes These tables have been produced for test institutes to facilitate the inspection of the appliance In accordance with EN 60350 1 2013 and IEC 60350 1 2011 Baking Baked items that are placed into the oven on trays or in baking tins dishes at the same time will not necessarily be ready at the same time Shelf positions for baking on two...

Страница 52: ...levels Baking trays universal pan 5 3 1 130 140 35 55 Small cakes Baking tray 3 160 20 30 Small cakes Baking tray 3 150 25 35 Small cakes 2 levels Universal pan baking tray 3 1 150 25 35 Small cakes 3 levels Baking trays universal pan 5 3 1 140 35 45 Fatless sponge cake Springform cake tin diameter 26 cm 2 160 170 25 35 Fatless sponge cake Springform cake tin diameter 26 cm 2 160 170 30 40 Fatless...

Страница 53: ...6 ...

Страница 54: ...6 ...

Страница 55: ......

Страница 56: ... BOVGBDUVSFE CZ 4 BVTHFS UF NC VOEFS 5SBEFNBSL JDFOTF PG 4JFNFOT 6 DXVJHUlWH PE DUO HU 6WU VLHPHQV KRPH FRP 0 QFKHQ 50 1 9001134171 9001134171 960510 ...

Отзывы: