background image

11

First steps

Gigaset S79H / en / A31008-M2151-R101-2-4N19 / starting.fm / 07.05.2010

V

e

rsion 4.1, 21

.11.2007

Registering the handset

A Gigaset S79H handset can be registered on up to four bases. You must initiate 
handset registration on the handset (

1

) and on the base (

2

). 

When the registration process has completed successfully, the handset returns to 
idle status. The handset's internal number is shown in the display, e.g., 

INT 1

. If not, 

repeat the procedure. 

1) On the handset

2) On the base

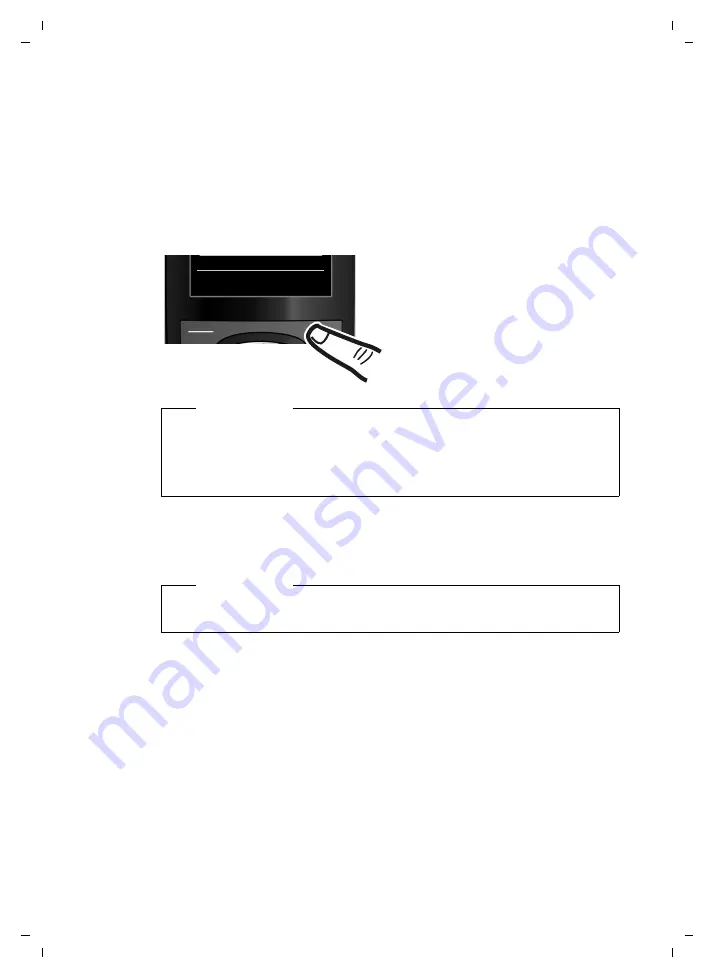
Within 60 sec. press and 

hold

 the registration/paging key on the base (approx. 3 

sec.).

¤

Press the key below 

§Register§

 on the 

display screen. 

A message appears stating that the 
handset is searching for a base that is 
ready for registration.

Register

Please note

If the handset is already registered 

to at least one base

, start the registration 

process as follows:

v


¢

Ï


¢

Registration 

¢

Register Handset

If the handset is already registered to 

four

 bases, select the required base.

Please note

For instructions on deregistering the handsets, please consult the base user 
guide.

Содержание Gigaset S79H

Страница 1: ...5 Bocholt Manufactured by Gigaset Communications GmbH under trademark license of Siemens AG As of 1 Oct 2011 Gigaset products bearing the trademark Siemens will exclusively use the trademark Gigaset All rights reserved Subject to availability www gigaset com Gigaset Communications GmbH 2010 ...

Страница 2: ...page 27 u If you do not want to take calls where the caller has withheld their number just set your handset to only ring if Calling Line Identification has not been withheld page 43 u If you do not wish to be disturbed you can simply set up a time control so that your phone will only ring when it is convenient page 43 VIP calls are still connected u You can assign important numbers to the number k...

Страница 3: ...eypad Lock on off press and hold in idle status Toggles between upper lower case and digits 8 Mute key page 26 Mute the microphone 9 Microphone 10 Recall key Consultation call flash Insert a dialling pause press and hold 11 Star key Ringtone on off press and hold with an open connection switch between pulse dialling tone dialling press briefly text input open table of special characters 12 Headset...

Страница 4: ...ls SMS ØðÚ Anniversary page 36 ØìÚ Alarm page 37 Signal strength i page 35 or Eco Mode icon page 35 Ringtone switched off page 44 Keypad Lock switched on page 20 ØáÚ Appointment page 36 Batteries are charged page 14 Charge status of the batteries page 14 Alarm switched on and wake up time set page 37 Current time page 13 Current day and month page 13 Name of the handset Number of new messages u à ...

Страница 5: ...do next 16 Using the phone 17 Using the control key 17 Using the display keys 18 Using the keys on the keypad 18 Using the side keys 18 Correcting incorrect entries 18 Using the menus 19 Activating deactivating the handset 20 Activating deactivating Keypad Lock 20 Using this guide 21 Menu overview 23 Making calls 25 Making an external call 25 Ending a call 25 Accepting a call 25 Using speaker mode...

Страница 6: ...etting keypad illumination 42 Activating deactivating Auto Answer 42 Changing the speaker earpiece volume 42 Setting a handsfree profile 43 Changing ringtones 43 Using the Resource Directory 44 Activating deactivating Advisory Tones 45 Setting your own area code 46 Restoring the handset default settings 46 Service Customer Care 47 Questions and answers 48 Authorisation 48 Guarantee Certificate Uni...

Страница 7: ...andset to your ear when it is ringing or when speaker mode is activated Otherwise you risk serious and permanent damage to your hear ing Your Gigaset is compatible with the majority of digital hearing aids on the market However perfect function with all hearing aids cannot be guaranteed The handset may cause an unpleasant humming or whistling noise in hearing aids or cause them to overload If you ...

Страница 8: ...ng fm 07 05 2010 Version 4 1 21 11 2007 First steps Checking the package contents 1 One Gigaset S79H handset 2 Two batteries 3 One battery cover 4 One charger 5 One power adapter 6 One belt clip 7 One plastic headset socket cover 8 One user guide 2 1 3 4 5 7 6 8 ...

Страница 9: ...ce of marks on the surfaces cannot be completely ruled out Please note u Never expose the telephone to the influence of heat sources direct sunlight or other electrical devices u Protect your Gigaset from moisture dust corrosive liquids and fumes Connecting the charger Please note Pay attention to the range of the base This is up to 300 m in unobstructed outdoor areas and up to 50 m inside build i...

Страница 10: ...cant health risks and personal injury For example the outer casing of the batteries could be damaged or the batteries could explode The phone could also malfunction or be damaged as a result of using batteries that are not of the recommended type Insert the batteries with the polarity in the cor rect direction The polarity is indicated in on the battery com partment First insert the battery cover ...

Страница 11: ...to the back of the handset so that the protrusions on the belt clip engage with the notches To remove press the centre of the belt clip firmly with your right thumb push the fingernail of your left index finger up between the clip and the housing and pull the clip in an upward direction Placing the handset in the charger Place the handset in the charger with its display facing forward To charge th...

Страница 12: ...1 If not repeat the procedure 1 On the handset 2 On the base Within 60 sec press and hold the registration paging key on the base approx 3 sec Press the key below Register on the display screen A message appears stating that the handset is searching for a base that is ready for registration Register Please note If the handset is already registered to at least one base start the registration proces...

Страница 13: ... Then remove the handset from the charger and do not replace it until the batteries are fully discharged 8 5 hrs Please note u After the first battery charge and discharge you may place your handset in the charger after every call u Always repeat the charging and discharging procedure if you remove the batteries from the handset and reinsert them u The batteries may warm up during charging This is...

Страница 14: ...ady set the time and date opentheinputfieldviathemenu page 24 The Date Time submenu is shown on the display The active input position flashes Enter day month and year as an 8 digit number via the keypad e g 4 Q2QQ O for 14 10 2009 Date Time Date 31 01 2009 Time 00 00 Back Save Calls Time Press the right or left control key to change the input position and correct an entry Enter the hours and minut...

Страница 15: ... Mode page 35 u Charge status of the batteries y y empty to full y flashes red batteries almost empty xy x x charging u INT 1 Internal name of the handset If Eco Mode page 35 is activated the icon is displayed in the top left cor ner of the display Your phone is now ready for use Press the key below Save on the dis play screen to confirm your entry The display shows Saved You will hear a confirmat...

Страница 16: ...ts The headset volume corresponds to the settings for the handset volume page 42 After using the headset replace the plastic cover to enable optimum sound in speaker mode Connecting the USB data cable To connect the handset to a PC you can connect a standard USB data cable with a mini B connector to the back of your handset page 54 Remove the belt clip if attached page 10 Remove the battery cover ...

Страница 17: ...liar with menu driven devices such as other Gigaset telephones read the section entitled Using the phone first page 17 If you have any questions about using your phone please read the tips on troubleshooting page 48 or contact our Customer Care team page 47 Information on is located here Setting the ringtone and volume page 43 Setting the earpiece volume page 42 Setting Eco Mode Eco Mode page 35 T...

Страница 18: ... by line In input fields Use the control key to move the cursor up t down s right v or left u Press and hold v or u to move the cursor word by word During an external call s Open the Directory u Initiate an internal consultation call t Adjust the loudspeaker volume for earpiece and speaker mode Functions when pressing the middle of the control key Depending on the operating situation the key has d...

Страница 19: ...tching key on the handset Enter digits or letters Using the side keys ø Press the keys on the right of the handset to set the volume for the handset ringtone speaker alarm signalling of appointments and the headset depending on the situation Correcting incorrect entries You can correct incorrect characters in the input fields by navigating to the incor rect entry using the control key You can then...

Страница 20: ...nu The main menu functions are shown in the display with icons The icon for the selected function is highlighted and the name of the associated function appears in the display header To access a function i e to open the corresponding submenu next menu level Use the control key p to select the required func tion and press the display key OK Briefly press the display key Back or the end call key a t...

Страница 21: ...idle status press and hold the end call key confirmation tone to switch off the handset Press and hold the end call key again to switch the handset on Activating deactivating Keypad Lock Keypad Lock prevents any inadvertent use of the phone Press and hold the hash key in idle status to activate or deactivate Key pad Lock You will hear the confirmation tone If Keypad Lock is activated you will see ...

Страница 22: ...Press right on the control key v to open the main menu Press right left down and up on the control key p to navigate to the Settings submenu Press the display key OK to confirm your selection Press down on the control key s until the Display menu option appears on the display Press the display key OK to confirm your selection Settings Date Time Audio Settings Display Language Registration Back OK ...

Страница 23: ... until the Large Font menu option appears on the display Press the display key Change to activate deactivate the function Display Screensaver Large Font Colour Schemes Backlight Back Change Display Screensaver Large Font Colour Schemes Backlight Back Change Press the key below Back on the dis play screen to jump back to the previ ous menu level or Press and hold the end call key a to return to idl...

Страница 24: ...dard mode or Complete expert mode Select the active mode is marked with Ø To open the main menu press v when the phone is in idle mode Ç Select Services Menu dependent on base Resource Directory Screensavers page 44 Caller Pictures page 44 Sounds page 44 Capacity page 45 É Additional Features Room Monitor page 38 Ê Call Lists All Calls page 31 Outgoing Calls page 31 Accepted Calls page 31 Missed C...

Страница 25: ... dependent on base Display Keypad Screensaver page 41 Large Font page 41 Colour Schemes page 41 Display Backlight page 41 Keypad Illumination page 41 Language page 41 Registration Register Handset page 11 De reg Handset dependent on base Select Base page 11 Telephony Auto Answer page 42 further submenus dependent on base System Handset Reset page 46 further submenus dependent on base Menu View Sim...

Страница 26: ...ll is in progress Ending a call a Press the end call key Accepting a call The handset indicates an incoming call in three ways by ringing by a display on the screen and by the flashing talk key c Accept the call by Pressing the talk key c Pressing the speaker key d Press the Accept display key If the handset is in the charger and the Auto Answer function is activated page 42 the handset automatica...

Страница 27: ...or a further 2 seconds For instructions on adjusting the speaker volume page 42 Switching to mute You can deactivate the microphone in your handset during an external call h Press key to mute the handset The display shows Microphone is off Press the key again to unmute the microphone Making internal calls Internalcalls tootherhandsetsregisteredon the same base are free Calling a specific handset u...

Страница 28: ...Surname Enter first names and or surnames If you do not enter a name in either of the fields the phone number is saved and displayed in place of a surname For instructions on entering text and special characters page 53 Phone Home Phone Office Phone Mobile Enter a number in at least one of the fields When scrolling through the Directory the entries are highlighted by a prefixed symbol ä k l E mail...

Страница 29: ...a surname has not been entered the Directory searches for the first name Selecting from the Directory s s Select entry c Press the talk key If several numbers are entered select the required number by pressing r and press the talk key c again The number is dialled Managing Directory entries Viewing entries s s Select entry View Press the display key The entry is displayed Options Press the display...

Страница 30: ...r of the receiving handset and press OK You can transfer several individual entries one after the other by responding to the Entry copied Copynextentry prompt with Yes A successful transfer is confirmed by a mes sage and confirmation tone on the receiving handset Please note u Entries with identical numbers are not overwritten on the receiving handset u The transfer is cancelled if the phone rings...

Страница 31: ...s s Select entry View Edit Press the display keys one after the other s Scroll to the Anniversary line v Select Off Save Press the display key Scheduling a reminder call on an anniversary In idle status a reminder call is indicated on the handset display and by the selected ringtone and volume that has been set for internal calls page 43 You can SMS Write an SMS Off Press the display key to acknow...

Страница 32: ...cally dialled at fixed intervals at least every 20 seconds The speaker key flashes and open listening is activated Party answers Press the talk key c The function is terminated Party does not answer The call is terminated after approx 30 seconds The function is termi nated after pressing any key or after ten unsuccessful attempts Display Number as in the Directory page 28 Delete Entry as in the Di...

Страница 33: ...hey will no longer be shown in bold Opening lists with the message key Use the message key f to open the follow ing list selection u Answering Machine List dependent on base or Network Mailbox if your net work provider supports this function and fast access is set for the Network Mailbox page 34 u Incoming SMS Message List dependent on base u Missed Calls List u Missed Alarms List page 33 An advis...

Страница 34: ... Alarms List under the following circum stances u You do not accept an appointment anni versary u The appointment anniversary was sig nalled during a phone call u The handset is deactivated at the time of the appointment anniversary u Automatic Redial was activated at the time of an appointment anniversary page 31 u Open the list by pressing the message key f page 32 Each entry is displayed with u...

Страница 35: ...cted Bases without an Answering Machine v Ì Network Mailbox To continue Enter the number for the Net work Mailbox Save Press the display key The setting for fast access applies to all Gigaset S79H handsets Calling the Network Mailbox Press and hold You are con nected directly to the Network Mailbox d Press speaker key d if required You will hear the Net work Mailbox announcement ViewingtheNetworkM...

Страница 36: ...age 13 v Í Calendar u The current day is selected highlighted in white u Days on which appointments have already been saved are highlighted in white r q Select the required day in the graphical calendar The selected day is highlighted in white The current day is no longer highlighted w Press the centre of the control key u If appointments have already been entered this will open the list of saved ...

Страница 37: ...he appointment reminder or SMS Press the display key to respond to the appointment reminder with an SMS Managing appointments v Í Calendar Editing individual appointments r q Select a day in the graphical Cal endar and press the control key w Days on which appoint ments have already been saved are highlighted in white in the Calendar q Select appointment for the day You have the following options ...

Страница 38: ...ry is displayed with the last name and first name The date and time will also be given Delete Delete appointment SMS Write an SMS If ten entries are already stored in the list the next appointment reminder will delete the oldest entry Setting the Alarm Clock Prerequisite The date and time have already been set page 13 Activating deactivating the Alarm Clock and setting the wake up time v á Alarm C...

Страница 39: ... 3 minutes depending on the base When the Room Monitor is activated all keys are locked except the end call key The handset s speaker is muted When the Room Monitor is activated incom ing calls to the handset are indicated with out a ringtone and are only shown on the screen The display and keypad are not illu minated and Advisory Tones are also turned off If you accept an incoming call the Room M...

Страница 40: ...Changing the set destination number v É Room Monitor Enter and save number as described in Activating the Room Monitor and enter ing the destination number page 39 Cancelling deactivating the Room Monitor Press the end call key a to cancel the call when the Room Monitor is activated In idle status press the display key OFF to deactivate Room Monitor mode Deactivating the Room Monitor remotely Prer...

Страница 41: ...n the handset is in idle status Press and hold the digit key The number is dialled immediately or Briefly press the digit key Press the display key with the number name abbreviated if necessary to select the number or press the display key Change to change the assignment or to delete the assign ment Changing display key assignments Press and hold the left or right side of the display key The list ...

Страница 42: ...ctivation Select On screensaver is displayed or Off no screensaver Selection Select screensaver or View Press the display key The active screensaver is displayed s Select screensaver and press OK Save Press the display key Briefly press the end call key a to return to the idle display Setting Large Font You can increase the font size of print and symbols in call lists and in the directory to impro...

Страница 43: ...call v Ï Telephony Auto Answer Change Press display key on Changing the speaker earpiece volume You can set the loudspeaker volume for speaker mode and the earpiece volume to five different levels During a conversation via the earpiece or in speaker mode ø Press the side key to call up the Handset Volume menu Change the volume by pressing ø louder or quieter or t Press the control key to call up t...

Страница 44: ...an select various ringtones melo dies or any sound from the Resource Directory page 44 You can set different ringtones for the fol lowing functions u Int Calls u Extern Calls Setting volume melodies In idle status v Ï Audio Settings Ringtones Handset Volume Melodies r Setting volume melodies for internal calls and anniversaries s Scroll to the next line r Setting volumes melodies for external call...

Страница 45: ...ll will now be signalled by one short alert tone ñ appears in the display Using the Resource Directory The Resource Directory on the handset man ages sounds which you can use as ring tones and pictures Caller Pictures and Screensavers Prerequisite Calling Line Identification CLIP The Resource Directory can manage the following media types Various mono and polyphonic sounds and pictures are preconf...

Страница 46: ...ila ble for Screensavers and Caller Pictures v Capacity Activating deactivating Advisory Tones Your handset uses Advisory Tones to tell you about different activities and statuses The following Advisory Tones can be activated deactivated independently of each other u Key click every key press is confirmed u Acknowledge tones Confirmation tone ascending tone sequence at the end of an entry set ting...

Страница 47: ...in the following fields q Select change input field r Navigate in the input field Ñ If necessary delete number press the display key Enter number Save Press the display key Example Restoring the handset default settings You can reset individual settings and changes that you have made The following settings are not affected by a reset u Registration to the base u Date and time u Entries in the Cale...

Страница 48: ...e Hotline 0845 367 0812 local call cost charge Ireland www gigaset com ie service Service Hotline 1850 777 277 6 6561 Ct Call Please note that if the Gigaset product is not sold by authorised dealers in the national territory the product may not be fully compatible with the national telephone network It is clearly spec ified on the box near the CE mark as well as on the bottom of the base station ...

Страница 49: ... 23 No Base flashes on the display 1 The handset is outside the range of the base Move the handset closer to the base 2 The base s range is reduced because Eco Mode is activated Deactivate Eco Mode page 35 or reduce the distance between the handset and the base 3 The base is not switched on Check the base power adapter Please register handset flashes on the display Handset has not been registered ...

Страница 50: ...ata medium shall be excluded from the Guar antee u The purchase receipt together with the date of purchase shall be required as evi dence for invoking the Guarantee Claims under the Guarantee must be submitted within two months of the Guarantee default becoming evident u Ownership of devices or components replaced by and returned to Gigaset Communications shall vest in Gigaset Communications u Thi...

Страница 51: ...tted with accessories not authorised by Gigaset Communications u This Guarantee shall not apply to or extend to services performed by the authorised dealer or the customer them selves e g installation configuration software downloads User manuals and any software supplied on a separate data medium shall be excluded from the Guar antee u The purchase receipt together with the date of purchase shall...

Страница 52: ...nd ards EN 14001 and ISO 9001 ISO 14001 Environment certified since September 2007 by TüV SÜD Management Service GmbH ISO 9001 Quality certified since 17 02 1994 by TüV SÜD Management Service GmbH Ecological energy consumption The use of ECO DECT page 35 saves energy and makes an active contribution towards protecting the environment Disposal Batteries should not be disposed of in gen eral househo...

Страница 53: ...able to use it again Specifications Batteries Technology Nickel metal hydride NiMH Size AAA Micro HR03 Voltage 1 2 V Capacity 550 1000 mAh The device is supplied with two approved batteries Handset operating times charging times This Gigaset can charge batteries up to a capacity of 1000 mAh The use of special high performance batteries or batteries withhighcapacitiesis notrecommendedfor cordless p...

Страница 54: ...s indicated at the bottom right of the screen Writing an SMS names Enter the individual letters characters by pressing the corresponding key The characters assigned to the key are shown in a selection line at the bottom left of the screen The selected character is high lighted Briefly press the key several times in suc cession to select the required letter char acter Standard characters 1 Space 2 ...

Страница 55: ...ng a firmware update Connect your phone to your PC using a USB data cable page 15 Start the Gigaset QuickSync program on your PC Establish a connection to your handset Select Settings Device properties to open the Device tab Click on Firmware update This launches the firmware update The update process can take up to 10 min utes not including the download time Do not interrupt the process or remove...

Страница 56: ...Gigaset QuickSync program on the PC Remove the USB data cable from the tel ephone Remove the battery page 9 Press and hold keys 4 and L with the index and middle finger Replace the battery Release keys 4and L The message key f and the talk key c will flash alternately Complete the firmware update as described Please note Personal pictures and sounds that you have loaded to your handset should alwa...

Страница 57: ...ion 4 1 21 11 2007 Accessories Mounting the charger on the wall Ordering Gigaset products You can order Gigaset products from your specialist retailer Use only original accessories This will avoid possible health risks and personal injury and also ensure that all the relevant regulations are complied with approx 4 mm 21 mm ...

Страница 58: ...se setting up 8 Battery charging 2 3 12 display 2 3 icon 2 3 inserting 9 tone 45 Birthday see Anniversary C Calendar 35 Call accepting 25 ending 25 external 25 internal 26 Call duration 25 Call Lists 31 Caller Picture 27 44 Calling external 25 internal 26 Changing destination number Room Monitor 39 display language 41 earpiece volume 42 ringtone 43 speaker volume 42 Character set 53 Charge status ...

Страница 59: ...nvironment 51 Error tone 45 Expert mode 23 48 F Fast access network mailbox 34 Firmware update 54 G General troubleshooting 48 Group call 26 Guarantee Certificate 49 H Handset activating deactivating 20 advisory tones 45 colour scheme 41 contact with liquid 52 de registering 11 display Backlight 41 display backlight 41 display language 41 earpiece volume 42 idle status 20 keypad backlight 42 large...

Страница 60: ...lists 31 handsets 17 missed calls 31 network mailbox 32 SMS list 32 Lock activating deactivating Keypad Lock 20 M Making calls accepting a call 25 external 25 internal 26 Manual redial 31 Medical equipment 6 Memory directory 29 resource directory 45 Menu end tone 45 opening 17 overview 23 using 19 Menu display expert mode 23 48 standard mode 23 48 Message key 2 opening lists 32 Microphone 2 Missed...

Страница 61: ...ymous call 43 Room Monitor 38 S Screensaver 41 Search directory 28 Sending directory entry to handset 29 Sensitivity Room Monitor 39 Service 47 Setting the date 13 24 Setting the time 13 24 Setting up handset 9 Side keys 2 Signal tone see Advisory Tones Slide show 41 SMS list 32 writing 53 Snooze mode 38 Sound see Ringtone Speaker key 2 mode 26 Specifications 52 Standard mode 23 48 Star key 2 T Ta...

Отзывы: