DISPLAY MODULE AND OFFICE CONFIGURATION EDITOR
_________________________________________________________________________________________________________
3-38
SIG-00-22-02 JUNE 2022 (Revised September 2022)
Version: B.1
CAUTION
TO MINIMIZE THE TIME THAT THE CROSSING IS ACTIVE, IF THE
EXISTING CONFIGURATION NEEDS TO BE SAVED, SAVE IT BEFORE
SELECTING “UPLOAD CONFIGURATION” FROM THE USB WIZARD
MENU.
The examples in this section are used to explain how to install software via a USB and Ethernet
cable connecting the Display to the CPU III or via the WebUI using an Ethernet cable to connect
directly to the CPU III. The software and version names may not be the same as seen in an
actual GCP. The example will also assume the GCP is a Dual unit and the main modules are
loaded first. The procedure is repeated for the standby modules.
There is no specified order when installing/updating software in the GCP5000. If replacing the
CPU MEFs and the MCF as part of the same upgrade; the order of installation is immaterial;
however, the MEFs must be loaded before attempting to place the GCP back into operation.
In this example, the following files will be loaded into the indicated modules:
•
CPU III Module
o
DIAG (CP) File: GCPNCP3_MEF_1.1.32r.tgz (CPU III CP executive software
begins with GCP)
o
VLP File: 9VC72-V3H00_02.010.MEF
o
VLP MCF: – File: GCP3K-01-00.mcf, CRC= 2CF3E617
The files should be copied to the GCP4000/Executive folder of the USB drive if a USB drive is
being used instead of the WebUI.
3.4.2.1 Replace CP MEF on CPU III via USB Drive
Perform the following actions:
1. Insert USB Drive in the USB slot on the front of the Display
2. If Maintainer security has been enabled, enter the password. The password is case
sensitive. If security is not enabled, proceed to step 3.
3. Install an Ethernet cable from the Laptop port on the Display to the Laptop port on the
CPU III unit. Verify that the Ethernet cable is well seated on both ends, then press any
key.
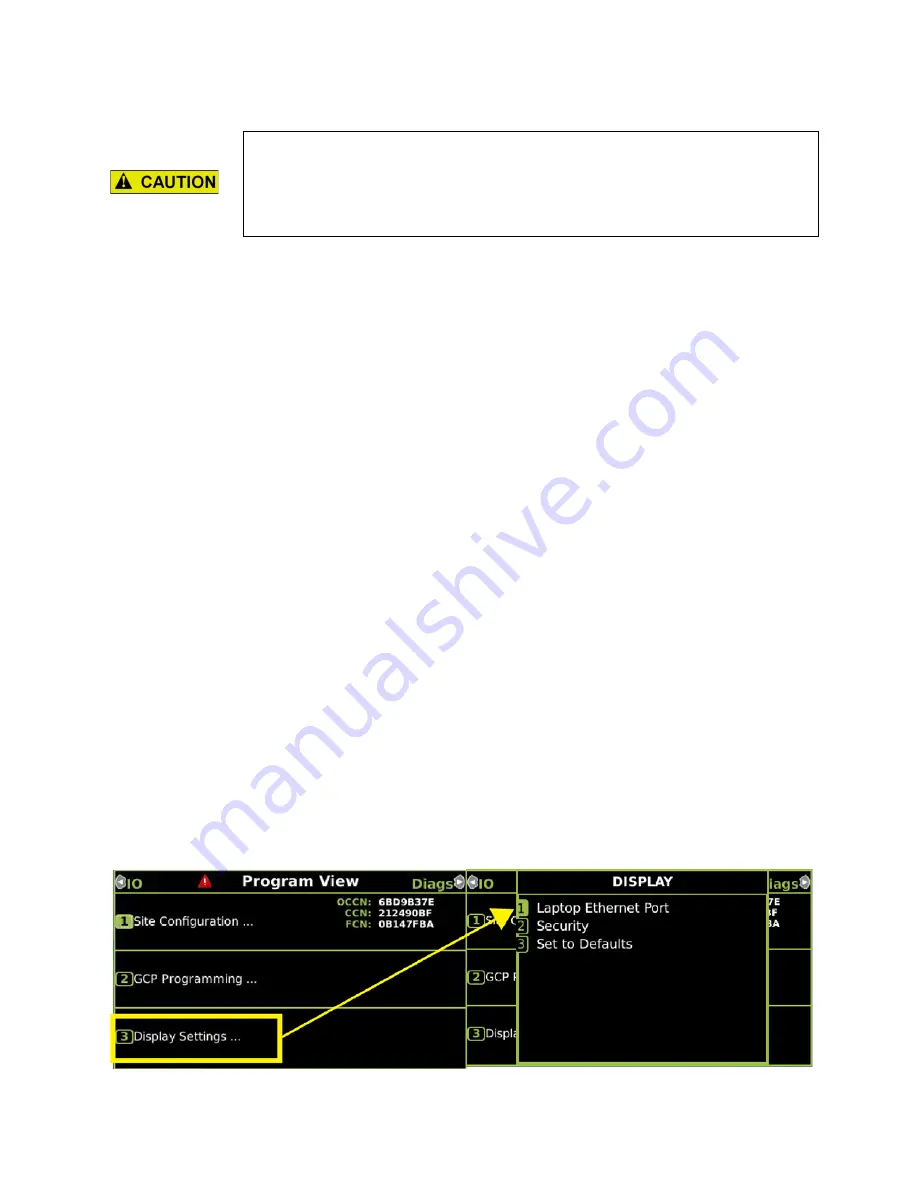
4. You will need to verify that the Display is set up as a Client instead of a Server, to do so,
access the Laptop Ethernet Port menu Program View > 3) Display Settings > Laptop
Ethernet Port.
Figure 3-54 Ethernet Menu


