On-Line Operation
UMSITRPDS3-1
November
2010
6-24
6.4.9 Disabling the Transmitter Magnetic Pushbuttons and Write Protection
The table below correlates a symbol that appears in the lower left quadrant of the transmitter display with
the type of pushbutton disabling.
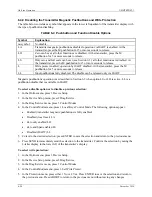
TABLE 6-4 Pushbutton and Function Disable Options
Symbol Explanation
no symbol
No disable.
LA
Transmitter magnetic pushbuttons disabled; operation via HART is enabled. At the
transmitter, press the M pushbutton for 5 or more seconds to release.
LO
Zero can be set; all other functions are disabled. At the transmitter, press the M
pushbutton for 5 or more seconds to release.
LS
Only zero and full scale can be set (see Section 6.3); all other functions are disabled. At
the transmitter, press the M pushbutton for 5 or more seconds to release.
L
Write protect enabled; operation by HART disabled. At the transmitter, press the M
pushbutton for 5 or more seconds to release.
LL
Input pushbuttons fully disabled. The disable can be released only via HART.
Magnetic pushbuttons operation is as described in Section 6.3 when option LS or LO is active. LL is a
pushbutton disable that is available in HART.
To select a disable option or to disable a previous selection:
1.
In the Online menu, press 3 Device Setup.
2.
In the Device Setup menu, press 2 Diag/Service.
3.
In the Diag/Service menu, press 3 Control Modes.
4.
In the Control Modes menu, press 1 Local Keys Control Mode. The following options appear:
•
Enabled (transmitter magnetic pushbuttons is fully enabled)
•
Disabled (local reset) LA
•
Zero only enabled LO
•
Zero and Span enabled LS
•
Disabled (HART) LL
5.
Cursor to the desired selection; press ENTER to save the selection and return to the previous menu.
6.
Press SEND to immediately send the selection to the transmitter. Confirm the selection by noting the
2-letter display in the lower left of the transmitter’s display.
To select write protection:
1.
In the Online menu, press 3 Device Setup.
2.
In the Device Setup menu, press 2 Diag/Service.
3.
In the Diag/Service menu, press 3 Control Modes.
4.
In the Control Modes menu, press 3 Set Write Protect.
5.
In the Protection menu, press either 1 No or 2 Yes. Press ENTER to save the selection and return to
the previous menu. Press ABORT to return to the previous menu without saving any changes.
Содержание 7MF4033 series
Страница 48: ...Model 275 Universal Hart Communicator UMSITRPDS3 1 November 2010 2 26 ...
Страница 86: ...Installation UMSITRPDS3 1 November 2010 4 34 ...
Страница 152: ...Calibration and Maintenance UMSITRPSD3 1 November 2010 7 20 ...
Страница 158: ...Circuit Description UMSITRPDS3 1 November 2010 8 6 ...
Страница 197: ......
Страница 198: ......
Страница 200: ...Model Designations and Specifications UMSITRPDS3 1 November 2010 9 42 ...
Страница 204: ...Glossary UMSITRPDS3 1 November 2010 10 4 ...
Страница 208: ...Appendix A Online Configuration Map UMSITRPDS3 1 11 4 November 2010 ...
Страница 210: ...Appendix B Hazardous Area Installation UMSITRPDS3 1 12 2 November 2010 FIGURE 12 1 Control Drawing ...
Страница 211: ...UMSITRPDS3 1 Appendix B Hazardous Area Installation November 2010 12 3 FIGURE 12 2 Control Drawing ...
Страница 212: ...Appendix B Hazardous Area Installation UMSITRPDS3 1 12 4 November 2010 FIGURE 12 3 Control Drawing ...
Страница 216: ...Appendix C Elevation and Suppression Correction UMSITRPDS3 1 13 4 November 2010 ...

