background image


    COUPE                                                           


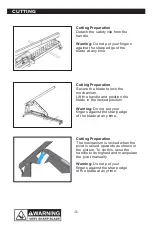
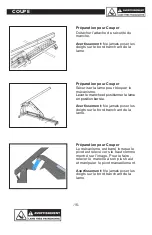
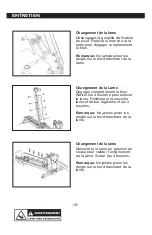
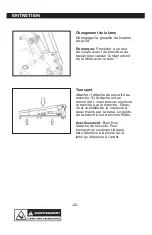
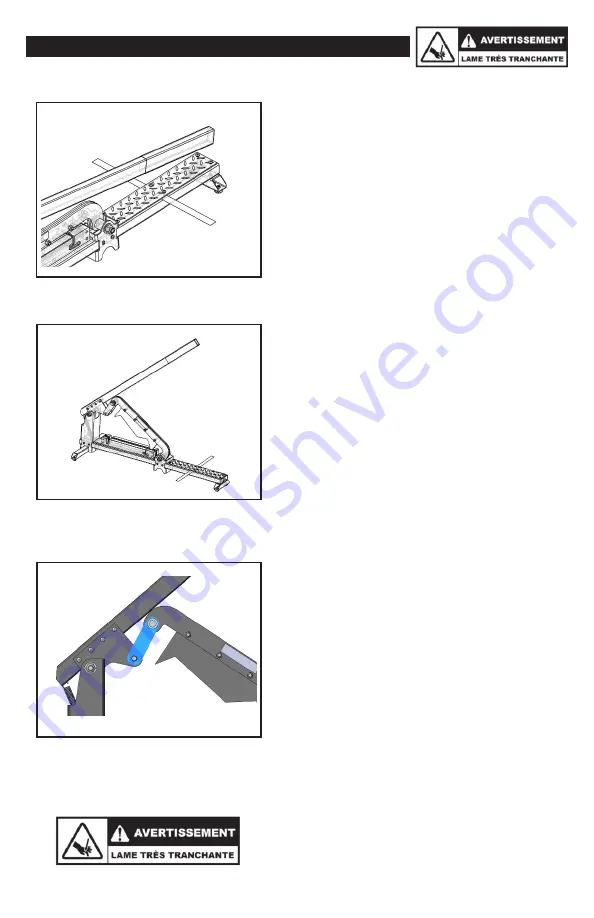
Préparation pour Couper


Détacher l’attache de sécurité du 
manche.


Avertissement: 

Ne jamais poser les 

doigts sur le bord tranchant de la 
lame.


Préparation pour Couper


Sécuriser la lame pour bloquer le 
mécanisme. 

Lever le manche et positionner la lame 
en position barrée. 


Avertissement: 

Ne jamais poser les 

doigts sur le bord tranchant de la 
lame.


Préparation pour Couper


Le mécanisme est barré lorsque le 
pivot est relevé vers le haut comme 

montré sur l’image. Pour le faire, 
relever le manche à son plus haut 
et manipuler le pivot manuellement.


Avertissement: 

Ne jamais poser les 

doigts sur le bord tranchant de la 
lame.


-1

5

-


Содержание UK-12

Страница 1: ...s directives Le non respect des directives d crites ci dessous peut causer des blessures graves VEUILLEZ CONCERVER CES DIRECTIVES POUR REFERENCE ULTERIEURE WARNIG Read and understand all instructions...

Страница 2: ...firm substrate or solid stand 9 Use the right tool Do not force the 12 Wall Covering Cutter or use it for a job for which it was not designed use only on approved materials 10 Keep blade sharp A dull...

Страница 3: ...UP 2 Installation of the Cutter Install the front cross bar to the cutter base with the two bolts and nuts provided as shown Warning Do not put your fingers against the sharp edge of the blade at any...

Страница 4: ...ism Lift the handle and position the blade in the locked position Warning Do not put your fingers against the sharp edge of the blade at any time Cutting Preparation The mechanism is locked when the p...

Страница 5: ...to unlock the mechanism then down the handle to cut Warning Do not put your fingers against the sharp edge of the blade at any time Cutting Preparation Before cutting reposition the pivot downwards in...

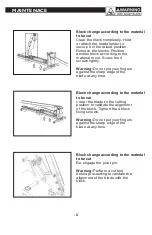
Страница 6: ...t use WD 40 Block change according to the material to cut Keep the slicer closed Remove the 4 screws from the bottom of the base Warning Do not put your fingers against the sharp edge of the blade at...

Страница 7: ...t your fingers against the sharp edge of the blade at any time Block change according to the material to be cut Lower the blade to the cutting position to validate the alignment of the block Tighten t...

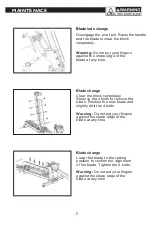
Страница 8: ...de change Clear the block completely Remove the 4 bolts to remove the blade Position the new blade and slightly refit the 4 bolts Warning Do not put your fingers against the sharp edge of the blade at...

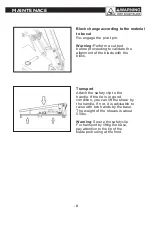
Страница 9: ...blade with the block Transport Attach the safety clip to the handle If the tie is in good condition you can lift the shear by the handle If not it is advisable to raise with two hands by the base The...

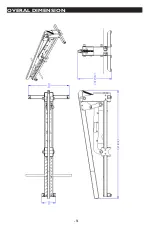
Страница 10: ...9 OVERAL DIMENSION...

Страница 11: ...PART LIST 10...

Страница 12: ...6 Rubber handle 1 7 1 4 Rivet 24 8 5 8 11 UNC Hexagonal locknuts 2 9 5 8 Flat washer 4 10 5 8 11 UNC Hexagonal head screw 2 11 10 24 UNC Lock nut 4 12 3 8 16 UNC Hexagonal head screw 4 13 3 8 16 UNC H...

Страница 13: ...UKUT12 00005 R01 Lever support 1 24 UKUT12 00006 R01 Spindle support 1 25 UKUT12 00010 R01 Blade support 4 26 UKUT12 00011 R01 Structural Rails L 1 27 UKUT12 00013 R01 1 4 Plate 4 28 UKUT12 00014 R01...

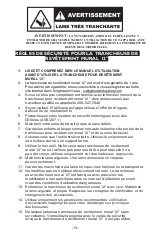
Страница 14: ...a trancheuse pour rev tement mural 12 et de la zone de travail 8 Assurez vous que l outil est s curitaire Utilisez le uniquement sur une surface dure ou un support ferme 9 Utiliser le bon outil Ne for...

Страница 15: ...GE Montage de la Tranche Fixer la barre transversale avant la base en utilisant les deux boulons et crous fournis comme illustr Avertissement Ne jamais poser les doigts sur le bord tranchant de la lam...

Страница 16: ...nisme Lever le manche et positionner la lame en position barr e Avertissement Ne jamais poser les doigts sur le bord tranchant de la lame Pr paration pour Couper Le m canisme est barr lorsque le pivot...

Страница 17: ...uer le m canisme puis descendre le manche pour couper Avertissement Ne jamais poser les doigts sur le bord tranchant de la lame Pr paration pour Couper Avant de couper repositionner le pivot vers le b...

Страница 18: ...e pas utiliser du WD 40 Changement de bloc selon le mat riel couper Garder la trancheuse ferm e Retirer les 4 vis du dessous de la base Remarque Ne jamais poser les doigts sur le bord tranchant de la...

Страница 19: ...les doigts sur le bord tranchant de la lame Changement de bloc selon le mat riel couper Descendre la lame en position de coupe pour valider l enlignement du bloc Serrer les 4 vis de fixation du bloc R...

Страница 20: ...ment de la Lame D gager compl tement le bloc Retirer les 4 boulons pour enlever la lame Positionner la nouvelle lame et refixer l g rement les 4 boulons Remarque Ne jamais poser les doigts sur le bord...

Страница 21: ...c le bloc Transport Attacher l attache de s curit au manche Si l attache est en bonne tat vous pouvez soulever la tranche par le manche Sinon il est conseill de la soulever deux mains par la base Le p...

Страница 22: ...DIMENSION HORS TOUT 21...

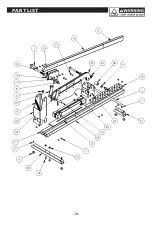
Страница 23: ...LISTE DES PI CES D TACH ES 22...

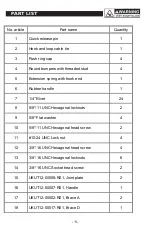
Страница 24: ...crochet 1 6 Manche en caoutchout 1 7 Rivet 1 4 24 8 crou hexagonale 5 8 11 UNC 2 9 Rondel plate 5 8 4 10 Vis t te hexagonal 5 8 11 UNC 2 11 crou hexagonale 10 24 UNC 4 12 Vis t te hexagonal 3 8 16 UN...

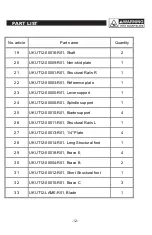
Страница 25: ...1 23 UKUT12 00005 R01 Support levier 1 24 UKUT12 00006 R01 Support pivot 1 25 UKUT12 00010 R01 Support lame 4 26 UKUT12 00011 R01 Longeron de structure G 1 27 UKUT12 00013 R01 Plaque 1 4 4 28 UKUT12...

Страница 26: ...NOTES NOTES 25...

Страница 27: ...NOTES NOTES 26...

Страница 28: ...Made in Quebec Fabriqu au Qu bec Siding tools Industries Inc 1158 Route Marie Victorin Verch res QC J0L 2R0 www sidingtoolsindustries com...

Отзывы: