Approach
1.
Click on
Walls
.
2.
Draw a line in the layout.
✓
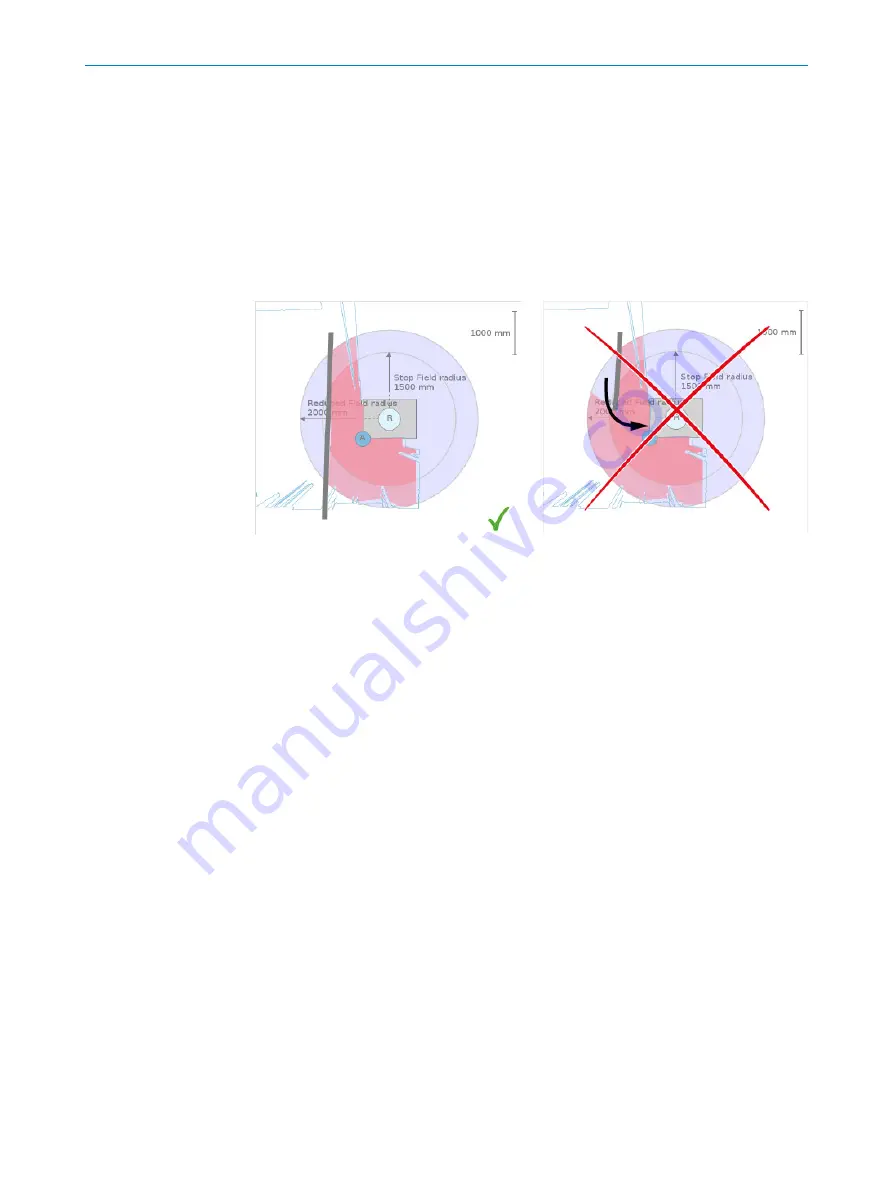
The wall is drawn. The protective fields are adjusted so that areas behind the wall
are no longer monitored.
Complementary information
The lines must be drawn so that they do not end in the middle of a field. This would
mean that a person from an unmonitored area could step directly into the protective
field. The required minimum distances would possibly not be observed.
Figure 12: Valid line
Figure 13: Invalid line
6.3.4.4
Drawing fields manually
Overview
With the
Fields
function, the fields can be drawn manually.
Prerequisites
•
The area has been scanned.
•
Free Fields
mode is active (
Settings
).
Approach
1.
Click on
Fields
.
2.
In the preview, click on the position where the circle is to be placed.
✓
2 circles with different radii are displayed.
The inner circle is for the protective field for the “Trigger protective stop” function.
3.
Use the displayed tools to configure the circles as desired and confirm by ticking
the check mark (
).
✓
The drawn circles are combined with the results of the scan. The protective fields
are generated.
4.
If necessary, draw other circles to protect all relevant areas with protective fields.
✓
Several circles are merged into a single field.
CONFIGURATION
6
8025720/1A9R/2020-12-15 | SICK
O P E R A T I N G I N S T R U C T I O N S | nanoScan3 Tool - URCap
25
Subject to change without notice


