background image

Shure Incorporated

11/21

Adjusting Microphone Gain

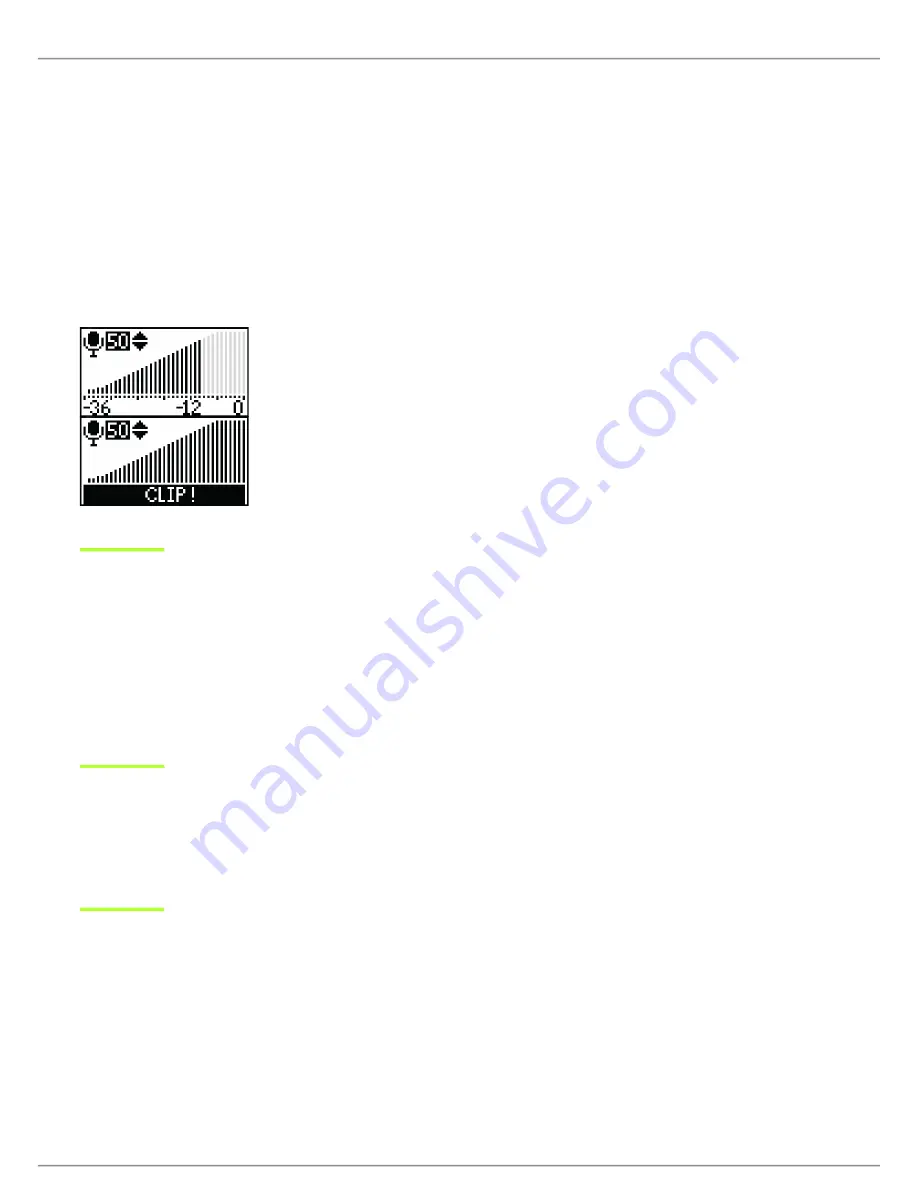
In order to capture the highest quality audio signal, the microphone gain must be set at the appropriate level. Press the joystick 

up or down to adjust levels in the 

MIC GAIN screen in the menu, or from the home screen when the mic gain icon is highlight­

ed. Use the following guidelines to achieve the best results:

Adjust the gain to correspond to the highest anticipated sound level. The loudest sounds should peak between -12 dB and 

-6 dB.

Setting the gain too low will result in more noise in the recording. If set too high, the signal will clip and become distorted. 

The audio meter will indicate that the signal is clipping when the level reaches the highest bar.

Tip:

 For higher resolution metering, adjust the gain in the 

MIC GAIN

 screen to see more precisely where the signal is peaking.

Headphone and Camera Output Volume

Headphone Volume:

 Accessible in the menu by selecting HEADPHONE, or in the playback, recording, and home screens by 

selecting the headphone icon and pressing the joystick up or down.

Camera Output Volume:

 Accessible in the menu by selecting 

UTILITIES

 > 

CAMERA

OUT

. Level is selectable (LOW, 

MEDIUM, or HIGH) to accommodate different camera preamp sensitivities.

Note:

 Always set the gain to the appropriate level prior to adjusting the headphone or camera output volume.

Low-Cut Filter

Rolls off low frequencies 170 Hz and below (12 dB per octave) in order to reduce low frequency rumble caused by camera 

handling and other environmental factors. A custom Rycote  Windjammer (A83-FUR) can be used to further reduce wind noise.

®

Содержание VP83F

Страница 1: ...VP83F LensHopper Camera Mount Condenser Mi crophone with Integrated Flash Recording The Shure professional shotgun microphone VP83F user guide Version 1 1 2020 H...

Страница 2: ...th 9 Format The Memory Card Before Use 10 Adjusting Microphone Gain 10 Headphone and Camera Output Volume 11 Low Cut Filter 11 Recording Audio 11 Adjusting Settings While Recording 12 Managing Tracks...

Страница 3: ...Audio Quality High resolution recording 24 Bit 48khz sampling WAV format Supercardioid lobar pickup pattern rejects unwanted sounds Interference tube for increased directionality RF Immunity Built in...

Страница 4: ...led Opening the front panel Squeeze the latches on each side and open the front panel to access the memory card and battery compartment Installing the memory card Always turn the power off before remo...

Страница 5: ...cators Note The battery door must be closed and latched before closing the front panel Mounting the Microphone On a Camera Slide the microphone onto the camera shoe Tighten the knurled ring to secure...

Страница 6: ...tate the microphone clockwise to tighten onto a tripod For other mounting solutions such as microphone stands or boom poles an adapter may be required Audio Connections Camera Output Red The camera ou...

Страница 7: ...g playback Important Never use the microphone gain to adjust the headphone volume as this may result in poor signal quality or distor tion Control Panel Menu Display Displays menu information and sett...

Страница 8: ...r Solid red recording Flashing red paused Home Screen Indicators Track information Displays track title and duration Low cut filter icons On Off Remaining recording time Displays time remaining on the...

Страница 9: ...to the right to open the main menu and to proceed into submenu screens Return to previous screen select homescreen icons Press the joystick to the left to back out of the menu In the home screen push...

Страница 10: ...to adjust monitoring levels The headphone and camera output level adjustments occur after the signal has reached the recording section of the device and should not be used to compensate if the gain se...

Страница 11: ...eaches the highest bar Tip For higher resolution metering adjust the gain in the MIC GAIN screen to see more precisely where the signal is peaking Headphone and Camera Output Volume Headphone Volume A...

Страница 12: ...ng Settings While Recording If necessary audio settings Microphone gain Headphone volume and Low cut filter can be adjusted while recording to compensate for unexpected changes such as a volume increa...

Страница 13: ...tamp Tip For best performance format the memory card in the device every time after exporting tracks Utilities SD CARD Remaining recording time is displayed and the following settings can be accessed...

Страница 14: ...installed on the unit is recommended Please visit www shure com for details Battery Life Use the following information for reference when considering which battery type to use with the device Actual...

Страница 15: ...output turned up and there is still no sound try a different pair of headphones Sound is not being recorded Ensure the MicroSD memory card is installed correctly Try formatting the card in the device...

Страница 16: ...er if they are not backed up and remove them from the memory card Accessories and Replacement Parts Replacement foam windscreen A83W Rycote Windjammer A83 FUR Camera and Headphone Output Pin Configura...

Страница 17: ...ximum SPL 0 dB Gain Setting 1 kHz at 1 THD 1000 load 129 2 dB SPL Signal to Noise Ratio 30 dB Gain Setting 78 4 dB Self Noise equivalent SPL A weighted typical 30 dB Gain Setting 15 6 dB SPL A Environ...

Страница 18: ...ignal level is equivalent to cartridge output at specified SPL S N ratio is the difference between 94 dB SPL and equivalent SPL of self noise A weighted Connector Type 3 5 mm 1 8 dual mono Unbalanced...

Страница 19: ...Shure Incorporated 19 21...

Страница 20: ...generates uses and can radiate radio frequency energy and if not installed and used in accordance with the instructions may cause harmful interference to radio communications However there is no guara...

Страница 21: ...risk to the user This product meets the Essential Requirements of all relevant European directives and is eligible for CE marking The CE Declaration of Conformity can be obtained from Shure Incorporat...

Отзывы: